Loading ...
Loading ...
Loading ...
DJI RSC 2
User Manual
© 2020 DJI OSMO All Rights Reserved.
9
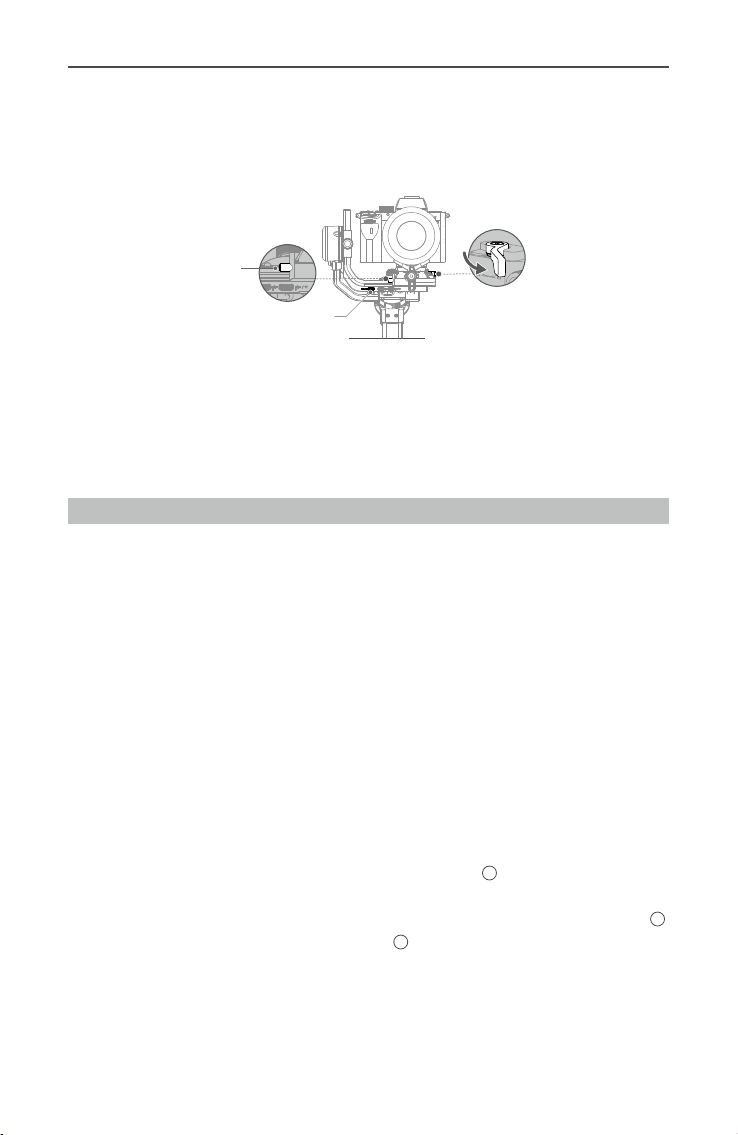
To remove the lower quick-release plate from the gimbal, toggle the lever on the camera
mounting plate to the unlocked position and remove the lower quick-release plate while
pressing the safety lock on the mounting plate.
4. Connect the Camera Control Cable
Choose the proper camera control cable according to the camera type. Plug one end of
the cable into the camera and plug the other end into the RSS camera control port of the
gimbal as shown above.
Balancing
To obtain the best performance from DJI RSC 2, proper balancing is essential. Proper
balance is critical for shots with DJI RSC 2 where fast motion or acceleration is required
and also offers longer battery runtimes. There are three axes that need to be properly
balanced before powering on DJI RSC 2 and setting up the software.
Before Balancing
1. The camera needs to be fully congured, with all accessories and cables connected,
before installing and balancing the camera on the gimbal. If the camera has a lens
cap, make sure to remove it before balancing.
2. Before balancing, make sure to power on the camera if using an optical zoom lens and
to select the focal length if using a varifocal lens. Make sure DJI RSC 2 is powered off
or in sleep mode before balancing.
Balancing Steps
1. Balancing the Vertical Tilt
a. Unlock the tilt axis and loosen the mounting plate knob
1
.
b. Rotate the tilt axis so that the camera lens is pointing upward. Check to make sure
the camera is not top or bottom-heavy. If top-heavy, move the camera backward
2
.
If bottom-heavy, move the camera forward
2
.
c. Tighten the mounting plate knob while holding the camera upward. The vertical tilt
is balanced when the camera is steady while pointing upward.
Lever
Safety Lock
RSS Camera Control Port
Loading ...
Loading ...
Loading ...