Loading ...
Loading ...
Loading ...
Page 4
Parts Supplied
1 - Hardware bag
• 4 - 4x8 mm installation screws
• 4 - 4x12 mm installation screws (C)
2 - Charcoal Filter
1 - Air deector
Installation Instructions
Range Hood Model Recirculating Kit
HMWB30WS RECHMWB30
HMWB36WS RECHMWB36
The Installation of the Recirculation kit affects the installa-
tion of the hood, so take into consideration the following
steps.
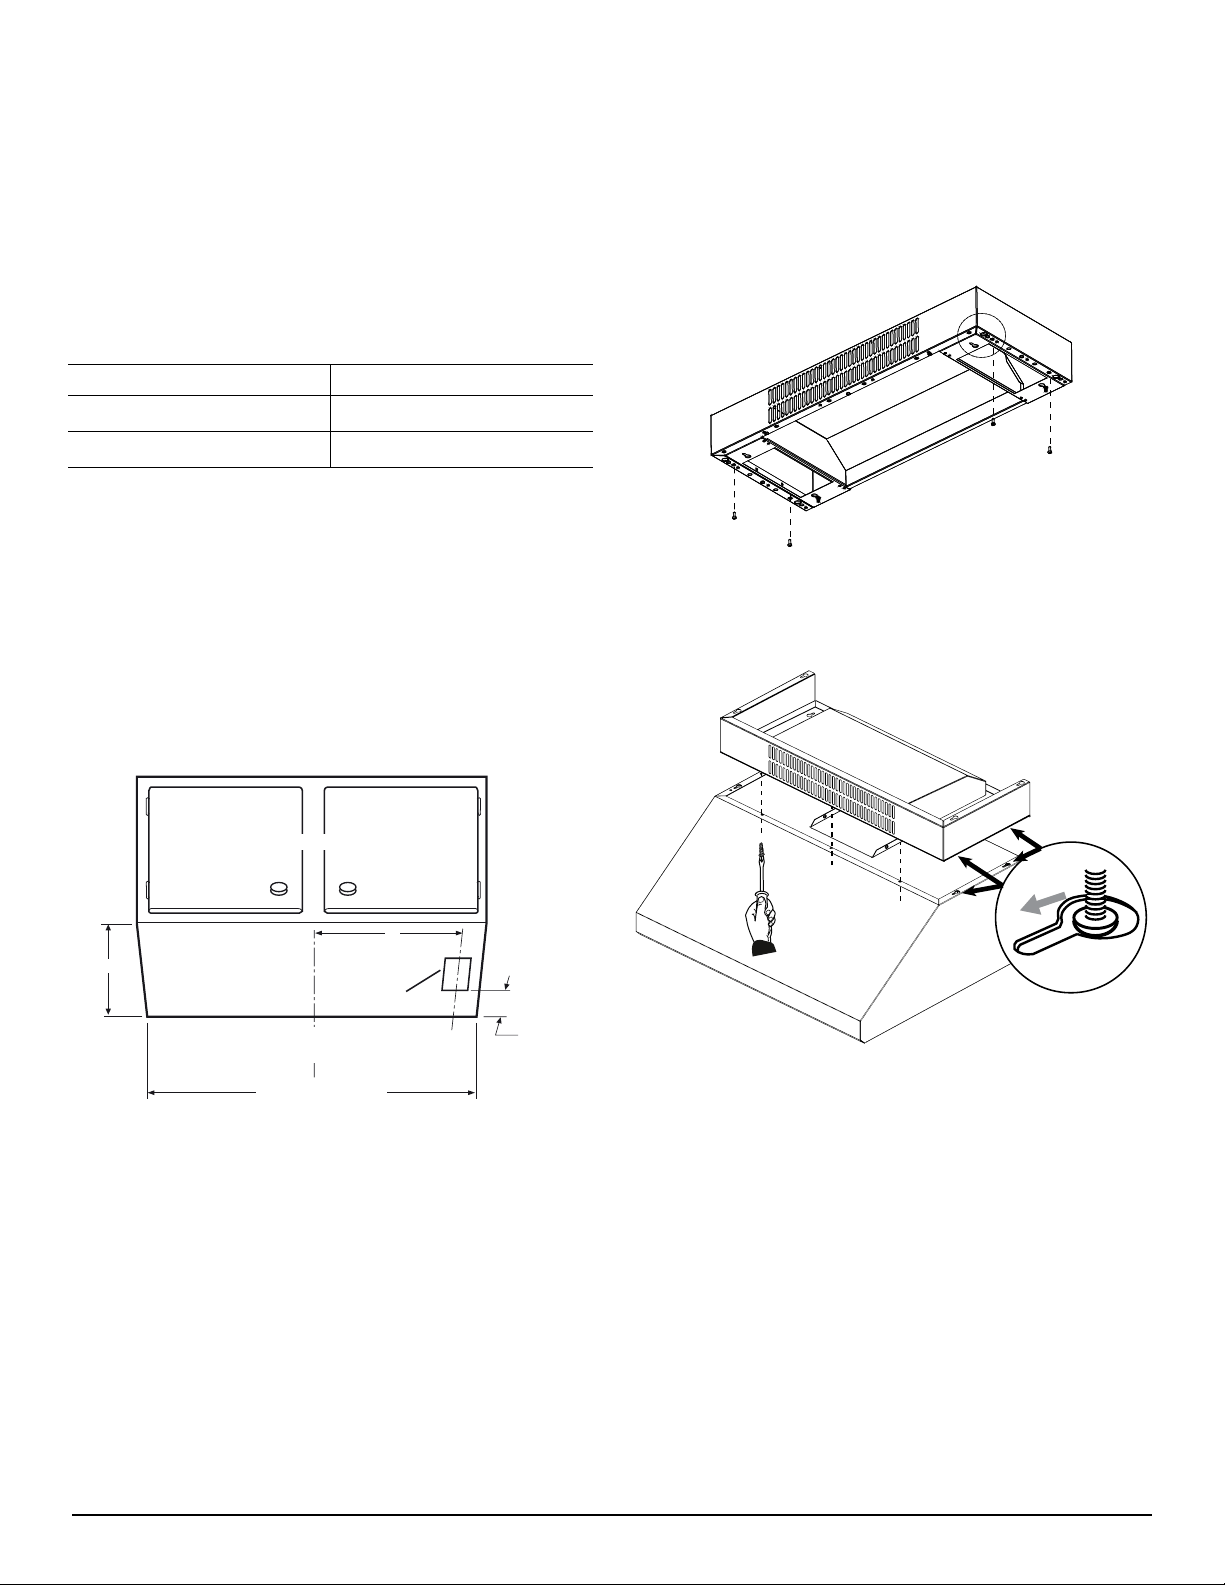
Cabinet or soffit preparation when installing the
recirculation kit.
For cabinet or soft preparation take into consideration that
there’s no need to provide cutouts on walls for vertical or
rear air discharge, since there is no need to install any Duct.
See the gure for Conduit passage cut-out.
4
7
/
8
”
Cabinet front
12” min
Rear
Wall
Bottom of
Cabinet or
Soffit
A
4” x 4”
cut out for
conduit
passage
Center
Line
Hood Width min.
NOTE: The height of the hood with the recirculation kit
installed increases from 11” to 15“.
Check that there is enough clearance and that minimum
height from the countertop to the bottom of the hood is
30” (762 mm).
Hood Preparation
The transition must not be installed, since no ducting is
necessary.
Wall Mount Installation
First install deector on top of the hood then install to the
wall:
1. Fit four screws C on bottom of the deector, do not
tighten completely.
C
C
C
C
2. Install the deector on top of the hood so that screws C
go respectively into Side Slots on top of the hood and
Side Slots on bottom of Deector, slide the deector
frontward until stops.
B
B
B
3. Tighten the four screws C from inside of the hood.
NOTE: You must uncover the installation holes from the
inside of the hood.
4. Fit the 4x8 mm screws, from inside the hood through
point B to nal assembly Deector to the hood.
5. Proceed to install hood as described on the Installation
Manual.
Loading ...
Loading ...
Loading ...