Loading ...
Loading ...
Loading ...
Consumer Support Troubleshooting Tips Installation Instructions Care and Cleaning Operating Instructions Safety Instructions
10
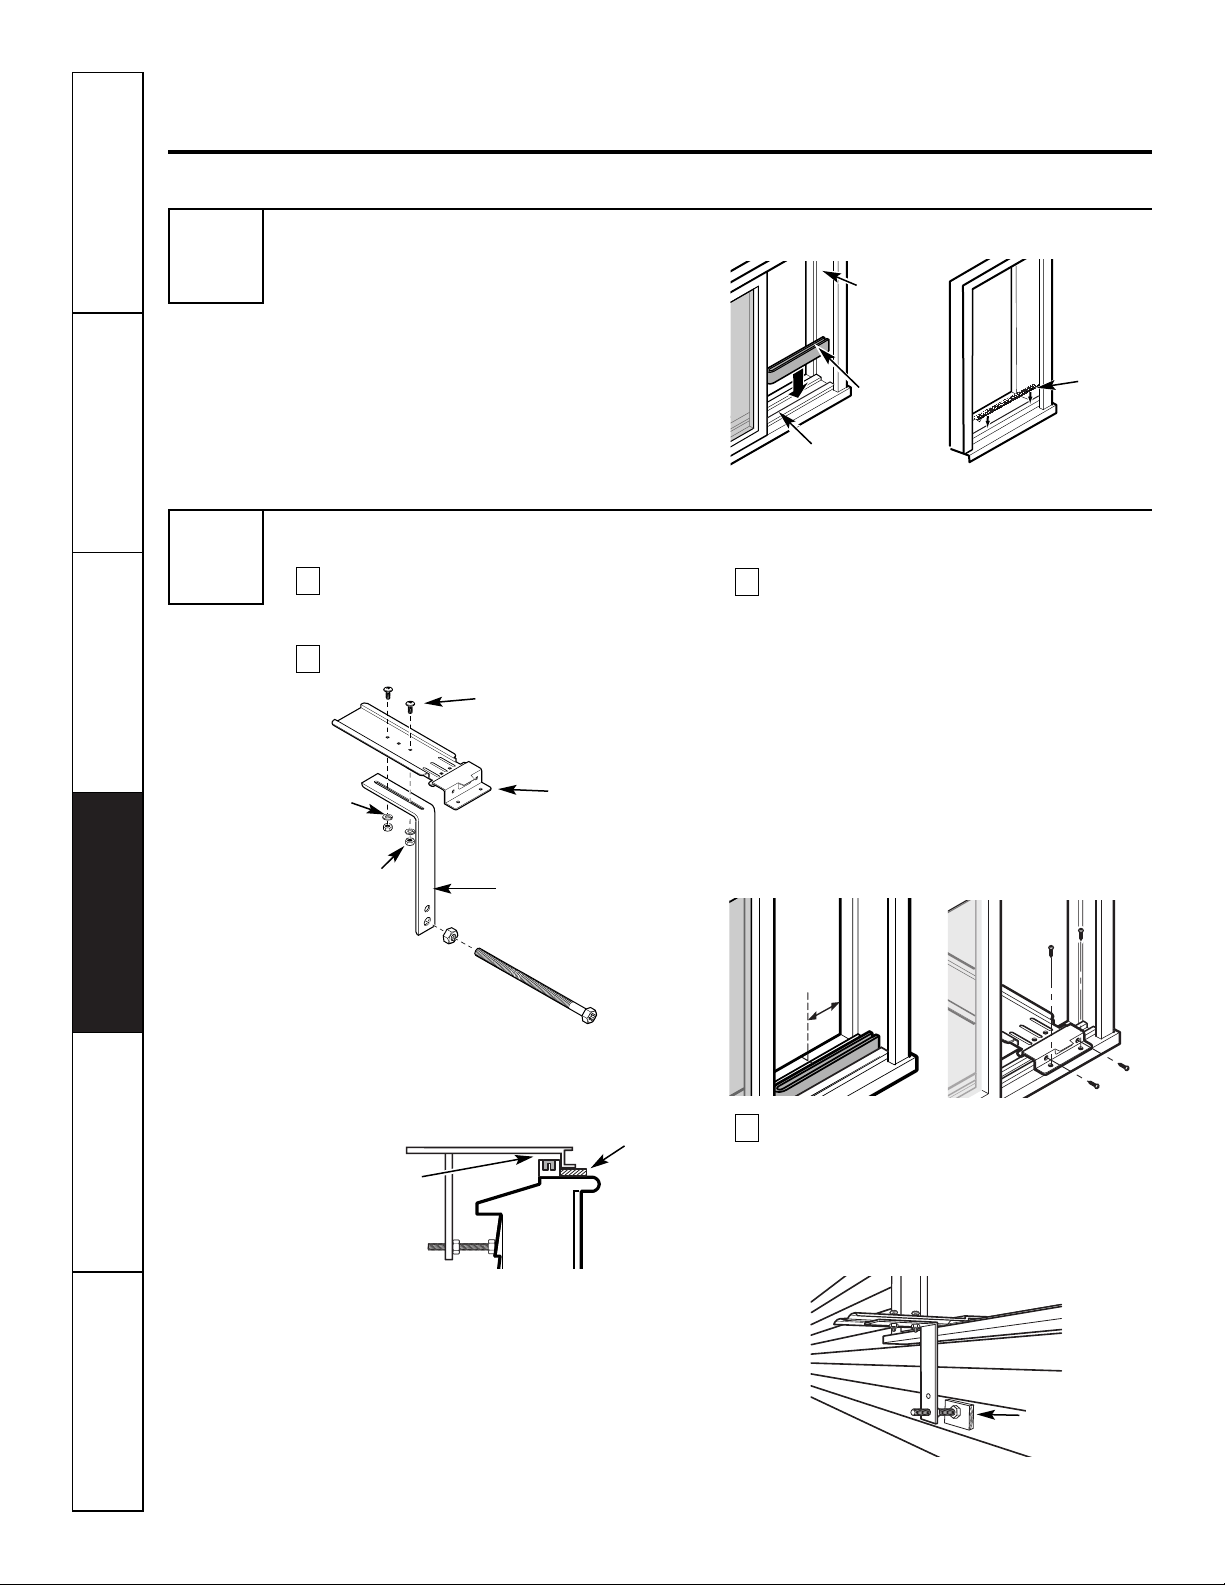
Horizontal sliding window installation instructions.
Read completely, then follow step-by-step.
Install the Window Track Gasket or Seal
For sliding window installation, fold and fit one of
the foam gaskets into the window track. This may
require cutting the ends of the gasket to make it
fit properly in the track. Discard the bottom seal;
it is not needed.
For casement window installation, remove the
backing from the bottom seal and apply it to the
horizontal inside face edge of the window frame.
Discard the foam gaskets; they are not needed.
3
4
Window track
Foam
gasket
Window
jamb
Loosely attach the support platform to
the support angle using 2 Type A screws,
washers and nuts.
Attach the leveling bolt and nut.
The window track may not allow the air
conditioner to tilt toward the outside and will
keep it from draining properly. To adjust for
this, attach a piece of wood to the stool.
WOOD PIECE—
WIDTH: 2″
LENGTH:
Long enough to fit inside window frame.
THICKNESS: To determine the thickness, place
a piece of wood between the stool and the
support platform to make it 1/16″ higher
than the top of the window track.
Attach securely with nails or screws provided
by the installer.
Measure and mark a line 8
1
⁄4″ (for sliding
windows) or 8
1
⁄8″ (for casement windows)
from the window jamb. Center the support
assembly on the window track. Attach the
support platform to the window stool using
4 Type D screws.
NOTE: For casement window installation, the
back edge of the support platform must butt flush
against the window frame face. Modify window
as needed.
Depending on the window track material,
you may need to drill holes in the window
track through the existing holes in the
support assembly to secure the screws.
Pull the support angle against the outside
wall and tighten the screws on top of the
support platform. Adjust the leveling bolt so
the support platform is installed with a slight
tilt to the outside. Use a level; about 1/3
bubble will be the correct slant to the
outside. Tighten the nut.
D
C
B
A
Prepare the Window and the Support Assembly
Type A screws
Support platform
Support angle
Leveling bolt and nut
8
1
⁄4″
(sliding
window)
8
1
⁄8″
(casement
window)
Washers
Nuts
A filler block is
recommended for
homes with vinyl or
aluminum siding
1/16″ higher
than track
Wood
Stool
Bottom
seal
Sliding Window
Casement Window
Loading ...
Loading ...
Loading ...