Loading ...
Loading ...
Loading ...

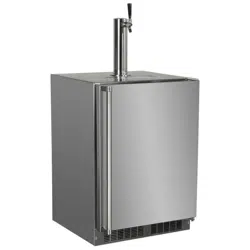
USING YOUR BEER DISPENSER
Mounting
bracket
6FUHZV
Remove foam plug
from hole port
!
CAUTION
If the CO2 WDQNLVSODFHGRQWKHÀRRULWPXVWEHVHFXUHGLQ
the upright position with a chain or other means to prevent
it from being tipped over.
Reseal hole
around tubing with
the foam plug
CO2 tank
placed in the
bracket
The foam insulation plugs provided in the portholes are
CRITICAL to proper functioning of the unit and preventing
frost build up that can cause damage to the unit and/or
refrigerator contents. ALWAYS reseal the CO2 line porthole
ZLWKWKHSURYLGHGLQVXODWLRQSOXJVRQFHDOOOLQHVhave been
properly installed.
NOTE
Optional CO2
tank external mounting bracket:
The optional mounting bracket is designed to hold the 5#
CO
2 cylinder that comes with the beer dispenser. Larger
cylinders may be purchased from a third party and mounted
externally. Use the hole port on the rear of the cabinet to
run the CO2 line to the keg.
Many options are available for mounting the CO
2 tank
outside of the beer dispenser to gain additional cold
storage space inside.
Secure the optional external mounting bracket on the
back of the beer dispenser (this is ideal for mobile
units) or mount within adjacent cabinetry (ideal for
undercounter built-in units:
0RXQWWKHVFUHZV[
3
»4ÀDWKHDGPDFKLQH
VFUHZVSURYLGHGZLWKWKHEUDFNHWLQWKHUHDURIWKH
appliance. Do not completely tighten. Place WKHNH\KROH
VORWVLQWKHIODQJHVRIWKHEUDFNHWRYHUWKHfour screws and
tighten them to secure the bracket to the back of the
cabinet. The bracket can also be fastened
to adjacent cabinetry using the provided #10 x
3
»4" wood
screws.
Mark the hole locations where required using a pencil and
the slots in the mounting bracket. Drill appropriate pilot
KROHVGHSHQGLQJRQWKHPDWHULDO\RXDUHPRXQWLQJWRDQG
secure the bracket per the above instructions.
NOTE
Consider the length of the red air line when choosing a
place for the CO
2 tank. The red air line supplied is 4 feet
PHWHUVORQJ
With the gauges mounted to the CO
2 tank place the tank in
the mounting bracket.
Remove the foam plug from the hole port, and feed the
red CO2 line through the rear wall and out the coil cover on
the inside of the cabinet. Connect the red CO
2 line to the
keg coupler.
Reseal the hole in the back of the cabinet with the foam
plug.
11
Loading ...
Loading ...
Loading ...