Loading ...
Loading ...
Loading ...
8
en-us Installation Procedure
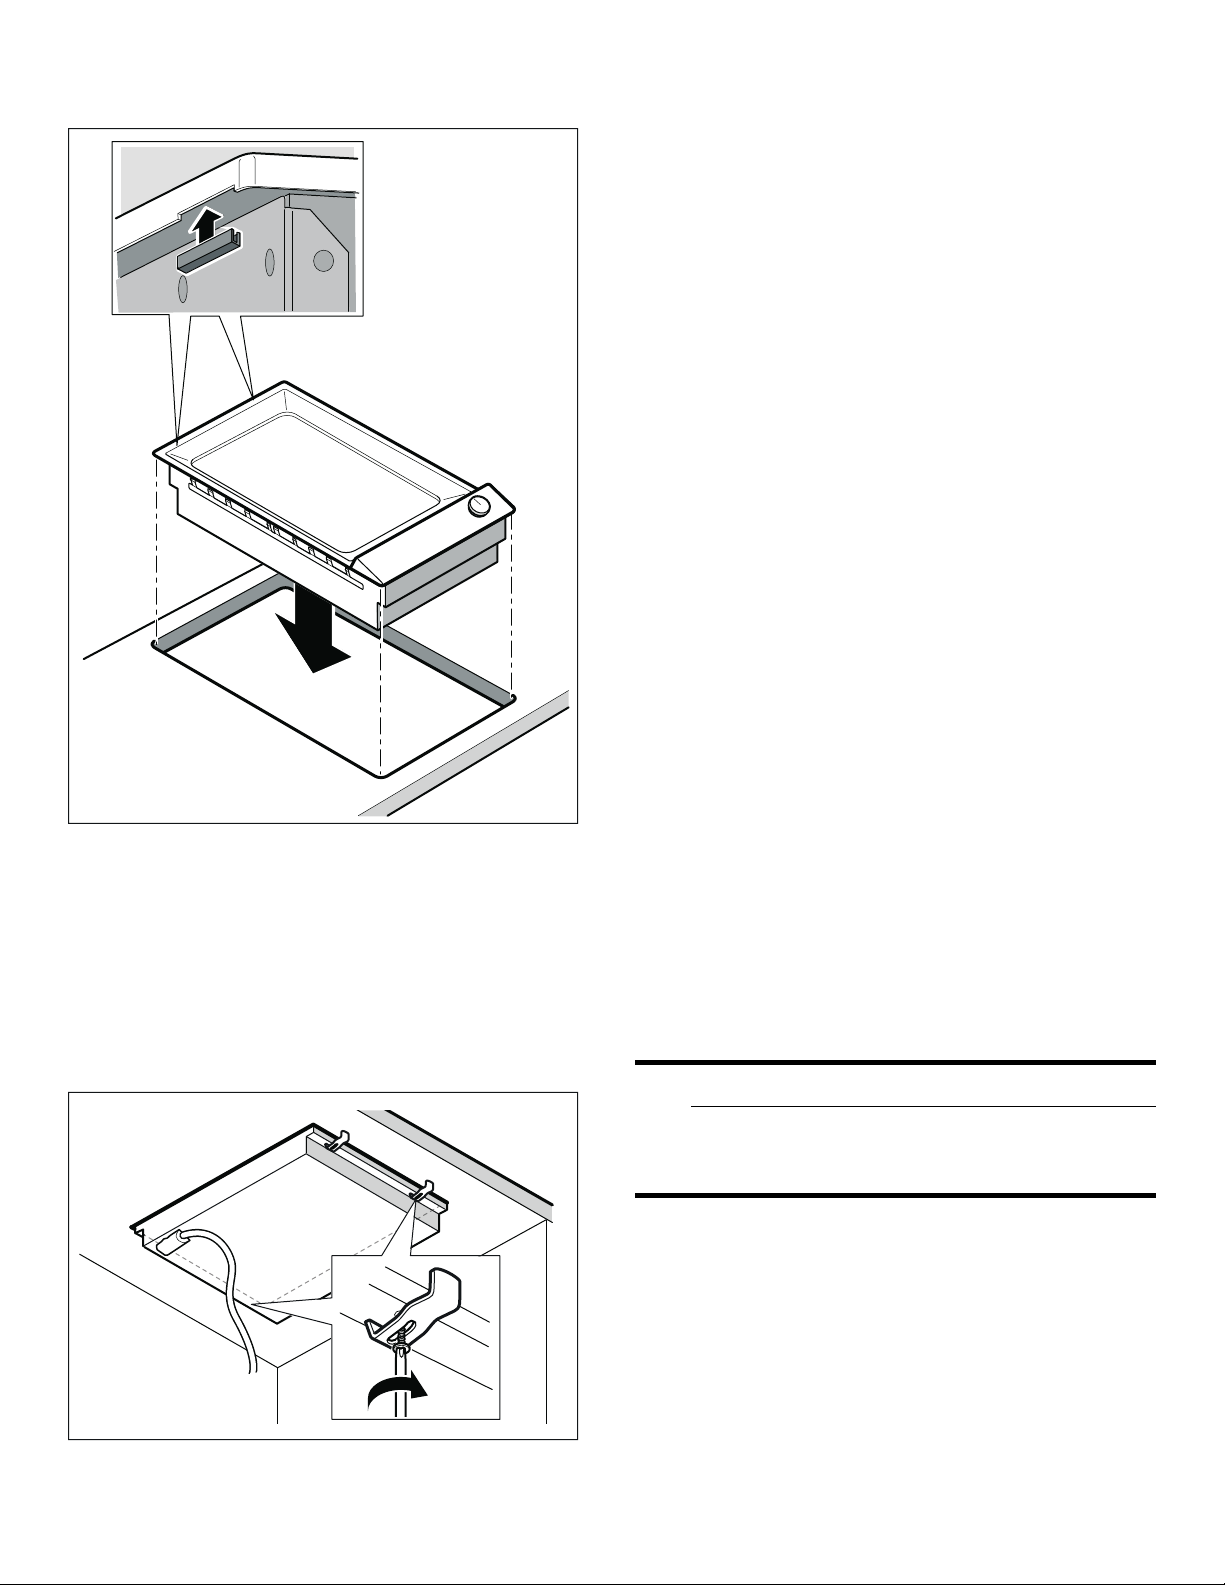
3. Place the appliance evenly in the cut-out. Push it down
firmly into the cut-out.
Note: The appliance must sit securely in the cut-out
and must not be able to move around (e.g. during
cleaning). If the width of the cut-out is at the upper
tolerance limit, secure battens to the sides of the cut-
out if necessary.
4. Secure the appliance from below using the four
enclosed brackets at the front and back.
Connect Electrical Supply
Refer to data plate for more information. See "Service"
for data plate location.
The branch-circuit breakers ampacity, the wire sizes and
the connections must be conform to the requirements of
the National Electrical Code or Canadian Electrical Code
and all local codes and ordinances.
Attach flexible conduit to the junction box. Connect the
lead wires to the junction box supply wires in proper
phase:
▯ black (L1) to black
▯ red (L2) to red
▯ green to ground
The mains connecting cable must at least correspond to
the type SJTO 3x16 AWG 105°C. The mains connecting
cable must only be purchased through and connected by
an authorised specialist.
Connection with a plug
▯ Plug has to be conform with NEMA
CONFIGURATIONS FOR PLUGS AND
RECEPTACLES.
▯ The appliance must be properly grounded.
▯ Plug must be rated not less than type 6-20 P (2-pole 3-
wire grounding).
▯ Only a qualified electrician should connect the plug.
▯ Install a socket outlet earthed in accordance with
regulations approx. 27" (700 mm) above the floor
behind the appliance. The socket outlet must still be
accessible after installation.
Check the Installation
9 WARNING
Before you plug in an electrical cord or turn on
power supply, make sure all controls are in the OFF
position.
Remove everything from the cooktop surface. Clean
cooktop surface with cooktop cleaning creme.
Switch on the circuit breaker.
Verify that elements function properly.
[
Loading ...
Loading ...
Loading ...