Loading ...
Loading ...
Loading ...
12 49-6000226 Rev. 4
Tools needed:
• Flat Head Screwdriver
• Phillips head screwdriver
• Socket/Torque Wrench
• 1
1
/16” Socket
• Pipe Joint Compound or Pipe Thread Sealant Tape
• Anode Rod, if needed
* See page 22 for part ordering instructions
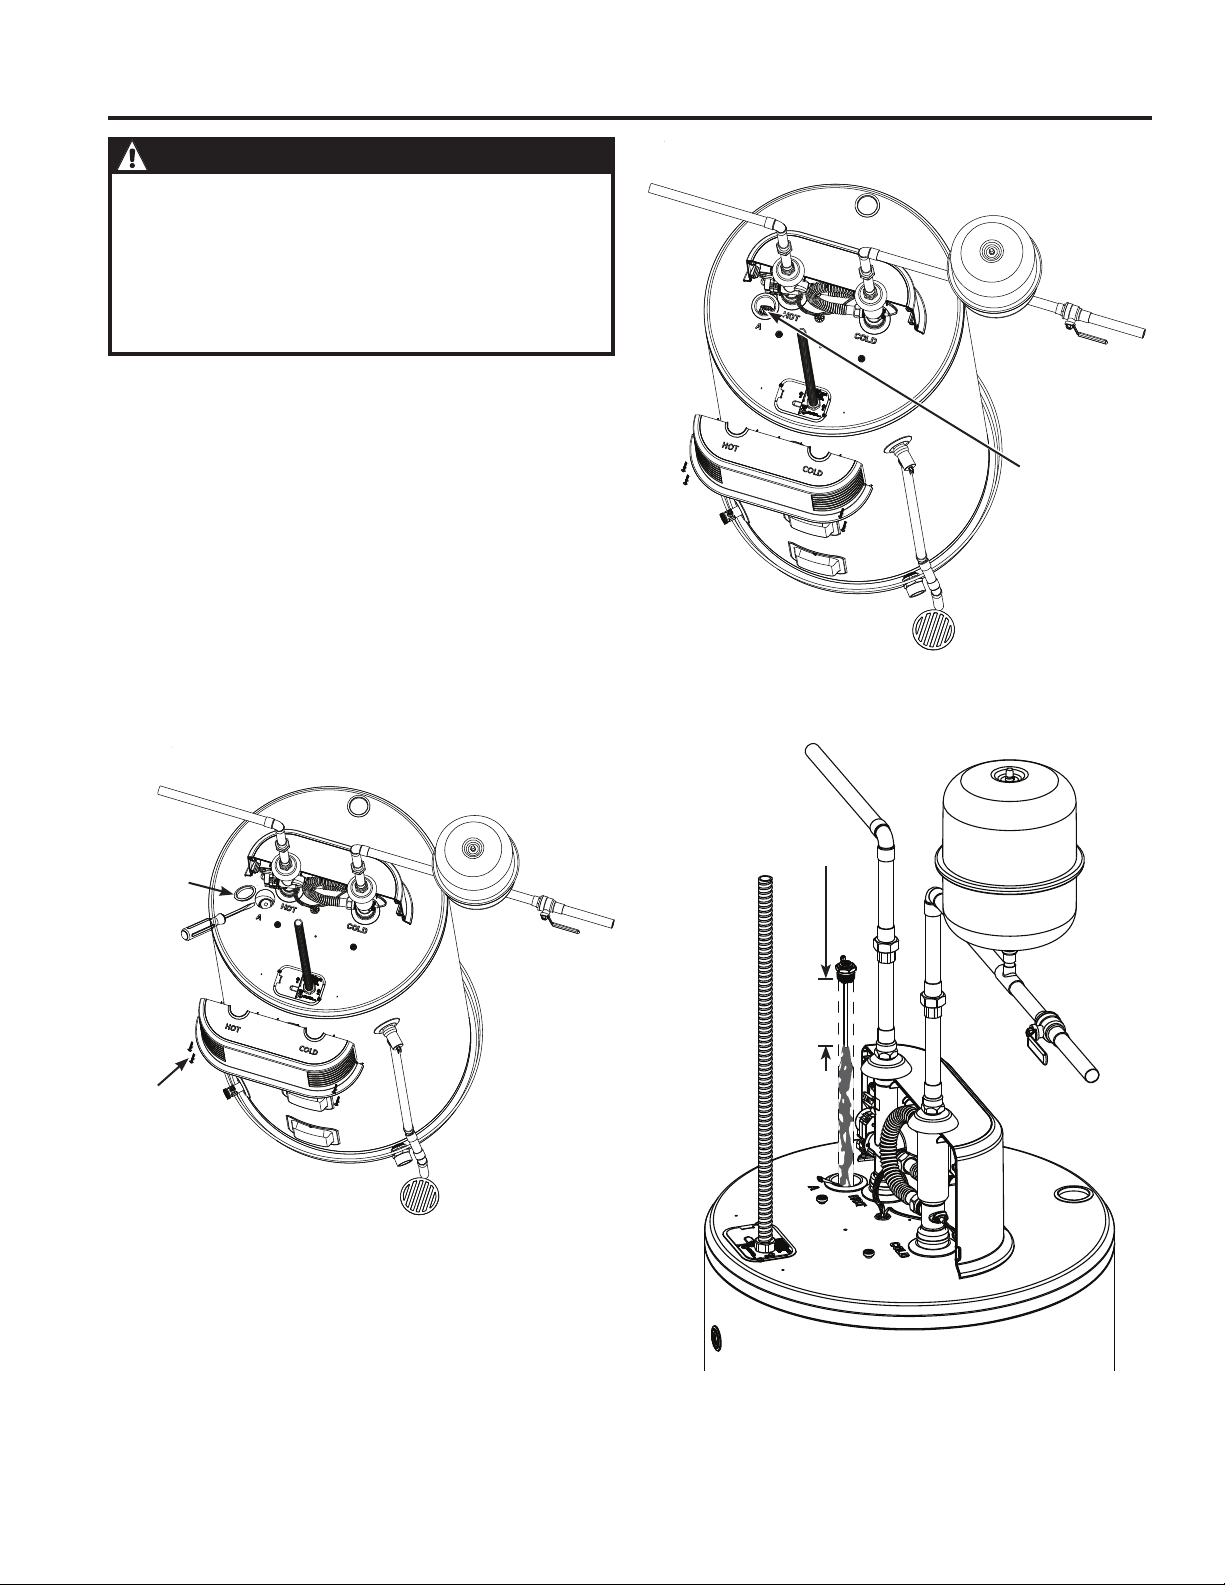
To Service Anode Rod:
1. Disconnect power, shut off the water supply, drain the
water lines of the home. Drain 1 to 2 gallons of water
from the water heater through the lower drain valve.
2. Skip to step 3, for models without Integrated Mixing
Valve. For models with Integrated Mixing Valve,
remove (4) screws and front section of shroud using
Phillips screwdriver per Illustration B.
3. Remove anode cap and foam insulation in hole with
flat head screwdriver to expose anode fitting as shown
in illustration B.
NOTE: For models with sensing anode feature, anode
fitting is already exposed (see illustration C). Wire
attached to anode fitting must be detached prior to
next step.
4. Using a 1 1/16” socket/wrench, unscrew the anode
rod, then lift out to inspect as shown in illustration D.
Anode Rod Maintenance and Service
CAUTION - IMPORTANT SAFETY NOTICE
This information is intended for use by individuals
possessing adequate background of electrical,
electronic and mechanical experience. Any attempt
to repair a major appliance may result in personal
injury and property damage. The manufacturer or
seller cannot be responsible for the interpretation
of this information, nor can it assume any liability in
connection with its use.
Illustration B (Appearance will vary by model)
Illustration C (Appearance will vary by model)
Illustration D (Appearance will vary by model)
Remove anode
cap and foam
insulation in
hole to expose
anode fitting
Remove (4) phillips
screws (if equipped)
on front shroud on
integrated mixing
valve model to
expose anode rod
aceess.
Remove anode
wire if equiped
with sensing
anode.
Replace anode rod
if more than 6” of
core wire exposed
CARE AND CLEANING
Loading ...
Loading ...
Loading ...