Loading ...
Loading ...
Loading ...

- 9 -
INSTALLATION INTO CABINET
WARNING: The Warming Drawer is very heavy. Utilize sufficient manpower to lift the Warming Drawer into
the required opening to prevent injury. A minimum of two persons is recommended.
IMPORTANT: The door(s) must be removed prior to installation in the cabinet. This will prevent damage to the
doors and reduce the weight of the Warming Drawer for installation.
1. Verify that all cabinet and electrical preparations have been completed and meet the requirements of
these instructions.
2. Verify that electrical power to the Warming Drawer is turned off at the breaker.
3. Verify that the Warming Drawer electrical cord can be plugged into an approved electrical outlet without
the use of an extension cord.
4. Lift the Warming Drawer into the cabinet opening.
5. Prior to sliding the Warming Drawer into the cabinet, verify that the electrical cord is connected and is not
pinched when sliding into the cavity.
6. Slide the Warming Drawer into the cabinet cutout so and check the level. Shim the bottom if required to
prevent uneven cakes and cooking.
7. Locate the mounting holes on the Warming Drawer front panel and secure with screws.
8. Secure the Warming Drawer to the cabinet cutout using screws that will match cabinet finish (not
supplied).
FINAL CHECK AND VERIFICATION
1. After the Warming Drawer has been installed into the cabinet check the following prior to first use:
2. Verify that all tapes, plastics, cardboard, and paper packing materials and instructions have been
removed from the Warming Drawer.
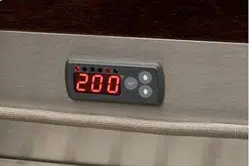
3. Turn the circuit breaker for the Warming Drawer on and verify the control is functional.
4. Following the instructions in the Use and Care manual verify the Warming Drawer will heat and the timer
functions.
5. If the display does not turn on or the drawer does not heat, check the circuit breaker and wiring.
Loading ...
Loading ...
Loading ...