Loading ...
Loading ...
Loading ...
INSTRUCTION SHEET
©2011 Electrolux Home Products, Inc. Instruction Sheet 297299700 Rev. C 07.18.11
12. Trim Kit Leveling (See Figure 16)
(Single and Dual Installations)
a. To raise front of unit, turn leg leveler to left with
adjustable wrench to fit 1-1/4” hex.
b. To raise back of unit, adjust bolt clockwise with
3/8” socket or flat head screwdriver
13. Hinge Adjustment (See Figure 16)
(Single and Dual Installations)
a. The bottom hinge is designed to make final
minor adjustments for door to door and door to
cabinet alignment.
b. Hinge will move side to side 3/32” and raise up
1/8”.
Use a 7/16” socket or open end wrench to raise or
lower the door.
Use a 3/8” socket and a Phillips screwdriver to
loosen bottom hinge. Shift door left or right, then
retighten screws and bolts.
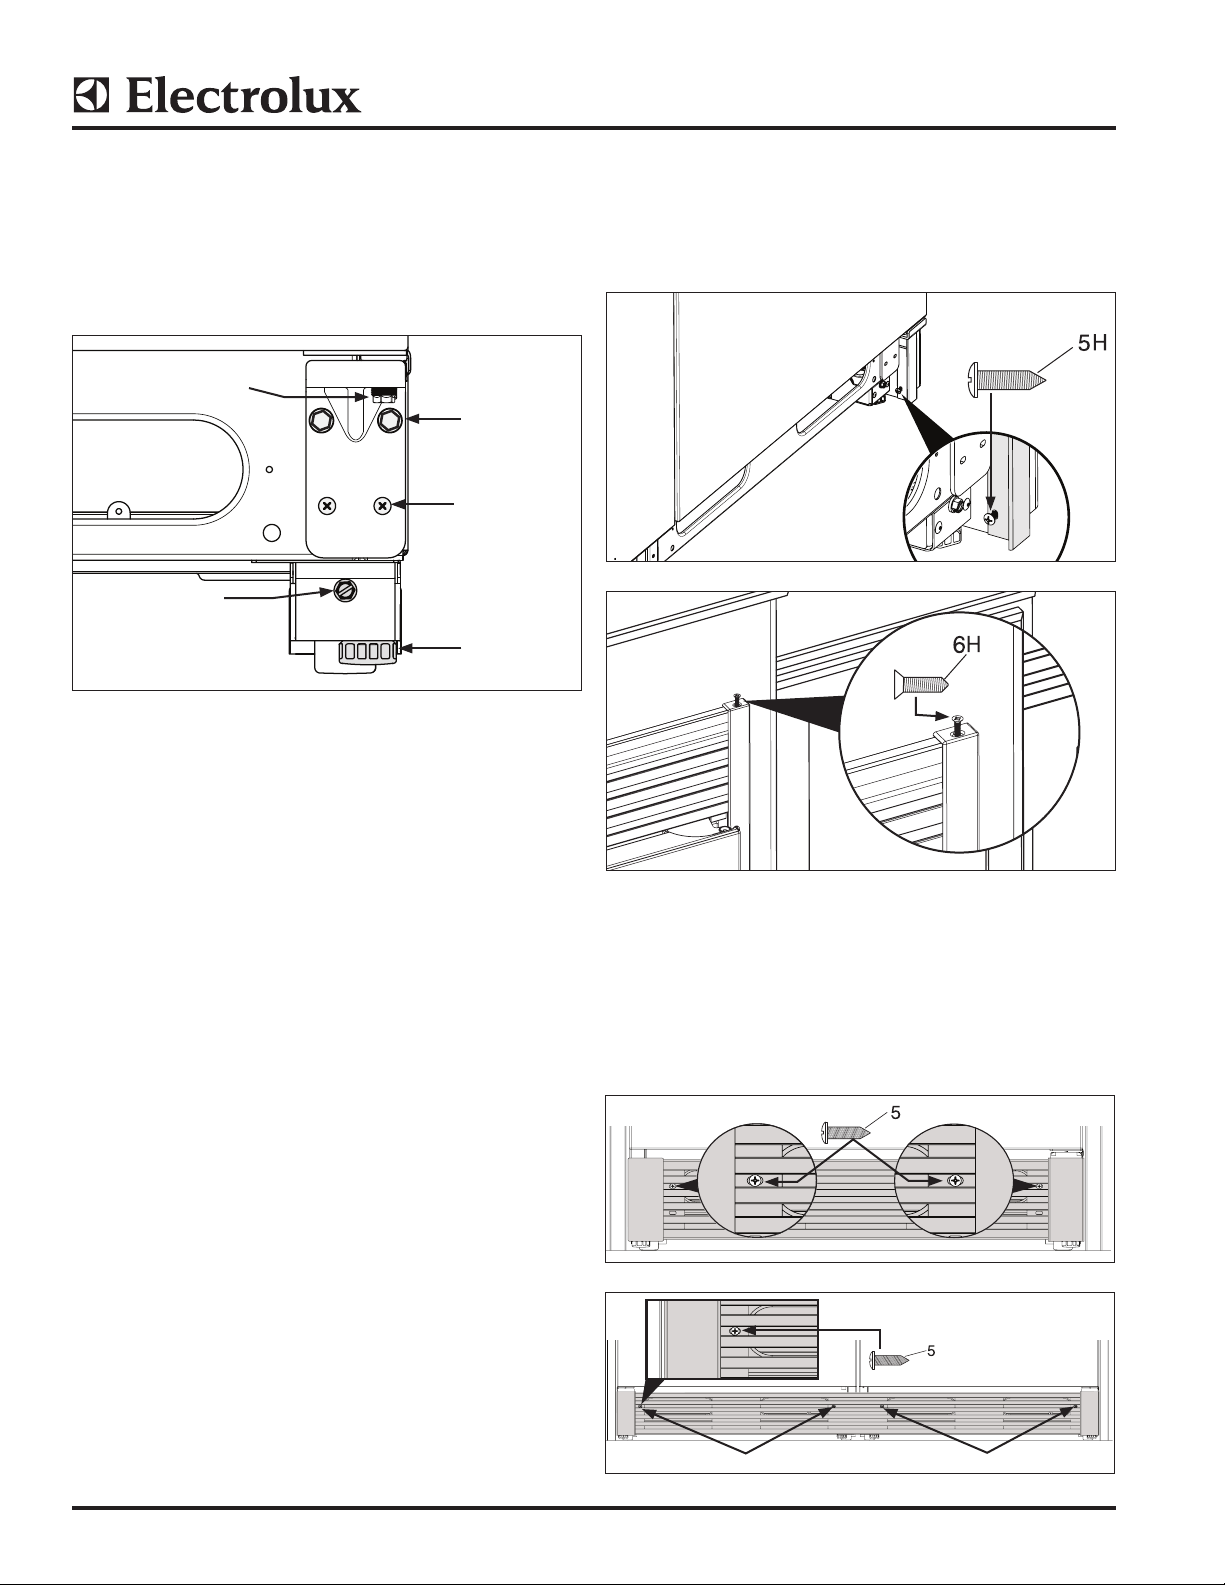
14. Side Trim Attachment to Kitchen Cabinets
(Single and Dual Installations)
a. Fasten bottom of side trim with screw.
(See Figure 17)
b. Fasten screws to top trim. (See Figure 18)
15. Kick Plate Attachment
(Single Unit) Attach the kick plate to the cabinet with
two (2) screws. (See Figure 19)
(Dual Unit) Attach the kick plate to the cabinet with
four (4) screws. (See Figure 20)
Figure 17.
Figure 16.
Leg Leveler
To raise back of
unit, adjust bolt
clockwise.
Phillips Head
Screws
3/8” Bolts
To raise or lower door,
adjust 7/16” bolt.
Figure 18.
Figure 19.
Figure 20.
Screws
Screws