Loading ...
Loading ...
Loading ...
INSTRUCTION SHEET
©2011 Electrolux Home Products, Inc. Instruction Sheet 297299700 Rev. C 07.18.11
Installing Trim Kit Tie Bar
(Dual Installation Only)
NOTE: Leveling may be required to line up the holes
in steps “a” and “d”.
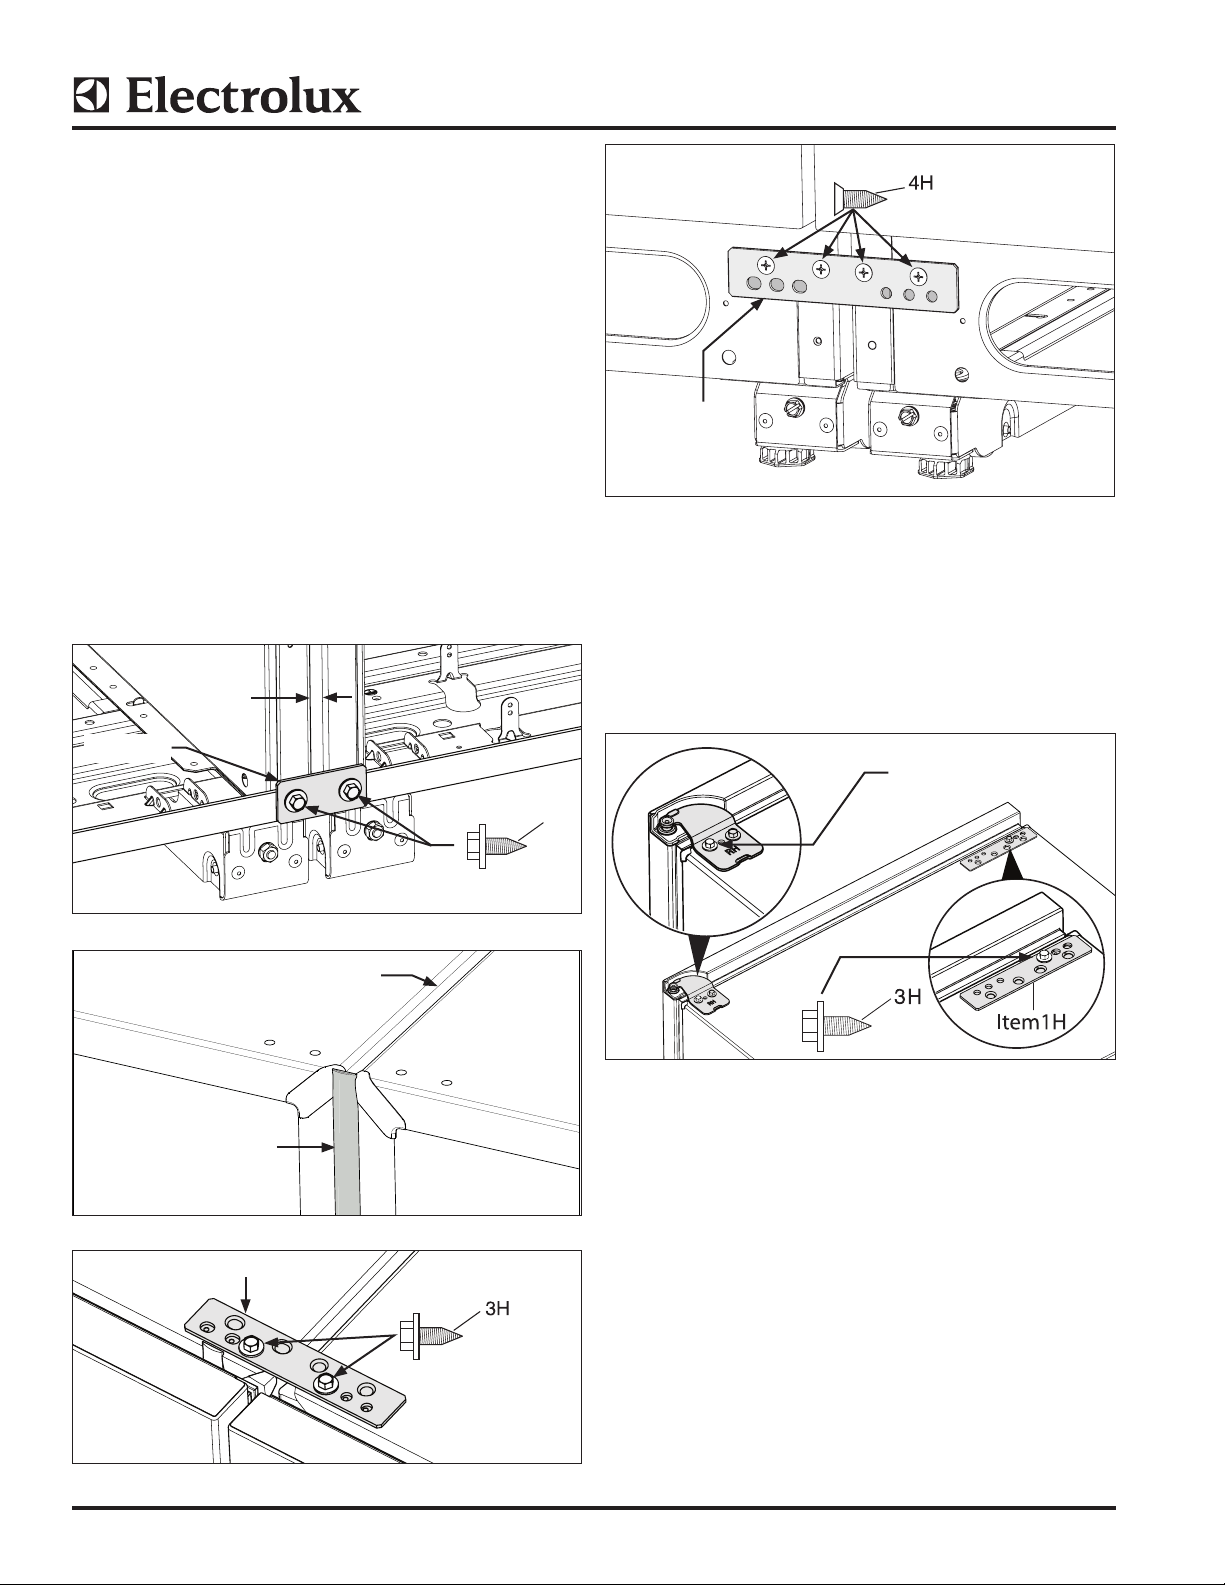
5. a. Tie units together by securing the mounting
bracket at the back of the units with a
3/8” socket. (See Figure 5).
b. Install center strip to insure the proper 3/8” gap
is maintained between units. (See Figure 6).
c. Tie units together with the common mounting
bracket at the front top with two screws in
the inner two screw holes by using a 3/8” socket.
(See Figure 7)
d. Tie units together with common mounting
bracket at the bottom front using #3 Phillips
driver. (See Figure 8)
3
H
Figure 5.
Figure 6.
3/8” Center Strip
Item 1 Dual kit
Item 1H
3/8” Gap Between Units
Figure 7.
Figure 8.
6. Remove outer screw from top hinge using a 3/8”
socket driver or wrench and save for later. Install
mounting bracket with one screw mounted to inside
hole using a 3/8” socket. (See Figure 9).
Side Trim Installation
(Single and Dual Installations)
7. a. Position Left Hand Side Trim on cabinet trim with
bottom resting on the floor.
b. Drill the 1/8” (3mm) pilot hole.
c. Run screw in all the way and then back out.
Remove side trim for later install.
(See Figure 10).
NOTE: Some cabinet substrates may require pre-drilling
holes using a 1/8” (3mm) diameter drill bit.
Figure 9.
Trim Kit Installation (Single Unit Installation)
Trim Kit Installation
Remove Screw
Item 2H
Item 1H
3/8” Gap
Loading ...
Loading ...