Loading ...
Loading ...
Loading ...
23
Setting Up
(Picture 1)
(Picture 1)
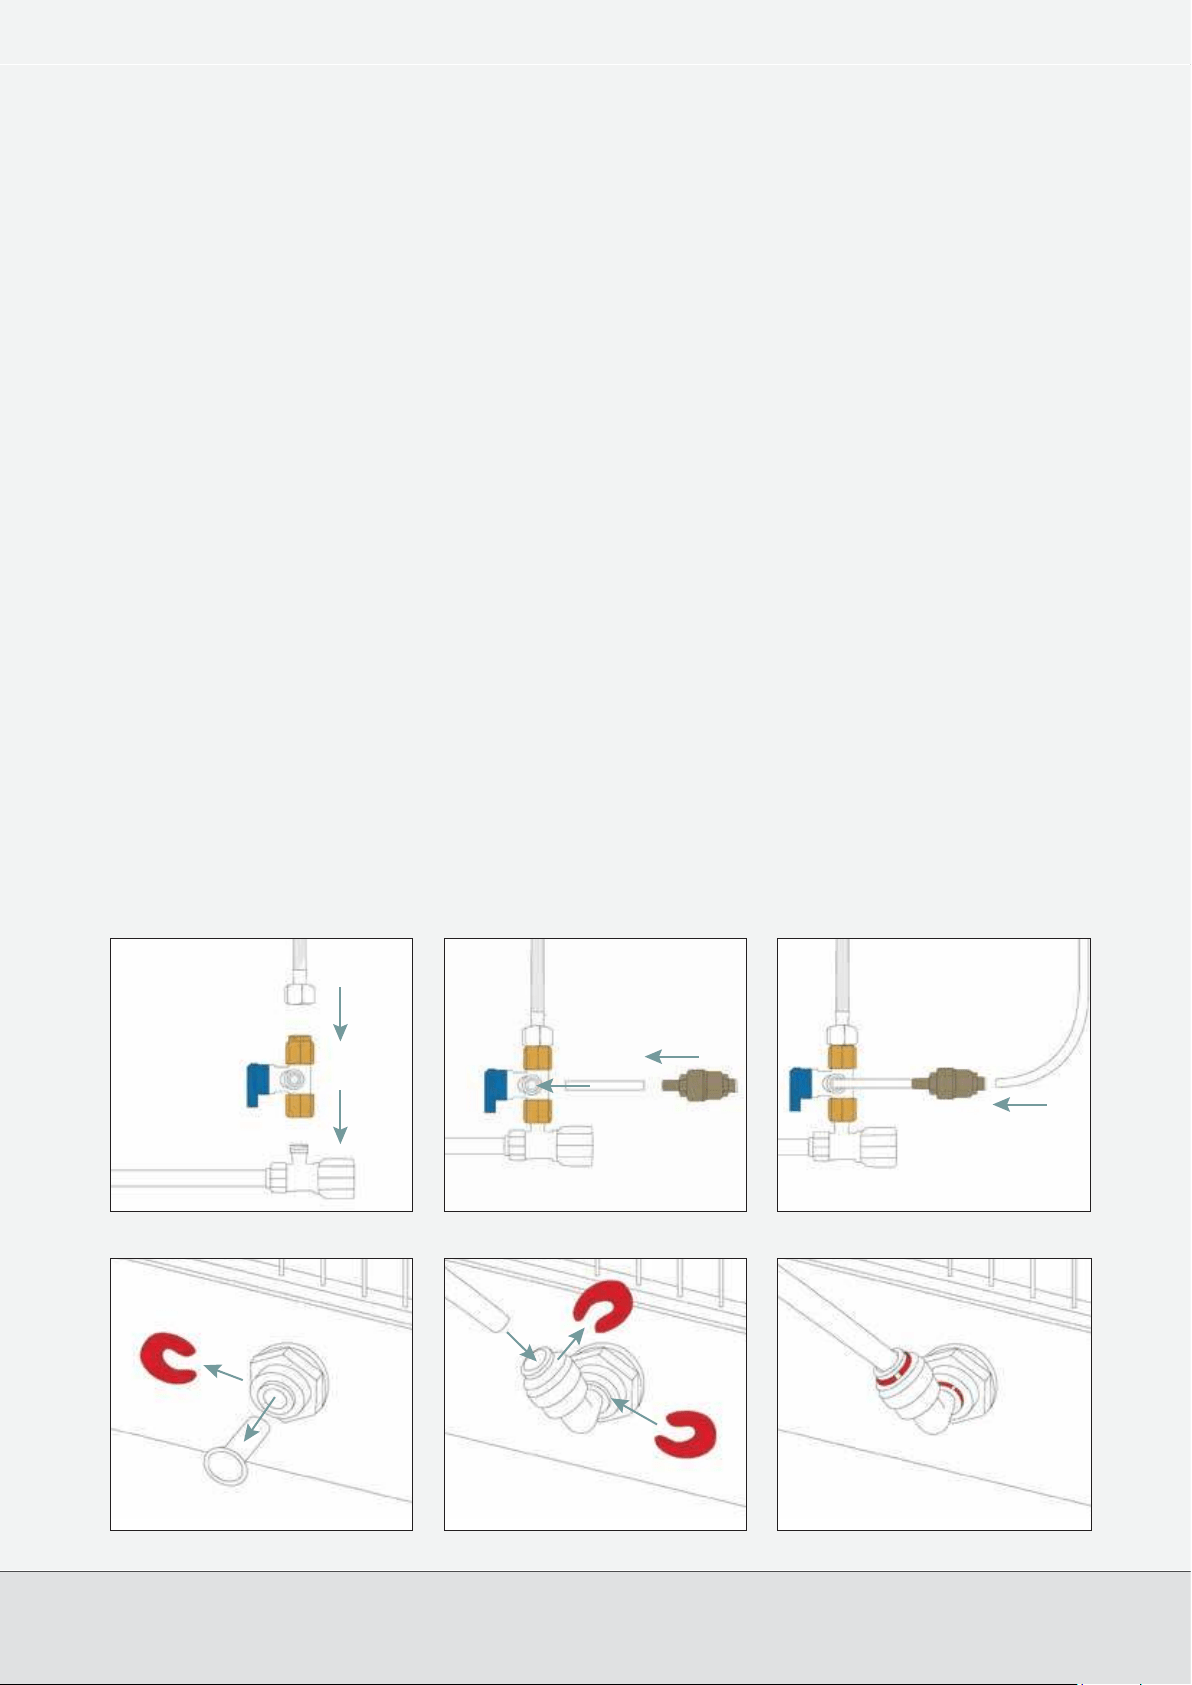
CONNECTION TO YOUR BIBO
10. Carefully drill an 8mm hole through the bench top about 5cm (2”) out from the wall directly behind where your
BIBO will be located. (NOTE: if the bench top is granite or similar a diamond drill bit is required and we
recommend this task is carried out by our Service Technician or another suitably qualified person).
11. Feed the long length of ¼” pipe from underneath the cupboards up through the 8mm hole. (Picture 3)
12. Measure about a 30cm (12”) length of ¼” pipe above the bench and cut off any surplus.
13. Remove all the packaging from your BIBO and place it in its preferred location.
14. At the rear of your BIBO, remove the locking clip from the Water Inlet connector. (Picture 4)
15. Depress the collar of the Water Inlet connector and remove the blanking plug. (Picture 4)
16. Press the Stem Elbow connector into the Water Inlet connector. (Picture 5)
17. Replace the locking clip to the Water Inlet connector. (Picture 5)
18. Remove the locking clip from the Stem Elbow connector. Press the length of ¼” pipe above the bench into the
Stem Elbow connector. Replace the locking clip to the Stem Elbow Connector. (Picture 5)
19. Insert the drip tray into the slots at the bottom of the front panel of your BIBO.
20. Check all press fittings are snug and piping is pressed fully into the connectors. (Picture 6)
21. Turn on the cold water Shutoff Valve under the sink and check the cold tap is running.
22. Open the small valve on the Angle Check Valve so the lever is in line with the ¼” pipe.
23. Use a paper towel or tissue to check the whole system for any leaks.
1. Make sure both power switches on the back of your BIBO are in the off (‘o’) position before connecting to the
power supply (see page 4 of the User Manual for guidance).
2. Switch on the Power Switch only at the back of your BIBO.
3.
DO NOT TURN YOUR BIBO’S HOT TANK SWITCH ON (CLEARLY LABELLED ON THE BACK OF UNIT)
UNTIL YOUR BIBO HAS FILLED ITSELF WITH WATER.
4. Now follow the instructions on “Using Your BIBO” on pages 8-14 of the User Manual and follow your BIBO’s
on-screen prompts – ENJOY!
If you have any quesions please call us on 1300 002 426
USER MANUAL
(Picture 2) (Picture 3)
(Picture 4) (Picture 5) (Picture 6)
Cold Water
Line
Angle Check
Valve
Pipe
PLV
to 8mm hole in
benchtop
Pipe
Clip
Plug
Shutoff Valve
Loading ...