Loading ...
Loading ...
Loading ...
Page 7
Bucket
lid
Hole
Buckle
lid
Float
1.Using two hands gently remove lid
from the top of the bucket.
2.Remove casters
from bucket
3.Re-install the lid and be
sure that it is securely
clipped into the bucket
Important Note: Verify the plastic float
system on the top of the bucket is still
securely installed and swinging properly
before placing bucket back in the
dehumidifier
INSTALLATION GUIDE
When you open the box, you should have received:
Portable dehumidier
User Guide
Castors (4)
Pump Drain and Continuous Drain Kits
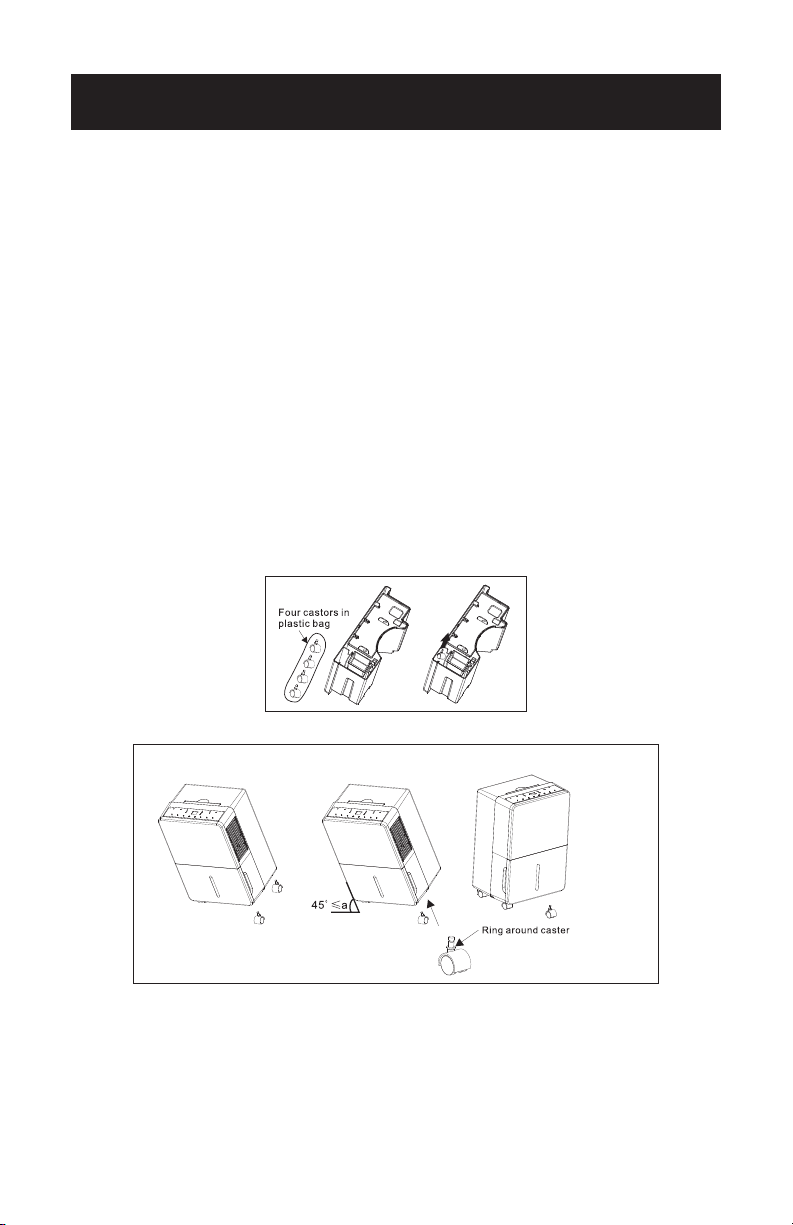
To Install Castors:
1. Remove castors from the water collection bucket.
The four castors can be taken out from the side of the bucket directly (See Fig 1).
2. Tilt the dehumidier no more than 45˚ and push to insert the castors into the
base of the unit. Make sure the ring around the castor is ush against the bottom
of the dehumidier. (See Fig. 2).
SET UP & USE
Fig. 1
Bucket
lid
Hole
Buckle
lid
Float
1.Using two hands gently remove lid
from the top of the bucket.
2.Remove casters
from bucket
3.Re-install the lid and be
sure that it is securely
clipped into the bucket
Important Note: Verify the plastic float
system on the top of the bucket is still
securely installed and swinging properly
before placing bucket back in the
dehumidifier
Fig. 2
Loading ...
Loading ...
Loading ...