Loading ...
Loading ...
Loading ...

8
|
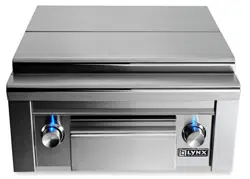
SIDE BURNER ACCESSORY CARE & USE/INSTALLATION
IMPORTANT NOTES
WHERE’S THE WIND?
When selecting a suitable location, consider important
factors such as exposure to the wind and foot-traffic
patterns.
If you have a side burner attached to a freestanding grill,
position it so the prevailing wind blows into the front
control panel (at your back when grilling), supporting the
proper front-to-rear airflow.
Built-in accessories located in areas with prevailing winds
should be protected by a wind barrier.
HOW LONG IS YOUR RUN?
Keep all gas supply lines as short as possible because gas
lines lose pressure over distance and with each elbow and
tee that is added. This drop in pressure affects accessory
performance. (See INDEX: “Gas Supply Line Runs” for
further details.)
ARE YOU “ON-THE-LEVEL”?
Proper leveling during installation is critical. An accessory
that is out of level will cause erratic burner combustion and
inefficient, uneven heating. A carpenter’s spirit level should
be used to level the accessory both front-to-back and side-
to-side.
If the floor is uneven or has a decided slope, re-leveling
may be required each time you move a freestanding unit.
BUILT-IN INSTALLATIONS
Lynx built-in accessories are intended for installation in a
built-in enclosure constructed of non-combustible materials.
The accessory drops into the opening shown in the cutout
detail drawing and hangs from its counter-top trim. A deck
is not required to support it from the bottom.
Pay special attention to the provisions shown for gas line
hook-up. (See INDEX: “Cut-out Dimensions for Built-in Grills
& Accessories”)
Installation provisions may be made for the Power Burner
installation. The Power Burner cooking height may be
reduced to better accommodate large cooking pots.
Clearances to combustible material must be maintained
as outlined below. No combustible material shall be used
in the construction of a counter top using a recessed
application.
The enclosure should have ventilation holes to prevent gas
build-up in the event of a leak. The deck ledges and counter
should be flat and level. (Refer to ANSI Z21.58 Standard for
Outdoor Cooking Gas Appliances, Section 1.7 Enclosures
For Self Contained LP-Gas Supply Systems or local codes
for additional information.)
The grill accessory does not come with its own power
source. It may be powered directly from your Lynx Grill.
When a Lynx grill is not available or if the grill is not located
close enough to the grill a Lynx LASK (Lynx Accessory Switch
Kit) is available as an optional purchase.
CLEARANCE TO COMBUSTIBLE MATERIALS
Minimum clearance from the sides and back of the
accessory to adjacent combustible construction below the
counter top is 12” from the sides and back.
Dégagement minimal entre les parois latérales et l’arrière
de l’appariel et la construction combustible au-dessous
du panneau supérieur de l’appareil (30 cm à partir des
parois latérales et 30 cm à partir de l’arrière).
Minimum clearance from sides and back of unit to adjacent
combustible construction extending above the counter top
is 18” from the sides and back.
Dégagement horizontal minimal entre les parois latérales
et l’arrière de l’appariel et la construction verticale
combustible au-dessus de l’appareil (45.7 cm à partir des
parois latérales et 45.7 cm à partir de l’arrière).
Do not use this appliance under unprotected overhead
combustible surfaces.
Ne pas utiliser cet appareil sous une surface combustible
non protégée.
BEFORE YOU START...continued
Loading ...
Loading ...
Loading ...
