Spotlight Cam

Smart Security at Every
Corner of Your Home
Your new Spotlight Cam lets
you extend the Ring of Security
around your entire property.
Now, you’ll always be the first to
know when someone’s in your
yard, and you can watch over
your home from anywhere.
Monitor your home, prevent
crime and protect your
property – all from your phone,
tablet or PC.
2

Contents
1. Charging
2. In-app Setup
3. Physical Installation
4. Features
5. Troubleshooting
3

1. Charge
the provided
battery.
4
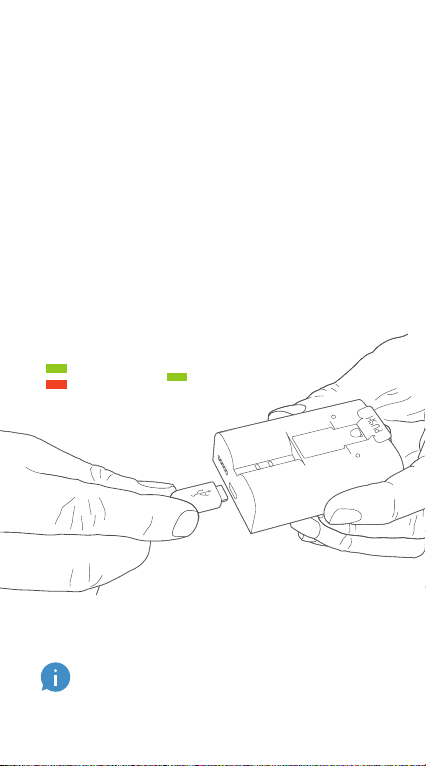
Charge the battery
First, fully charge the battery by
plugging it into a power source
using the provided orange
cable.
The small light on top will glow
green once fully charged.
= Charged
= Charging
If you can’t wait to play with your Spotlight
Cam, go ahead and set it up. But, we
recommend fully charging it before
installation.
5
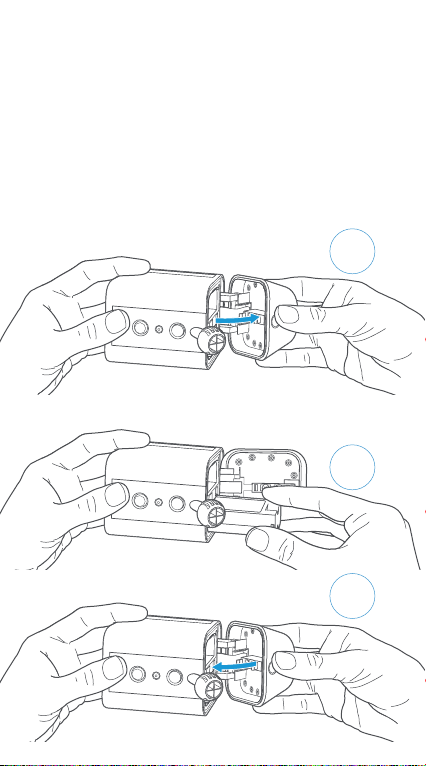
Insert the battery
After charging, insert the
battery in your Spotlight Cam
until it clicks into place. Then,
click the door closed.
A
C
B
6

2. Set up
your
Spotlight
Cam in the
Ring app.
7
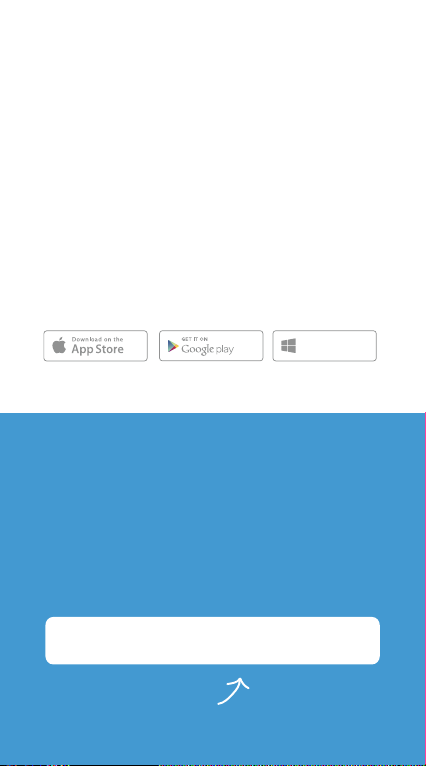
Download the Ring app
The Ring app walks you through
setting up and managing your
Spotlight Cam.
Search for “Ring” in one of the
app stores below, or visit:
ring.com/app.
Download from
Windows Store
Your Wi-Fi password
Grab your Wi-Fi
password
It’s required for the in-app
setup. Write it down below so
it’s handy when you need it:
Spotlight Cam Wired
Spotlight Cam Battery
8
Spotlight Cam Wired
Spotlight Cam Battery
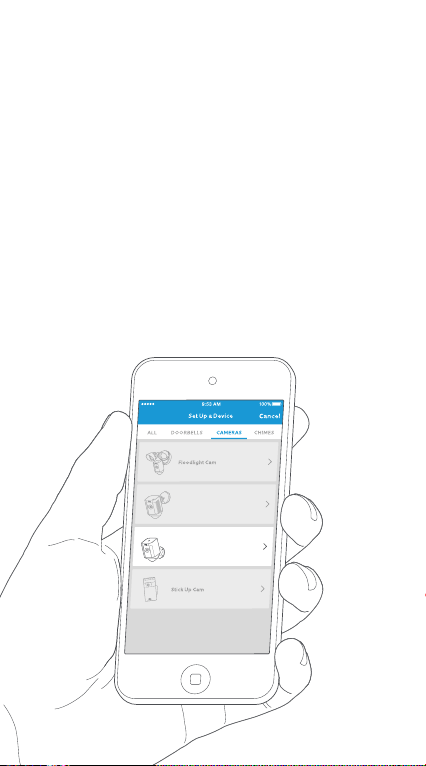
Set up your Spotlight
Cam near your router
In the Ring app, select Set Up
Device.
When prompted, select
Spotlight Cam and follow the
in-app instructions.
9
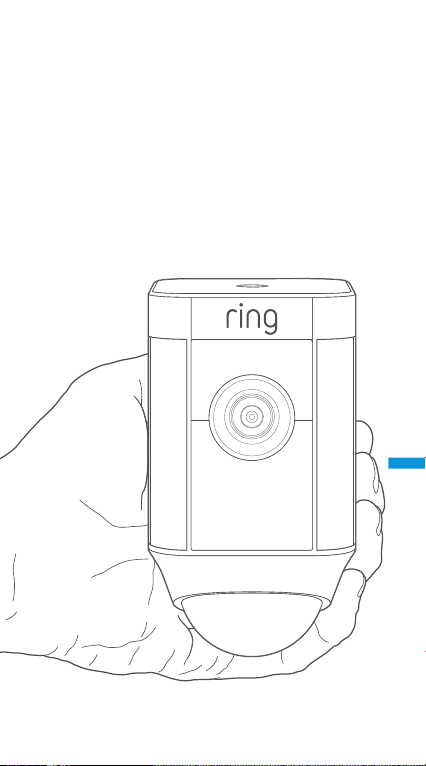
Try it out!
After setup, tap the Live View
button in the Ring app to see
video from the camera.
10
White light flashing?
If the light on the bottom of
your Spotlight Cam flashes
after setup, it’s updating its
internal software.
The update process can take
up to a few minutes. The light
stops flashing when the update
is complete.
11

Test video quality
outside.
Now, take your Spotlight Cam
outside, near the place where
you want to install it. Test video
quality again.
Everything look good?
Continue to the next section.
Something not right?
Jump ahead to the
troubleshooting section.
12

3. Install your
Spotlight
Cam on
the wall.
13
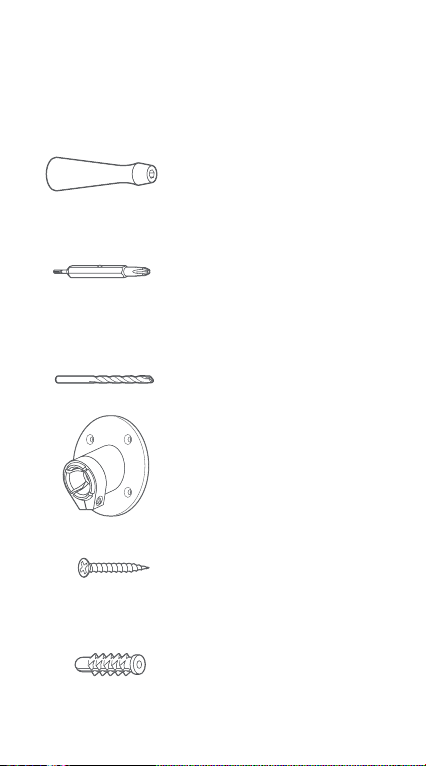
Screwdriver
Use the screwdriver handle to
hold the provided bit.
Screwdriver Bit
Use the Phillips end for installing
the mounting bracket and the
star-shaped end for the security
screw on the mounting plate.
Drill Bit
Use this to pre-drill holes if
installing on a masonry surface,
such as stucco or brick.
Mounting Bracket
Attach this to the wall first, then
pop Spotlight Cam into the
socket.
Install Screws (5)
Use these to secure the
mounting bracket to your wall.
Wall Anchors (5)
Use these to attach the mounting
bracket to your wall if installing
on a hard surface, such as stucco
or brick.
Contents…
14
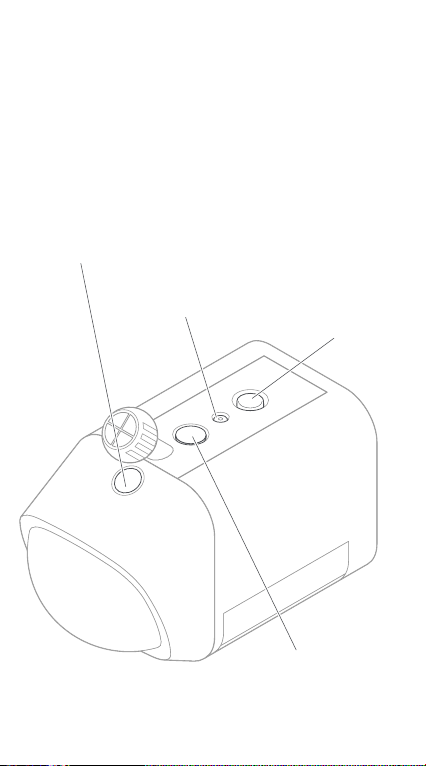
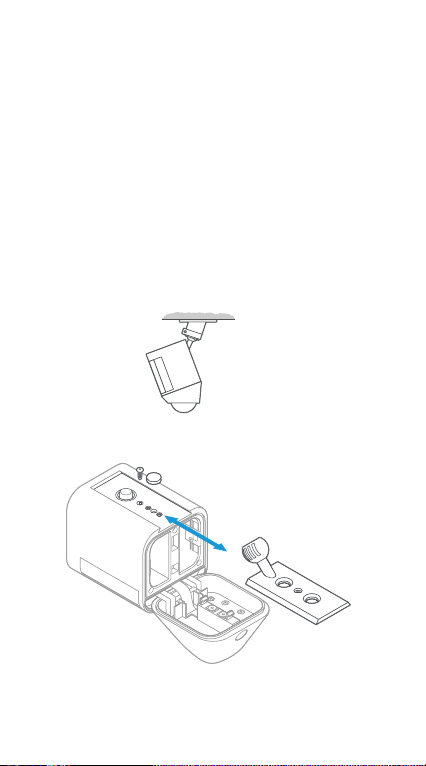
How to remove the
mounting plate…
2. Remove
security screw
3. Press
release button
1. Press button
to open battery
compartment
4. Remove weather
seal, and insert in
unused hole
15
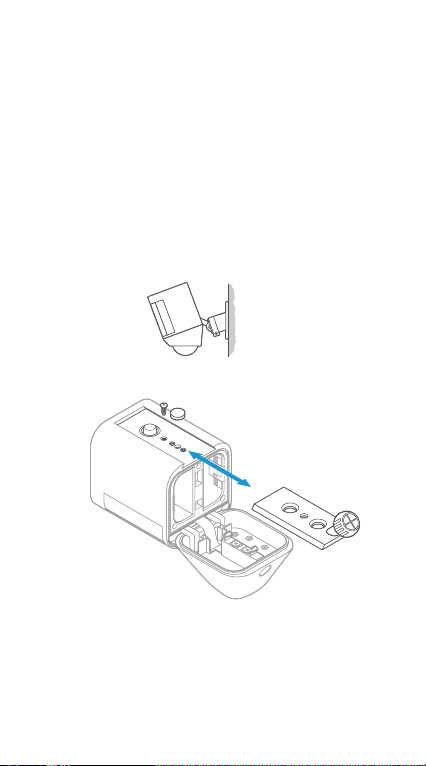
Mounting on a wall
To install Spotlight Cam on a
wall, insert the mounting plate
with the ball socket pointing
down.
16
Mounting on an eave
To install Spotlight Cam on an
eave or overhang, insert the
mounting plate with the ball
socket pointing up.
17

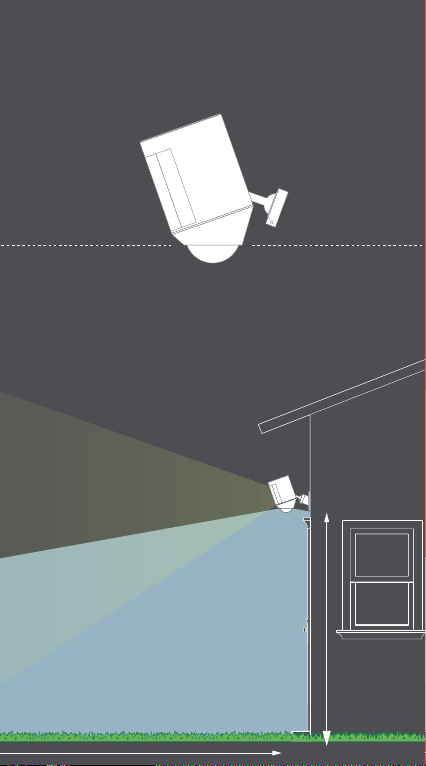
How installation
height affects motion
detection
30 feet (10 Meters)
9 feet
(3 Meters)
Parallel to ground
Select an install height
When mounted at 9 feet off
the ground, with the motion
detector parallel to the
ground, the motion sensor is
optimized to detect human-
sized objects at up to 30 feet.
18
30 feet (10 Meters)
9 feet
(3 Meters)
Parallel to ground
19

Install the mounting
bracket
First, mark your holes using the
mounting bracket as a guide.
If installing on a masonry
surface, first drill holes using
the provided drill bit. Insert the
wall anchors before inserting
the screws.
If installing on a wood surface,
you can screw the bracket
directly into your wall.
20
21

If you have a Ring
Solar Panel…
Ring Solar Panel charges your
Spotlight Cam continuously—
no need to charge or swap out
batteries.
If you don’t yet have a Ring
Solar Panel, skip this section.
For more info, visit ring.com
22
Mark the Holes
Select an install location where
Solar Panel can get at least 1
hour of direct sunlight a day.
Mark the holes using the
mounting arm as a template.
23

Install Wall Anchors
(optional)
If installing on a hard surface
(such as stucco or brick), use
the included drill bit to pre-drill
the mounting holes, then insert
the wall anchors.
If installing on wood or siding,
skip this step.
24
Screw in the Mounting
Arm
Drive the included mounting
screws into your wall (or the
wall anchors, if installing
on a hard surface) until the
mounting arm is secure.
Note: It’s easier to screw in the mounting arm
before you attach the solar panel.
25
Attach the Solar Panel
Slot the Solar Panel onto the
mounting arm, and make sure
it’s secure.
26
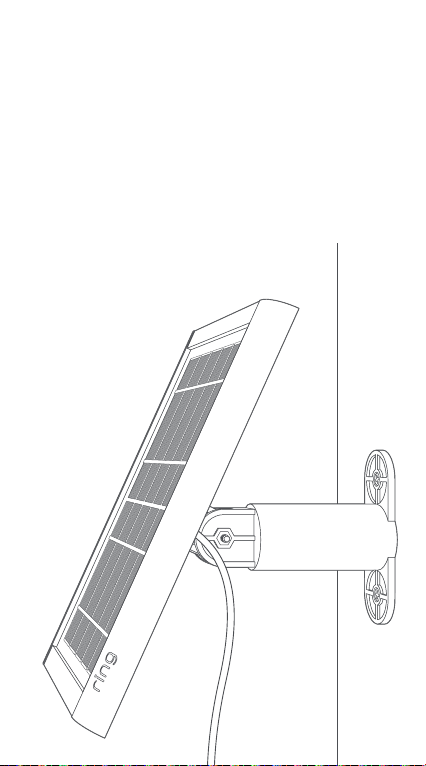
Adjust the Angle
Loosen the screw on the
mounting arm and adjust the
panel to your desired angle,
then re-tighten the screw to
secure your setting.
27
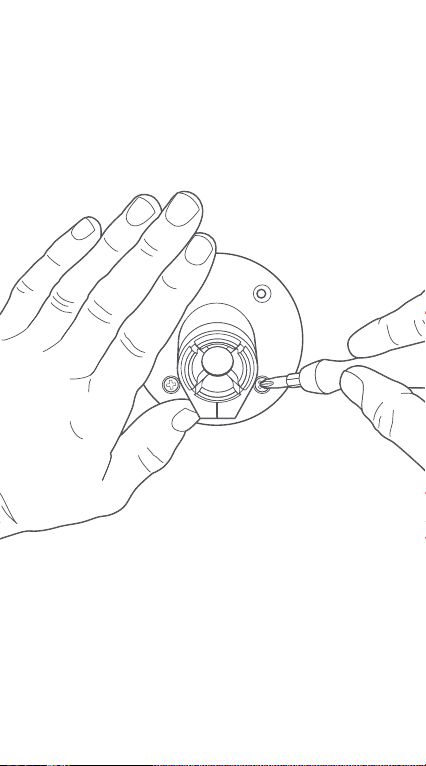
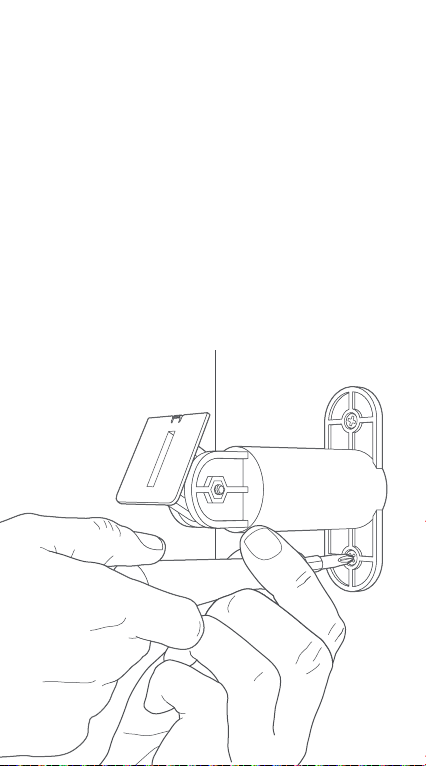
Connect
the Cable
Remove
the weather
proofing plug
nearest to the
bottom of
your Spotlight
Cam.
Then place the
power plug
from your
Ring Solar
Panel into the
power input,
taking care
to align the
screw holes.
28

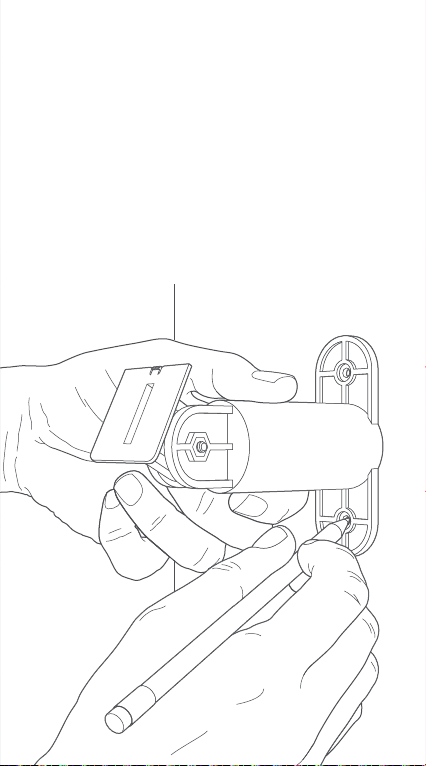
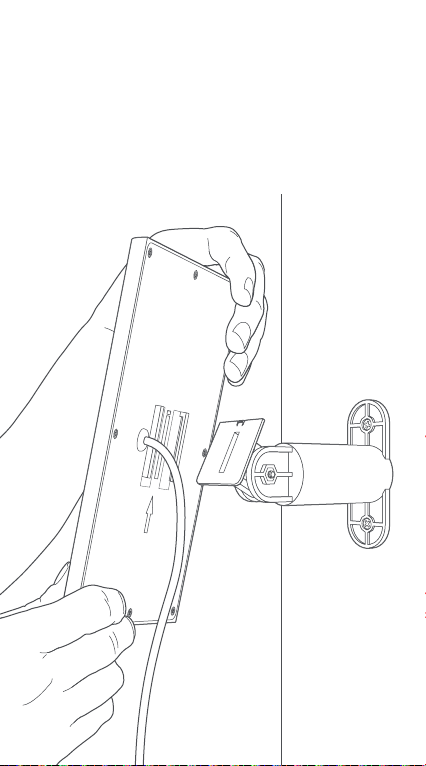
Secure the Cable
Secure the power cable to
your Spotlight Cam with the
included screws. This helps
ensure that your Spotlight Cam
stays water-tight.
Note: Make sure you charge and insert the included
battery into your Spotlight Cam. Ring Solar Panel
keeps the battery charged, but does not replace it.
29

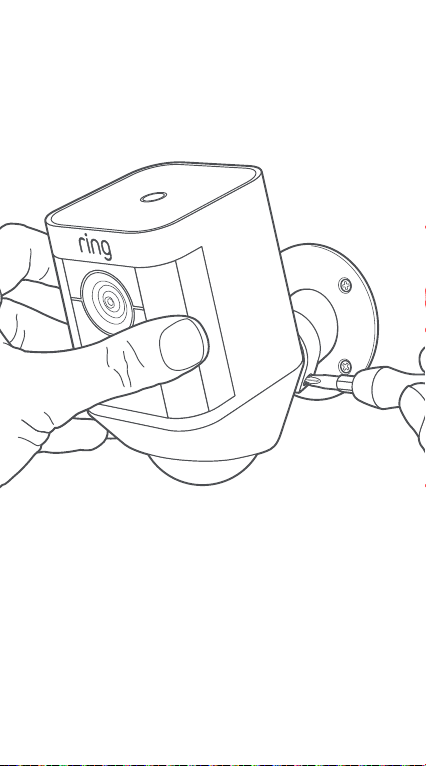
Attach Spotlight Cam
to the mounting
bracket
Push the ball into the socket
until it pops into place.
30

31

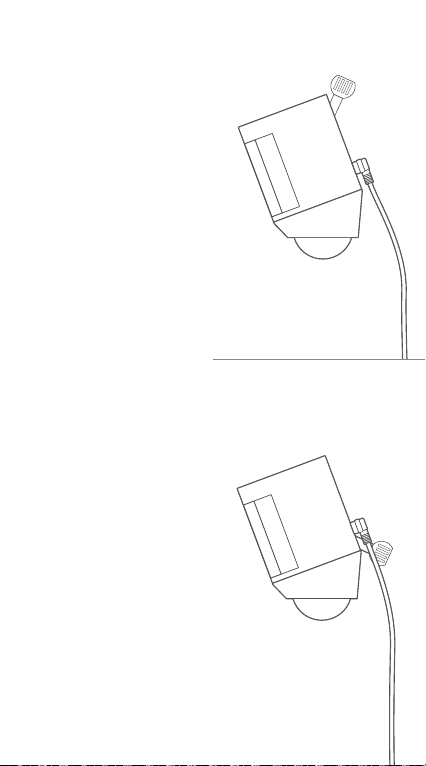
Adjust the camera
angle
To ensure accurate motion
detection, position the camera
with the motion detector
parallel to the ground.
Tighten the side screw to
secure the camera position.
32
33

4. Check
out all the
exciting
features.
34
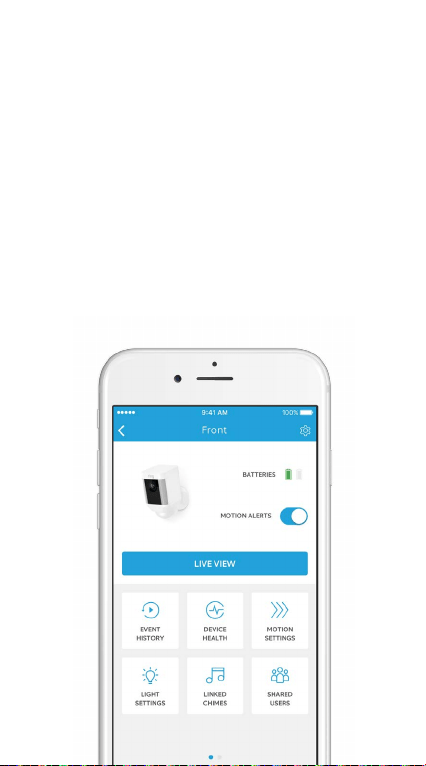
After setup, select
your Spotlight Cam in
the Ring app
This will bring you to the Device
Dashboard, where you can
change settings and access
various features.
35
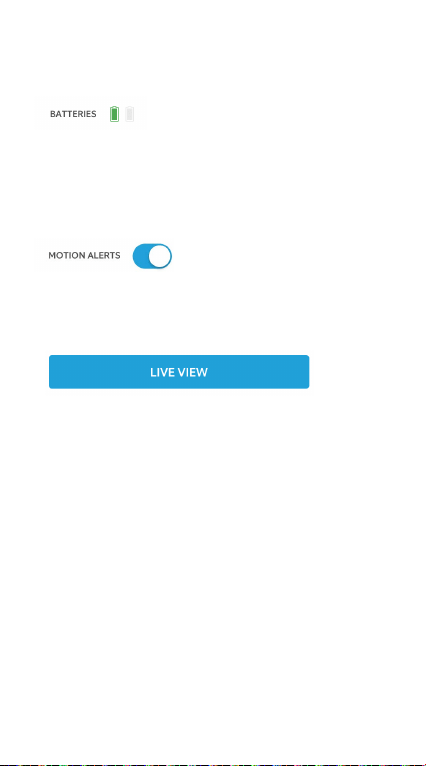
Check the level of the battery
(or batteries) in your
Spotlight Cam.
Turn notifications on or off for
motion events.
Tap to see live video from
Spotlight Cam. From here, you
can see, hear and speak to
visitors, and control the siren
and lights.
36
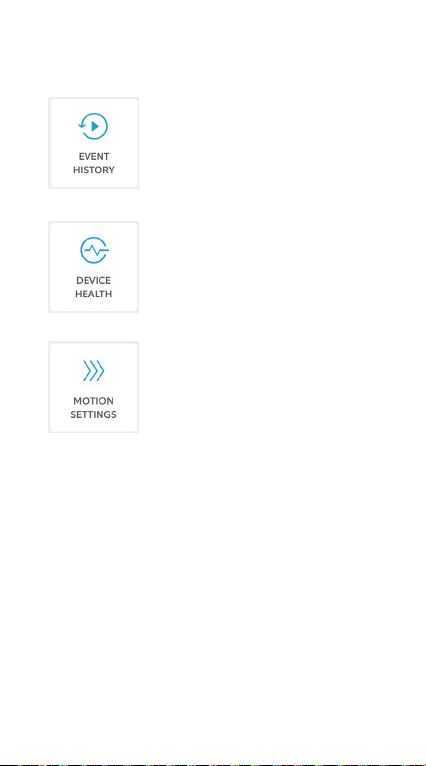
View a log of all the
events captured by
your Spotlight Cam
in Event History.
Visit Device Health
to diagnose any
problems you run
into.
Select Motion
Settings to
customize motion
detection settings.
37

Motion Detection
Spotlight Cam utilizes three
Motion Zones, which are
customizable areas Spotlight
Cam will monitor and alert you
about. When motion is detected
in one of your Motion Zones at
night, the lights on Spotlight
Cam turn on.
To customize your Motion Zones
and set how long the lights will
stay on for when triggered, tap
Motion Settings, then Motion
Zones.
38
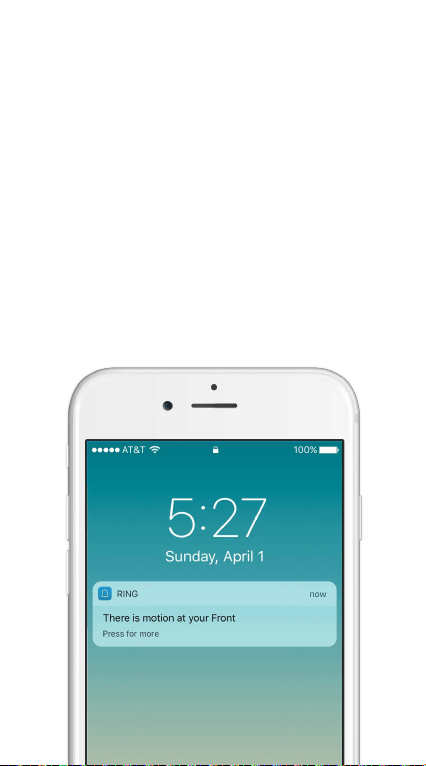
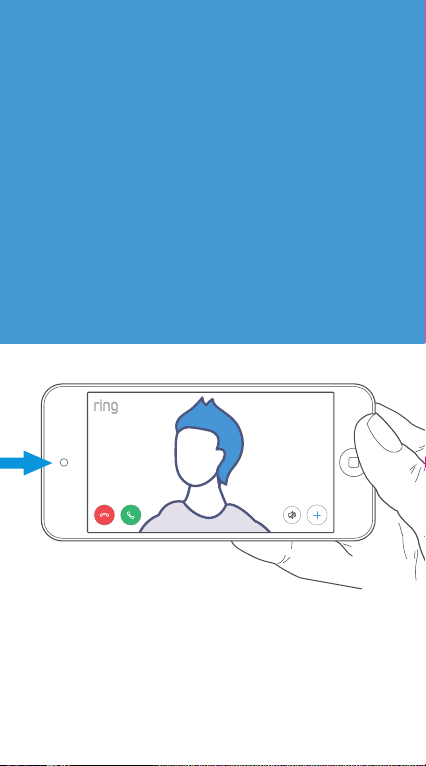
Notifications
If your phone is locked when the
camera captures a live event, a
notification is displayed on your
home screen.
If your phone has a passcode,
you’ll need to enter it to access
the live event.
39

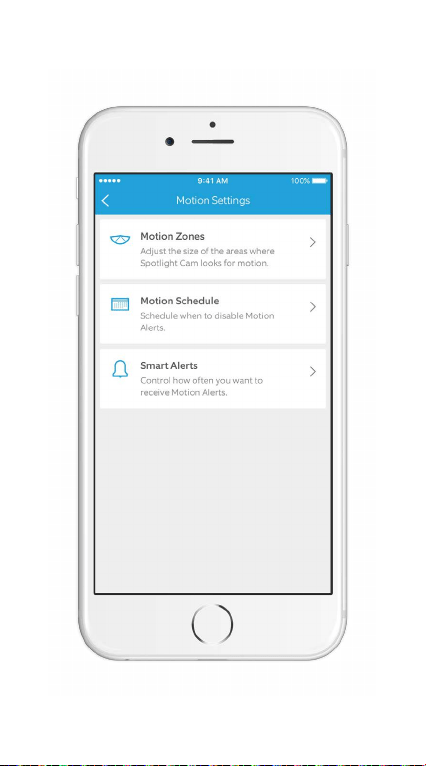
Motion Zones
Adjust the areas that will trigger
motion events and turn the
lights on at night.
Motion Schedule
Schedule times when you don’t
want to receive motion alerts.
Smart Alerts
Adjust how often you want to
be notified for motion events.
Select Motion
Settings
to customize your
motion preferences.
40
41

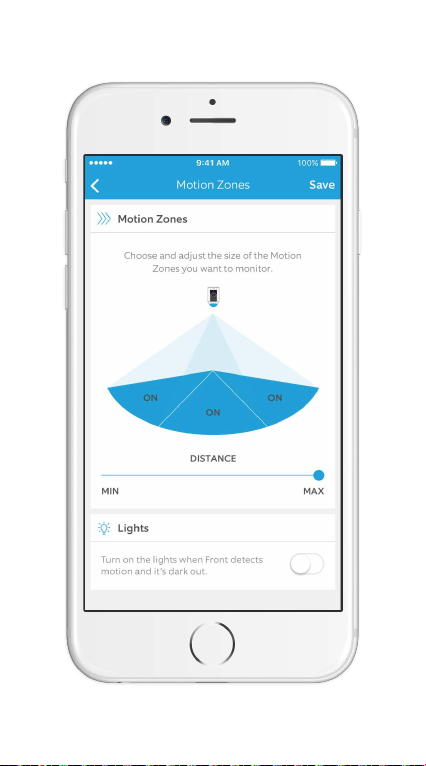
Select Motion
Zones
Customize the areas
that will trigger the
camera to turn on
when motion is
detected.
Simply tap on the
diagram to turn a
motion zone on or off.
You can also set
whether or not the
lights turn on when
motion is detected at
night.
42
43
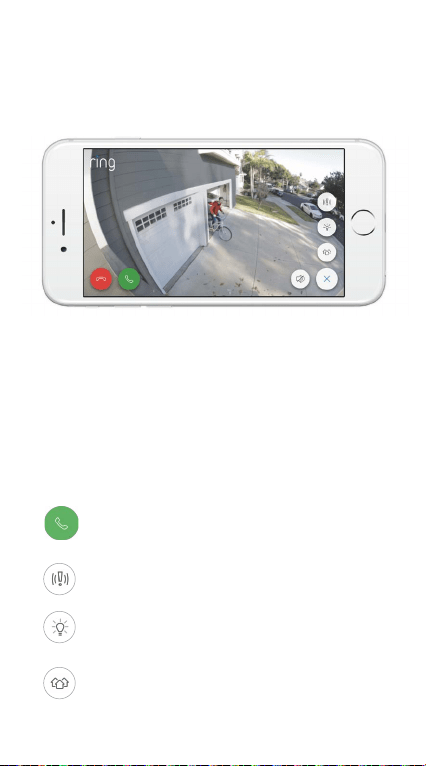
Live Events
A live event begins when
motion is detected or when
selecting Live View.
During live events, you can
access these features:
Two-way Talk – Speak to visitors
and hear what they have to say.
Siren – Activate the siren.
Lights – Turn the lights on and o.
Ring Neighborhoods – Share
suspicious events with neighbors.
44

Ring Video Recording
This optional feature saves
recordings of every event your
Spotlight Cam captures, allowing
you to share them with others.
You can access these events
on any device running the Ring
app or by logging into your
account at: ring.com/activity.
Learn more at:
ring.com/video-recording
Your new Spotlight Cam includes a free
trial of Ring Video Recording for you to
enjoy. Watch your email inbox for important
announcements about this service.
45

5. Having
trouble?
Here are
some
answers…
46

Spotlight Cam is not
powering on.
Make sure the battery is correctly inserted
in its compartment. If it’s not there, put the
battery in.
If it’s inserted, remove the battery and
use the orange power cable to plug the
battery into a power outlet. When only the
green light is illuminated, the battery is fully
charged.
There are two battery
compartments, but
Spotlight Cam only
comes with one battery.
Do I need another battery
for Spotlight Cam to
work?
Spotlight Cam only needs one battery to
work properly. You can purchase another
battery on Ring.com for extended battery
life, and to avoid downtime during battery
charges.
47

I’m having trouble
completing the in-app
setup.
When the in-app setup fails, look at the
light on the bottom of your Spotlight Cam.
The light color indicates the issue.
Flashing red means your Wi-Fi password
was entered incorrectly. Select your Wi-Fi
network in your phone settings, select
the option to forget it, then reconnect to
it again to confirm that you’re using the
correct password during setup.
Flashing blue means your Spotlight Cam
may be too far from your router to get a
decent signal. You may need to get a Ring
Chime Pro to boost the Wi-Fi signal to your
Spotlight Cam.
Learn more at: ring.com/chime-pro
Flashing green indicates a possible issue
with your internet connection. Unplug your
modem or router for 40 seconds, plug it
back in, then repeat the setup process.
48

Why can’t I find the
temporary Ring network
on my phone?
Sometimes your phone fails to pick up the
temporary Ring network. If this happens, go
to your phone settings, turn off your Wi-Fi
connection, wait 30 seconds and turn it
back on.
If the Ring network still fails to appear,
ensure that your Spotlight Cam has at
least one battery inserted, and that it’s fully
charged.
If none of the above helped…
Perform a hard reset on your Spotlight Cam
by holding down the setup button for 15
seconds, waiting 30 seconds and repeating
the setup process.
If that didn’t help…
Turn off cellular data and Bluetooth on your
mobile device and try the setup again. You
can re-enable them once setup is finished.
If that didn’t help…
Try performing the setup on a different
mobile device.
49

Why can’t visitors hear
me on my Spotlight Cam
when I talk through the
app?
If you’re on an iPhone or iPad, check the
microphone permissions on your device.
Select Settings, find Ring and select
it. Lastly, make sure the switch next to
Microphone is toggled on.
If you’re on an Android device, go to
Settings > Application/Apps > Application
Manager > Ring > Permissions. Ensure
everything here is on.
Why is my video and/or
audio quality poor?
First, determine the cause. Remove your
Spotlight Cam and bring it inside near your
router. Open the Ring app, and press the
Live View button, or trigger a motion event
to see live video.
If you get good video quality near your
router, you need to extend your Wi-Fi signal.
We recommend Ring Chime Pro to boost
the signal to your Spotlight Cam.
50

Learn more at: ring.com/chime-pro
If video quality is still poor near your router,
test your internet speed by selecting Device
Health in the Ring app, then Test Your Wi-Fi.
The instructions in the app will help you
diagnose and solve any issues related to
poor video quality.
If I have two batteries in
my Spotlight Cam, how
do I know which one
needs to be charged?
When your battery needs to be charged,
the Ring app will notify you. To determine
which battery needs to be charged, you
will need to open the battery compartment
and look for the red flashing light on the
side closest to the hinge. This indicates that
the battery in this compartment needs to
be charged.
51

For additional help, visit:
ring.com/help
Or give us a call…
US 1 800 656 1918
Canada 1 855 300 7289
Mexico (D.F) 52 55 8526 5445
Worldwide +1 310 929 7085
For a list of all our customer
support numbers, visit:
ring.com/callus
© 2017 Ring Inc.
RING, ALWAYS HOME, and CHIME are trademarks of Ring Inc.
Last updated: 10/05/17