CHARGING THE BATTERY
Ensure that the battery is fully charged prior to use. This may take 3-4 hours to fully charge. The battery will not ship fully charged due to federal regulations.
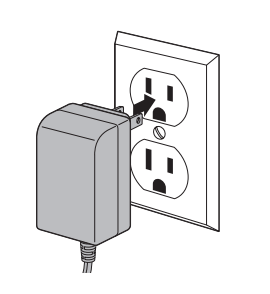
- Plug the charger into a power outlet.
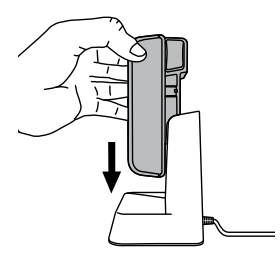
2. Align the ribs on the ONEPWR Battery to the grooves in the charger. Slide the battery pack into the charger.
3. When charging, the lights on the battery will illuminate to show the state of charge. If the light on the charger flashes red, there is an error with the battery or the charger. Remove battery from charger and try again.
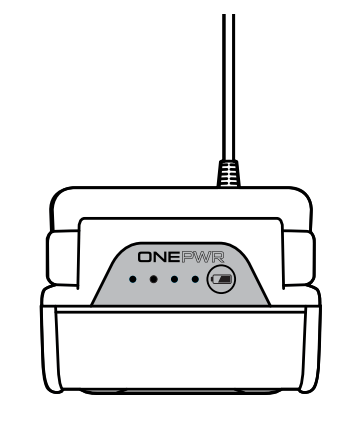
4. When charged the lights on the battery will turn off and the light on the charger will be solid.
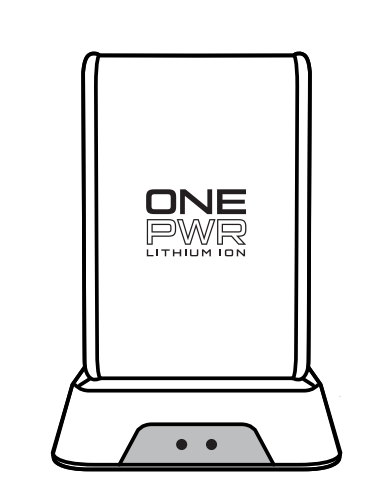
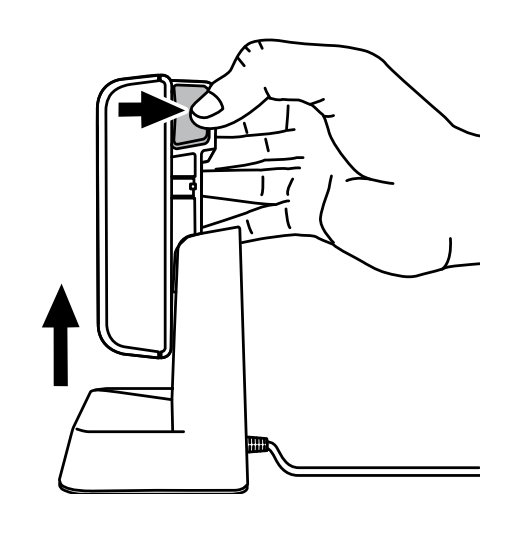
5. To remove the battery pack from the charger, press the latches and pull up on the battery pack.
TIPS: During charging, the pack and ambient temperature should be between 41°F to 86°F (5°C and 30°C). The charger will sense if the pack, or ambient temperature, is too cold or too hot, and will return an error code (red LED will be on) and not charge the pack. Use battery only with charger listed. For use with Hoover ONEPWR Lithium Ion Batteries.
PRODUCT ASSEMBLY
FULLY ASSEMBLE BEFORE OPERATING
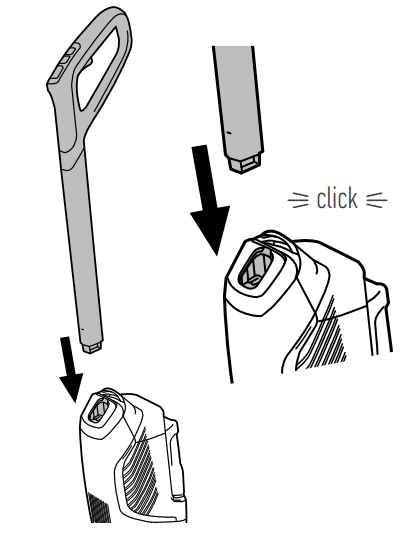
- Push the handle down into the body until it clicks into place.
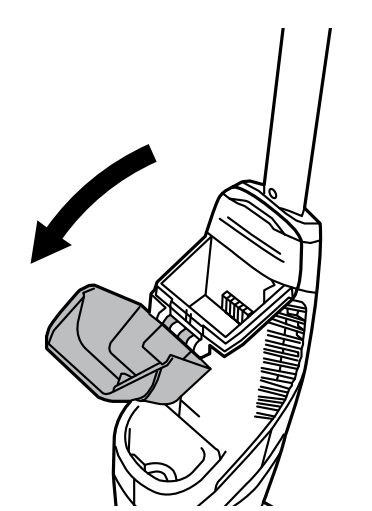
2. To install a charged battery, first open the battery cover.
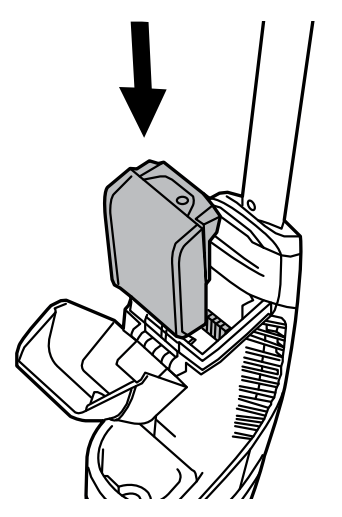
3. Then, align the rips on the ONEPWR Battery with the grooves in the cleaner and slide the battery into place until it clicks.
FILLING THE SOLUTION TANK
CAUTION: USE EXTRA CARE WHEN CLEANING ON STAIRS. TO AVOID PERSONAL INJURY OR DAMAGE, AND TO PREVENT THE CLEANER FROM FALLING, ALWAYS PLACE CLEANER AT BOTTOM OF STAIRS OR ON FLOOR. DO NOT PLACE CLEANER ON STAIRS OR FURNITURE, AS IT MAY RESULT IN INJURY OR DAMAGE.
WARNING: TO REDUCE THE RISK OF FIRE AND ELECTRIC SHOCK DUE TO INTERNAL COMPONENT DAMAGE, USE ONLY HOOVER CLEANING PRODUCTS(S) INTENDED FOR USE WITH THE APPLIANCE.
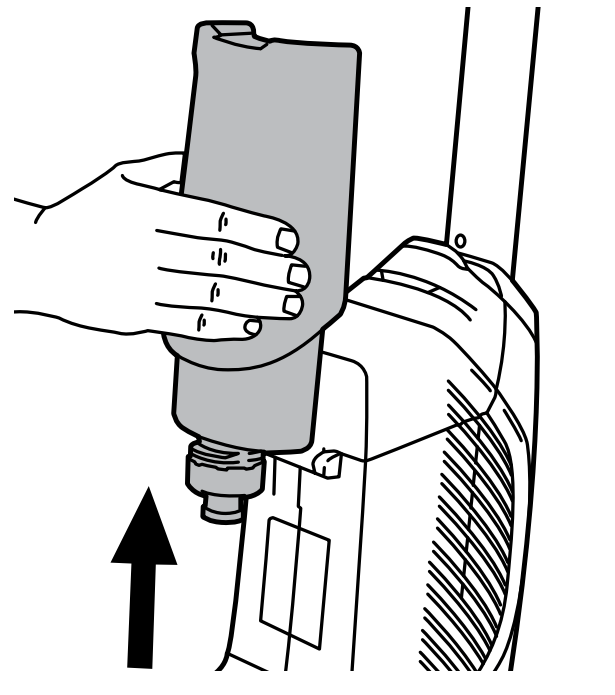
- Remove the solution tank from the back of the unit by gently pulling up on the tank.
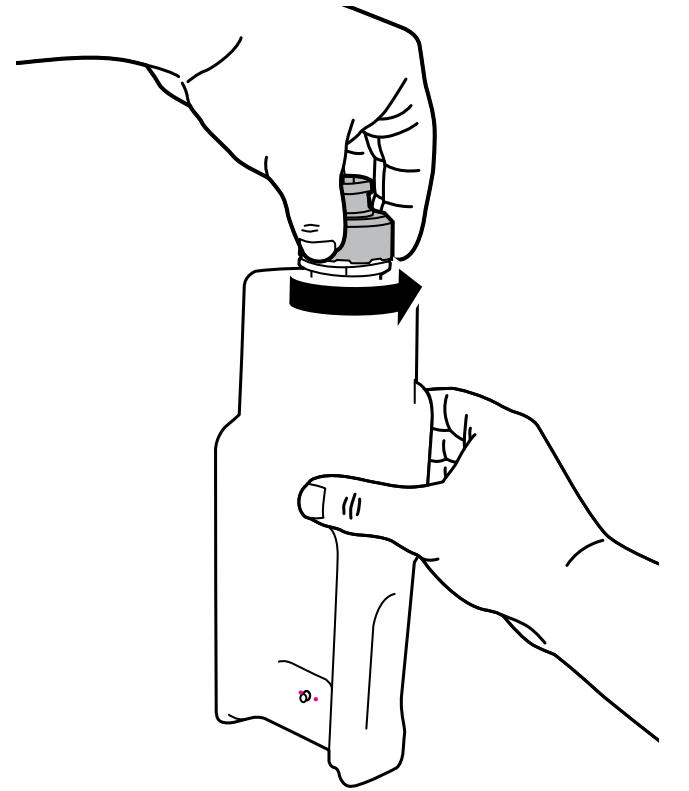
2. Remove the cap
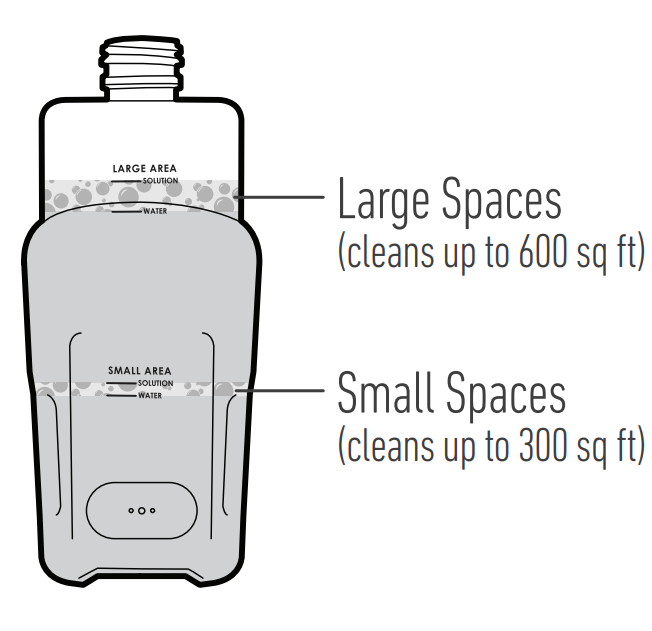
3. Fill with warm water to appropriate water line. Add solution to solution line.
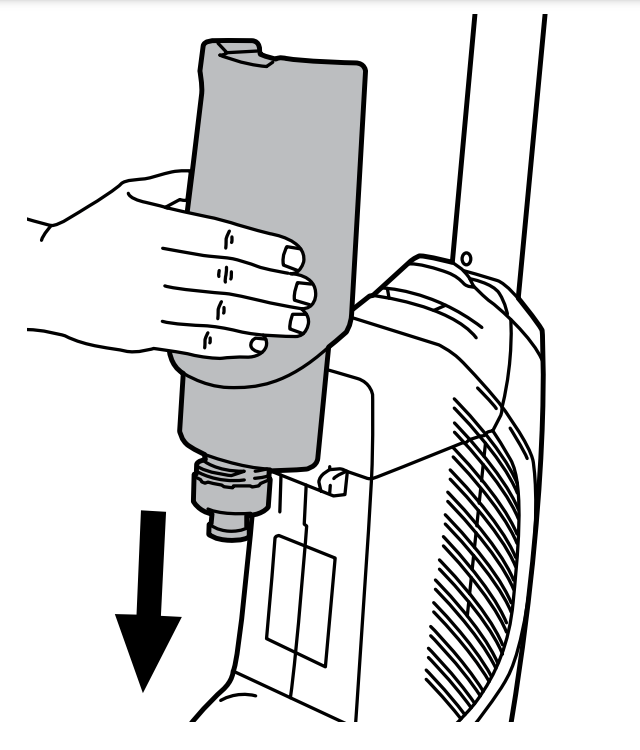
4. Replace cap and install tank into body with the cap down.
CLEANING FLOORS
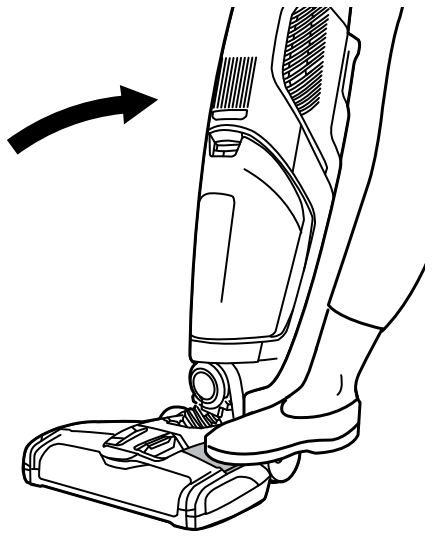
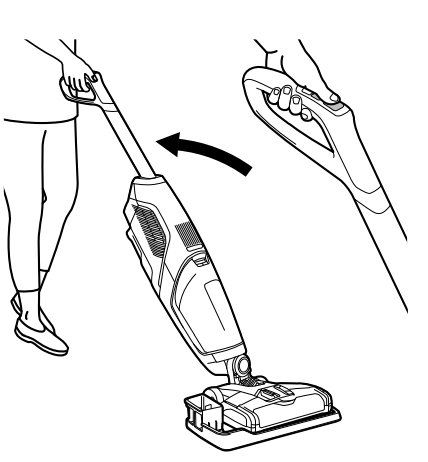
- Recline by placing a foot gently on the base of the cleaner and pull the handle backwards.
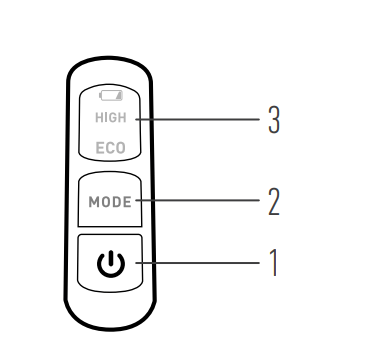
2. Use the Power Button (1) to turn ON/ OFF. The Mode Selector (2) will change between HIGH for large messes and ECO for extended run time. The Display Panel (3) will indicate the current mode and battery change level.
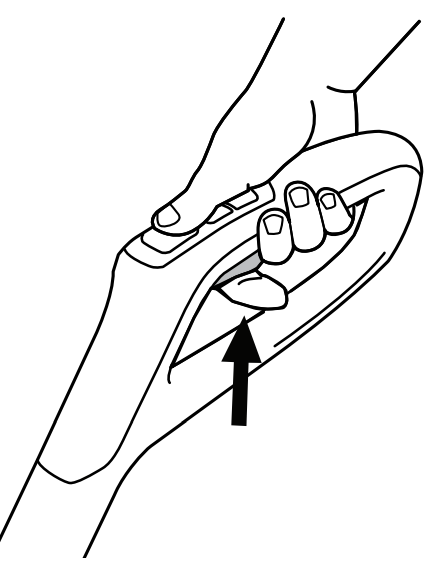
3. Engage the trigger on the handle to dispense solution as desired.
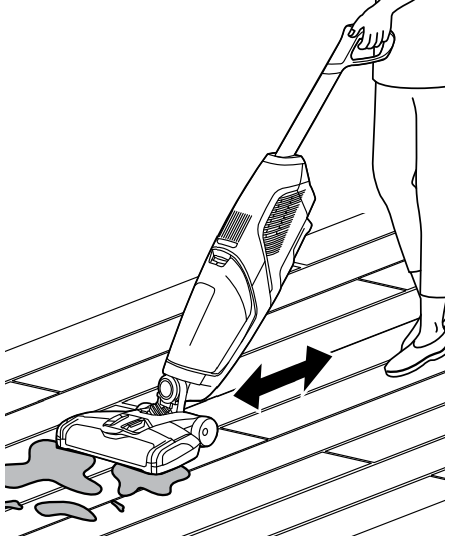
4. On forward stroke, tap trigger as needed to dampen brush roll and extract on backwards strokes.
TIPS: Dried Messes: To clean dried messes on hard floors, use trigger to spray solution onto dried mess and allow to sit for 1-2 minutes. Pass the brush roll over mess until clean. Wet Messes: To clean wet messes on hard floors, pass over the mess until removed, then use trigger to spray solution onto floor. Pass the brush roll over remaining mess until floor is clean.
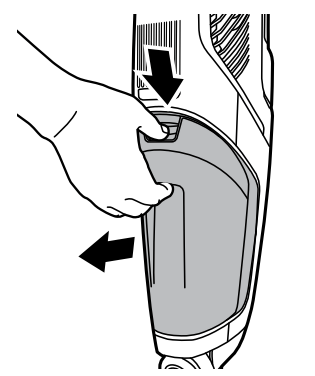
EMPTYING THE DIRTY WATER TANK
NOTE: When full, the float in the dirty water tank will rise and there will be an audible change in the operating sound. Empty the dirty water tank promptly. Continuing to clean with a full tank may impact performance.
- To remove the tank, press down on the release latch on the front of the tank and pull the tank away from the unit
2. Grasp the lid by the grips and lift.
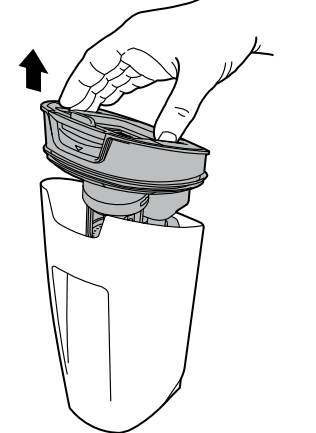
3. Empty the tank and rinse.

4. Rinse debris from the tank lid and float screen. Keep the filter on the lid dry while cleaning for optimal performance
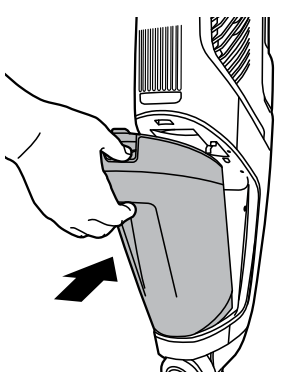
5. Replace lid and install tank into body by aligning the bottom of the tank and pushing back into the cleaner until it clicks.
TIPS: Use for picking up small liquid spills (one gallon or less, never to exceed 1/8” in depth). When vacuuming liquid, make sure the product does not get submerged or doused in liquid, which could cause shock, product failure, or personal injury.
CLEANING THE BRUSH ROLL AND NOZZLE
WARNING: RISK OF PERSONAL INJURY - BRUSH ROLL MAY SUDDENLY RESTART. TURN POWER SWITCH OFF AND REMOVE BATTERY BEFORE CLEANING OR SERVICING.
THIS PRODUCT CONTAINS NO SERVICEABLE PARTS. IF APPLIANCE IS NOT WORKING AS IT SHOULD, HAS BEEN DROPPED, DAMAGED, LEFT OUTDOORS, OR DROPPED INTO WATER, CALL CUSTOMER SERVICE AT 1-800-944-9200 PRIOR TO CONTINUING USE
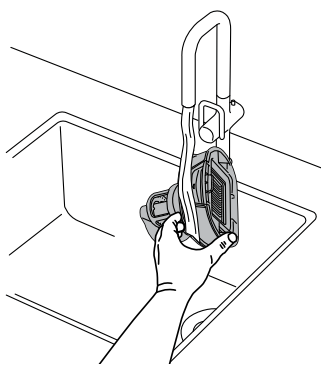
- Place cleaner on tray.
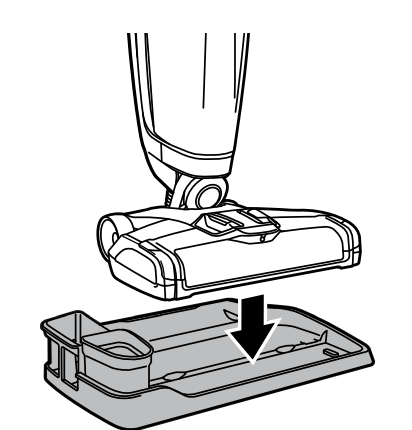
2. Fill the included measuring cup with water to max line (5 oz.). Pour water slowly into rinse and storage tray.
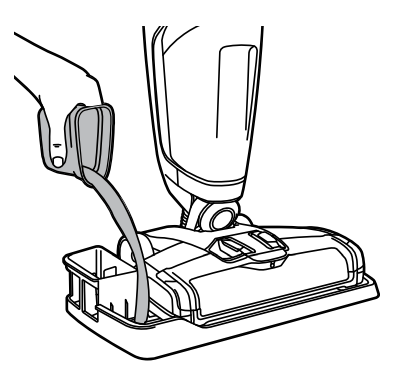
3. Recline and turn on to HIGH mode.
4. Run for 10-15 seconds until water is extracted from tray. Repeat as needed until brush roll is rinsed and debris is cleared from nozzle. Replace the handle in the upright position.

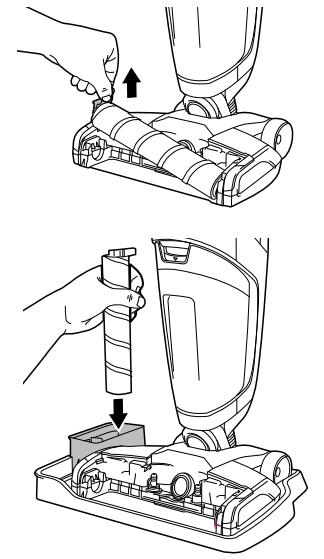
- After rinsing, remove the nozzle cover by squeezing the latches and lifting up.
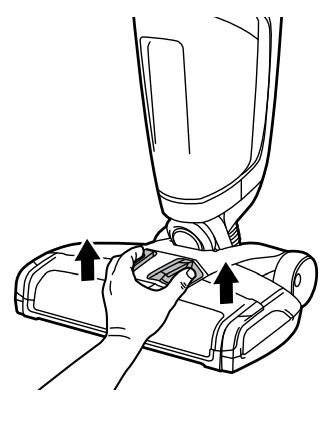
2. Lift up on the tab to remove the brush roll. Place in rack on storage tray and allow to dry completely before reinstalling
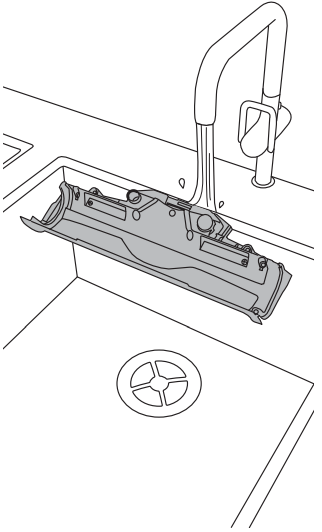
3. If needed, rinse brush roll cover and wipe any remaining residue from the brush roll chamber and hose. Allow to dry before returning to the cleaner
4. To reassemble, align brush roll onto the gear and lock into place by pressing down on the tab end.
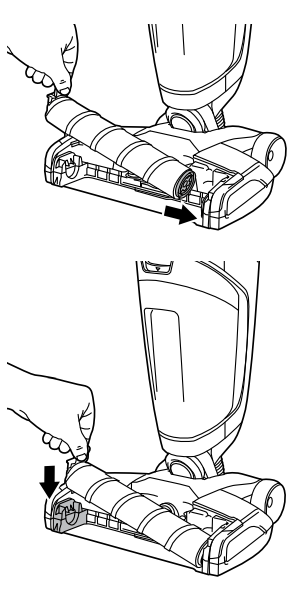
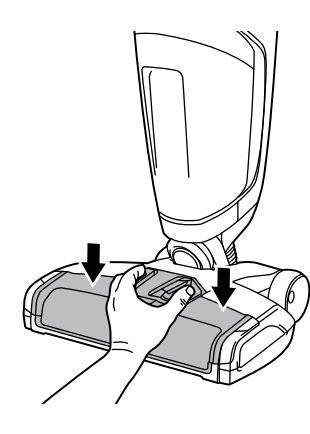
5. Replace brush roll cover. Ensure that the corners are down and the brush roll cover is fully in place.
FILTER CARE
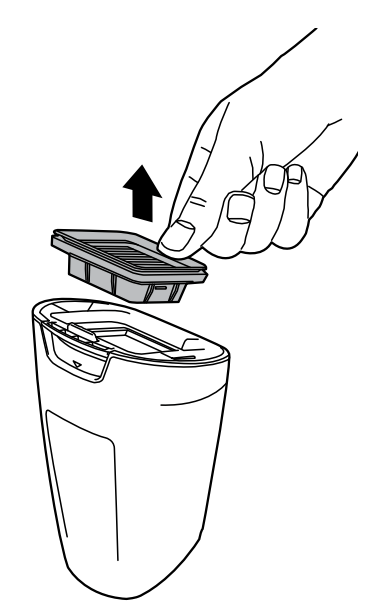
- Access the filter by removing the dirty water tank. Press down on the release latch on the front of the tank and pull the tank away from the unit.

2. Lift up on the tab to remove the filter.
3. Hand wash with warm water.
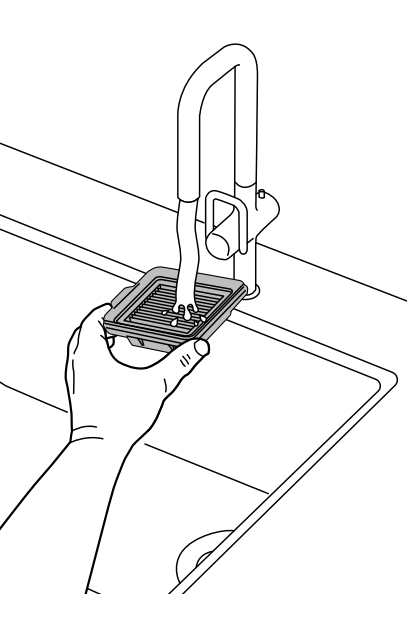
4. Dry the filter completely before reassembling (at least 24 hours).

THERMAL PROTECTION AND ACCESSORIES
AN AUTO RESET THERMAL PROTECTOR HAS BEEN DESIGNED INTO YOUR CLEANER TO PROTECT IT FROM OVERHEATING. WHEN THE THERMAL PROTECTOR ACTIVATES THE CLEANER SUCTION MOTOR WILL STOP RUNNING.
IF THE VACUUM STOPS RUNNING PROCEED AS FOLLOWS:
- TURN THE CLEANER OFF AND REMOVE BATTERY PACK IMPORTANT: IF LEFT TURNED ON, THE CLEANER MOTOR MAY RESTART UNEXPECTEDLY.
- EMPTY DIRTY WATER TANK.
- INSPECT THE BRUSHES FOR ANY OBSTRUCTIONS. CLEAR OBSTRUCTIONS IF PRESENT.
- AFTER THE MOTOR COOLS FOR 30 MINUTES, THE THERMAL PROTECTOR WILL DEACTIVATE AND CLEANING MAY CONTINUE. (REINSTALL THE BATTERY PACK.)
IF THE THERMAL PROTECTOR CONTINUES TO ACTIVATE AFTER FOLLOWING THE ABOVE STEPS, CONTACT CUSTOMER SERVICE AT 800-406-2005
THIS PRODUCT CONTAINS NO SERVICEABLE PARTS. IF APPLIANCE IS NOT WORKING AS IT SHOULD, HAS BEEN DROPPED, DAMAGED, LEFT OUTDOORS, OR DROPPED INTO WATER, CALL CUSTOMER SERVICE AT 1-800-944-9200 PRIOR TO CONTINUING USE.
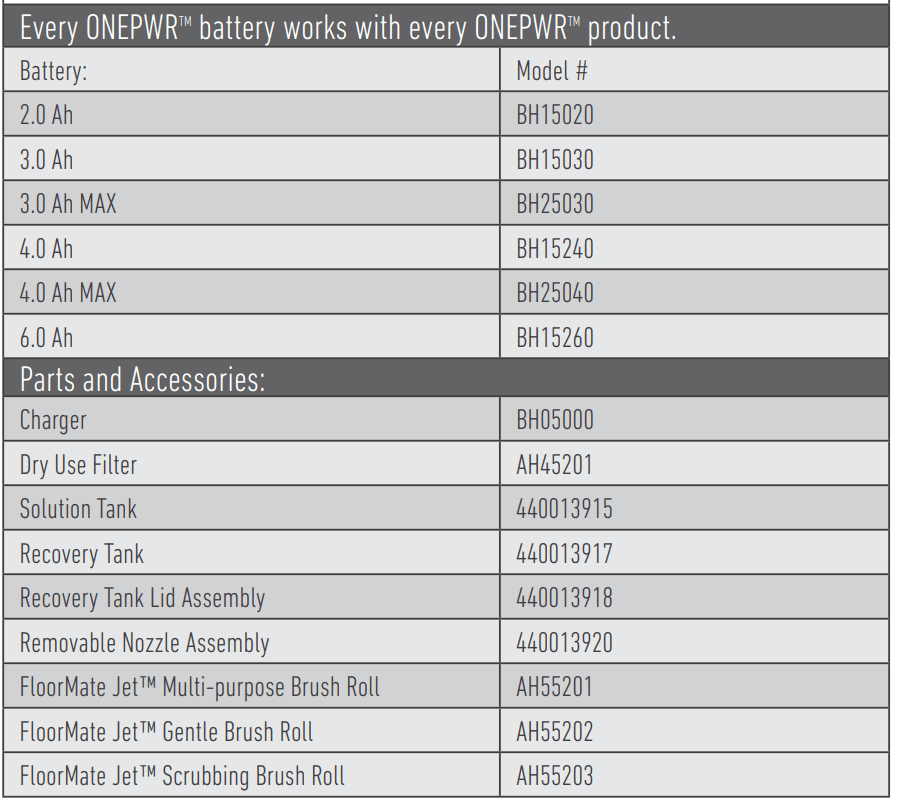
Look for these accessories on Hoover.com or Hoover.ca or call 800-406-2005.
TROUBLESHOOTING
WARNING: TO REDUCE THE RISK OF ELECTRIC SHOCK AND INJURY FROM MOVING PARTS UNPLUG BEFORE CLEANING OR SERVICING.
Issue | Possible Cause | Suggested Solution |
Reduced or no spray | 1. Solution tank is empty | 1. Refill solution tank |
2. Solution tank not fully installed | 2. Turn power OFF, reinstall solution tank until snug | |
3. Clogged Solution Nozzle | 3. Follow instructions as shown in the Cleaning the Brush Rroll and Nozzle section. Remove brush roll cover. Submerge spray nozzle in solution-water mixture and let soak overnight, making sure spray tip is fully submerged (Use mixture of 2 oz solution per quart of water). Gently scrub with water, dry and reinstall | |
Loss of suction | 1. Dirty water tank not installed properly | 1. Turn power OFF, remove and reinstall dirty water tank. There will be an audible "click" when tank locks into place. |
2. Dirty water tank is full | 2. Turn power OFF, empty and reinstall dirty water tank
| |
3. Brush roll cover is not installed properly | 3. Turn power OFF, remove brush roll cover, reinstall brush roll and cover according to instructions on page 12 | |
4. Nozzle hose behind brush roll is clogged | 4. Turn power OFF, follow instructions for care of brush roll and cover on page 12 | |
5. Filter is clogged | 5. Clean and allow filter to dry completely | |
6. Dirty water tank screen is clogged | 6. Clean float screen in the dirty water tank. Twist the screen counter-clockwise to remove from tank lid. Rinse thoroughly and replace by aligning grooves and twisting clockwise to secure on tank lid | |
Brush roll not turning | 1. Handle is not reclined | 1. Recline handle and turn power ON to allow brush roll to rotate |
2. Brush roll is not installed properly | 2. Turn power OFF, follow instructions for care of brush roll and cover on page 12 | |
3. Brush roll is obstructed | 3. Turn power OFF, follow instructions for care of brush roll and cover on page 12. Ensure brush roll is free of hair and debris | |
Machine won't turn on | 1. Battery not installed properly | 1. Remove battery, align guide rails to the front of the battery compartment and slide battery down until it clicks to ensure proper connection |
2. Battery does not have a charge | 2. Recharge battery, White lights will blinki when battery is charging. Once completely charged, all lights will be off. All four white lights will illuminate when battery charge button is pressed and battery is fully charged. | |
3. Handle is not fully installed | 3. Remove battery, ensure handle is installed properly per assembly instructions on page 7 | |
4. An obstruction prevented brush roll from spinning | 4. Turn power OFF and remove battery, follow instructions for care of brush roll and cover on page 12. Ensure brush roll is free of hair and debris and reinstall. If problem persists, wait 30 minutes and try again | |
Leaking | 1. Cap on solution tank is not closed tightly | 1. Turn power OFF, remove solution tank, tighten cap and reinstall |
2. Solution tank is not installed properly | 2. Turn power OFF, remove solution tank and reinstall until snug | |
Floors are streaked | 1. Too much solution was applied | 1 . Clean area in HIGH mode without engaging the trigger to remove excess solution |
2. Solution other than recommended Hoover Multi-surface solution was used | 2. Clean the area using the recommended Hoover Multi-surface line of solutions and follow the instructions for filling the tank on page 8 | |
3. Solution was not mixed properly | 3 . Follow the instructions for filling the tank on page 8 and reclean the area | |
4. Brush roll was not rinsed and dried fully after prior use | 4. Follow the instructions for rinsing the brush roll on page 12 and reclean the floors | |
Light on the charger is flashing red, and battery won't charge | 1. There is an error with the battery | 1. Remove battery from charger and try again. If problem persists, call customer service for support |


