Your Greet is powering on.
Solid green
Solid blue
Your Greet has successfully connected to the WiFi
network.
Blinking green
Your Greet is ready for setup.
Blinking blue
Your Greet is connecting to the WiFi network.
Please do NOT turn off or unplug the camera at this
time.
5
Status Light Definitions
If you were unable to connect your Greet successfully:
Make sure that you are connecting to a 2.4GHz WPA-
PSK/WPA2-PSK WiFi network, and that your network is
not hidden.
Please make sure that you entered the network name
and password correctly. Note: Both are case-sensitive.
You may need to improve your WiFi strength. Visit
www.zmodo.com/support for suggestions.
Greet allows you to answer your door from anywhere
with an Internet connection. See, hear, and speak to
your visitors directly from your smartphone.
You can access your Greet's full features by using the
TM ®
Zmodo app on your Android or iOS smartphone.
You can also view your Greet using any web browser by
logging into user.zmodo.com with your Zmodo account
information.
This section will cover the main features of your Greet.
4
Main features
View live, on-demand video and
record clips
View live video from your smart-
phone at any time. No need to wait
for alerts or a call, just access
Greet from your device list to see
what's happening on your front
porch. Digitally pan Greet's live
view by swiping your finger to the
left or right.
Receive calls on your smartphone
When someone rings Greet, your
Indoor Chime will sound and you
will receive a call on your
smartphone. You can choose to
accept the call, decline it, or select
a customized voice message to
play for your visitor.
Hear and speak to your visitors
Simultaneous two-way audio allows
you to see, hear, and speak to your
visitor at the same time. Tap the
microphone button to talk to your
visitor, and tap it again to mute your
microphone.
View and save alert clips
Greet automatically records a short
video clip whenever it detects
motion, you receive a call, or you
miss a call. Access these clips in
the app and download them to your
phone for safekeeping.
Schedule notifications and record
messages
Schedule when to receive
notifications and calls from Greet in
the device settings. You can also
silence your chime for a restful
night, and record up to 5 voice
messages to play for visitors when
you decide not to answer a call.
Support
6
Having difficulty?
www.zmodo.com/support
Follow us on Twitter @Zmodo
Scan the QR-code below!
Like us on Facebook.com/Zmodo
Scan the QR-code below!
REV-A00
10 11
12 13 14
15 16
5
Enter the password of the WiFi that
you want your Greet to connect to.
Please make sure that your WiFi
password is correct. Tap “Next” to
proceed.
Note: The WiFi password is case-sensitive.
Tap “Next” to proceed. (If you’re setting
up multiple Greet doorbells at once,
tap + to add additional units.)
4
7
If you see this screen, the app will
connect your Greet to your WiFi
network. This may take a few minutes.
Note: This screen will appear when you set up
more than one Greet doorbells. If you add just one
Greet, please proceed to step 8.
8
Name your Greet and set a password for
it, and tap "Confirm" to finish. Your Greet
has been successfully configured.
Please hold your phone’s display in
front of a Greet and keep it stable to
scan the QR code with your Zmodo
device. The distance between your
phone and the Greet should be about
8 inches (20cm).
Note: If you’re setting up multiple Greet doorbells,
just one Greet needs to scan the QR Code, the
others will be added to the account automatically.
6
You can use the Live Chat function in the Zmodo app if
you have any technical problems.
Please follow the steps below:
Access the “Me” page in the lower right corner of the
Zmodo app and select “Zmodo Support”.
For more instructions, troubleshooting, support, and other
resources, please visit:
Attach Greet to the mounting bracket. First, attach the
security screws partially so that it's easier to tighten them
when the Greet is mounted. Fasten the shorter screw to
the left side of the Greet, and the longer screw to the
bottom as shown below, using the smaller head on the
provided screwdriver. Then mount the Greet onto the
mounting bracket by pushing firmly and sliding
downwards.
Once the bracket is secure, fasten the two wires to the
terminals on the bracket. Ensure each wire is making
contact with the metal plating of each terminal. You can
fasten either wire to either terminal, but make sure that
the wires are not touching each other.
5
Screwdriver &
Interchangeable
Bit
Greet
(Smart Doorbell)
Mounting Bracket
(attached)
Masonry
Drill Bit
Spare Security
Screws
Mounting Screws
& Anchors (x6)
Mounting Level
Quick Start Guide
4
2
3
1
5
Greet
Quick Start Guide
Greet
Quick Start Guide
Note: Use the provided screws with anchors when mounting on brick,
concrete, or stucco. When mounting on wood or vinyl, you may use the screws
directly without anchors.
Mark and drill the appropriate holes in the wall for the
mounting bracket. Snap the provided level onto the
mounting bracket and align the bracket against the wall
where you would like to install your doorbell. Using the
bracket as a guide, mark the wall with the six
corresponding holes for screws. Remove the mounting
bracket from the wall and detach the provided level. Drill
six holes slightly smaller than the wall anchors using the
provided drill bit.
4
Fasten the mounting bracket onto the wall and connect the
wires to the wire terminals. Tap the wall anchors with a
hammer until the anchors are flush against the wall. Using
the Philips tip for the provided screwdriver and the
provided screws, fasten the bracket into place. Make sure
that the two wires from Step 1 are fed through the opening
and exposed.
6
Note: If you are having difficulty sliding Greet onto its mounting bracket,
please loosen the security screws.
Tighten the security screws until secure and restore the
power to your doorbell from your circuit breaker. Once
Greet is securely attached to its bracket, tighten the
security screws completely using the smaller bit on the
provided screwdriver. You may now restore power to the
doorbell. Your Greet should power on and the Status Light
will begin to blink green after a few moments.
1
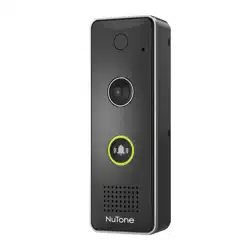
The Greet Smart Doorbell allows you to answer your door
from any location. The Greet is powered by your home's
existing mechanical doorbell chime. It works with Google
Assistant and Amazon's Alexa for added convenience.
This quick start guide will help you configure your Greet
for initial use. For detailed instructions and
troubleshooting, please visit:
www.zmodo.com/support
Welcome!
What’s in the box:
1
2
Remove the mounting bracket from
Greet. Take your Greet out of the
packaging and slide down to remove
the mounting bracket as shown below:
Slide down
IMPORTANT! Before you begin, make sure
that the power to your doorbell is turned
off. Check your circuit breaker for a switch.
Before you begin:
2
Mounting your Greet
Remove your existing doorbell button. Once you’ve
removed your old doorbell, make sure that the two wires
used to connect your doorbell button remain exposed.
3
Mobile Setup
We are constantly working to improve our product and app. Please visit
www.zmodo.com/support for updated instructions, manuals, and more.
Make sure that you have a strong WiFi connection at the
location of your Greet. Visit for www.zmodo.com/support
advice on improving your WiFi signal range.
Make sure you know the SSID (WiFi network name) and
password of the 2.4GHz WPA-PSK/WPA2-PSK WiFi
network that you want your Greet to connect to. Your
network cannot be hidden.
TM
Download and install the "Zmodo" app from Google Play
TM ® TM
or the App Store (Compatibility: iOS 7.0+ or Android
4.0+). Launch the app and sign up for a free Zmodo
account. All of your devices will be bound to this account.
This quick start guide will help you configure your Greet for
initial use. For detailed instructions and troubleshooting,
please visit:
Before you begin:
Zmodo
Make sure the network of the location where you install
the Greet has at least 1Mbps upload speed to view and
2Mbps upload speed when using the Zmodo Cloud
Service.
www.zmodo.com/support
6
The Greet was designed to seamlessly replace a pre-
existing doorbell button with a mechanical doorbell chime.
If you do not have a mechanical doorbell, you must attach
a 20 ohm/10 watt resistor (not included) between the
connected doorbell and one wire from the power source.
Failing to do so will cause permanent damage to your
Greet and your warranty will be voided.
You will need a strong 2.4GHz WPA-PSK/WPA2-PSK
WiFi network near your doorbell.
Make sure that your existing doorbell wiring is connected
to a mechanical doorbell chime and a transformer with a
low-voltage of 10VAC-36VAC.
Warning! Do not directly connect the doorbell to the
primary power source (110/120VAC and 220/230/240VAC).
Mounting
7 8
Power
Accessory
Note: The password provides an additional layer of
security for your devices. You will not need to use
this password when accessing your devices from
the Zmodo app. It is not required, but it is highly
recommended.
Fasten your power accessory to the mechanical chime.
Peel the cover off of the adhesive backing and press the
power accessory firmly onto the side of the mechanical
chime, the cover of the chime, or the wall near the
chime. You may want to find a suitable location to mount
your accessory before exposing the adhesive. Note:
Make sure that the wires don’t make contact with the
metal bars, otherwise the chime will not properly sound.
4
Install the cover on your chime, and restore power to
your system.
5
3
Loosen the screws of the chime terminals which have
wires connected. Your chime may have a wire connected
to the front door labelled “FRONT” and a wire connected
to the transformer labelled "TRANS". Using a screwdriver,
loosen the screws on the “FRONT” terminal and “TRANS”
terminal.
2
Installing your Power Accessory:
Note: The power accessory is an optional add-on to regulate the power
that flows to your Greet. If you hear a buzzing sound from your chime,
installing the power accessory will solve the issue. Before installing the
power accessory, please make sure that the power to your doorbell is
turned off from your circuit breaker.
1
Remove the cover of your mechanical chime. First,
locate your mechanical chime inside of your home. The
mechanical chime is the device that rings when your
doorbell is rung, and may commonly be a white box
mounted on the wall.
Connection Diagram
Metal BarMetal Bar
Original Chime Connection
Chime Connection with Power Accessory
Metal Bar
REAR
TRANS
FRONT
Metal Bar
Connection Diagram after installing Greet and Power Accessory
REAR
TRANS
FRONT
Fasten the two wires from the power accessory to the
terminals you just loosened the screws on your
mechanical chime. You can fasten either wire to either
terminal as long as there is no contact between the wires.
Power
Accessory
Chime
REAR
TRANS
FRONT
Transformer
Greet
Please don't mute your phone. Voice prompt is available
during the mobile setup process.
Log in and press in the upper
right corner of the Home Page.
2
+
9
Select the “QR Code” connection
method to connect your Greet. Your
camera will be added to your Zmodo
account.
IMPORTANT:Please avoid having the backlight on your phone's display or operating
in a strong light environment when scanning the QR code with your Greet.
3
Power on your Greet. The status light
will blink green when the Greet is
powered on. Tap “Next” to proceed.
You can simply move the brightness knob to the right to
light up your phone's screen display.
Please make sure that your Greet is not bound by other
users.
1
1