USER MANUAL
Preparation
STEP1
Charging the camera
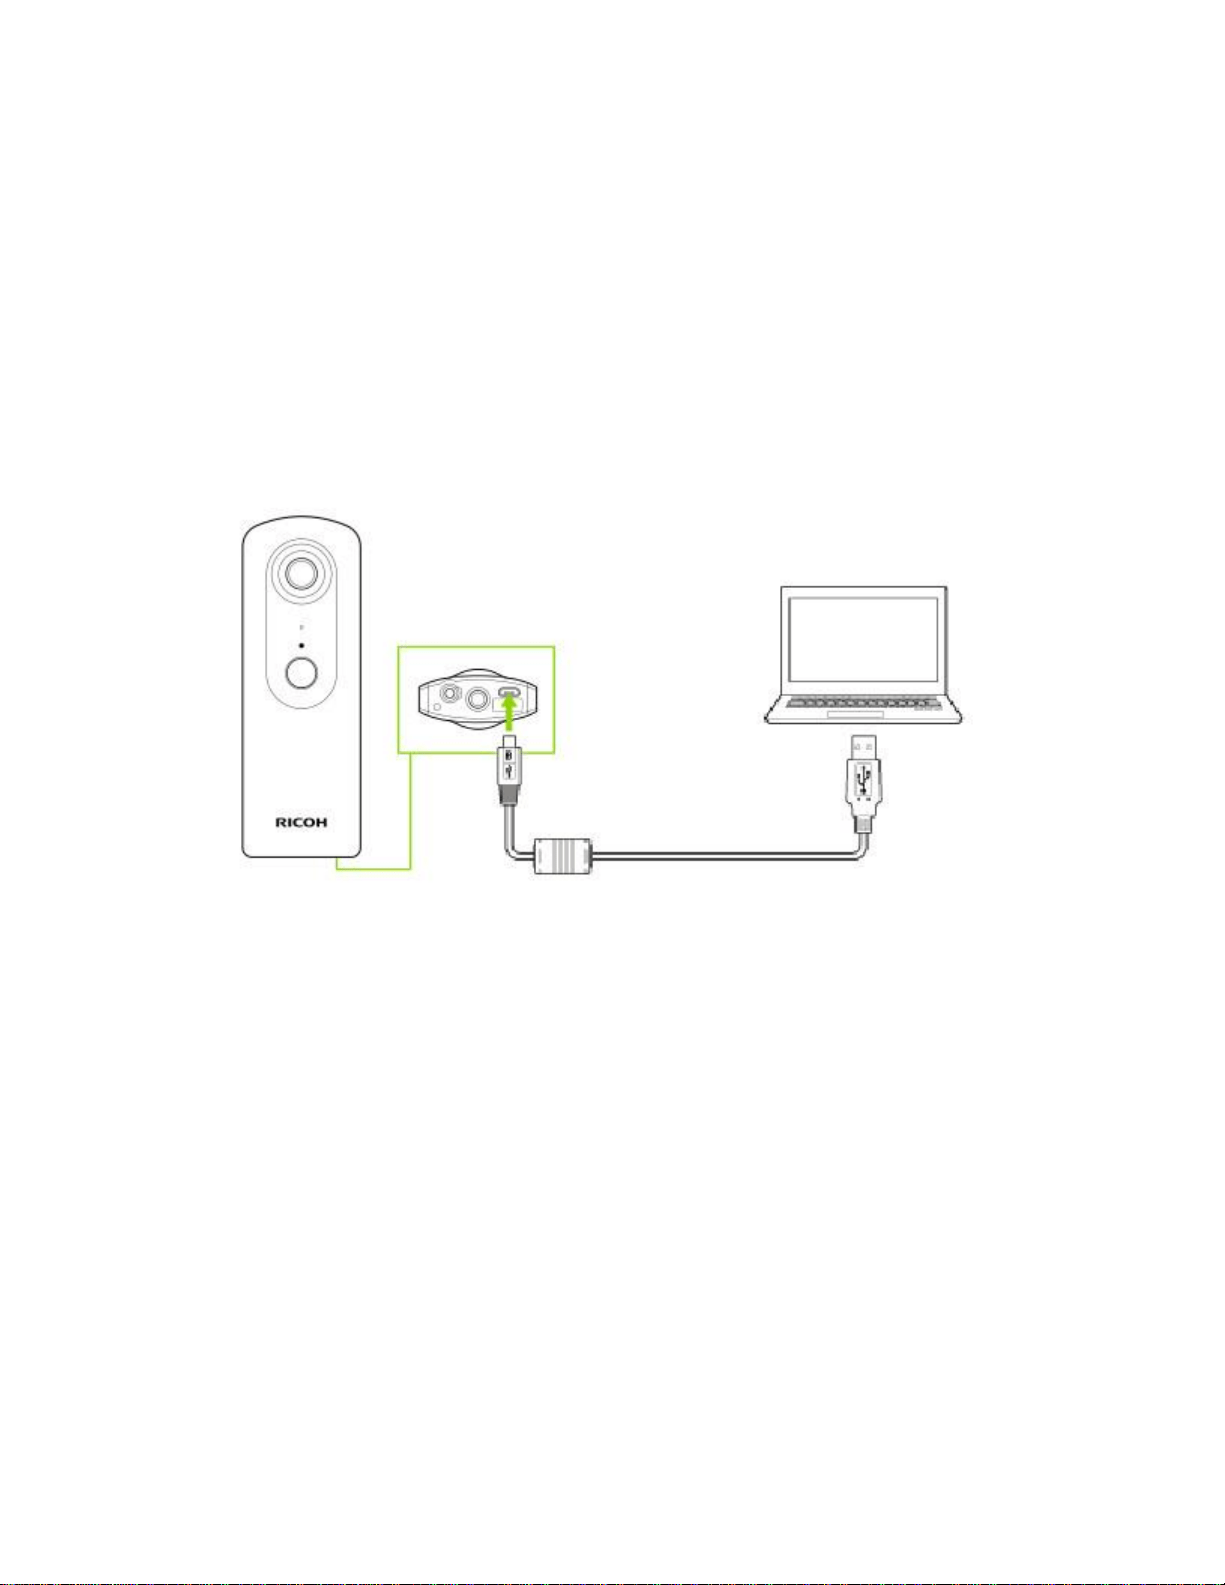
Connect the camera to your computer using the provided USB cable to charge it. The power
lamp lights green during charging and goes out when the camera is fully recharged. (The lamp
flashes in green when the remaining battery level is low.)
* The camera is charged in approx. 200 minutes (at 25°C (77°F)).
* When the remaining battery level is low, it may take a while for the camera to be recognized
by the computer.

STEP2
Installing computer application "RICOH THETA"
1. Download the app suitable for your computer.
For Windows users (start downloading)
For Mac users (start downloading)
2. Double click the file downloaded and install it following the on-screen instructions. When a
screen as shown in the diagram below appears, the installation is complete.
STEP3
Checking the camera firmware version
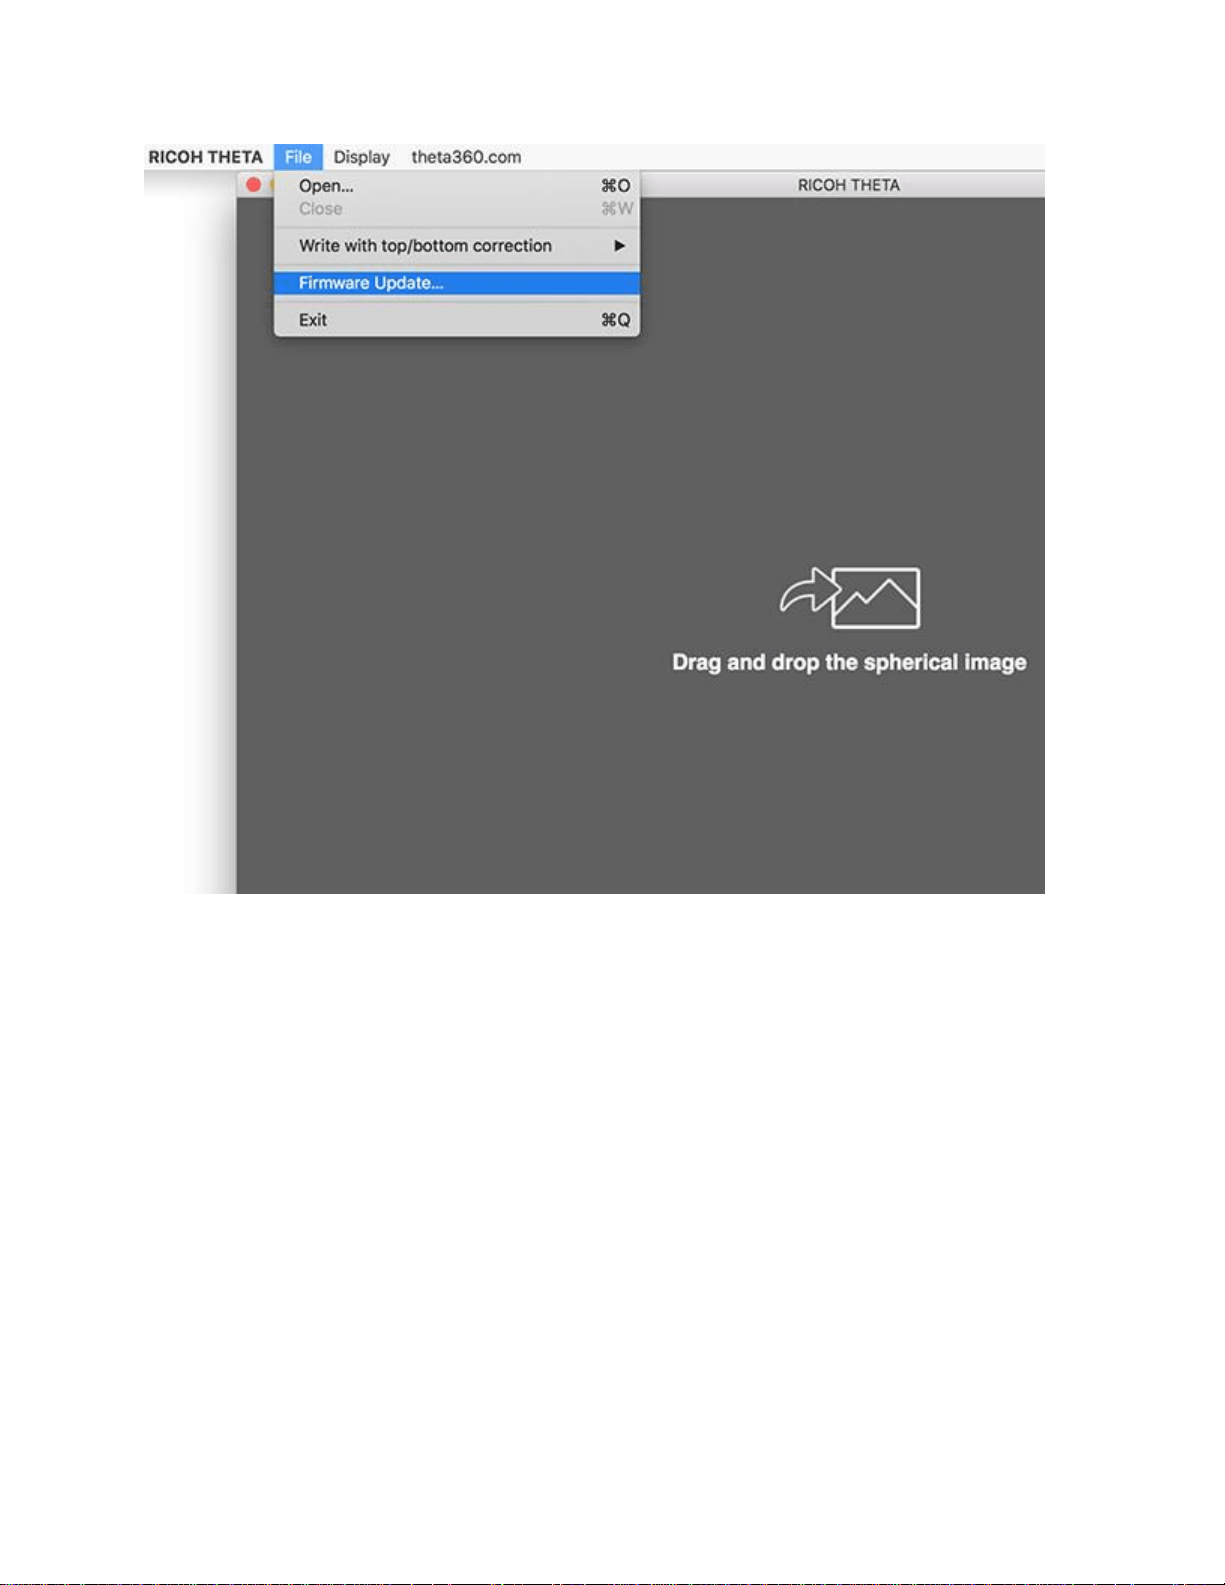
1. Start computer app"RICOH THETA".
2. Select [File] → [Firmware Update] in the menu.
3. Follow the instructions on the screen to connect the camera to your computer using the
provided USB cable.
* Internet connection of the computer is necessary. 4. Click [OK] and Check the firmware
version.
* If the firmware isn't the latest version, update it according to the message. 5. After checking the
firmware version, click [OK] and disconnect the USB cable.

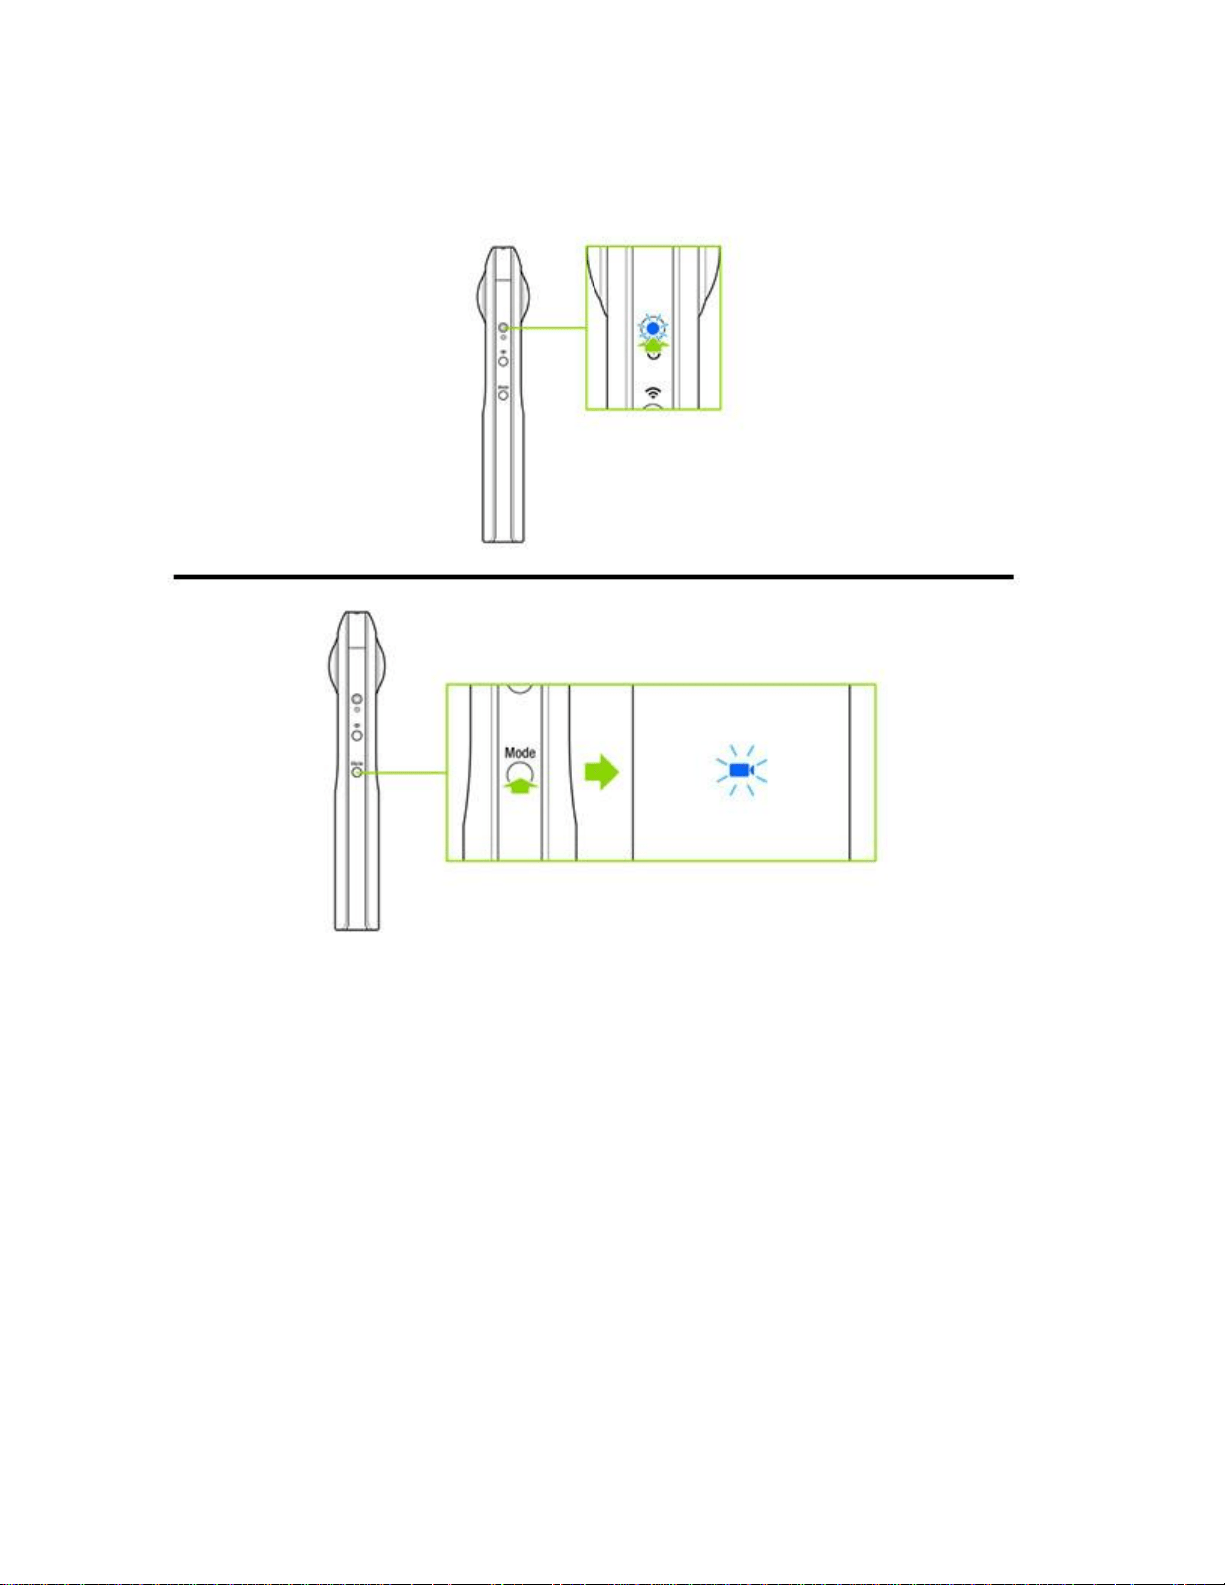
STEP1
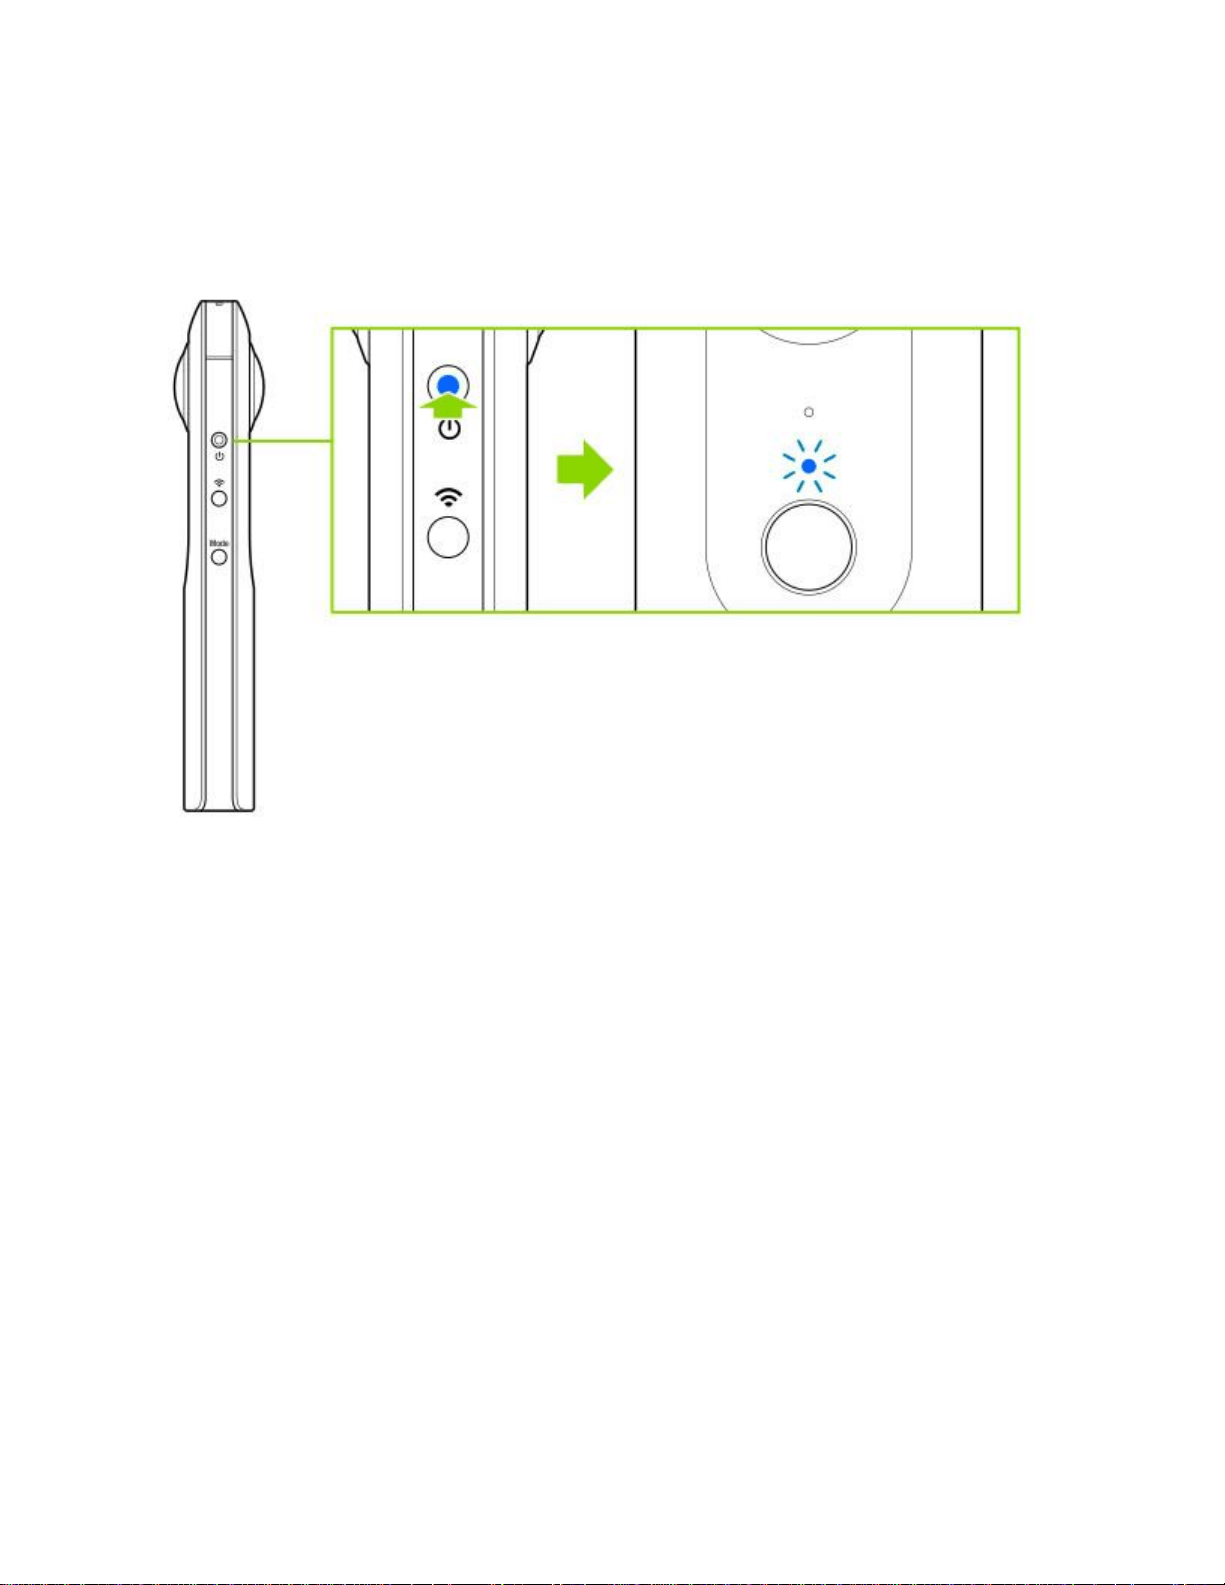
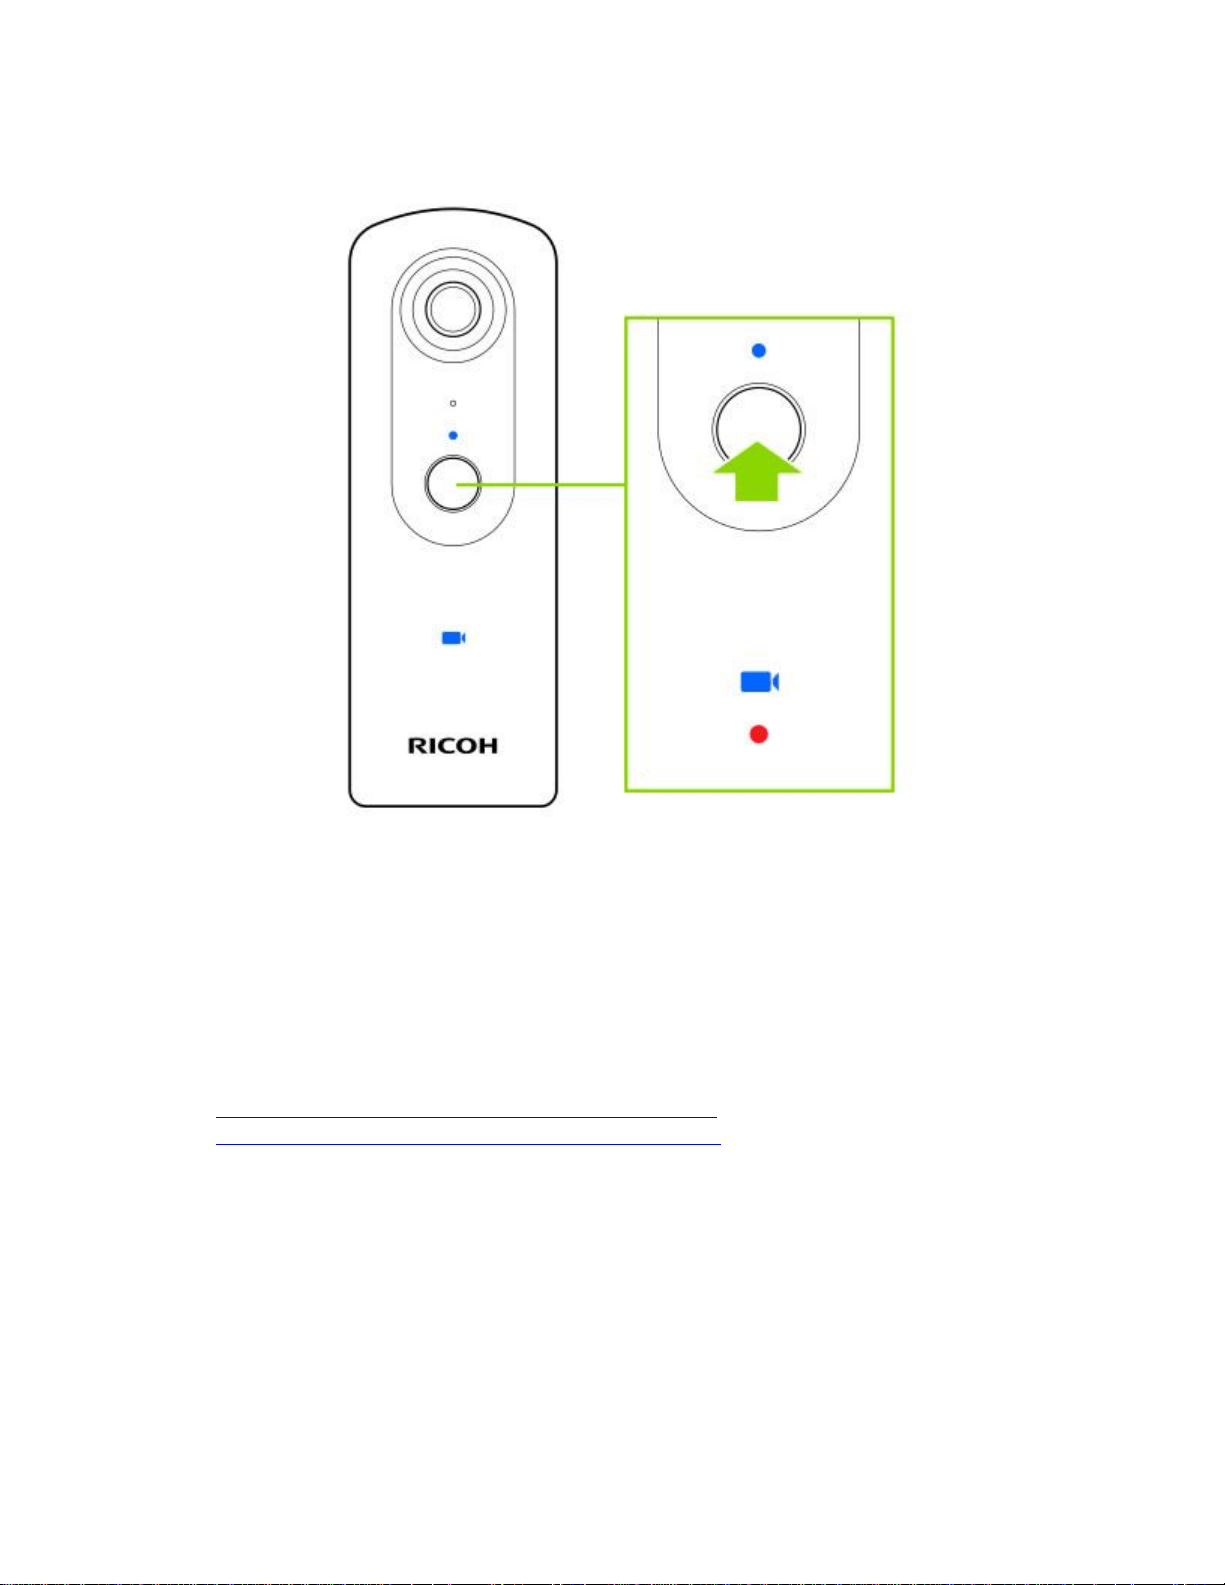
Starting the camera
1. Press and hold the power button. Camera status lamp flashes in blue slowly during startup.
2. When the camera is ready for use, the Camera status lamp lights in blue.
STEP2
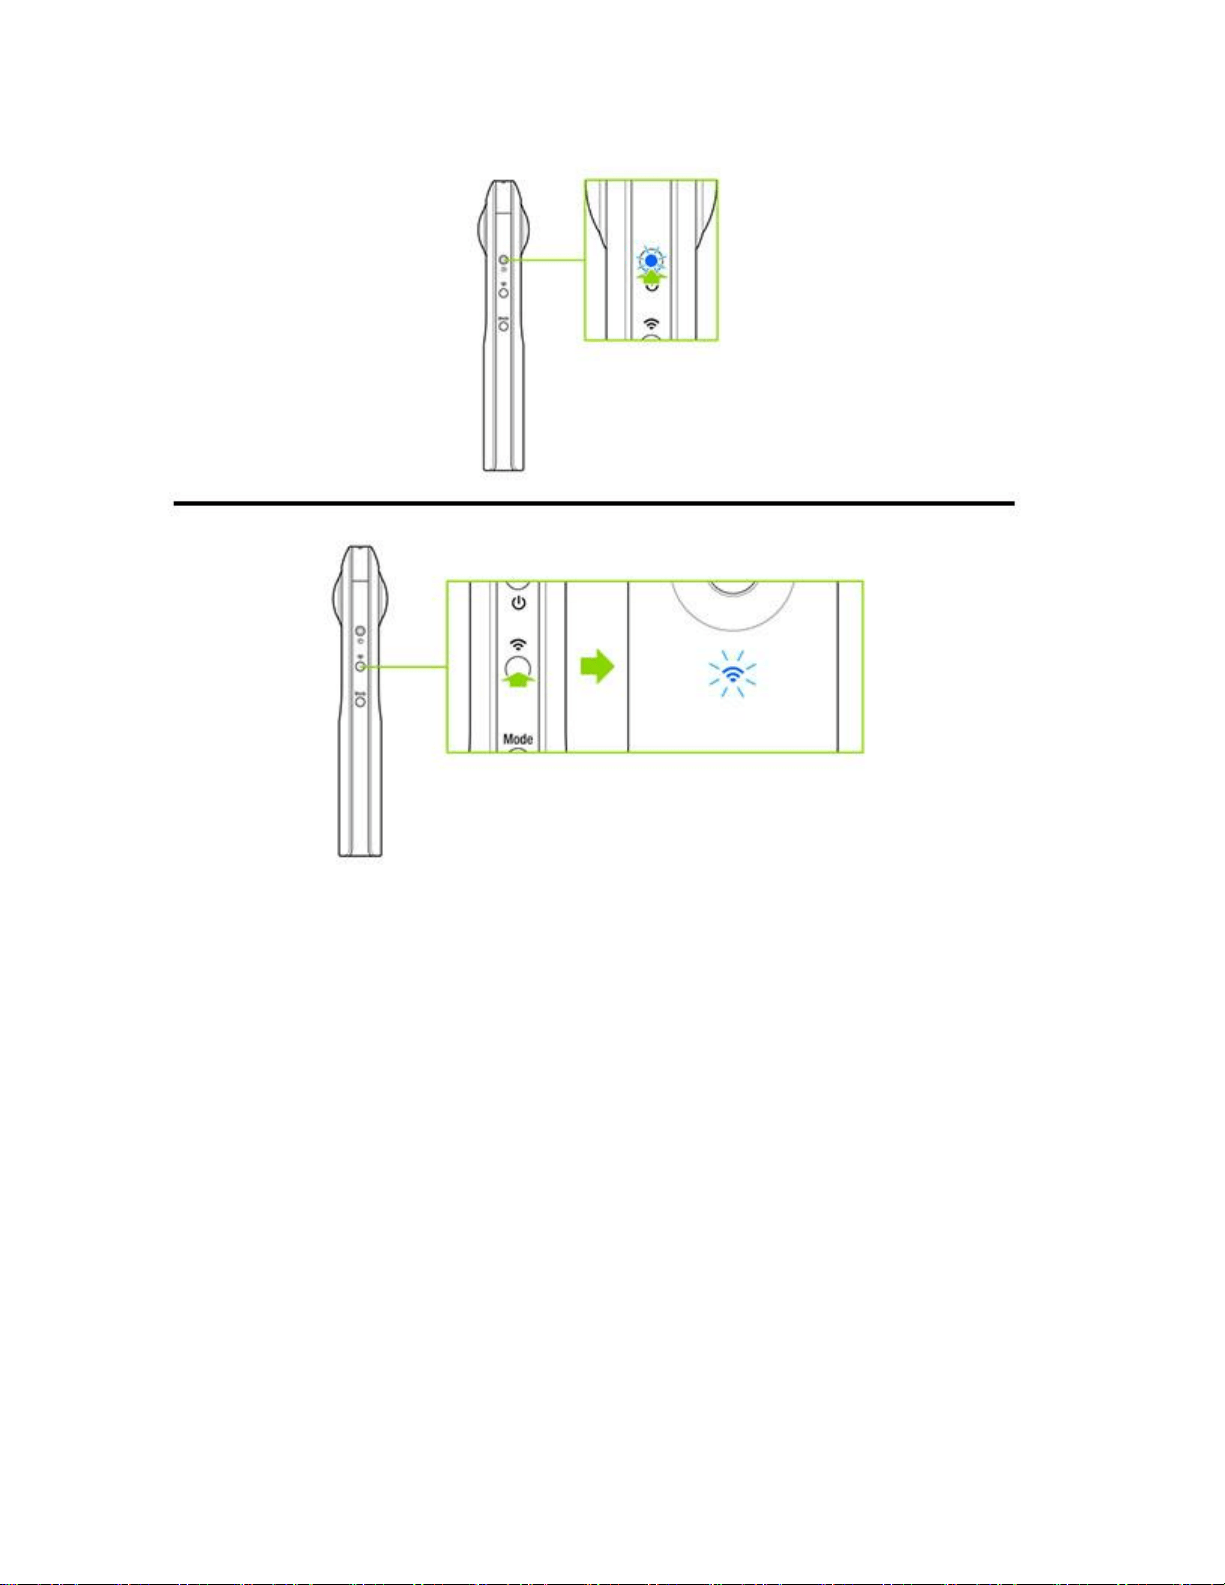
Connecting the camera to a smartphone
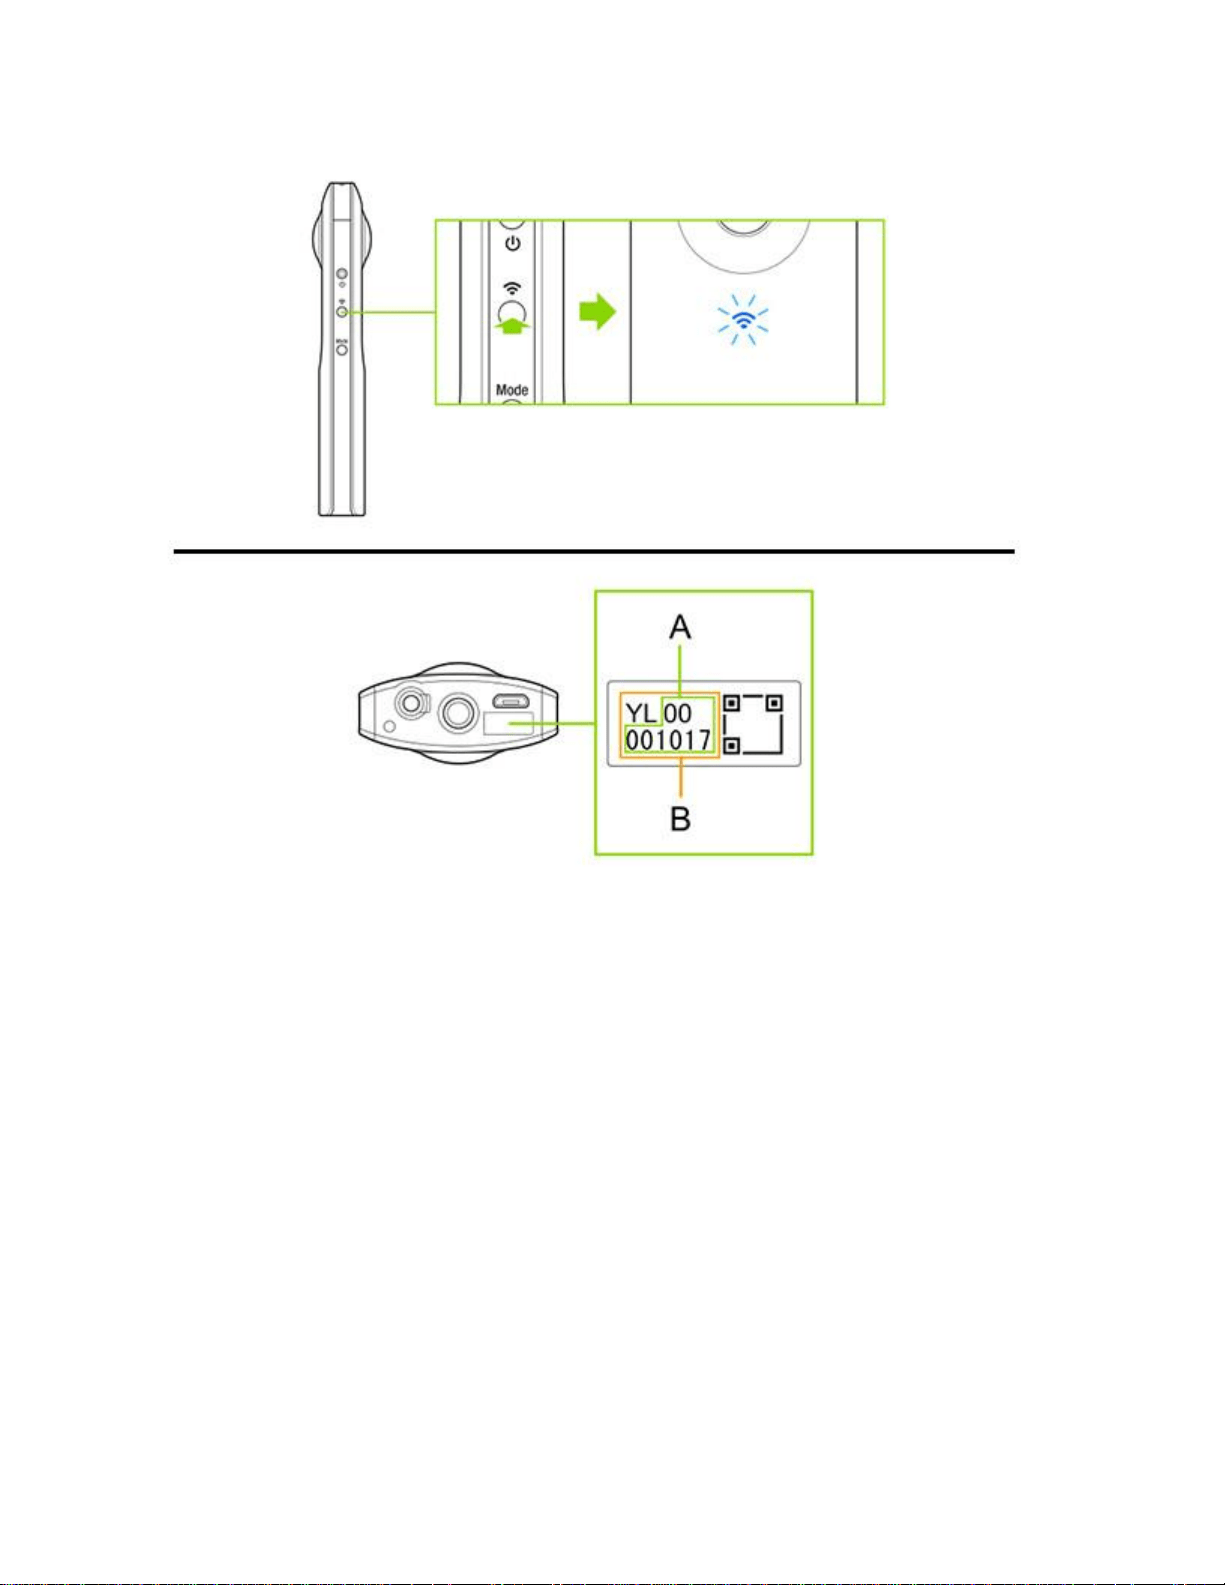
1. Press the wireless button. The wireless lamp flahes in blue.
2. Display the Wi-Fi™ settings of the smartphone.
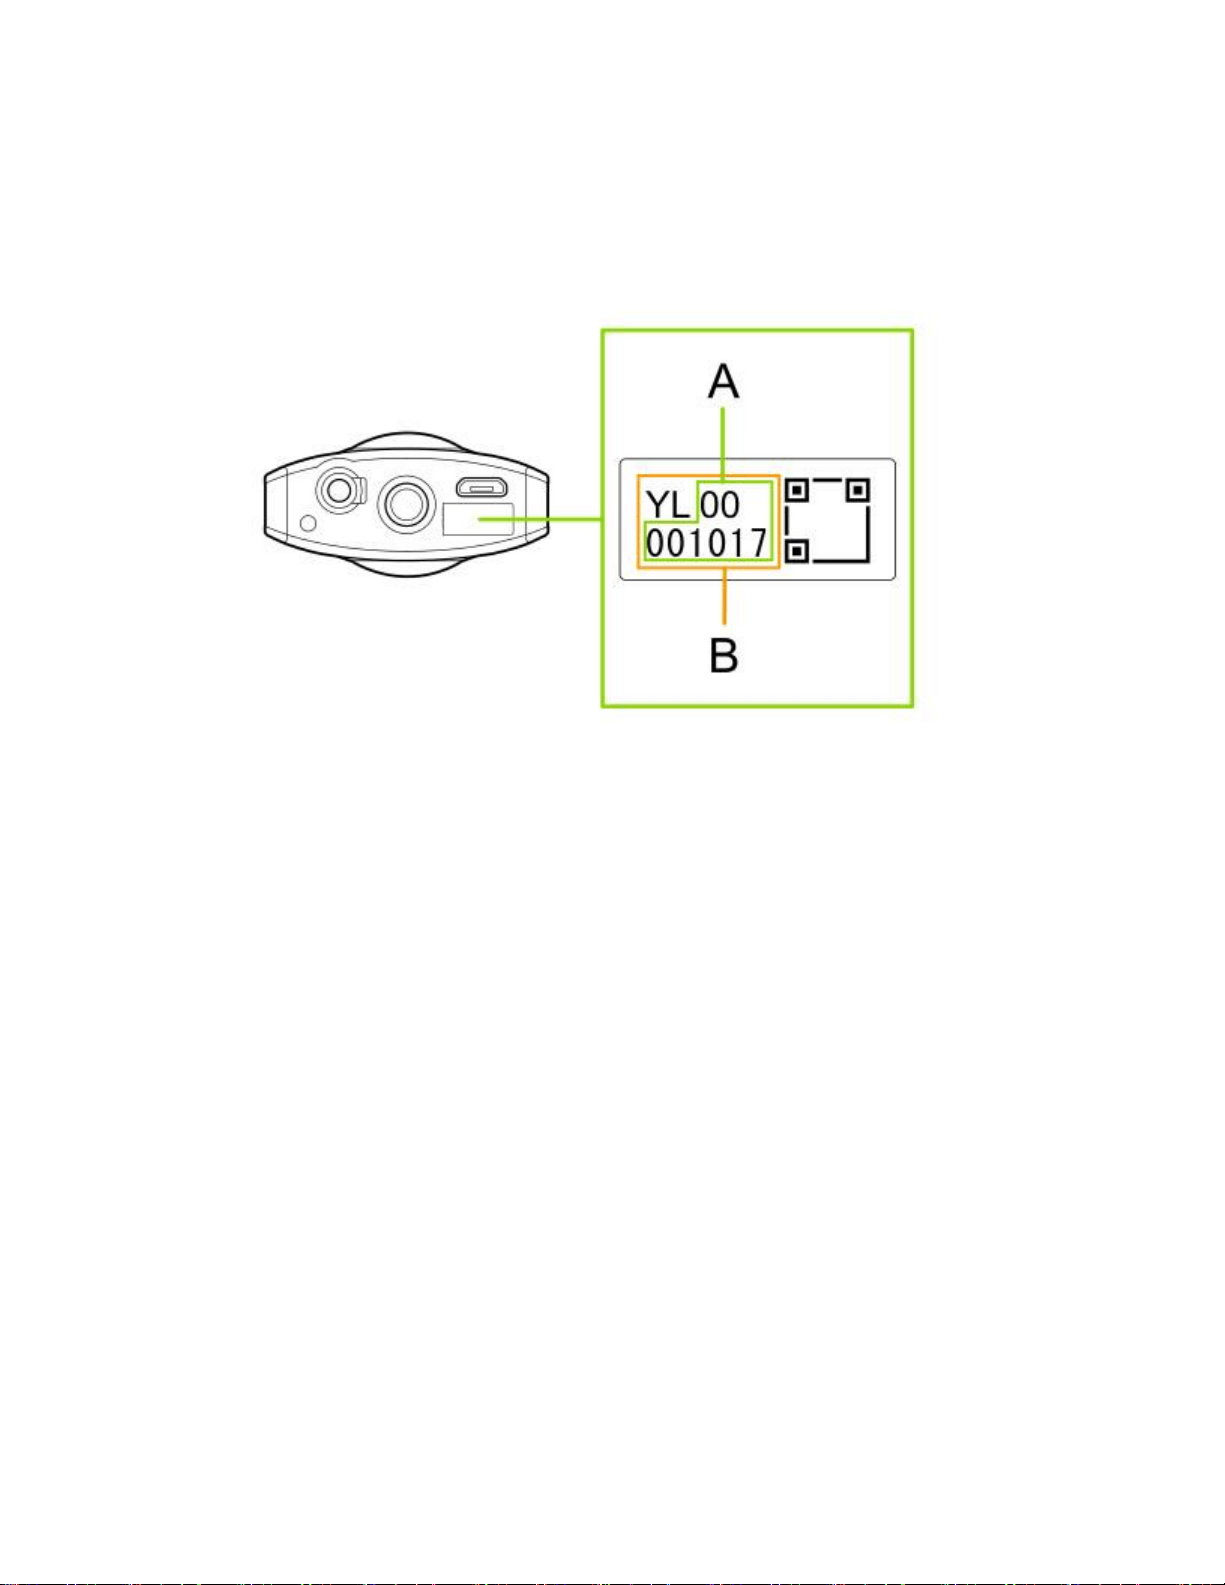
3. Check the serial number printed at the bottom of the camera.
* The serial number printed at the bottom of the camera is the same as the SSID and password. 4.
Select "THETA*******.OSC" from the network list and enter the password.
* "*********" of SSID part is indicated by (B).
* The password is indicated by (A). 5. When the wireless lamp lights in blue, the camera is
connected to the smartphone.
STEP3
Starting the smartphone app "RICOH THETA S"
1. Start "RICOH THETA S" app on the smartphone.
2. Tap "Cam imagpes" on the bottom left of the screen.
STEP4
Checking and changing the camera settings
Tap [Settings]. Change [Change Wi-Fi password]/[Sleep mode]/[Camera shutter
volume]/Transfer method].
* The date and time of the camera are synchronaized wih the smartphone when the cmaera is
connected to the smartphone and "RICOH THETA S" of smartphone app is started.
* "Wi-Fi Password", "Sleep mode" and "Camera shutter volume" can be set only when the
camera is connected to the smartphone.
Taken with the camera
STEP1
Starting the camera
1. Press and hold the power button to start the camera.
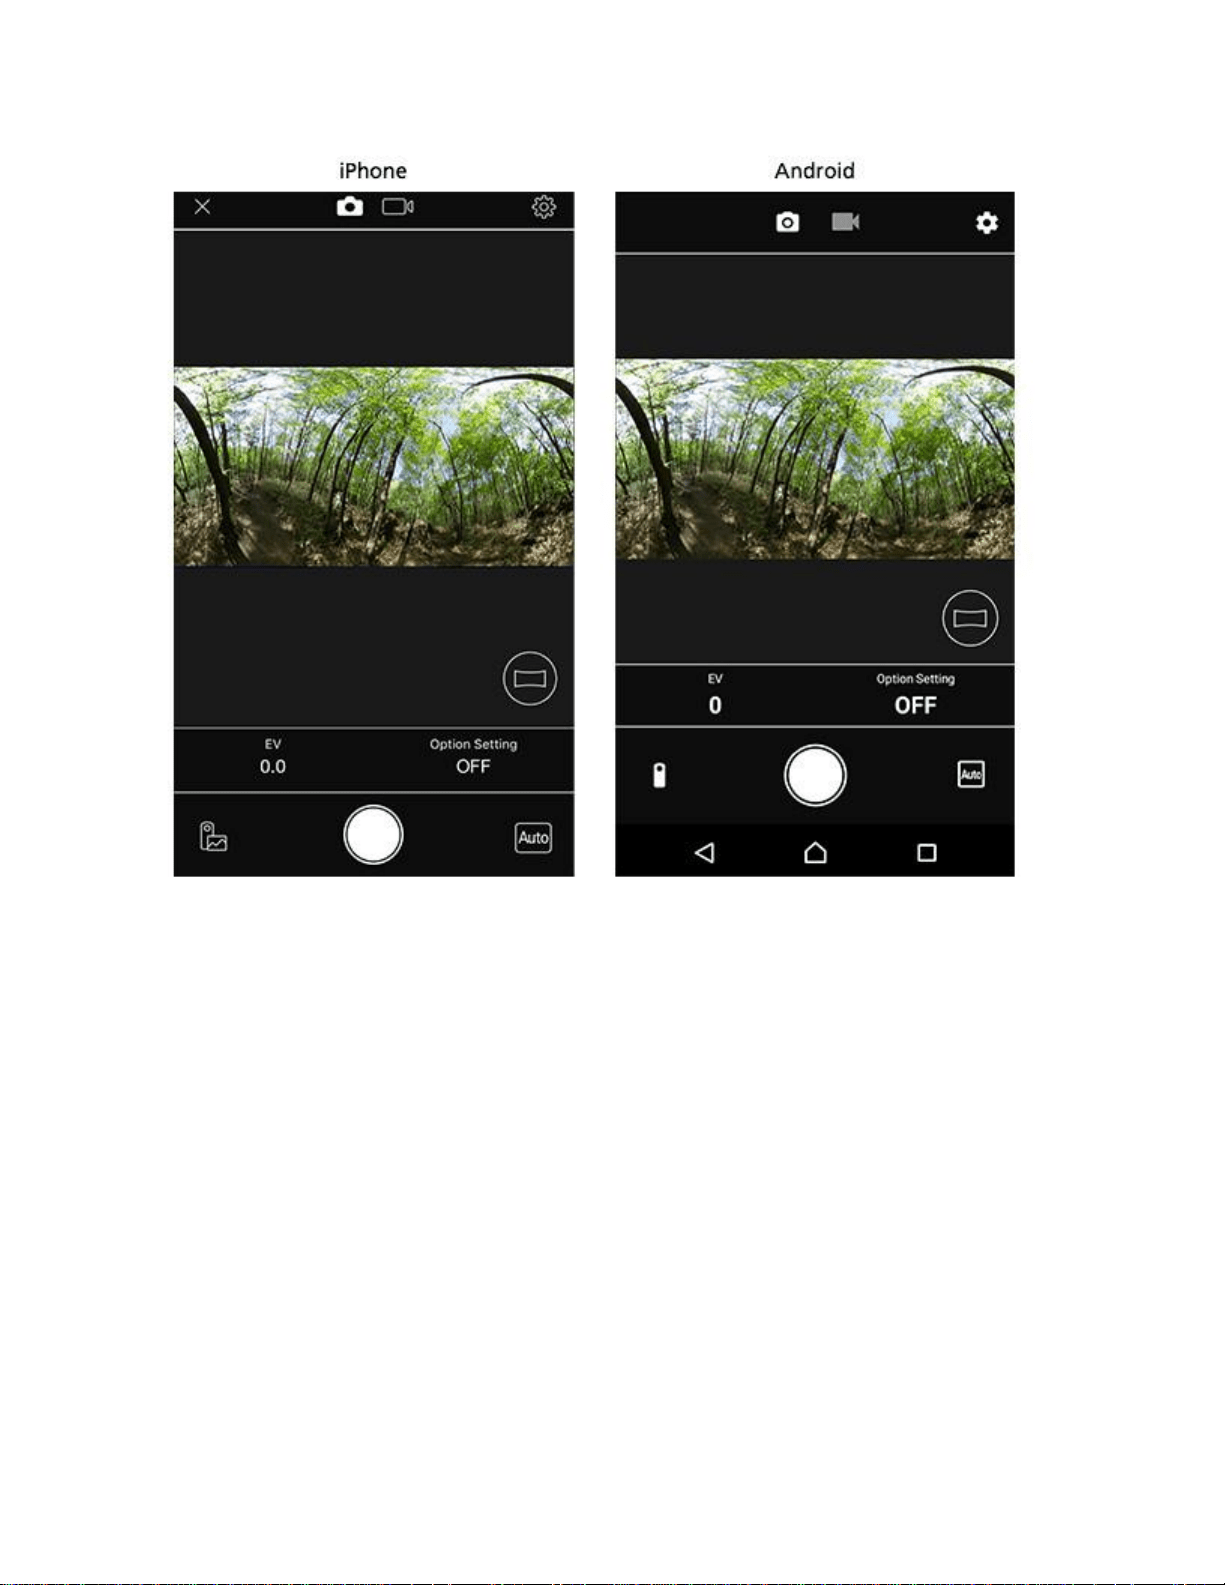
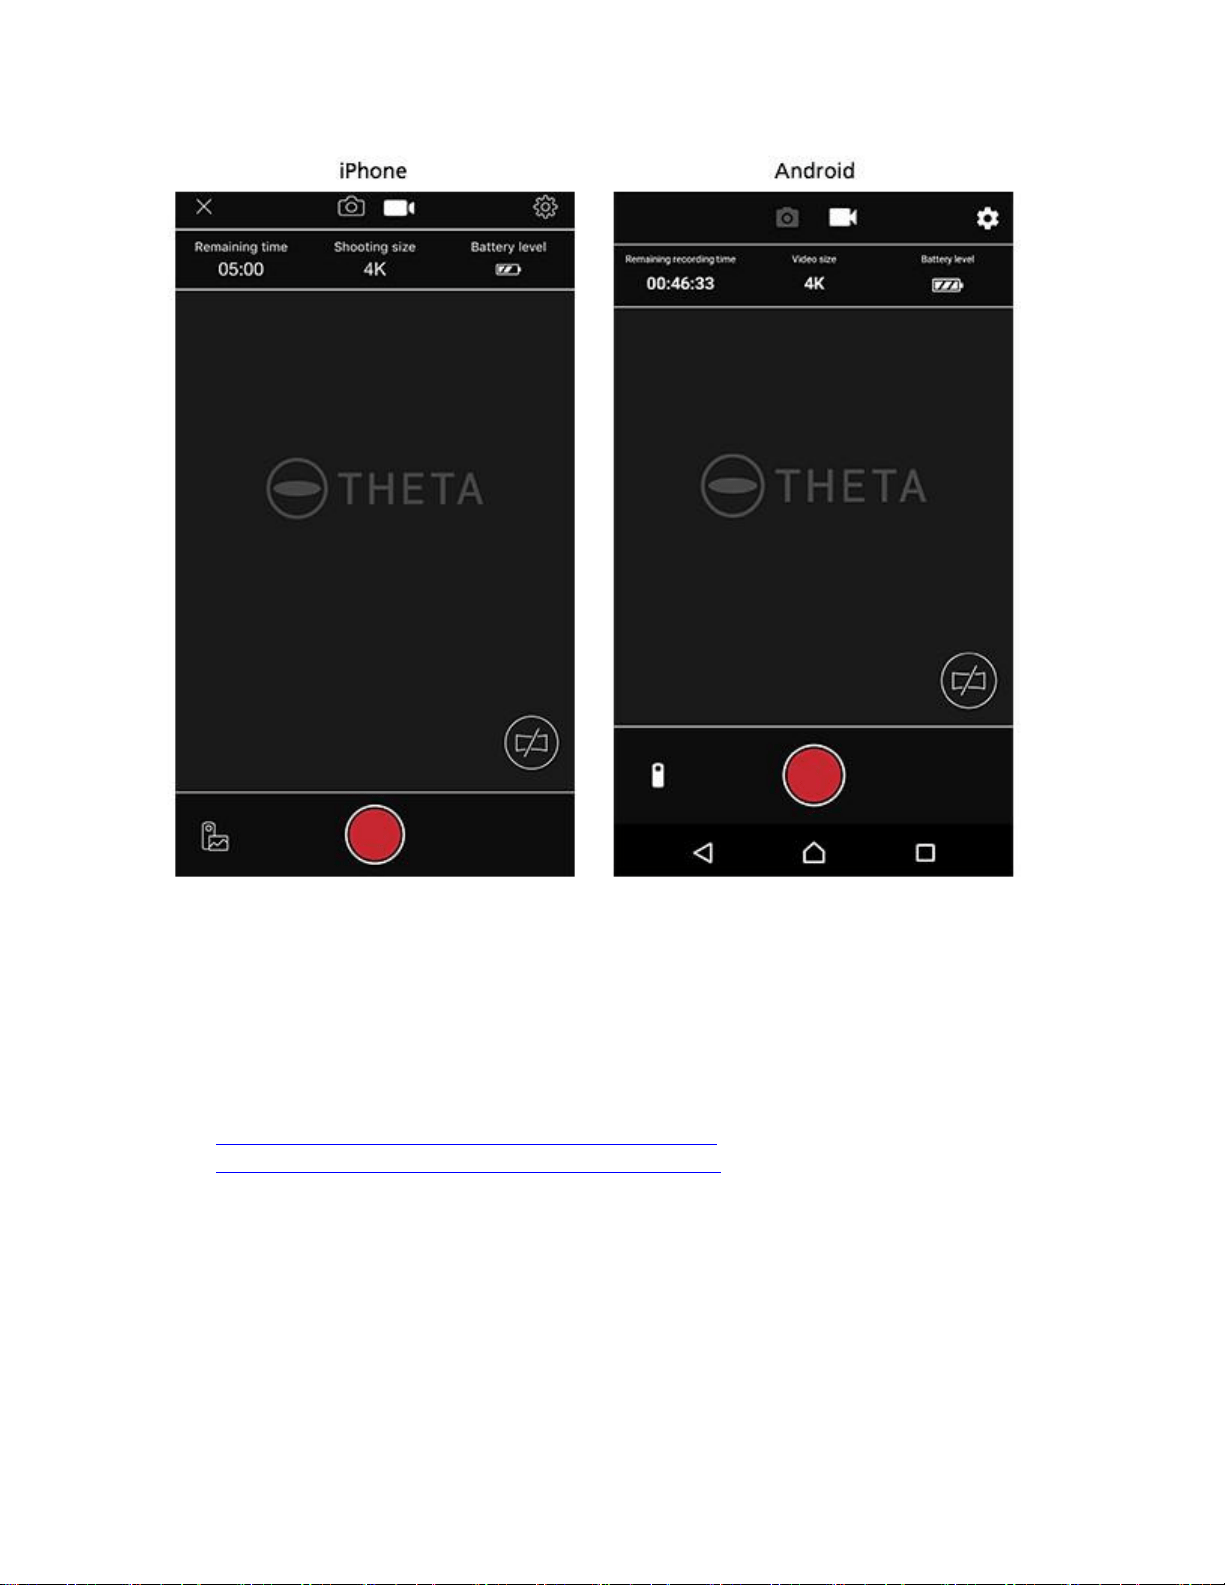
2. Press the mode button to select the video mode.
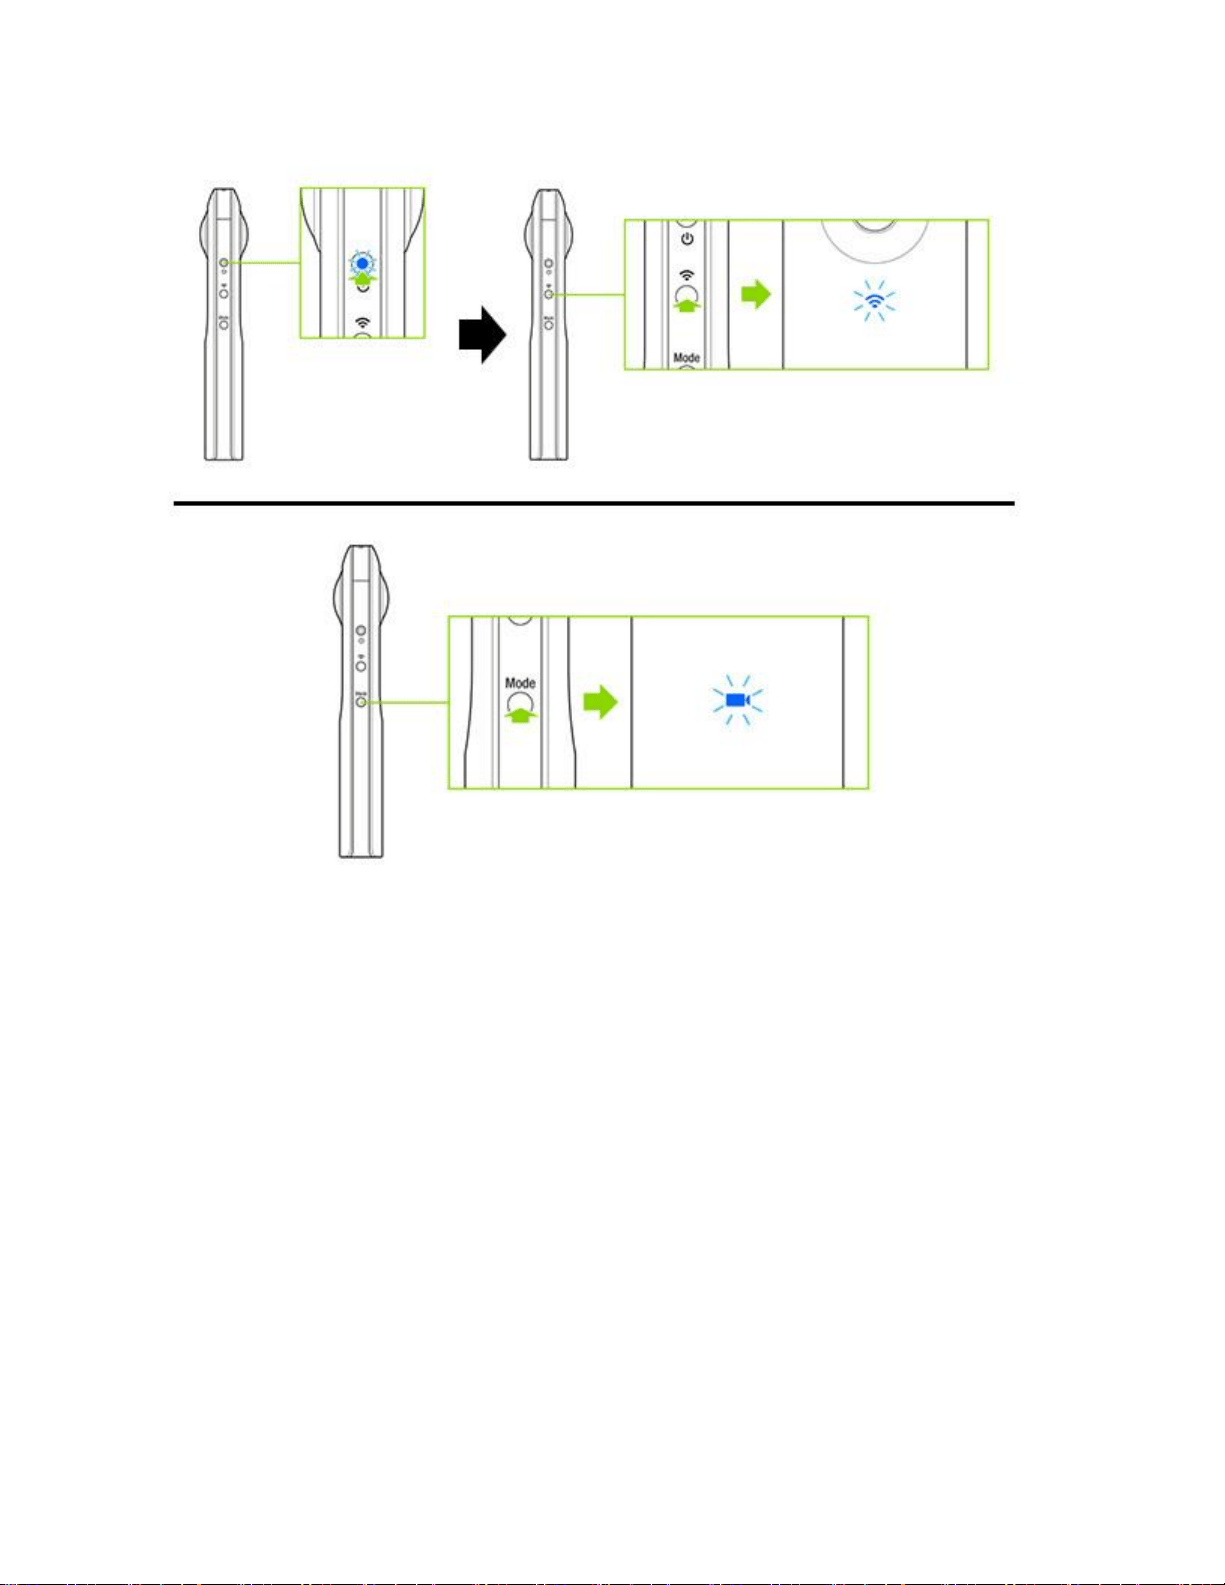
STEP1
Starting the camera
1. Press and hold the power button to start the camera.
2. Press the mode button to select the video mode.
3. Confirm that the wireless lamp is flashing. If it is off, press the wireless button.
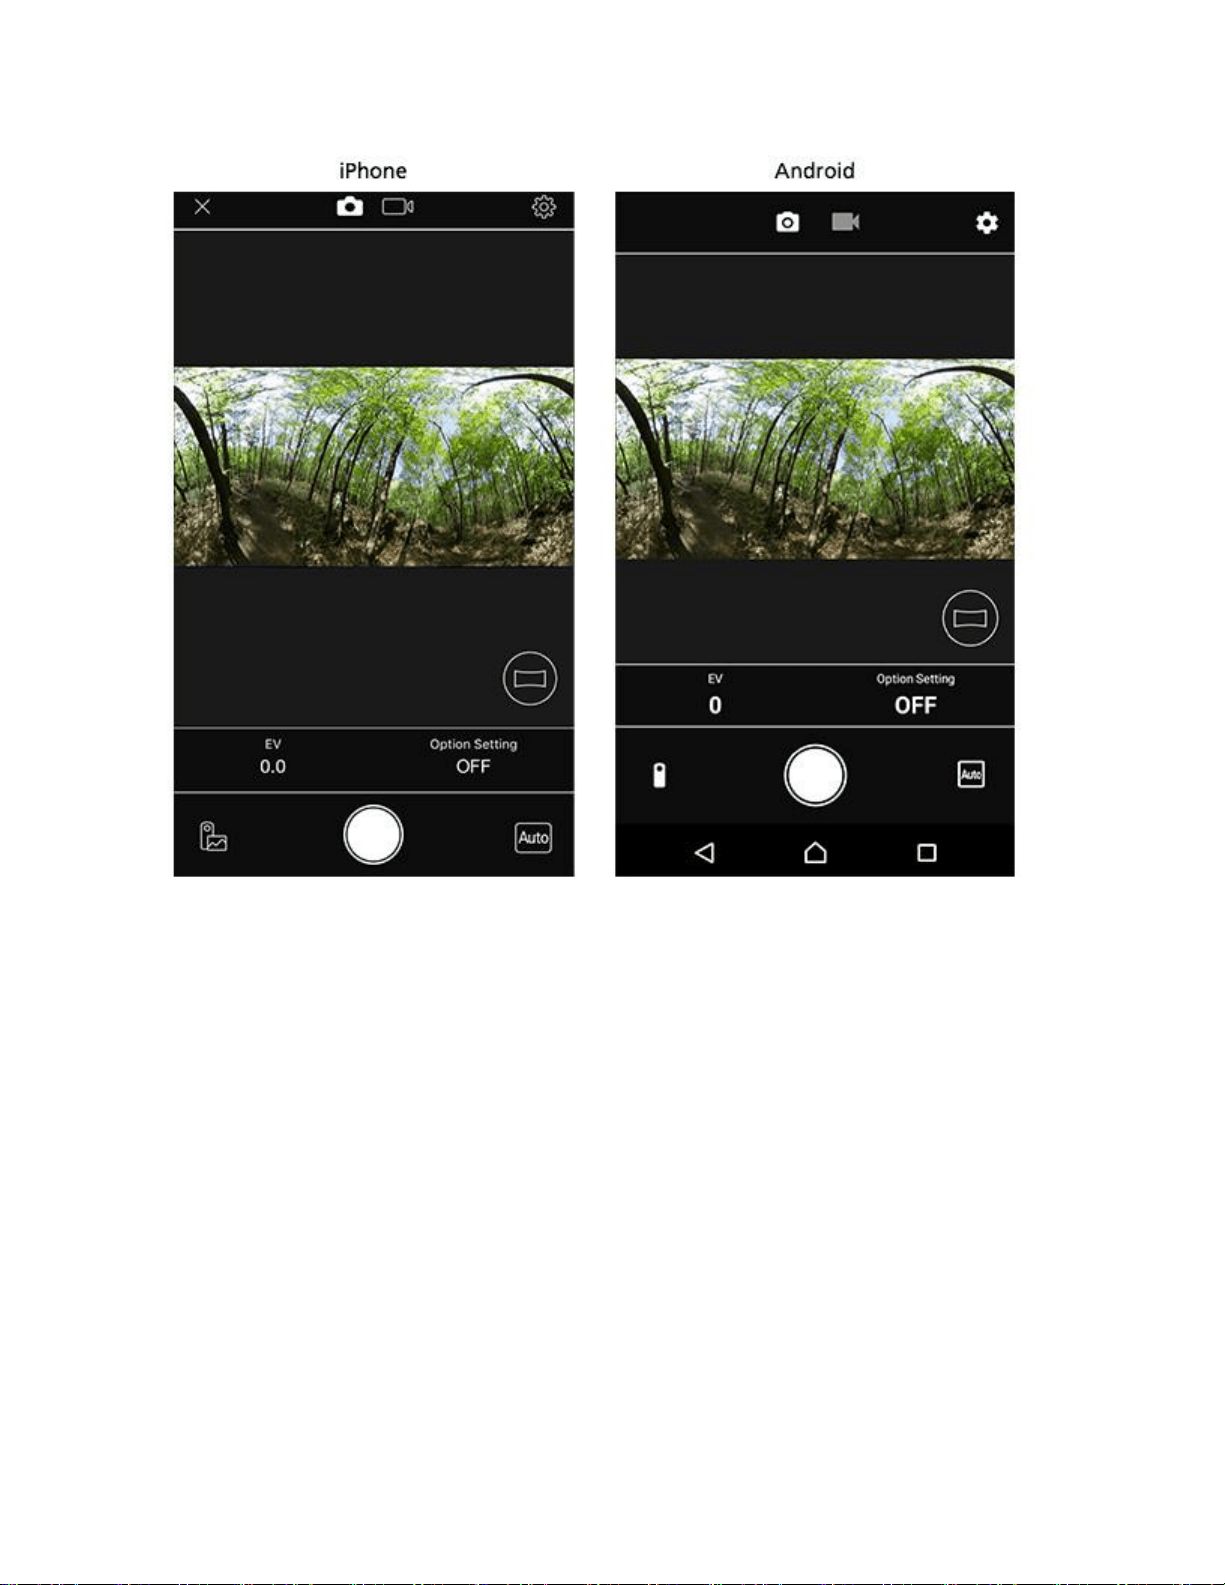
・ From the RICOH THETA S app remote shooting screen, you can switch shooting modes with
the still image button/video button.
STEP2
Connecting the camera to a smartphone
1. Display the Wi-Fi™ settings of the smartphone.
2. Check the serial number printed at the bottom of the camera. * The serial number printed at
the bottom of the camera is the same as the SSID and password. 3. Select
"THETA*******.OSC" from the network list and enter the password. * "*********" of SSID
part is indicated by (B).
* The password is indicated by (A). 4. When the wireless lamp lights in blue, the camera is
connected to the smartphone.

STEP3
Starting the smartphone app "RICOH THETA S"
Start "RICOH THETA S" app on the smartphone.
STEP1
Starting the camera
1. Press and hold the power button to start the camera.
2. Confirm that the wireless lamp is flashing. If it is off, press the wireless button.

STEP2
Connecting the camera to a smartphone
1. Display the Wi-Fi™ settings of the smartphone.
2. Check the serial number printed at the bottom of the camera. * The serial number printed at
the bottom of the camera is the same as the SSID and password. 3. Select
"THETA*******.OSC" from the network list and enter the password. * "*********" of SSID
part is indicated by (B).
* The password is indicated by (A). 4. When the wireless lamp lights in blue, the camera is
connected to the smartphone.
STEP3
Starting the smartphone app "RICOH THETA S"
1. Start "RICOH THETA S" app on the smartphone.
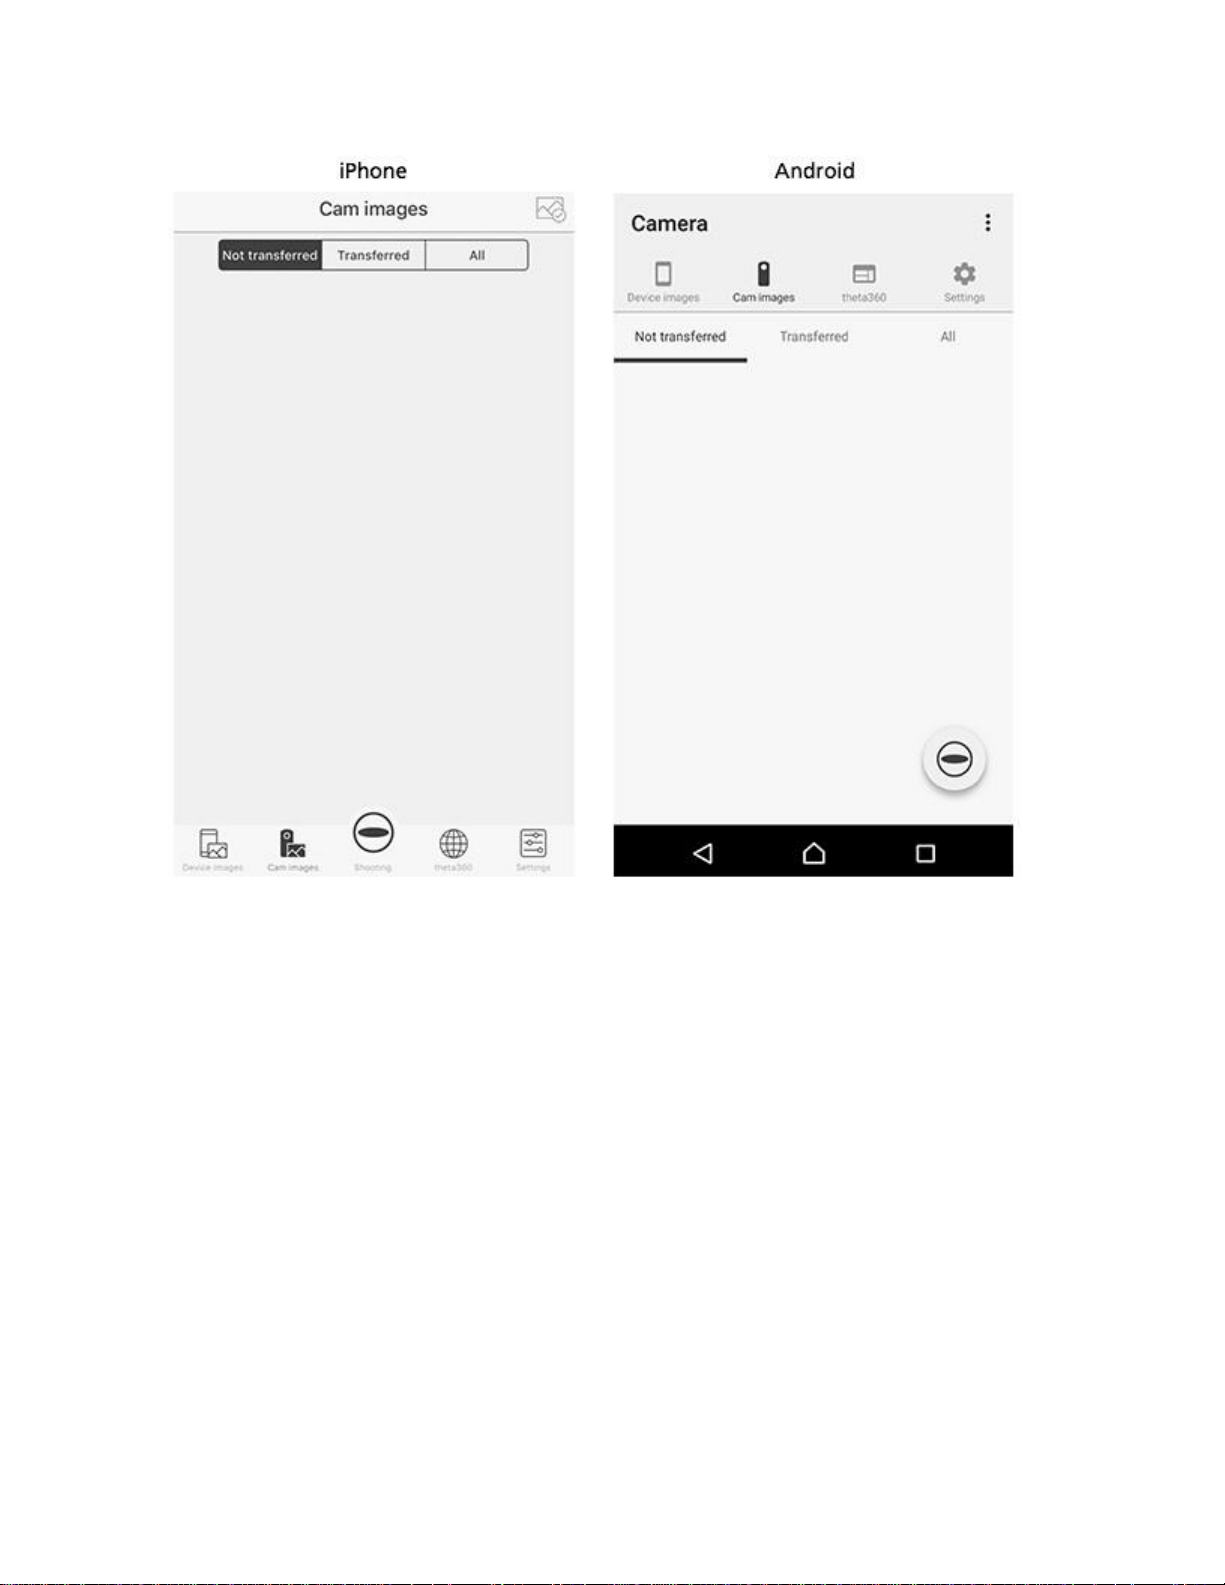
2. Tap "Cam imagpes" on the bottom left of the screen.

STEP4
Transferring videos
1. Tap "Cam imagpes".
2. Start transfer by tapping [Thumbnail] for the video you want to transfer.
・ The video camera mark and file size are displayed on the videos.
3. After the transfer is completed, the playback is available.
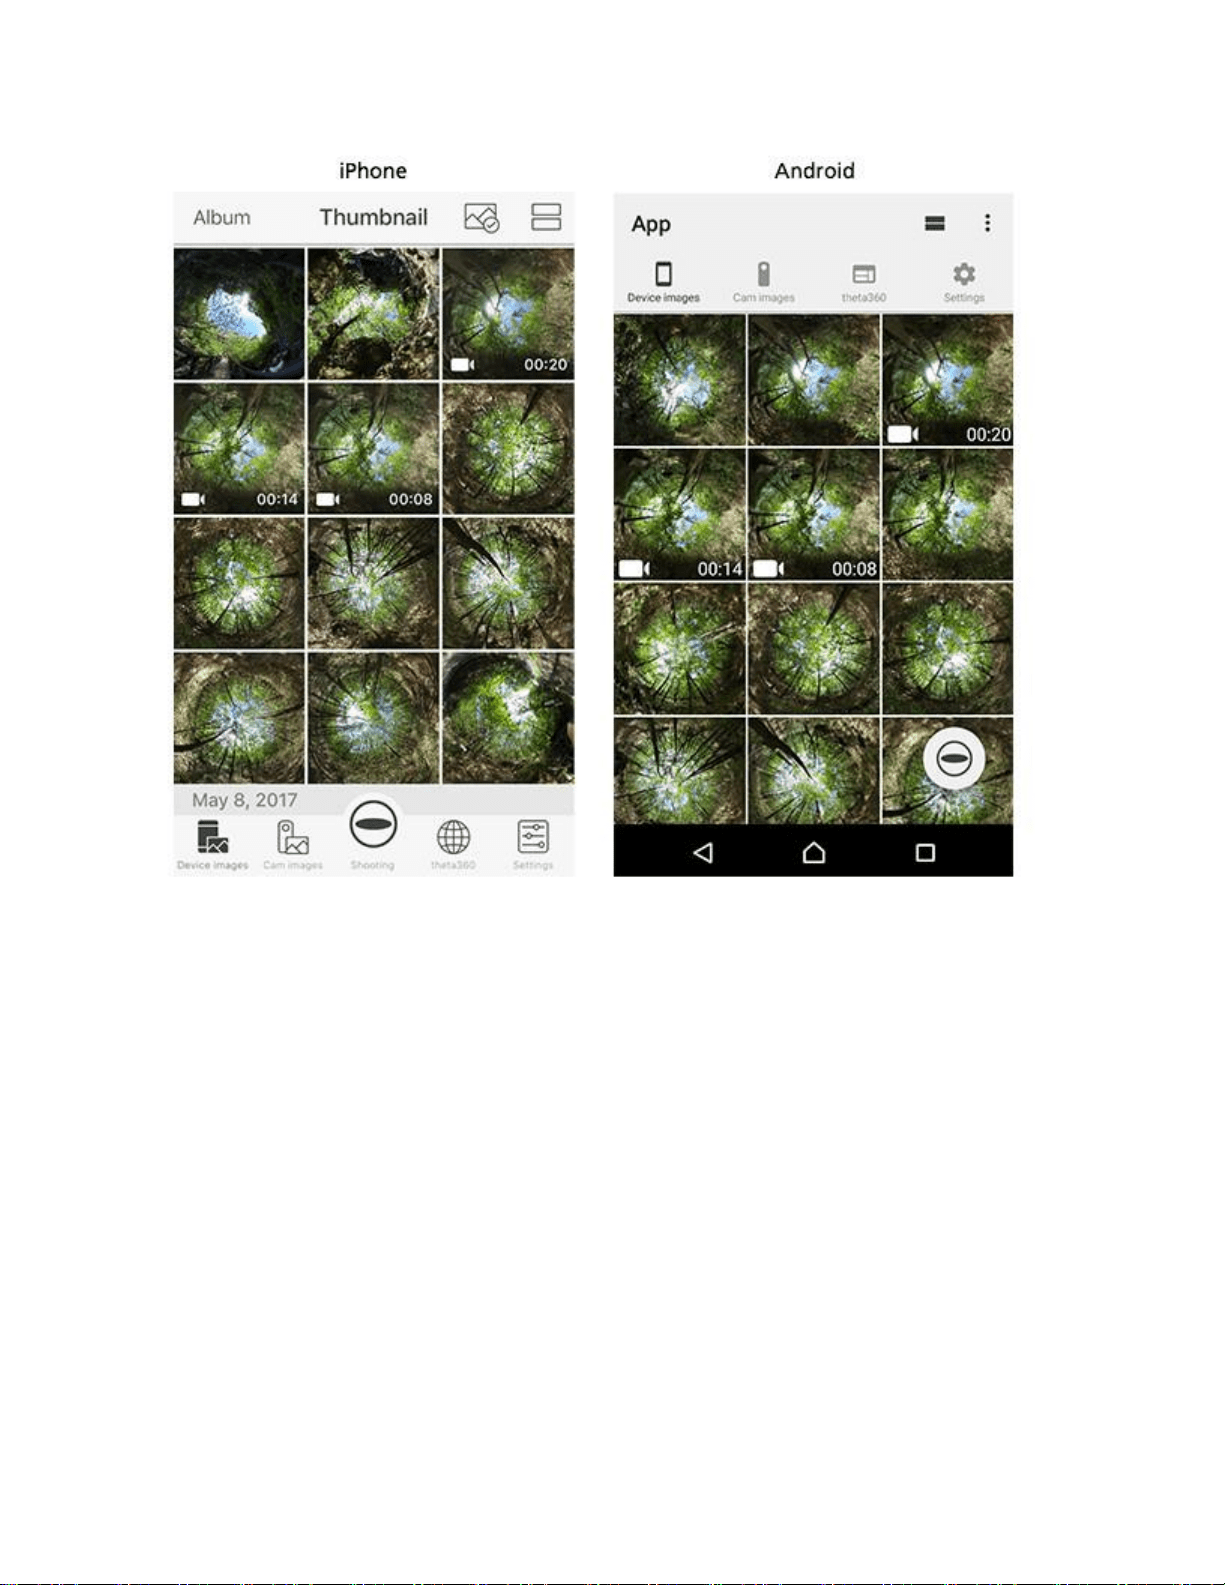
STEP5
Viewing video
rom the next time it can be viewed from the [Device images].
* Note that if an image is deleted from the "Photos" App, it is also deleted from "Device
images".
View examples on the theta360.com site
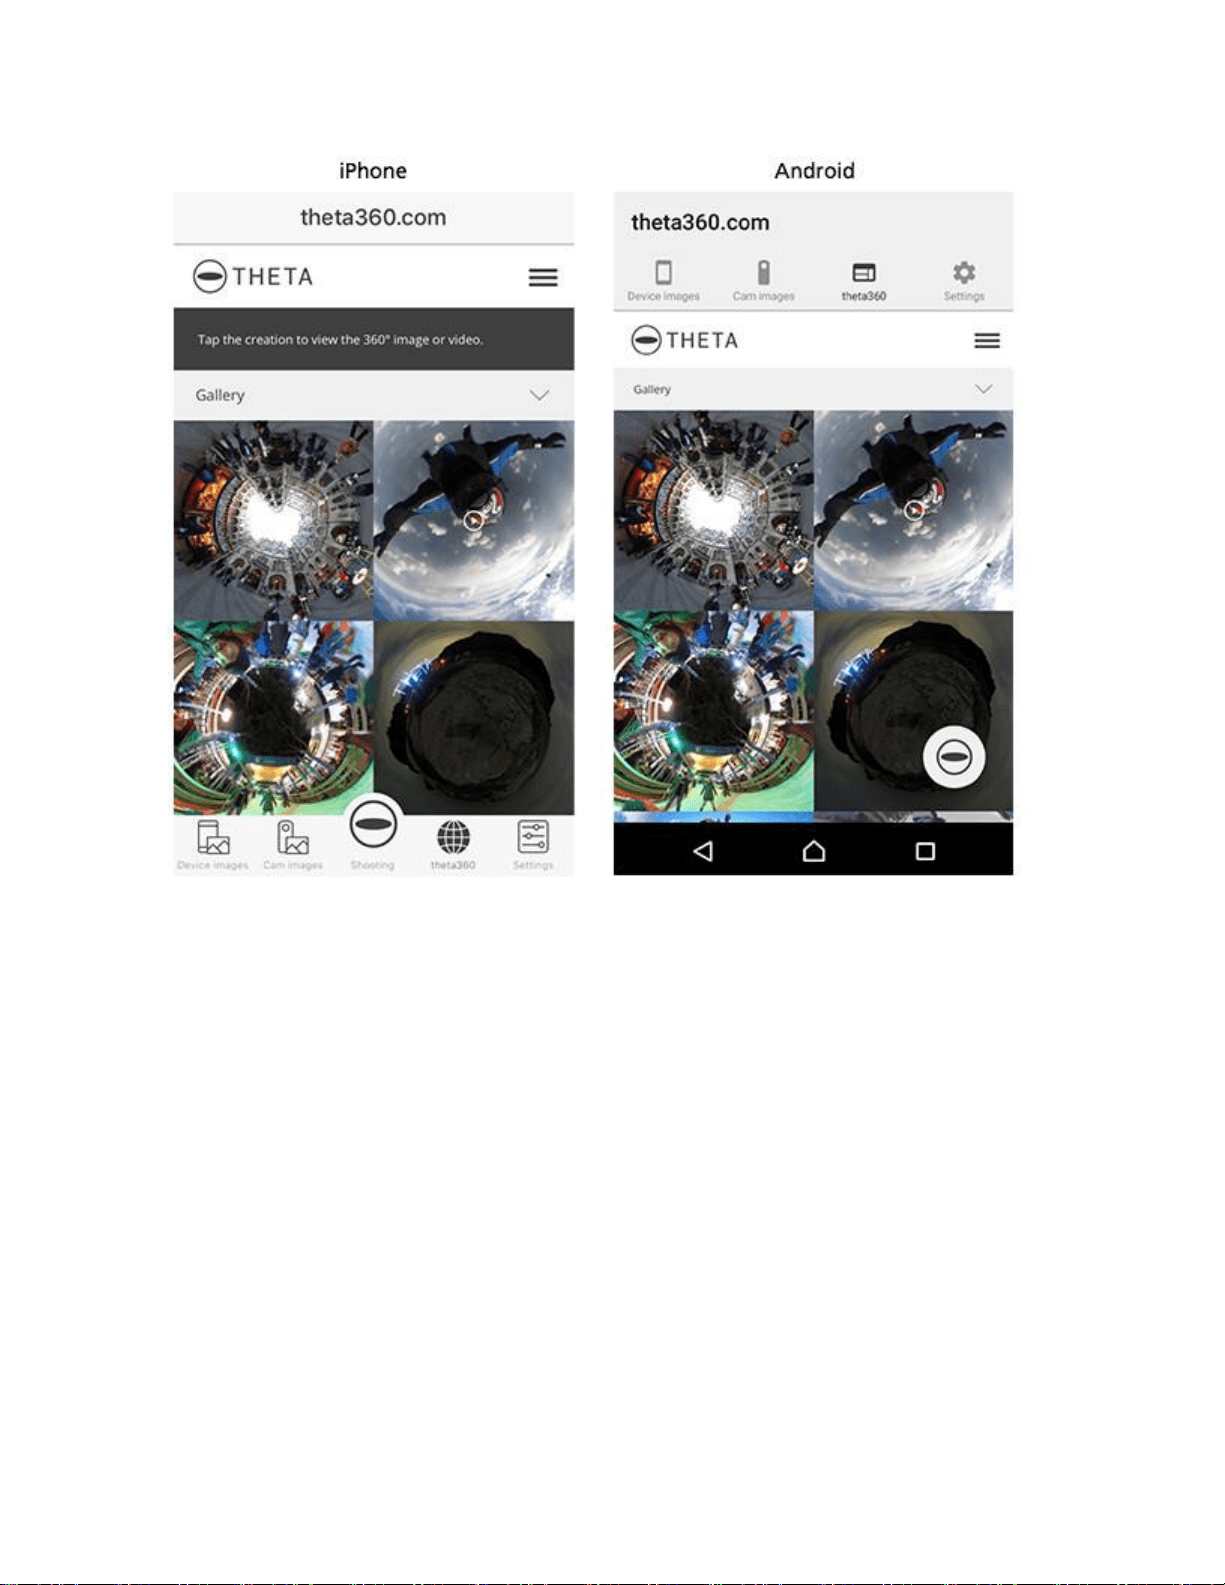
STEP1
Starting the smartphone app "RICOH THETA S"
1. Start "RICOH THETA S" app on the smartphone.
2. Tap "theta360".
3. Tap the video you want to watch.
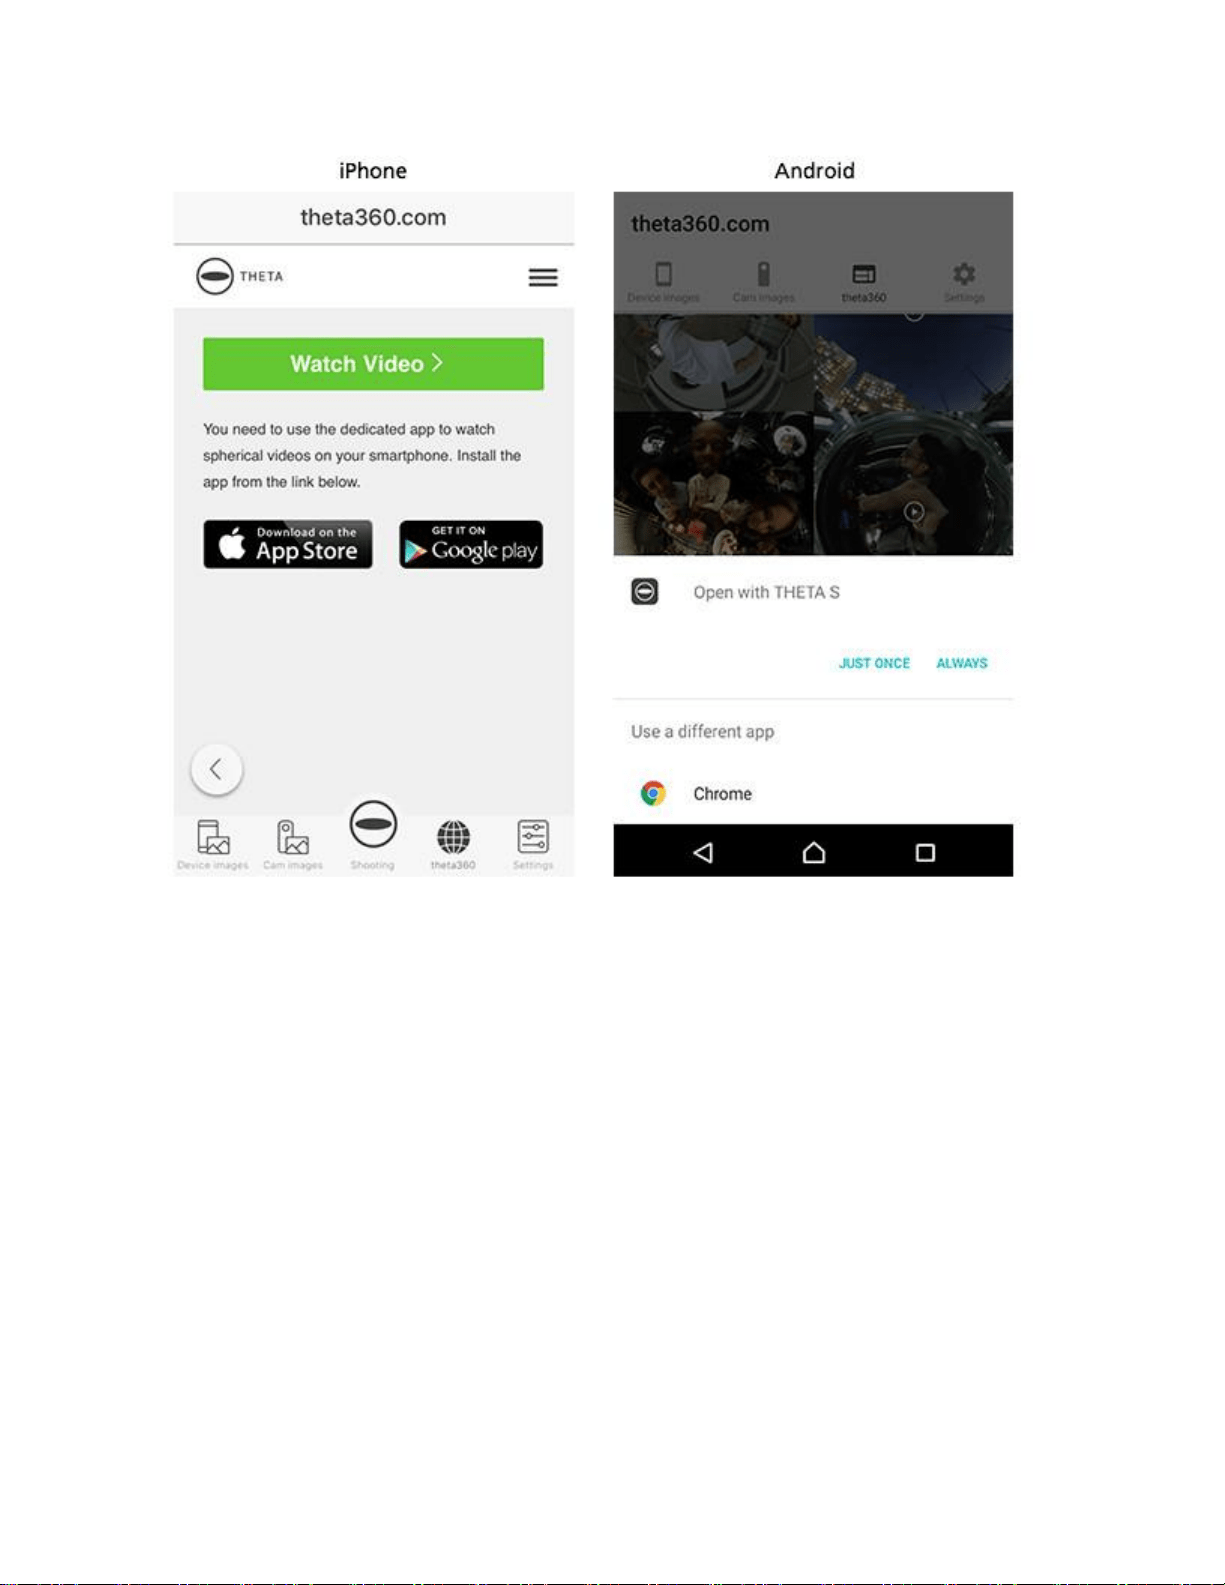
STEP2
Viewing videos
iPhone: Tap "WATCH Video".
Android: [JUST ONCE] or [ALWAYS] -Open with THETA S.
Viewing video on your computer
STEP1
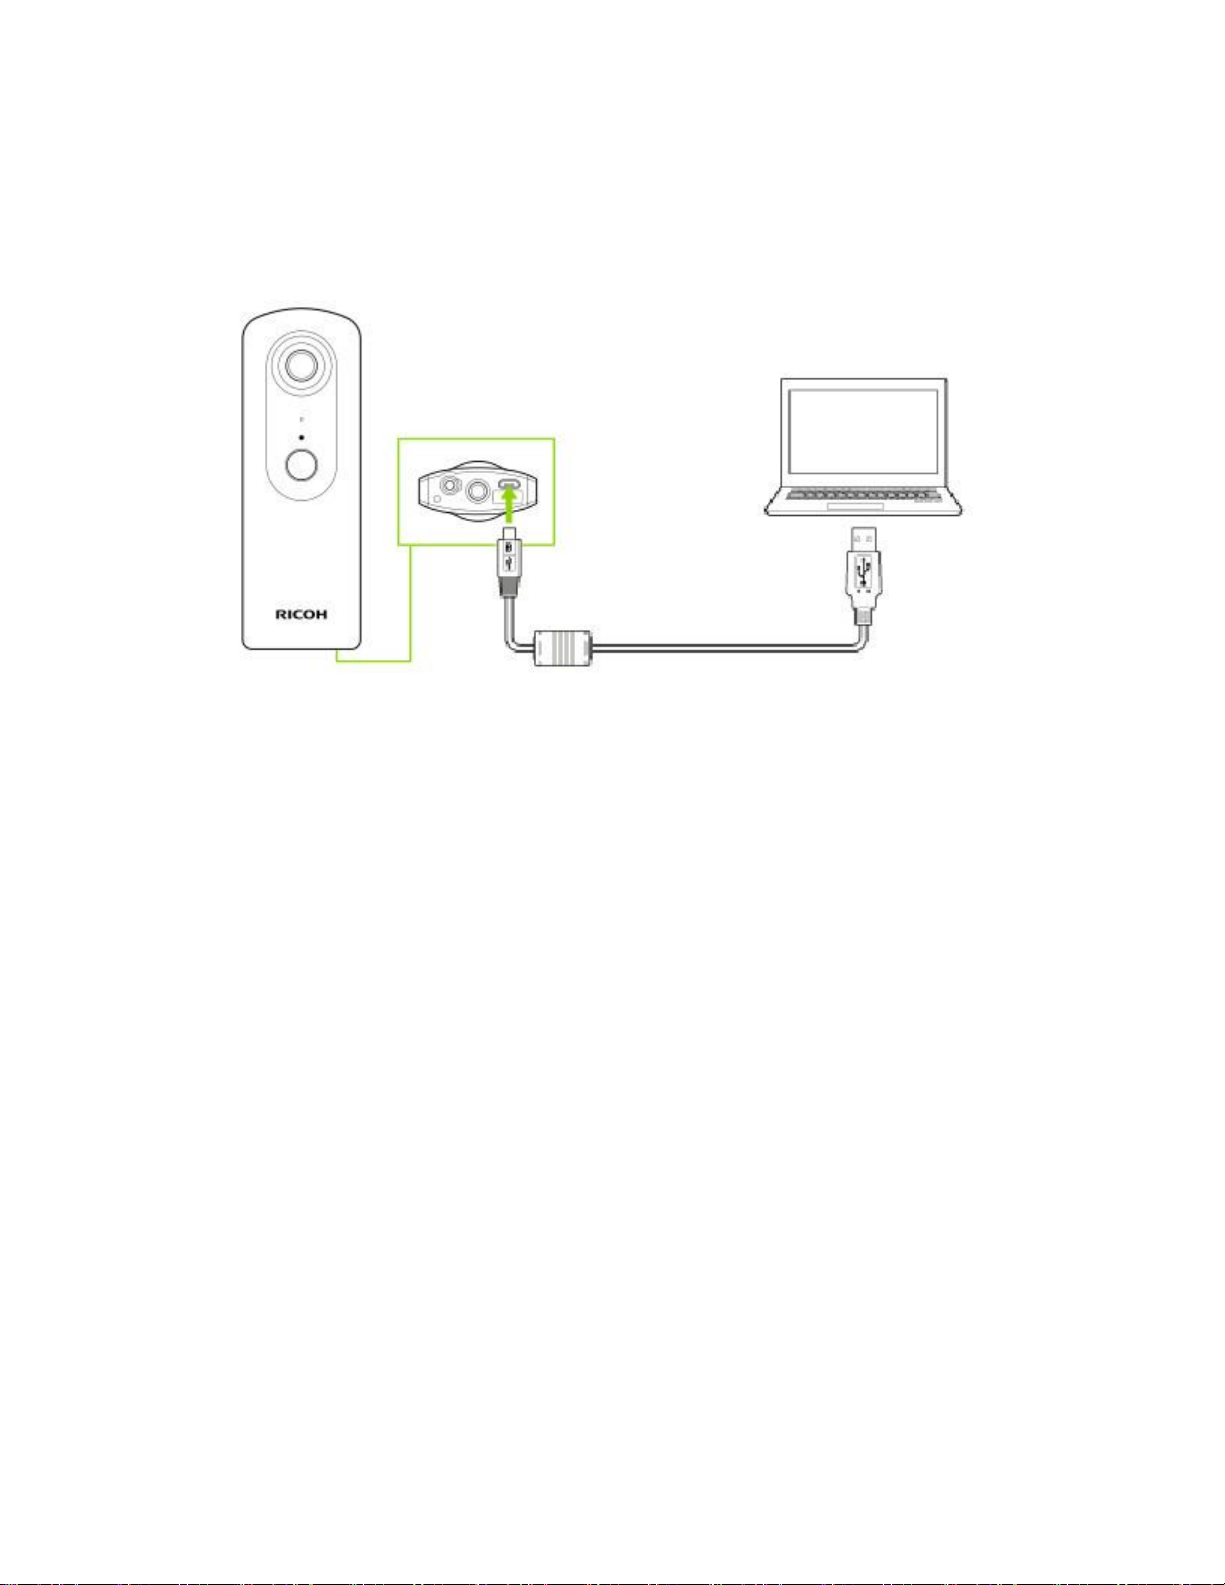
Saving video onto your computer
1. Connect the camera to the using the provided USB cable.
Widnows:
2. Select "Open device to view files".
3. Open the folder of [DCIM]-[***RICOH] and save video file (.mp4) onto your computer from
the camera.
Mac:
2. Using the "Photos" app or "Image Capture", import image to your Desktop, or other location.
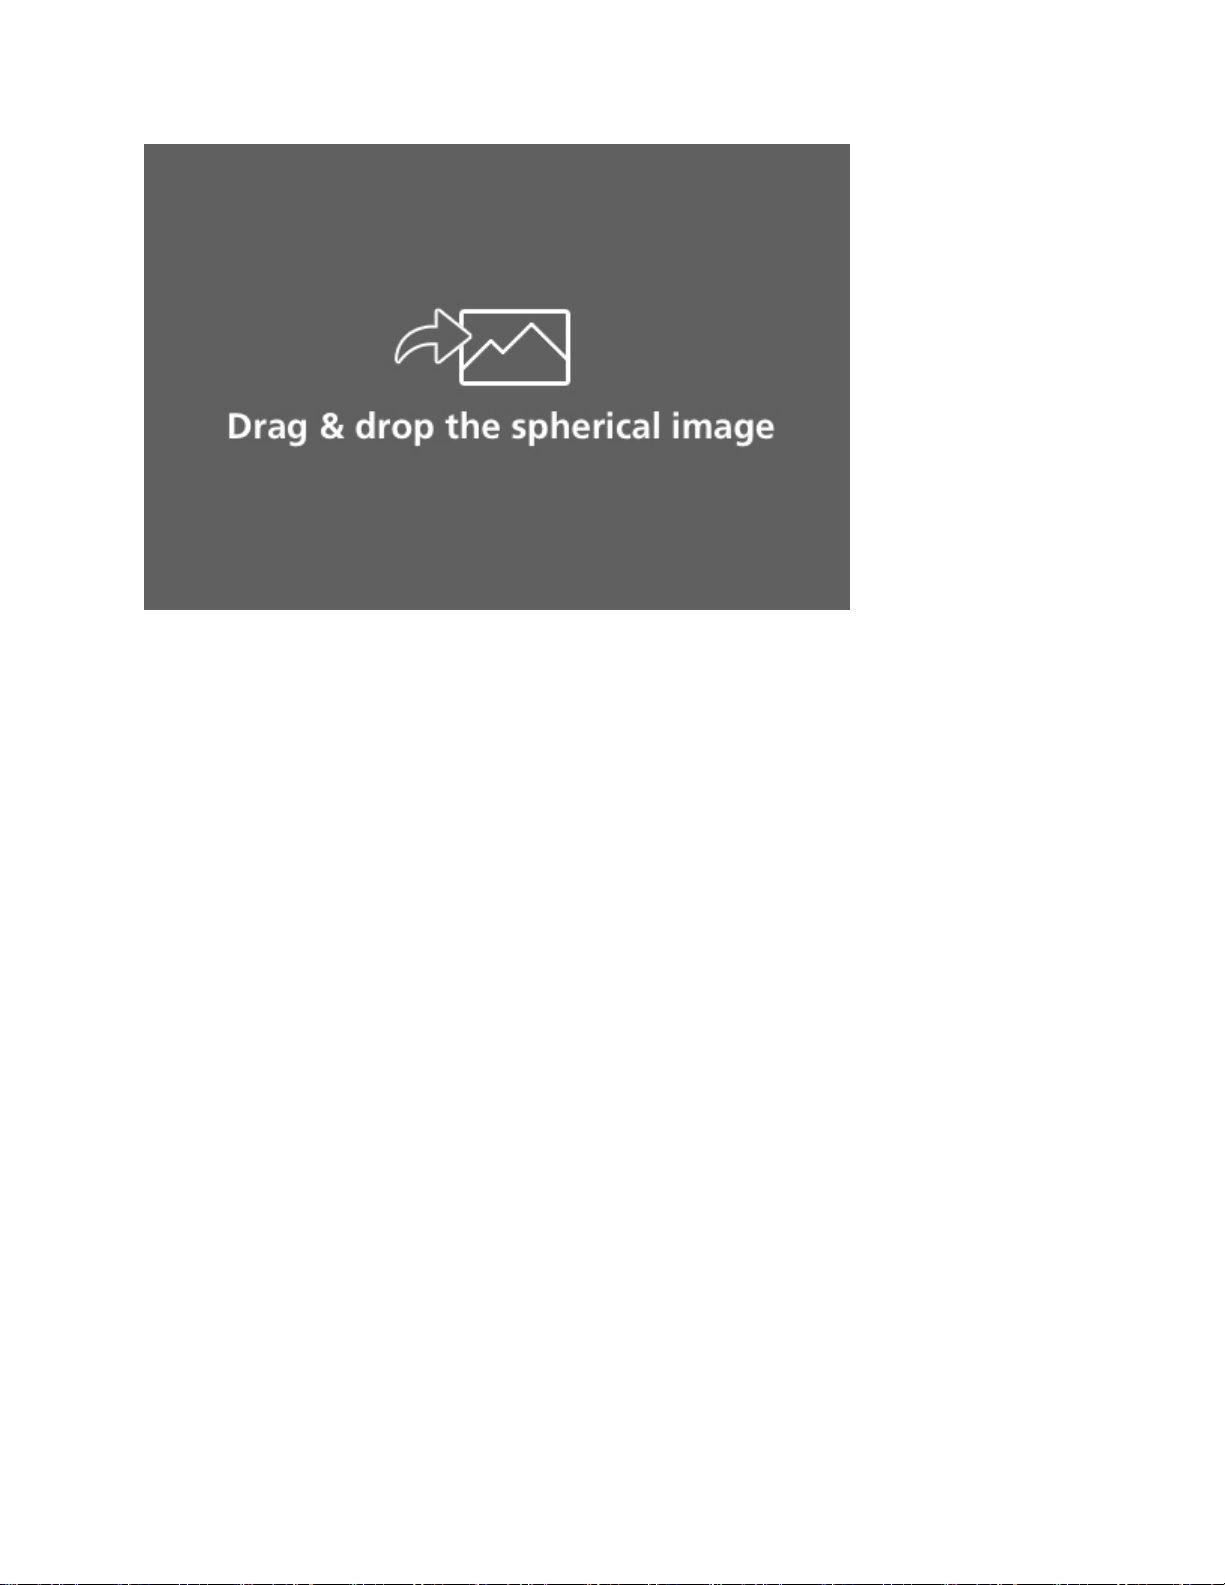
STEP2
Selecting video
Start the computer application, and then drag and drop imported videos (.mp4).
* You can also launch it by selecting [File] >> [Open] in the menu.
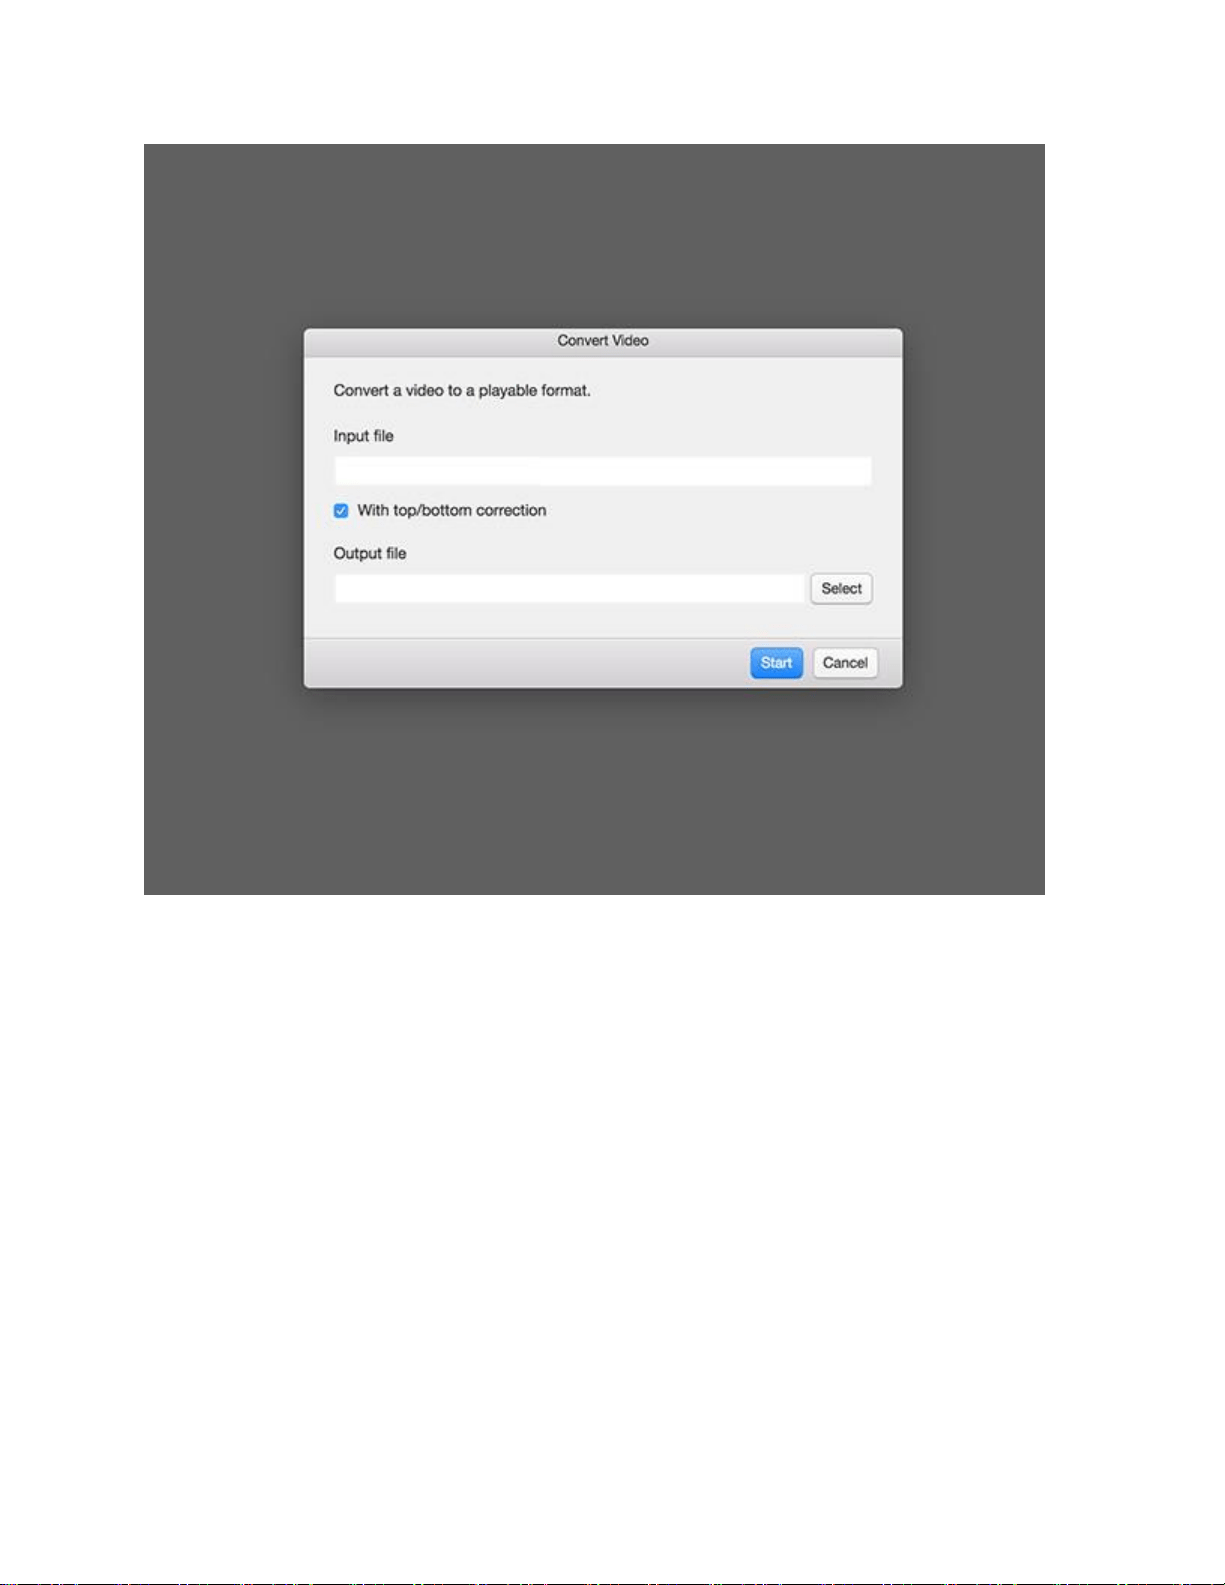
STEP3
Viewing video
1. Click [Select].
2. Select the folder to save the file and click [Start].
3. After conversion of the video file, playback starts.
* At the next playback, choose the video file (.mp4) converted by selecting [File] >> [Open].
* You can not directly view the image in the camera. Save the file to your computer to view it.