Loading ...
Loading ...
4 5
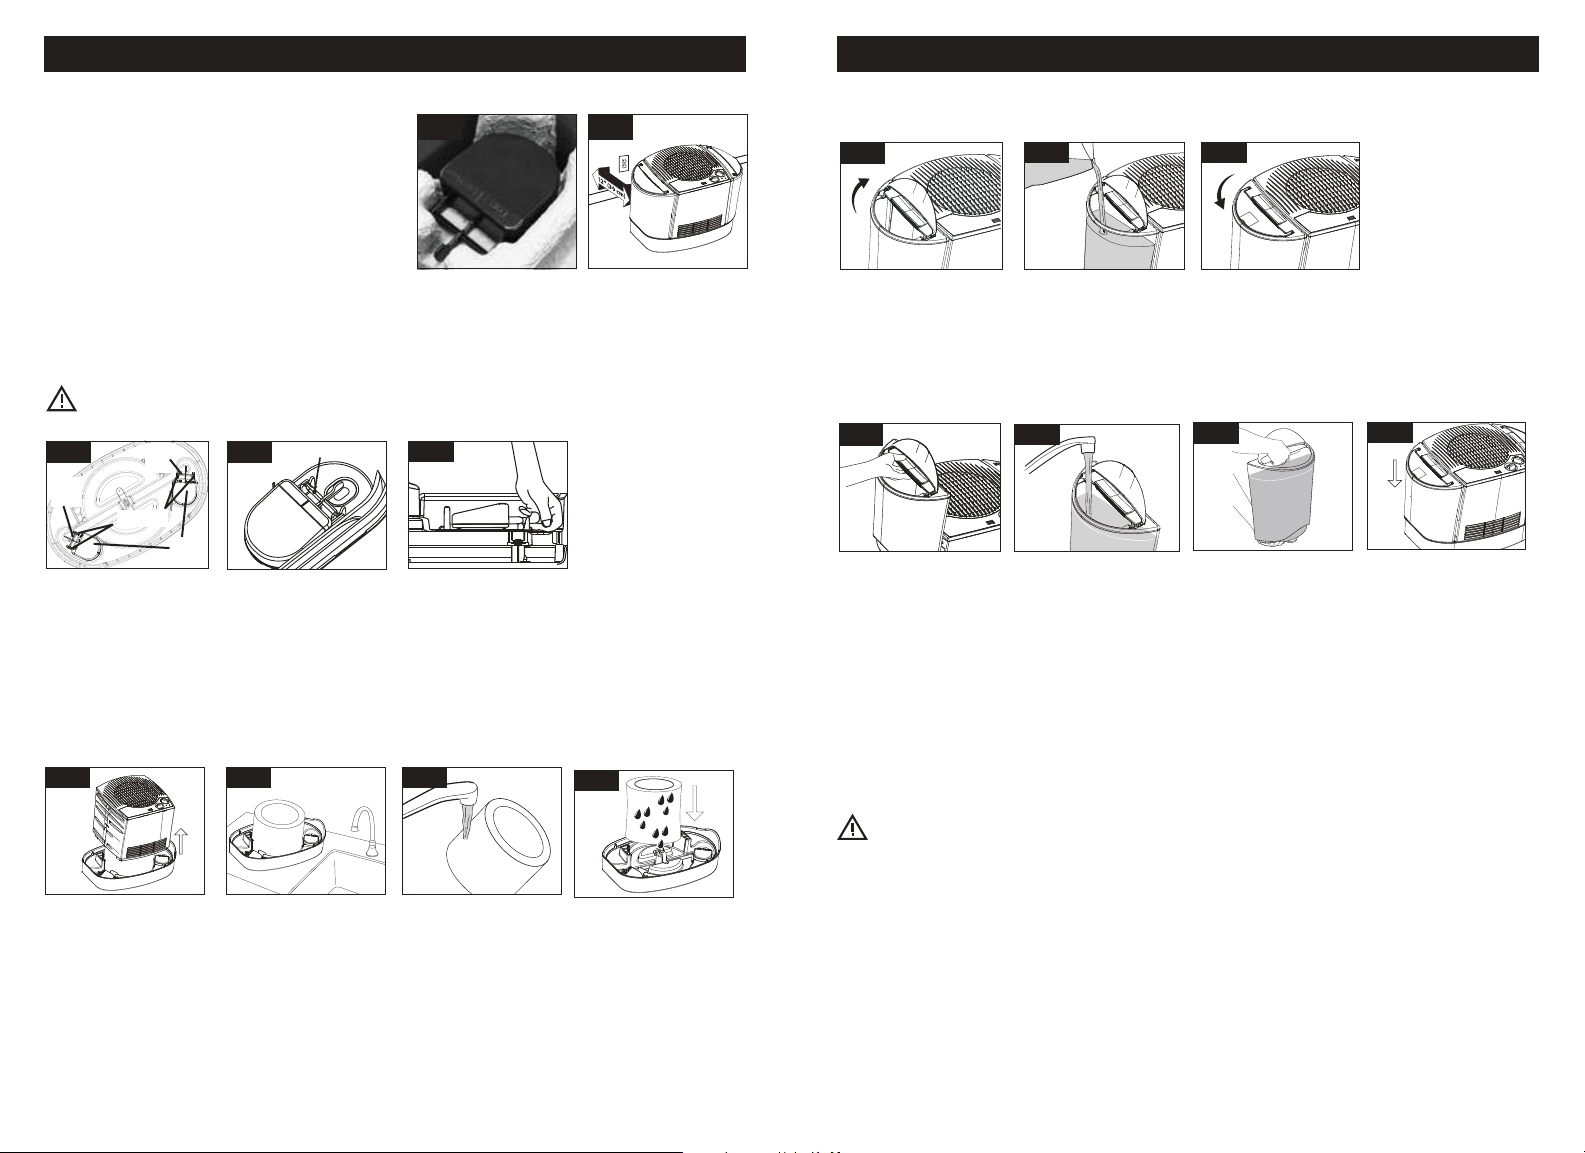
1. Remove Water Tanks and set aside. Remove Housing and lift up to expose Wicking Filter.
2. Carry Wicking Filter and Base to sink or tub.
3. Remove Filter from Base and run under cool water until saturated.
4. Carefully place wet Filter back in base; DO NOT squeeze out excess water.
1. Remove Water Tanks. Under each tank, identify the Brackets where the Float Paddle will be installed.
2. Place the Float Rod over both Brackets and press firmly until you hear it click into both Brackets.
3. Pull up gently on Float Rod to be sure it doesn’t pop out of either of the Brackets. Replace the Water Tank.
Repeat with second Tank and Float Paddle.
Step 3 Step 2
$
Step 4
$
Step 1
Step 2
FILLING/REFILLING WATER TANKS
1. Flip Tank Cover open.
2. Pour water into the Tank opening.
3. Close Tank Cover to keep objects and debris out of water.
Repeat to fill second Water Tank.
Step 1
Step 3
The Tanks can be filled in two ways.
To fill at the humidifier:
Float Paddle Installation – required for humidifier to operate
This humidifier uses a float system to regulate the water flow from the Tank to the Reservoir. The Float
Paddles must be properly installed for the unit to operate. If not properly installed, water may not flow into
the Reservoir or it may leak from the Base. The Float Paddle is designed to be easy to install and remove.
CAUTION: Improper placement of the Float Paddles could result in leaking or water not feeding
to the Reservoir.
Step 3
Step 2
Top
Le Haut
“Click”
Step 1
Float
Rod
Float
Paddle
Brackets
Preparing the Wicking Filter
To speed the delivery of moisture into your room it is recommended to wet the wicking filter before use.
Step 2
$
Step 1
$
Step 4
Step 3
To fill at the sink or tub:
1. Flip Tank Cover open. Grasp Tank Handle and lift Water Tank to remove from Base. Carry Tank to sink
or tub. NOTE: DO NOT use the Tank Cover to carry Water Tank.
2. Fill Tank with water. When filling, allow enough space at the top to minimize splashing when carrying.
Use cool tap water; DO NOT use warm or hot water.
3. Carry Water Tank back to humidifier using two hands; one hand on Tank Handle at the top of the Tank
and other hand supporting the bottom of the Tank. Take care not to push the Plunger on the bottom of
the Water Tank or leaking may occur.
4. Place the Water Tank on the humidifier Base. You may hear the water draining into the Reservoir.
Repeat to fill the second Water Tank.
NOTE: If the wicking filter has dried out, it may take up to a minute for the humidifier to turn back on while
the wick absorbs the water.
CAUTION: Use care when handling Water Tanks to avoid unnecessary impact. Banging
or dropping the Water Tanks could result in damage to the Tank that may
cause leaking.
1. Open box and locate locate the two (2)
Float Paddles and set aside. These must be
installed for the humidifier to operate properly.
2. Place the humidifier on a firm, level, water resistant
surface at least 12” (30 cm) from any walls.
DO NOT block Intake Grill on base of unit. DO NOT
place on surfaces that can be damaged by water.
Unpack the Humidifier (Keep this instruction manual for reference.)
SETTING UP YOUR HUMIDIFIER
Step 1 Step 2
Float
Rod
Loading ...
Loading ...
Loading ...