Loading ...
Loading ...
Loading ...
Page 11
ENGLISH
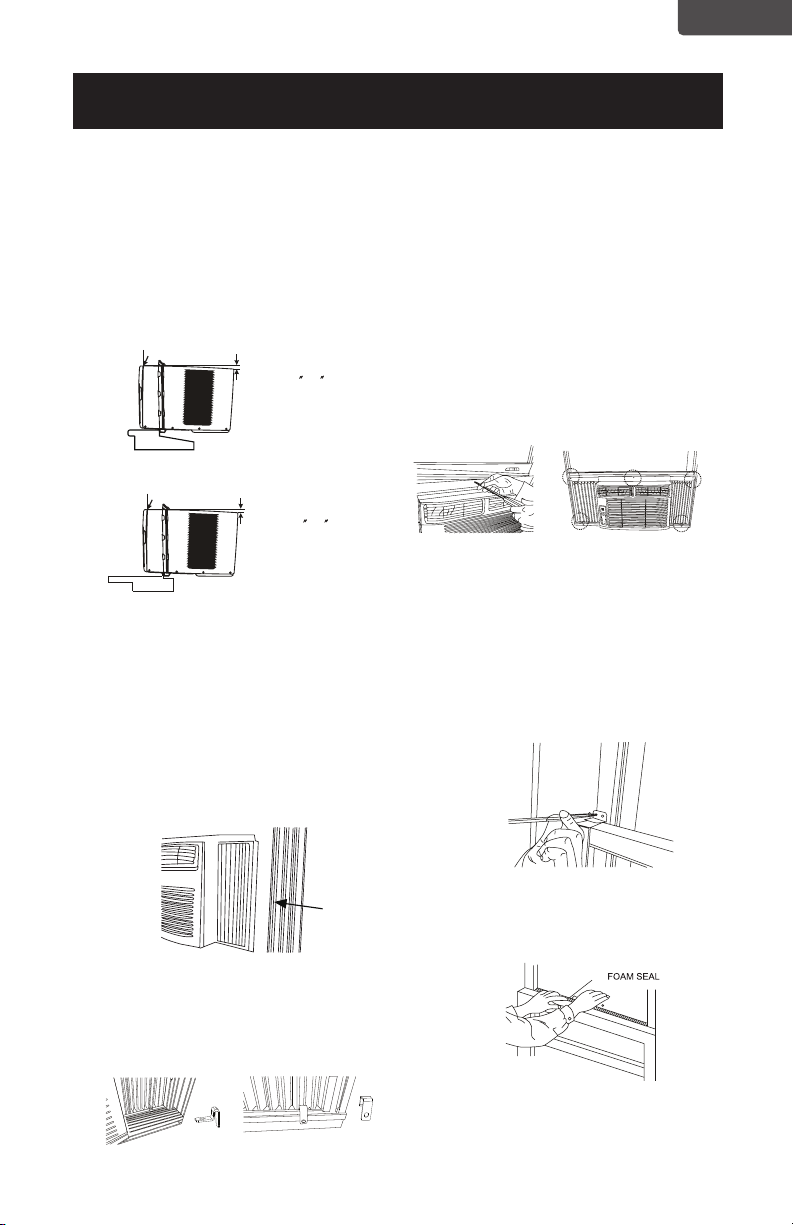
SECURE THE ACCORDION
PANELS
A. Using 2 people, keep a rm grip on
the air conditioner, carefully place
the unit into the window opening
so the bottom of the air conditioner
frame is against the window sill (Fig.
5A and Fig. 5B). Carefully close the
window behind the top rail of the
unit.
NOTE: Check that air conditioner is
tilted back about H (Fig. 5A
and Fig. 5B) (tilted about 3O to
4O downward to the outside).
After proper installation,
condensate should not drain
from the overow drain hole
during normal use, correct the
slope otherwise.
B. Extend the side panels out against
the window frame (Fig.6).
INSTALL SUPPORT BRACKET
A. Place the frame lock between the
frame extension and the window
sill as shown (Fig. 7A for Wooden
windows), (Fig. 7B for Vinyl-Clad
windows).
DRIVE LOCKING SCREWS
FOR WOODEN WINDOWS:
Drive 1/ 2 (12.7 mm) locking screws
through the frame lock and into the sill
(Fig. 8A).
NOTE: To prevent window sill from
splitting, drill 1/8 (3mm) pilot
holes before driving screws.
Drive 1/ 2 (12.7mm) locking
screws through frame holes
into window sash (Fig. 8B).
FOR VINYL-CLAD WINDOWS:
Drive 1/ 2 (12.7 mm) locking screws
through the frame lock and into the
window sash (Fig.8B).
NOTE: Before driving the screws, use
a drill to drill 5 holes through
the holes in the frame lock
and frame extensions into the
windows sash as shown (Fig.
8B).
C. To secure lower sash in place,
attach right angle sash lock with
3/4” (19mm) or 1/2” (12.7mm) screw
as shown (Fig.9).
D. Cut Window sash seal foam and
insert it in the space between the
upper and lower sashes (Fig.10).
SET UP & USE
W
oode
n Win
do
w
s
INSIDE
OUTSIDE
H:Abou t 3/4 to 1 (for 5 to 8K)
H
Fig. 5A
Fig. 5B
Fig. 6
Fig. 8A
Fig. 9
Fig. 10
Fig. 8B
Fig. 7A Fig. 7B
Vin
y
l-Clad Windows
INSIDE
OUTSIDE
H:Abou t 3/4 to 1 (for 5 to 8K
Measure from the cabinet edge
H
window
frame
Loading ...
Loading ...
Loading ...