Loading ...
Loading ...
Loading ...
4.5 + 0.3
Figure5 Figure6
20 GB
2.9. DIMENSIONS OF THE APPLIANCE
Height (mm)
Width (mm)
Depth (mm)
850
598-600
600
60 x 60
W
D
H
863
510
600
50 x 60
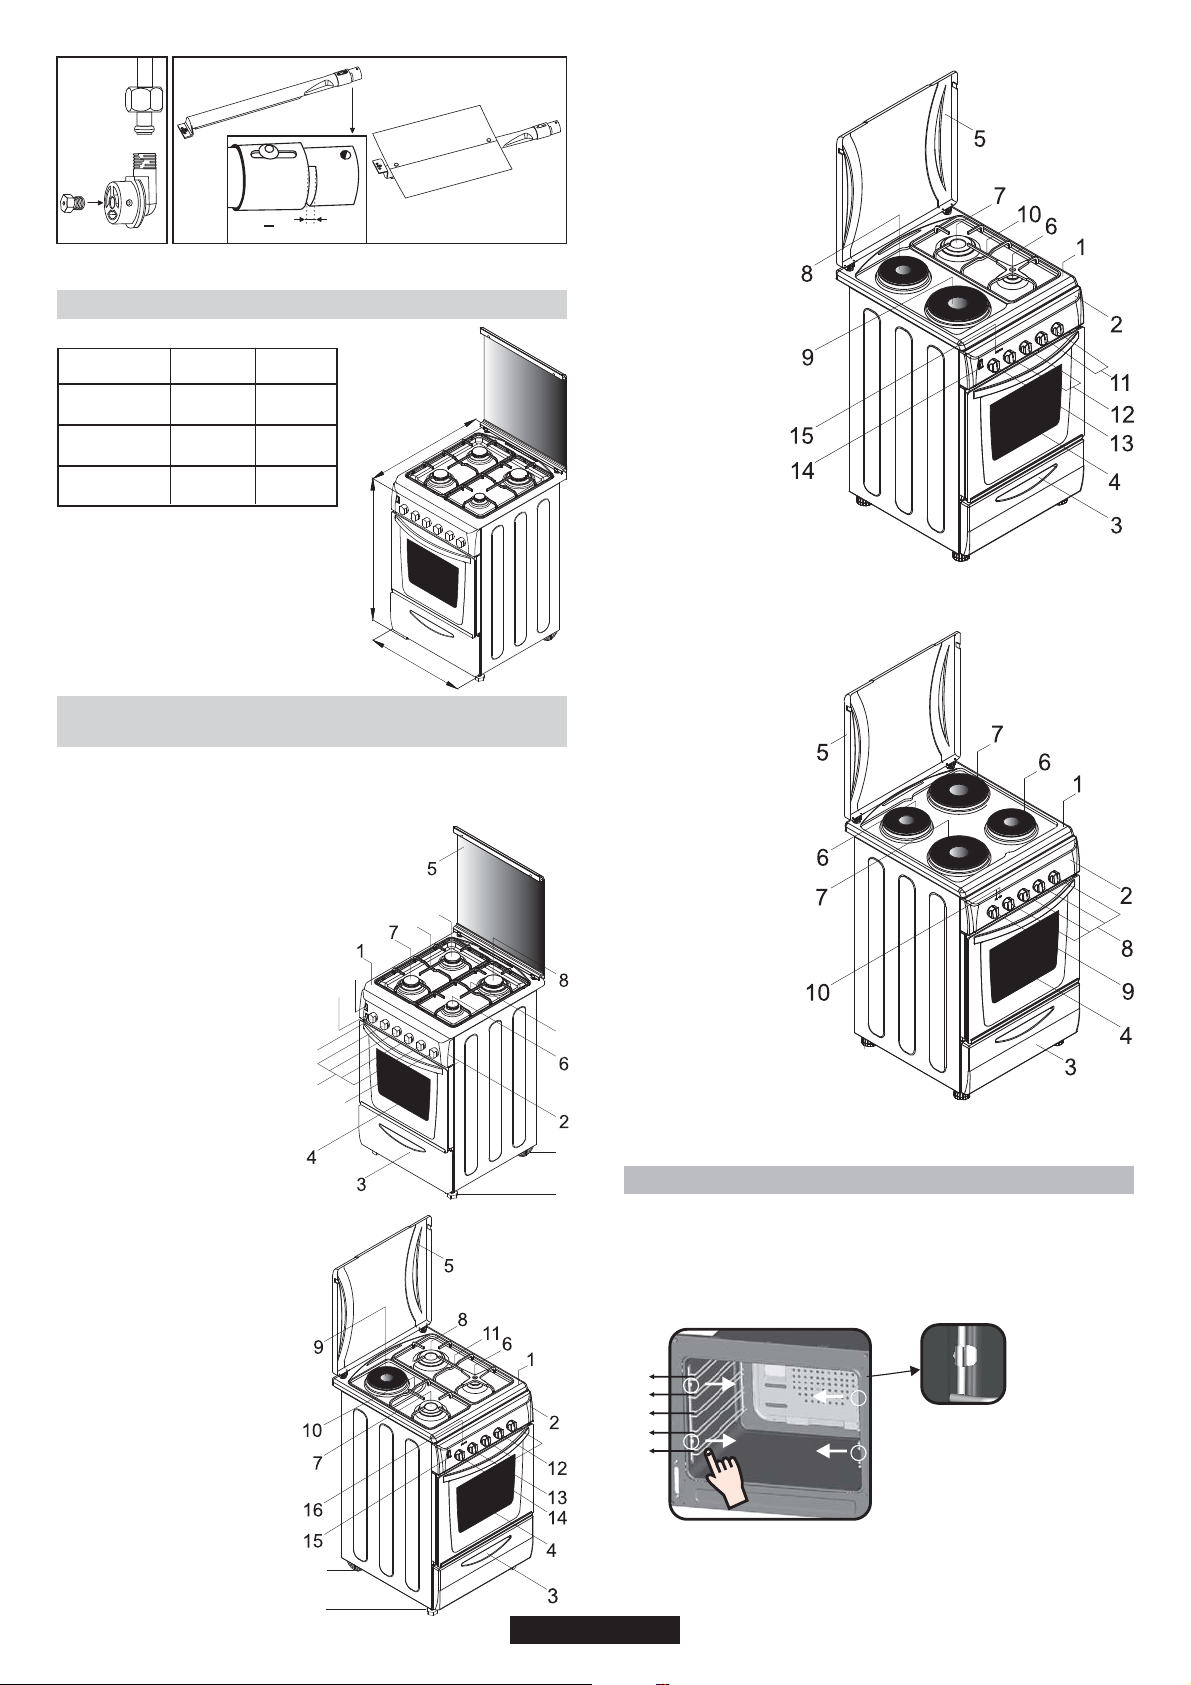
2.10. GENERAL APPEARANCE AND DEFINITION
OF THE APPLIANCE
This User Manual has been drawn up as a guide for several models.
Some of the properties mentioned in this manual may not exist in your
appliance.
1-
2-
3-
4-
5-
6-
7-
8-
9-
10-
11-
12-
13-
14-
15-
16-
17-
18-
Cook top
Control panel
Drawer
Oven door (Front door)
Glass top lid or metallic top lid
Auxilary burner
Rapid burner (Semi-Rapid burner)
Ultra rapid burner (Rapid burner)
Semi-Rapid burner
Left grate
Right grate
Burners control knobs
Thermostat oven knob
Ignition button or fan button
Lamp knob
Timer knob
Moving Foot (Adjustable Feet)
Bolt Foo t(Adjustable Feet)
9
10
11
14
15
13
12
16
17
18
17
18
1-
2-
3-
4-
5-
6-
7-
8-
9-
10-
11-
12-
13-
14-
15-
16-
17-
18-
Cook top
Control panel
Drawer
Oven door (Front door)
Metallic top lid or Glass top lid
Auxilary burner
Rapid burner (Semi-Rapid burner)
Ultra rapid burner (Rapid burner)
Hot plate
Left grate
Right grate
Burners control knobs
Hot plate control knob
Thermostat oven knob
Ignition button or fan button
Signal lamp
Moving Foot (Adjustable Feet)
Bolt Foot (Adjustable Feet)
1-
2-
3-
4-
5-
6-
7-
8-
9-
10-
11-
12-
13-
14-
15-
Cook top
Control panel
Drawer
Oven door (Front door)
Metallic top lid or Glass top lid
Auxilary burner
Rapid burner
Hot plate
Hot plate
Right grate
Burners control knobs
Hot plates control knobs
Thermostat oven knob
Ignition button or fan button
Signal lamp
1-
2-
3-
4-
5-
6-
7-
8-
9-
10-
Cook top
Control panel
Drawer
Oven door (Front door)
Metallic top lid or Glass top lid
Hot plate
Hot plate
Hot plate control knobs
Thermostat oven knob
Signal lamp
REMOVING AND CLEANING WIRE RACKS
1- Remove the wire racks by pulling them in the direction of the arrows
(see below)
2- To clean the wire racks either put them in the dishwasher or use a
wet sponge, ensuring that they are dried afterwards.
3- After the cleaning process install the wire racks in reverse order.
5
4
3
2
1
Loading ...
Loading ...
Loading ...