Loading ...
Loading ...
Loading ...
5
3:
5:
7:
6:
1.-FITTING THE STABILISERS.-
Take the short front stabiliser and
place it at the front of the unit, as
showed in FIG.3, insert the M8*75
SCREWS (2PCS.). Next, Take the Long
rear stabiliser and go thought the
same fing procedure. As with the
front stabiliser.
2. -ATTACHING THE PEDALS.-
Right and le refer to the posion that
the user adopts when to do the
exercises.
Inset the foot pedals onto the cranks
on the boom half of the unit.
Inset the hand pedals onto the cranks
on the top half of the unit.As showed
on Fig. 4.
3. - MAIN CONNECTION.-
Connect the unit to a plug provided of
a ground ( correct voltage ). Put the
swith (L) in
Posion (I) Fig.6 .
I --- MEANS “ POWER ON”
O ---MEANS “POWER OFF”
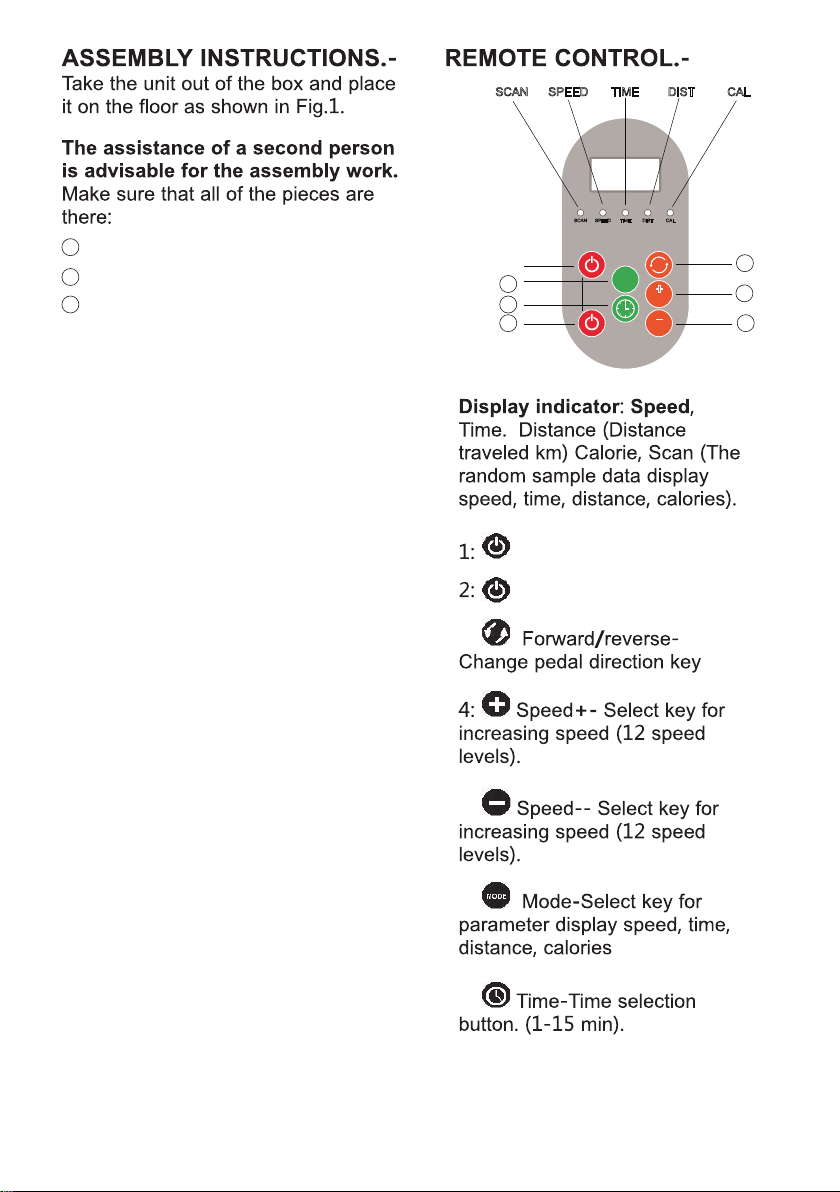
SCAN SPEED
START/STOP
TIME DIST CAL
UP
DOWN
M
TIME
SPEED
SPEED
+
SCAN SPEED TIME DIST CAL
1
2
3
4
5
6
7
Power for the top half of Bike
Power for the boom half of Bike
Main body
2
Accessories
3
Kits bag
Loading ...
Loading ...