Loading ...
Loading ...
Loading ...
6
The dispenser should be drained before cleaning the tanks and before leaving for long vacations or absences.
Draining the Dispenser
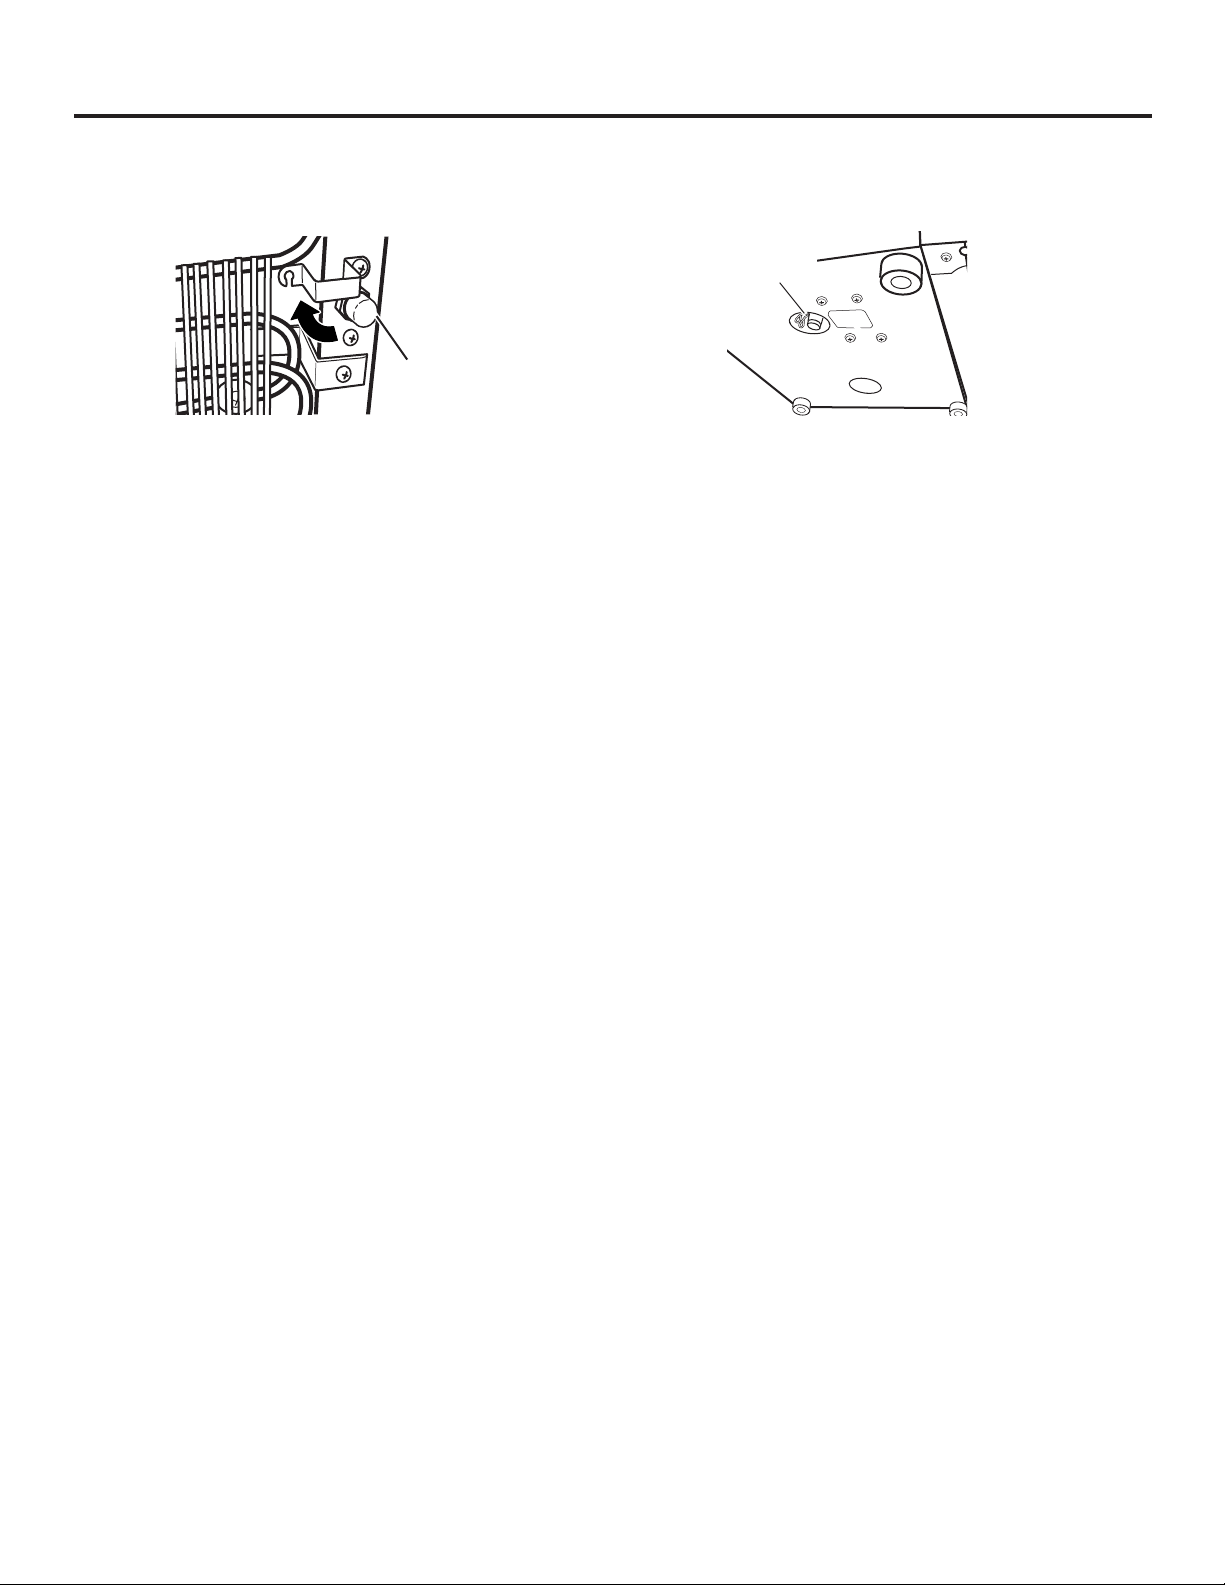
Drain
outlet cap
Storage models
(rear of dispenser)
Storage Models
1. Set both power switches (on the back of the dispenser,
if equipped) in the O (off) position and unplug
the dispenser.
2. Remove the water bottle from the dispenser.
3. Put a container that will withstand hot water under the hot
water tap. Press the hot dispenser button until the water
is cool (about 1 quart). Add water to the cold water reservoir
(on top where the bottle supplies water) as needed.
4. Dispense water from both buttons into container(s) until
no more water can be dispensed (about 1 quart of water
still remains in the dispenser).
5. Place a large bucket beneath the drain outlet on the rear
of the dispenser.
6. Using a Phillips screwdriver, loosen the screws on the bracket
covering the drain outlet cap. Rotate the bracket out
of the way to allow access to the cap.
7. Remove the cap and silicon stopper from the drain outlet and
and allow water to drain. After draining, replace the stopper
and cap.
8. Rotate the bracket back into place and tighten screws.
Make sure to install a full bottle and dispense water from
the hot water tap before plugging in and turning on the dispenser
(see Loading the Dispenser).
Countertop Models
1. Set both power switches (on the back of the dispenser,
if equipped) in the O (off) position and unplug
the dispenser.
2. Remove the water bottle from the dispenser.
3. Put a container that will withstand hot water under the hot
water tap. Press the hot dispenser button until the water
is cool (about 1 quart). Add water to the cold water reservoir
(on top where the bottle supplies water) as needed.
4. Dispense water from both buttons into container(s) until
no more water can be dispensed (about 1 quart of water
still remains in the dispenser).
WARNING: Lift the dispenser carefully; it weighs
approximately 40 lbs (18 kg). Avoid accidentally pressing
the dispenser buttons while lifting or carrying.
5. Place the dispenser over a sink with 3 feet on the counter. Hold
or secure the dispenser steady while removing the retaining
clip and drain cover. Remove the retaining clip
and drain cover from the drain outlet, making sure not
to damage the drain cover. Allow water to drain.
6. After draining, replace the drain cover and retaining clip.
Make sure to install a full bottle and dispense water from
the hot water tap before plugging in and turning on the dispenser
(see Loading the Dispenser).
Drain cover and
retaining clip
Countertop models
(bottom of dispenser)
Care and cleaning of the dispenser.
Loading ...
Loading ...
Loading ...