Loading ...
Loading ...
Loading ...

6
MODEL: RJ02-180-4 MODEL: RJ02-180-4
OPERATING INSTRUCTIONS
Using as a panini press in the closed position:
1. Always preheat the panini maker closed.
2. Before using the panini maker, use a pastry brush to lightly coat the top and
bottom grilling plates with vegetable oil. This will help enhance the non-stick
quality of the grill plates.
IMPORTANT: We recommend not to use non-stick sprays as they can cause
build-up on the cooking plate.
3. Make sure that the removable drip tray is in the correct position before you
use the panini maker.
4. The front two feet of the panini maker can be raised or lowered. Raising the
feet will allow the grease to drain to the back of the appliance when grilling.
5. Adjust the feet by pressing the center tab of each foot. This will cause the foot
to tilt into the upright position and it is now ready for use.
6. Preheat the panini maker for about 3 minutes. Keep the panini maker closed
when preheating.
7. Check to make sure that the cord is fully unwrapped and ready to plug in an
electrical outlet. The (POWER) light will illuminate and remain lit during use.
8. While preheating, prepare your food to be grilled.
9. After approximately 2 minutes, the green (READY) light will light up,
indicating the appliance is preheated and ready for use.
NOTE: When the panini maker is heated for the first time, it may emit a slight
smoke or odor; this is normal and should disappear after 2 or 3 uses. That
does not affect the safety of the appliance.
NOTE: When cooking more than one panini side by side, try to make sure
that each sandwich is similar in thickness. This will allow both to cook quickly,
evenly, and grill well on both the top and bottom.
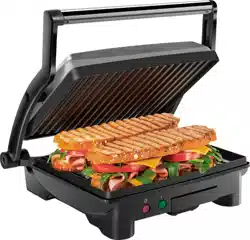
10. Place the panini sandwich centered on the bottom grill plate.
11. Close the handle and gently lower the top grill plate.
12. To ensure a perfectly grilled panini, make sure that the top grill plate lies
evenly on the top of the bread and the sandwich is centered on the grill plate.
If desired, press the handle down several times while cooking to press the
sandwich and make it flatter.
13. During cooking, the green (READY) indicator light will cycle on/off during
cooking. This indicates that the thermostat is maintaining the proper cooking
temperature.
14. Continue grilling until the bread is toasted, and food is cooked to your liking.
15. To remove your grilled panini sandwiches, always use a heat safe plastic or
wooden spatula as the grill becomes hot during cooking.
WARNING: never use a sharp edge or metal utensil as this can scratch the
non-stick finish on the grill plates.
Loading ...
Loading ...
Loading ...