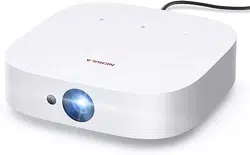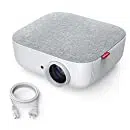
Nebula Prizm
User Manual
© Anker Innovations Limited. All rights reserved.
NEBULA and the NEBULA logo are trademarks of
Anker Innovations Limited, registered in the
United States and other countries.
Mode: D2210
For FAQs and more information, please visit:
www.SeeNebula.com
+1(800) 988 7973 (US) Mon-Fri 9:00-17:00 (PT)
51005000706 V01

English
01
Important Safety Instructions
Read and understand all instructions before you use this device.
Do not make any changes or settings that are not described in this
manual. If physical injury, loss of data, or damage is caused by
failure to follow instructions, the warranty does not apply.
Setup
• Toreducetheriskofreand/orelectricshock,donotexpose
thedevicetorainormoisture,andobjectslledwithliquids,
such as vases, should not be placed on the device.
• Donotplacethedeviceinareassusceptibletoexcessive
dust and dirt or near any appliance generating a strong
magneticeld.
• To prevent overheating, do not block or clog the ventilation
openings.
• Neverplacethedeviceinaconnedspace.Alwaysleave
enough space around the device for ventilation.
• Protect the device against direct sunlight, heat, large
temperature fluctuations, and moisture.
• When the device runs for a long period of time and the
surface becomes hot, shut it down and unplug the power
cord. Resume operation only after the device has cooled.
• Always handle the device with care. Avoid touching the lens.
• Never place heavy or sharp objects on the device or the
power cord.
• To avoid electric shock, do not disassemble.
• Onlyuseattachmentsoraccessoriesspeciedbythe
manufacturer.
• Avoidextremevibration.Itmaydamagetheinternal
components.
Table of Content
01 ImportantSafetyInstructions
04 What’sIncluded
04 Overview
07 GettingStarted
11 UsingtheNebulaPrizm
15 UpdatingtheFirmware
16 Specications
17 Troubleshooting
18 Notice
19 Trademarks
20 Warranty
English
English
02 03
• Do not allow children to handle the device without supervision.
• Under the following conditions, a layer of moisture can
appear inside the device which can lead to malfunctions: a)
if the device is moved from a cold to a warm area; b) after a
cold room is heated; c) when the device is placed in a damp
room. To avoid any moisture, seal the device in a plastic bag
before moving it to another room, and wait for one to two
hours before you take it out of the bag.
Power Supply
• Power off the device before removing the power supply from
the socket.
• Protect the power cord from being walked on or pinched,
particularly at plugs, convenience receptacles, and the point
wheretheyexitfromthisdevice.
• Unplug this device if there are lightning storms or when
unused for a long period of time.
• Where the MAINS plug or an appliance coupler is used as the
disconnect device, the disconnect device shall remain readily
operable.
• Before you make or change any connections, ensure that all
devices are disconnected from the power outlet.
• Never touch the mains cable of the mains connection with
wet hands.
Hearing Safety
• Toavoidhearingdamage,donotlistenforextendedperiods
at high volume. Set the volume at a safe level.
Cleaning
• Power off the device and remove it from the power supply
before cleaning the surface.
• Useasoft,lint-freecloth.Neveruseliquid,gaseous,or
easily flammable cleansers (like sprays, abrasives, polishes,
and alcohol).
• Donotuseanyliquidcleaningagentstocleanthelensas
they may damage the protective coating on the lens.
• Wipe the surfaces gently. Be careful that you do not scratch
the surfaces.
• Use lens cleaning paper to clean the lens of this projector.
Repairs
• Do not make any repairs to the device yourself. Only have
your device repaired by an authorized service center.
• Improper maintenance can result in injuries or damage to
the device.
• Referallservicingtoqualiedservicepersonnel.
Class II equipment symbol
This symbol indicates that the unit has a double insulation system.
Laser Safety
CLASS 1
LASER PRODUCT
IEC 60825-1:2014. Complies with IEC 62471:2006 Risk Group 2.
Caution:
• Possibly hazardous optical radiation emitted from this
device.
• Do not stare at the operating beam. The bright light may hurt
your eyes.
English
English
04 05
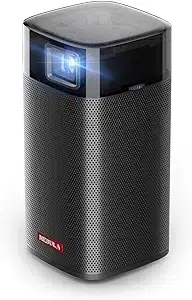
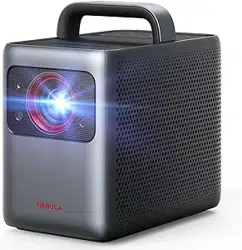
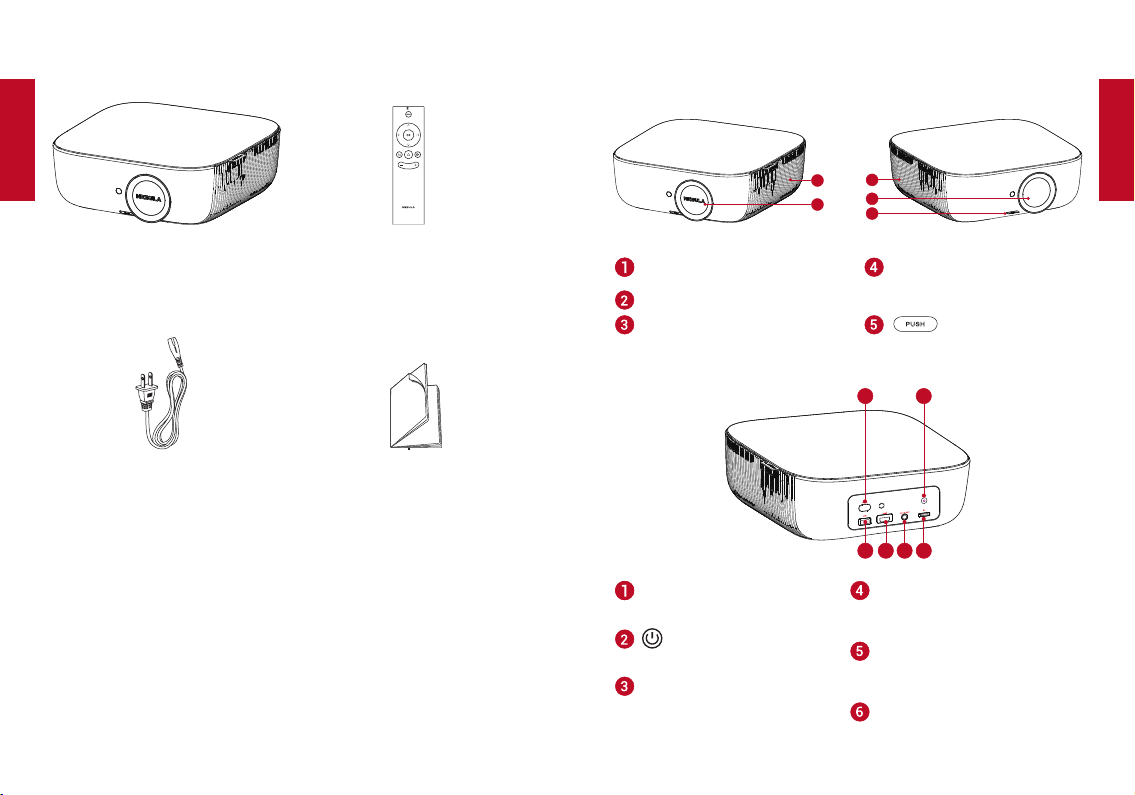
What’sIncluded
Main unit
Power cord
Remote control with batteries
Manual
Overview
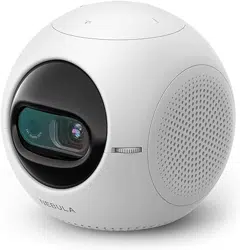
1. FrontView
3
2
1
4
5
Loudspeaker/Airventilation
(inlet)
Lens
• Rotate to adjust focus
Lens cover
Air ventilation (outlet) button
3
5
4
6
1
2
AC-IN
• Connect to power supply
• Presstopoweron/off
USB
• Connect to a USB storage
device
HDMI
• Connect to a playback
device with HDMI output
AUDIO OUT
• Connect to headphone or
externalspeaker
SD card slot
• Insert an SD card
English
English
06 07
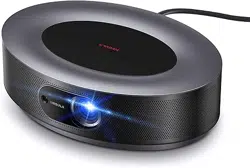
2. BottomView
1
2
Flip stand slot
Tripod socket
3. Remote Control
2
7
3
4
6
5
1
• Poweron/offorswitchtostandby
• Presstoconrmaselectionorentry
• Pause/resumeduringplay
• Press to mute or unmute the
loudspeaker
• Press to access the home menu
Navigation buttons
• Navigate menus or adjust the
selected contents
• Return to a previous menu
• Volumeup/down
GettingStarted
1. Placement
PlaceNebulaPrizmonaflat,stablefoundationsquarelyinfront
of the projection surface. For best results, the projection surface
shall be white and flat. The distance between this projector and the
projection surface must be a minimum of 1 meter (39.4 inches)
andamaximumof3meters(118inches).
1
39.4”
118”
English
English
08 09
The Nebula Prizm comes with a flip stand. To use the flip stand:
①
Press the button.
The flip stand pops out.
②
After use, press the button again, and simultaneously
hold the stand to push it back to the slot.
Note: You can also install your projector in the following ways: from
the rear, front ceiling and rear ceiling. Make sure you select the
correct Projector Mode option in this projector’s menu setting.
2. Select Projection Distance
The distance between this projector and the projection surface
determinestheapproximatesizeoftheimage.Usethetablebelow
todetermineapproximatelyhowfartoplacethisprojectorfromthe
screen based on the size of the projected image.
Screen or image size Projection distance
30 inches (65 cm × 39 cm) 88 cm
60 inches (131.5 cm × 79 cm) 179 cm
72 inches (157.5 cm × 94.5 cm) 213 cm
84 inches (184.5 cm × 111cm ) 249 cm
3. Correct Keystone
It is unnecessary to tilt this projector towards the projection
surface. To correct the keystone, adjust the V. keystone values in
this projector’s menu settings.
4. PreparetheRemoteControl
The remote control comes with two AAA batteries.
①
For the first time use, remove the battery insulation tab to
activate the remote control batteries.
②
To replace the batteries, slide to open the battery compartment,
insertnewbatteries(matchingthepolarity(+/-)indicated),and
close the battery compartment.
English
English
10 11
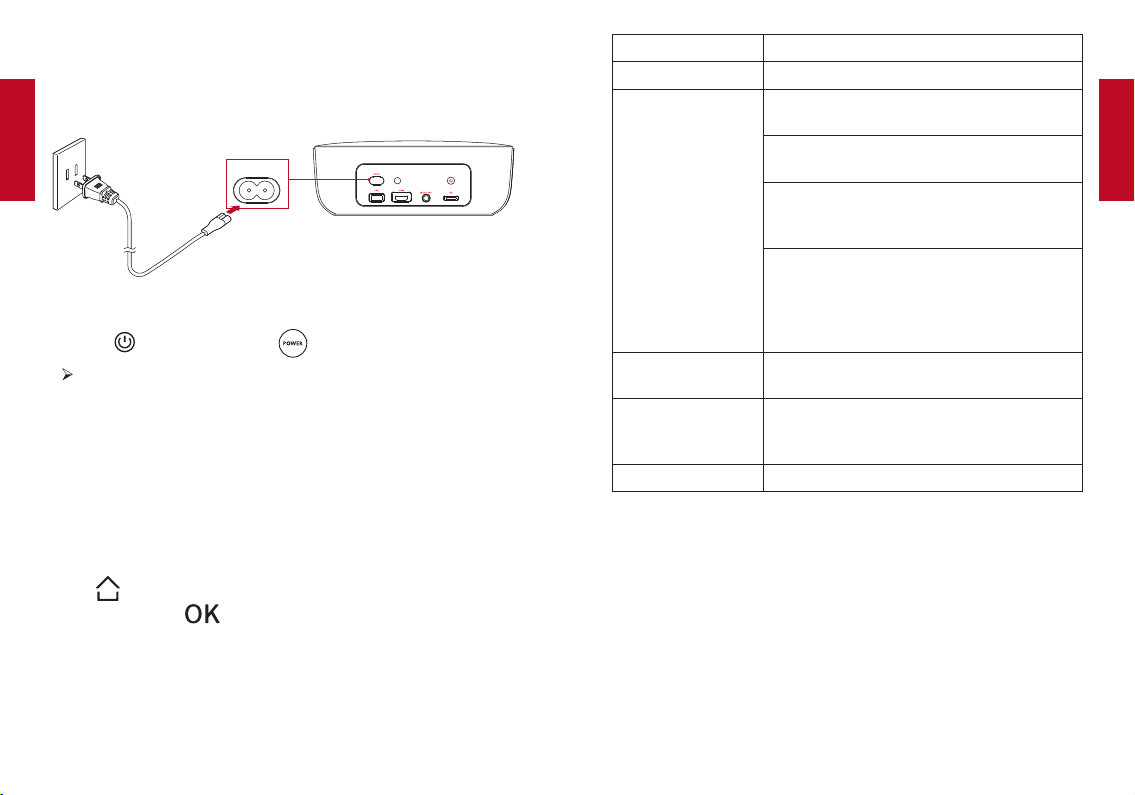
5. PowerOn
①
Connect this projector to the outlet by using the provided power
cord.
AC-IN
②
Remove the lens cover.
③
Press on the rear panel or on the remote control once.
The power button indicator turns from red to white. After 6
seconds,theindicatorwillalternatelyflashwhiteandredve
times, and then this projector will turn on.
④
Turn this projector towards a flat, white projection surface.
⑤
To focus the image, rotate the lens.
6. Settings
Go through the setup process when you turn on this projector for
thersttime.
Press on the remote control to access the home menu, select
[Setting] and press .
[Language] Select an on-screen language.
[Display Mode] [Standard] /[Bright]
[Projector Mode] [Front]: The device is located in front of the
projection surface.
[Rear]: The device is located behind the
projection surface.
[Front Ceiling]: The device is hanging from
the ceiling in an upside down position. The
image is rotated by 180 degrees.
[Rear Ceiling]: The device is hanging from
the ceiling in an upside down position
behind the projection surface. The image
is rotated by 180 degrees and horizontally
mirrored.
[V. Keystone]
Manual keystone correction. The default
value is 0.
[Firmware Upgrade]
Check if it is the latest version. Follow the
on-screen instructions to upgrade the
rmwareversion.
[About] Know the device name and system version.
UsingtheNebulaPrizm
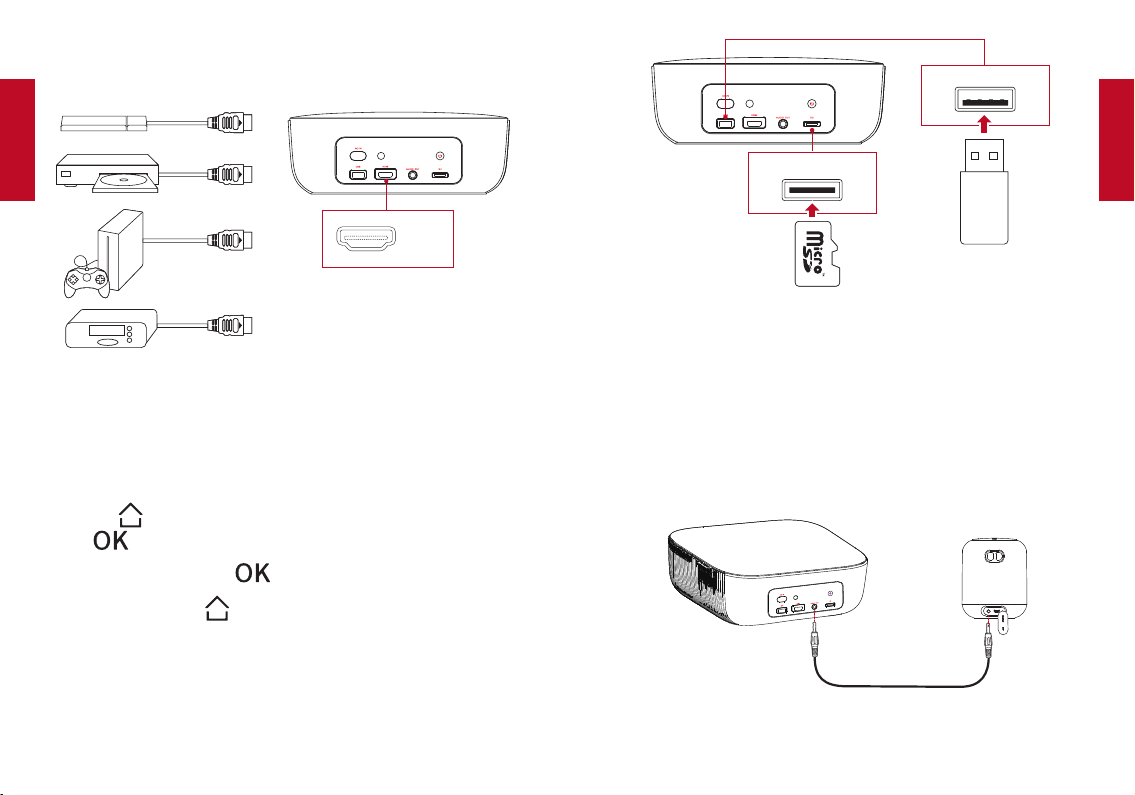
1. PlayfromHDMIPlaybackDevices
This projector can be connected to various HDMI playback devices
suchasaTVbox,TVstick,DVDplayer,set-topbox(STB),game
machine or other devices.
①
Connect this projector to an HDMI playback device with an
HDMI cable (not provided).
English
English
12 13
②
It will automatically start the HDMI playback when connected to
anHDMIplaybackdeviceforthersttime.
HDMI
2. PlayfromaUSBDriveorSDCard
With this projector, you can enjoy music, video, and pictures that
are stored on a USB drive or SD card.
①
Insert the USB drive or SD card into the USB socket.
②
Press to access the home menu, select [USB] or [SD] and
press .
③
Selectale,thenpress .
④
To stop play, press .
USB
SD
3. PlayfromExternalDevices
Thisprojectorcanalsobeconnectedtoexternaldevices,including
headphonesandspeakers.Whenconnectedtoexternalspeakers,
the built-in speaker system is disabled.
①
Use a 3.5mm audio cable or an adapter (not provided) to
connectyourheadphonesorexternalspeakers.
②
Connect the other end of the cable to the AUDIO OUT port on
this projector.
Note: Before connecting headphones, turn down the volume to
avoid straining your ears.
English
English
14 15
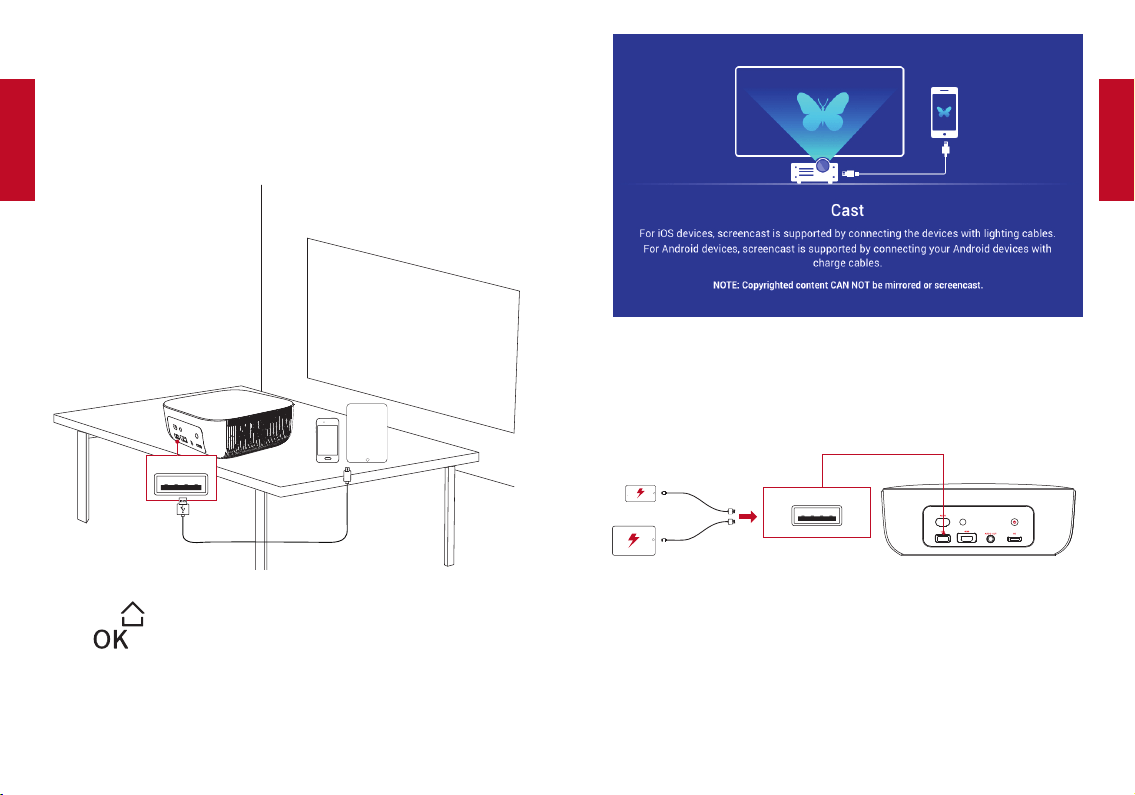
4. UseWireCast
You can mirror the screen of your smartphone or tablet onto the
projection surface.
①
Connect your smartphone or tablet to this projector by using a
USB cable (not provided).
USB
②
Press to access the home menu, select [Wire Cast] and
press .
③
Follow the on-screen instructions to complete the connection.
5. ChargeYourDevices
This projector can also be used as a power bank to charge your
USB devices.
USB
UpgradingtheFirmware
ToUpgradethermware,followtheinstructionsbelow:
①
DownloadthermwareupgradesoftwarewithaUSBdrivefrom
the Nebula website: SeeNebula.com.
②
Insert the USB drive into this projector’s USB port.
English
English
16 17
③
Press to access the home menu, select [Setting]> [Firmware
Upgrade].
④
Select [USB].
Thermwareupgradewillautomaticallybegin.Followtheon-
screen instructions to complete the process.
Specications
Specifications and design are subject to change without
notice.
Power supply: AC 110~240V
Power consumption: < 85 W
Display technology: 4 inch LCD 800 × 480
Light source: RGB LED
Projection image size: 40 - 100 inch
Resolution:800x480Pixel
Brightness:100ANSI/500lumens
Contrast ratio: 1000
:
1
Throw ratio: 1.4
Throw distance: 1m to 3m
Speaker drivers: 5W
Remote control batteries: 2 AAA batteries
Recommendedoperatingtemperature:5°Cto35°C/32°Fto95°F
Relative humidity: 15% ~ 85% (non-condensing)
Storagetemperatureandhumidity:<65°C/149°F,<90%humidity
Dimensions(WxHxD):253x228x94mm
Weight:
Troubleshooting
①
Fail to power on by the remote control?
• Make sure that this projector is connected to the power
supply.
③
The remote control doesn’t work?
• Make sure the battery is already installed in the remote
control.
• Replace new batteries.
④
Blurred image?
• Press
on the remote control to access the home menu,
select [Setting] > [V. Keystone] to adjust the keystone value.
• Rotate the keystone correction knob to focus the image.
⑤
Reversed projection image?
• Press
to access the home menu, select [Setting] >
[Projector Mode] and switch to a correct state.
English
English
18 19
Notice
Thisproductcomplieswiththerequirementsofthe
European Community This product can be used across EU
member states.
This product is designed and manufactured with high
qualitymaterialsandcomponents,whichcanberecycled
and reused.
This symbol means the product must not be discarded as
household waste, and should be delivered to an appropriate
collection facility for recycling. Proper disposal and
recycling helps protect natural resources, human health
and the environment. For more information on disposal and
recycling of this product, contact your local municipality,
disposal service, or the shop where you bought this product.
FCC Notice
This device complies with the FCC rules, Part 15. Operation is
subject to the following two conditions: (1) This device may not
cause harmful interference, and (2) This device must accept
any interference received, including interference that may cause
undesired operation.
Warning:Changesormodicationsnotexpresslyapprovedbythe
partly responsible for compliance could void the user’s authority to
operatetheequipment.
Note:Thisequipmenthasbeentestedandfoundtocomplywith
the limits for a Class B digital
device, pursuant to part 15 of the FCC Rules. These limits are
designed to provide reasonable protection against harmful
interference in a residential installation.
Thisequipmentgenerates,usesandcanradiateradiofrequency
energy and, if not installed and used in accordance with the
instruction manual, may cause harmful interference to radio
communications. However, there is no guarantee that interference
willnotoccurinaparticularinstallation.Ifthisequipmentdoes
cause harmful interference to radio or television reception, which
canbedeterminedbyturningtheequipmentoffandon,theuseris
encouraged to try to correct the interference by one or more of the
following measures:
• Reorient or relocate the receiving antenna.
• Increasetheseparationbetweenequipmentandreceiver.
• Connecttheequipmentintoanoutletonacircuitdifferent
from that to which the receiver is connected.
• Consultthedealeroranexperiencedradio/TVtechnicianfor
help.
FCC Radiation Exposure Statement:
ThisequipmentcomplieswithFCCradiationexposurelimitsset
forthforanuncontrolledenvironment.Thisequipmentshouldbe
installed and operated with a minimum distance of 20cm between
the radiator and your body. This transmitter must not be co-located
or operated in conjunction with any other antenna or transmitter.
Notice: Shielded cables
All connections to other computing devices must be made using
shielded cables to maintain compliance with FCC regulations.
Trademarks
HDMI,andHDMIlogoandHigh-DenitionMultimediaInterfaceare
trademarks or registered trademarks of HDMI licensing LLC in the
United States and other countries.

English
20
Warranty
30-Day Money-Back Guarantee for Any Reason
You may return your undamaged product and packaging within 30
days of purchase to receive a FULL REFUND for any reason. If the
reasonforreturnisn’tquality-related,thecustomermustpayfor
the return shipping.
12-Month Warranty for Quality-Related Issues
Nebula’s products are warrantied to be free from material and
workmanship defects for 12 months from the date of purchase.
Within this period, Nebula will provide a replacement and cover any
return shipping costs for products that fail in normal use.
Please Note: Any provided shipping labels must be used within 20
days from the date they’re issued by Nebula Support.
+1 (800) 988 7973 (US) Mon-Fri 9:00 - 17:00 (PT)
www.SeeNebula.com
© Anker Innovations Limited. All rights reserved. NEBULA and
the NEBULA logo are trademarks of Anker Innovations Limited,
registered in the United States and other countries.