Loading ...
Loading ...
Loading ...
11
10
6
5
6
E
G
4
11
11. IMPORTANT: Do not insert batteries into
the Console (5) until instructed to do so in
assembly step 13. If the batteries are inserted
before the Console Wire (G) is connected, the
Console will not function properly.
Tip: Avoid pinching the Console Wire (G).
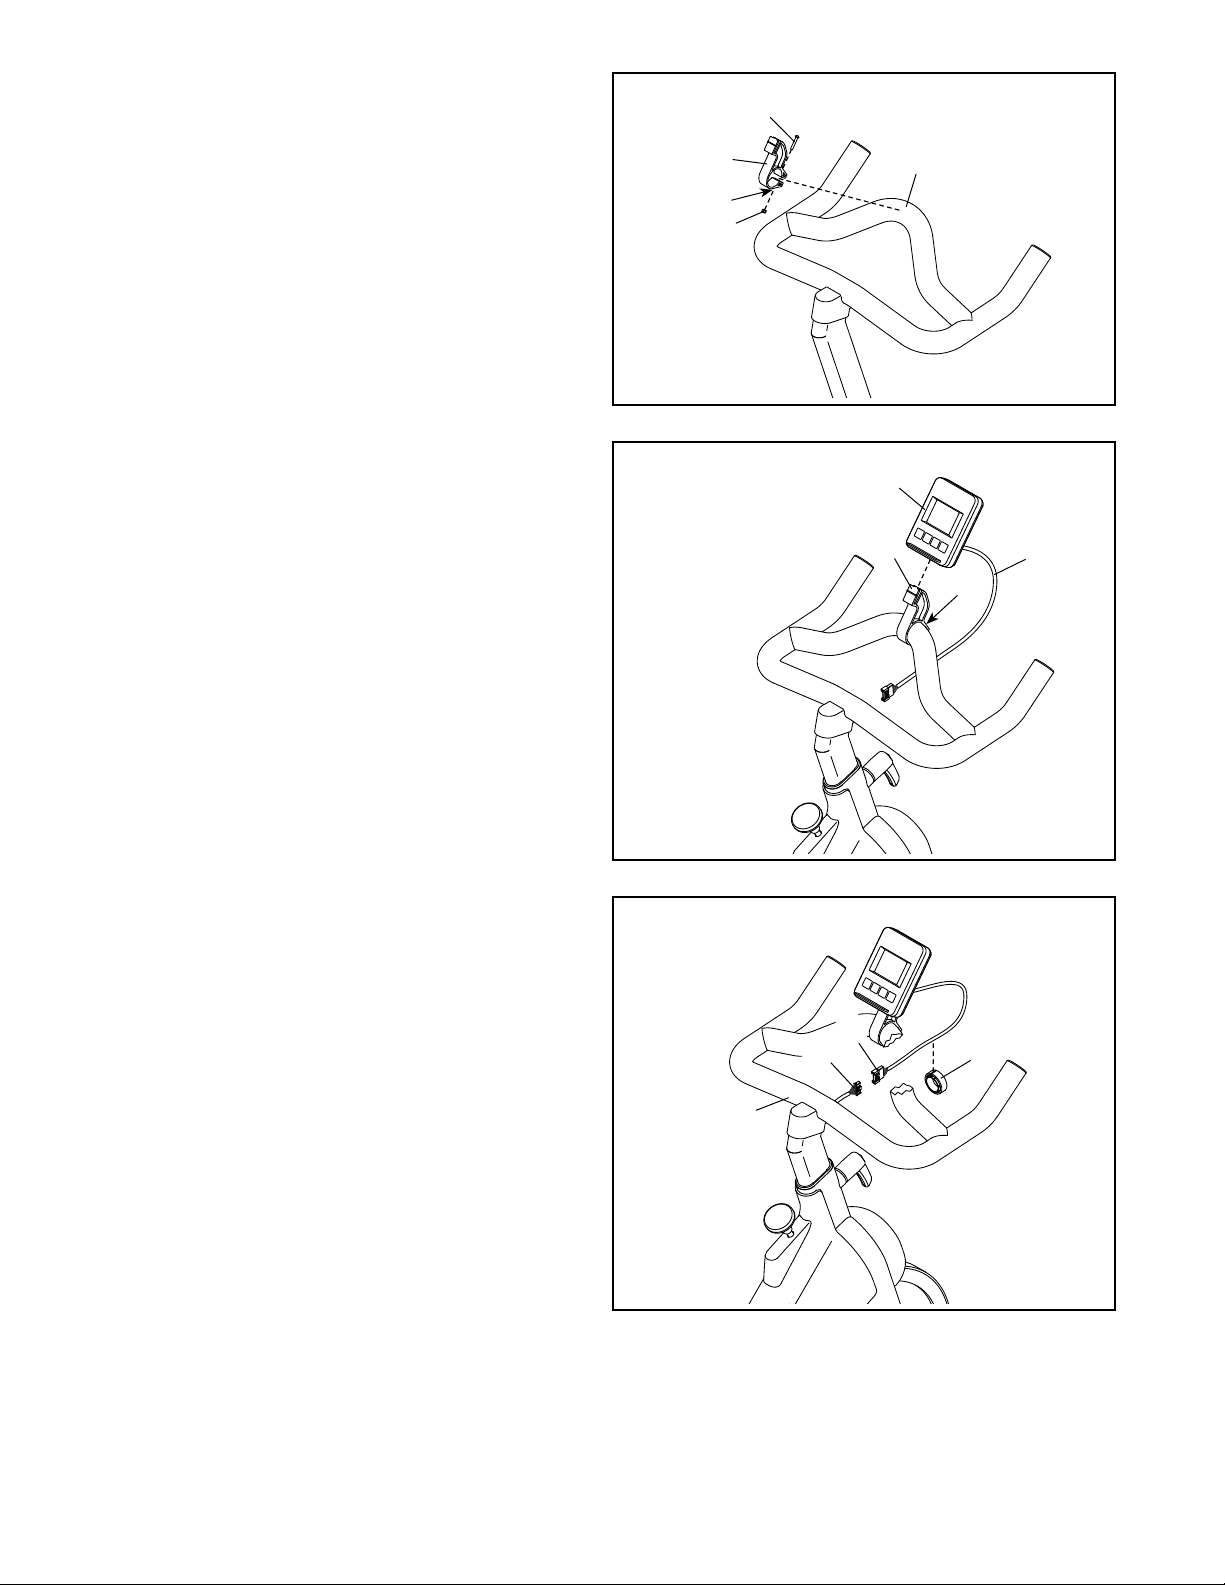
Slide the Console (5) onto the Mount (E). Next,
pivot the Console and the Mount to the desired
angle. Then, tighten the M4 x 25mm Screw (6).
26
E
F
10. Orient the Mount (E) as shown. Pull the Mount
open slightly and slide it onto the center of
the Handlebar (4). Attach the Mount with an
M4 x 25mm Screw (6) and an M4 Nut (26).
Make sure that the M4 Nut is pressed firmly
into the indicated hex hole (F) in the Mount.
Do not fully tighten the Screw yet.
12
12. Connect the Console Wire (G) to the Upper
Wire (56); make sure to align the connectors
properly and make sure to press the
connectors together firmly.
Next, press the Wire Protector (85) around the
Console Wire (G) in the location shown.
Then, insert the Wires (G, 56) into the Handlebar
(4), and press the Wire Protector (85) into the
Handlebar.
85
4
56
G
Do not insert
batteries into the
Console (5) yet
Loading ...
Loading ...
Loading ...