Loading ...
Loading ...
Loading ...
3/4” FULL-WIDTH OVERLAY CUSTOM PANELS WITH CUSTOM HANDLES
This panel design provides a nearly trimless appearance.
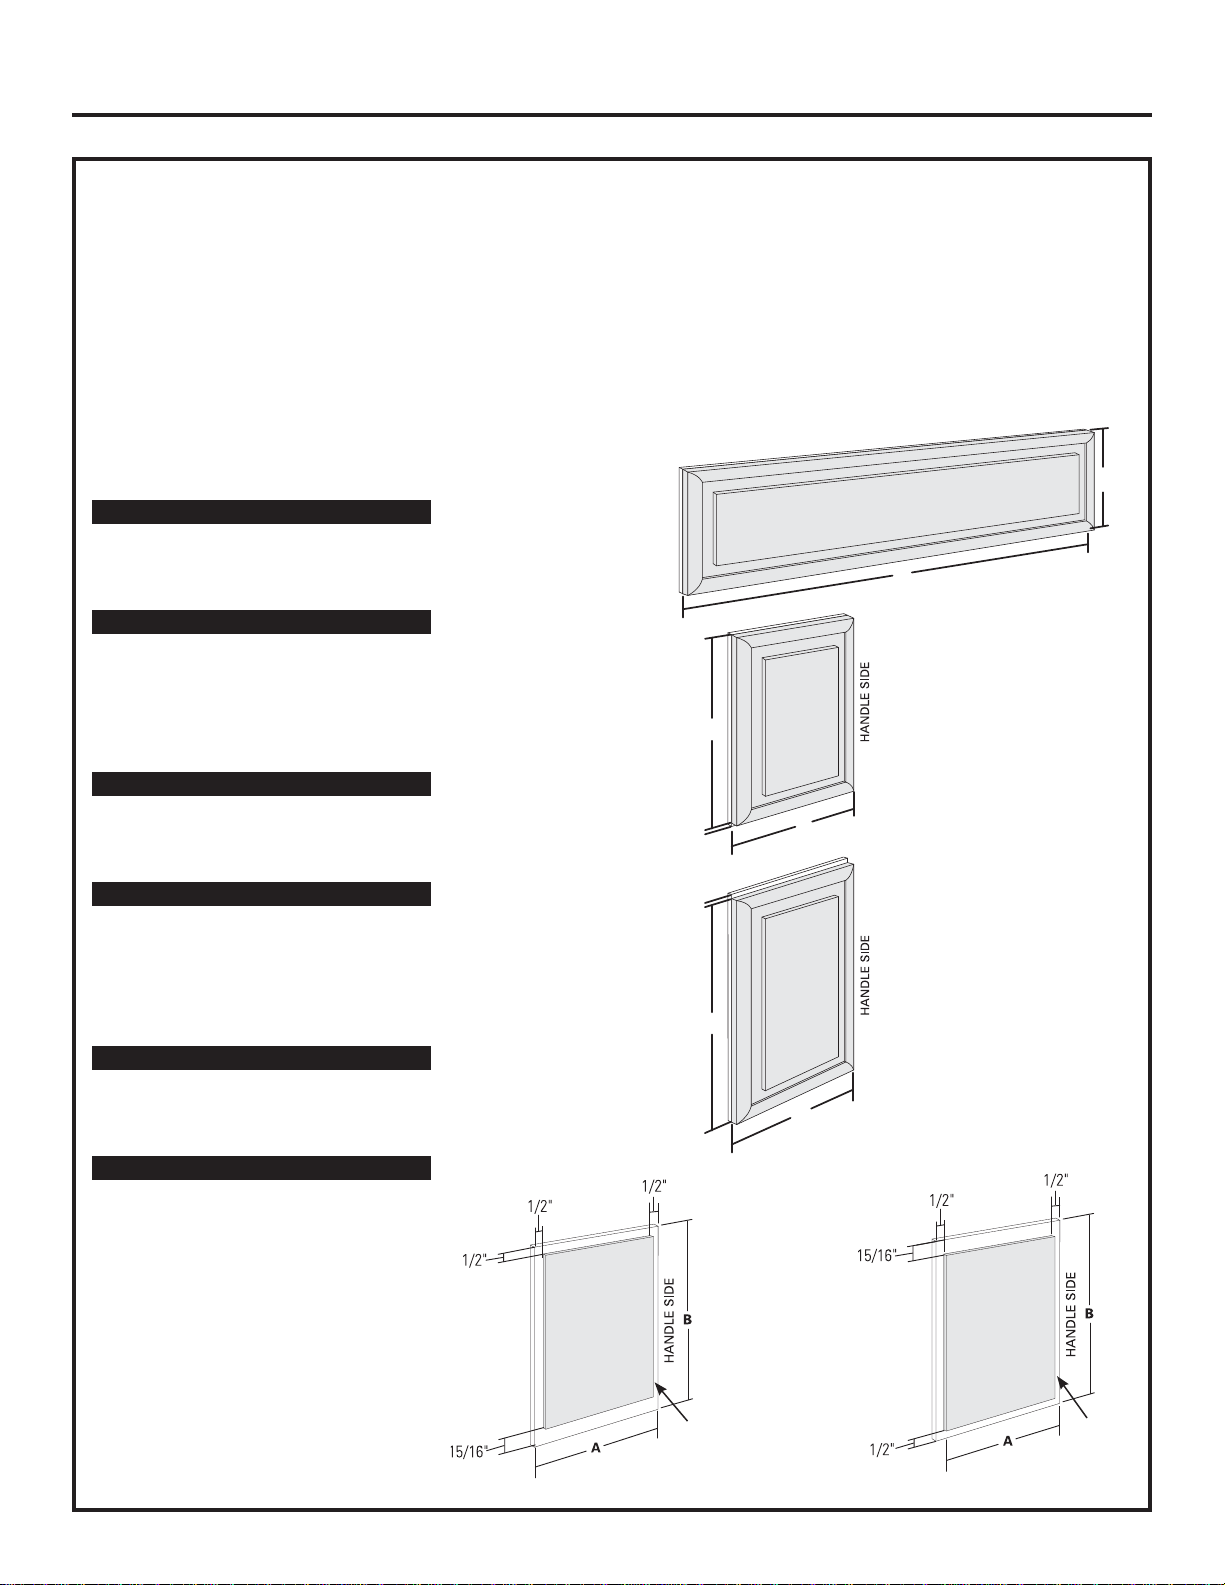
Assemble the spacer panel onto the backer panel. Allow 1/2” clearance on all four sides of the grille spacer
panel. Allow 1/2” clearance on the top, hinge side and handle side, and 15/16” on the bottom of the upper
freezer door panel. Allow 15/16” on the top and 1/2” clearance on the bottom, hinge side and handle side
of the lower freezer door panel. Secure the panels with glue. Be sure to observe clearances on all sides.
Secure the appearance panel to the assembled backer/spacer panel. Use glue
and screws. Countersink screws into the backer panel.
Grille Panel
Lower Freezer Panel
Upper Freezer Panel
Installation Instructions
30
42” Models A B
1/4” Backer Panel 39-15/16” 10-3/4”
0.10” Spacer Panel 38-15/16” 9-3/4”
3/4” Overlay Panel 40-3/16” 11”
48” Models A B
1/4” Backer Panel 45-15/16” 10-3/4”
0.10” Spacer Panel 44-15/16” 9-3/4”
3/4” Overlay Panel 46-3/16” 11”
42” Models A B
1/4” Backer Panel 16-7/16” 35-1/8”
0.10” Spacer Panel 15-7/16” 33-11/16”
3/4” Overlay Panel 16-7/16” 34-15/16”
48” Models A B
1/4” Backer Panel 18-7/16” 35-1/8”
0.10” Spacer Panel 17-7/16” 33-11/16”
3/4” Overlay Panel 18-7/16” 34-15/16”
42” Models A B
1/4” Backer Panel 16-7/16” 17-13/16”
0.10” Spacer Panel 15-7/16” 16-3/8”
3/4” Overlay Panel 16-7/16” 17-5/8”
48” Models A B
1/4” Backer Panel 18-7/16” 17-13/16”
0.10” Spacer Panel 17-7/16” 16-3/8”
3/4” Overlay Panel 18-7/16” 17-5/8”
Spacer
Panel
Finished
Backer
Panel
Spacer
Panel
Finished
Backer
Panel
Upper Freezer Panel
Spacer Assembly
Lower Freezer Panel
Spacer Assembly
5/16"
A
B
5/16"
A
B
A
B
Loading ...
Loading ...
Loading ...