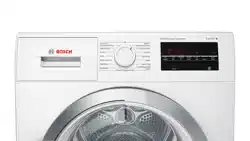
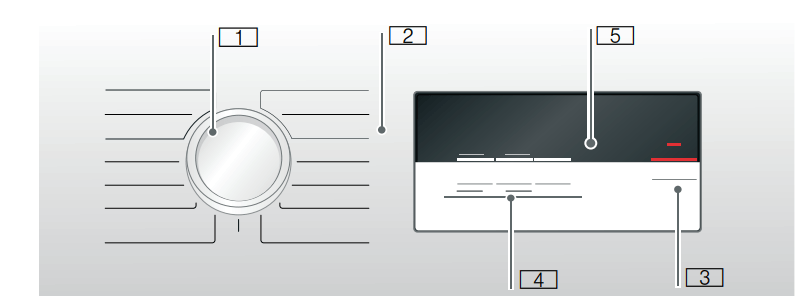
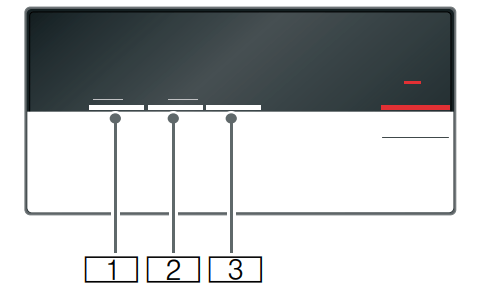
Programme selector for switching the dryer on/off and selecting the programme.
Programmes ~ Page 23.
Start button for starting or interrupting the programme ~ Page 25.
Buttons for applying default programme settings ~ Page 25.
Display panel ~ Page 21.
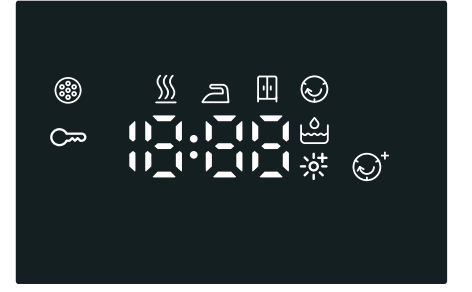
Display panel
Buttons on the display panel
Drying level.
Ready in.
Anti-crease.
For a detailed description of all buttons, see ~ Page 25onwards.
Display panel
Empty the condensate container ~ Page 27
Clean the fluff filter ~ Page 28 and clean the EasyClean filter ~ Page 31.
: Programme progress for Dry, Iron Dry, Cupboard Dry, Anti-crease, Pause and End of programme.
Childproof lock active ~ Page 25.
Anti-Crease selected.
Drying level selected.
Expected programme duration in hours and minutes.
Programme will end in 3 h/hours with the "Ready in" time selected.
Operating the appliance
Loading laundry and switching on the dryer
Note: The dryer must be correctly positioned and connected, ~ Page 13.
Place the laundry in the drum.
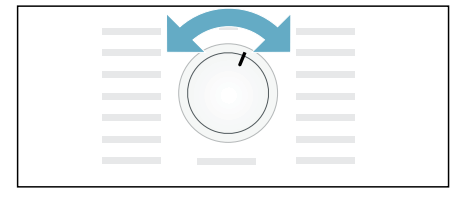
Turn the programme selector to any programme to switch the dryer on.
Close the dryer door.
Setting a programme
Note: If you have activated the childproof lock, you must deactivate it before you can set a programme, see ~ Page 25.
1. Select the required programme; detailed information on the programmes can be found on ~ Page 23 onwards.
2. Use the programme selector to set the required programme. The default programme settings for the selected programme appear in the display panel.
Note: Default programme settings are standard settings that are already defined when a programme is selected. After selecting a programme, you can see the default programme settings in the display panel.
3. If required, adjust the default programme settings. You can find detailed information on this on ~ Page 25 onwards.
Starting the programme
Press the Start button.
Note: If you want to lock the programme to prevent it from being adjusted inadvertently, you can select the childproof lock, see ~ Page 25.
Changing the programme or adding laundry
You can remove or add laundry and change or alter the programme at any time during drying.
To pause the programme, open the dryer door or press the Start button.
Add or remove laundry.
Select another programme or an additional function, if required.
Close the dryer door.
Press the Start button.
Note: The programme duration in the display panel is updated depending on the load and residual moisture in the laundry. The values displayed may change after the programme is changed or the load is adapted.
Cancelling the programme
The programme can be interrupted at any time; to pause, open the dryer door or press the Start button.
Programme end
appears in the display panel.
Removing laundry and switching off the dryer
Remove the laundry.
Turn the programme selector to the "off" position.
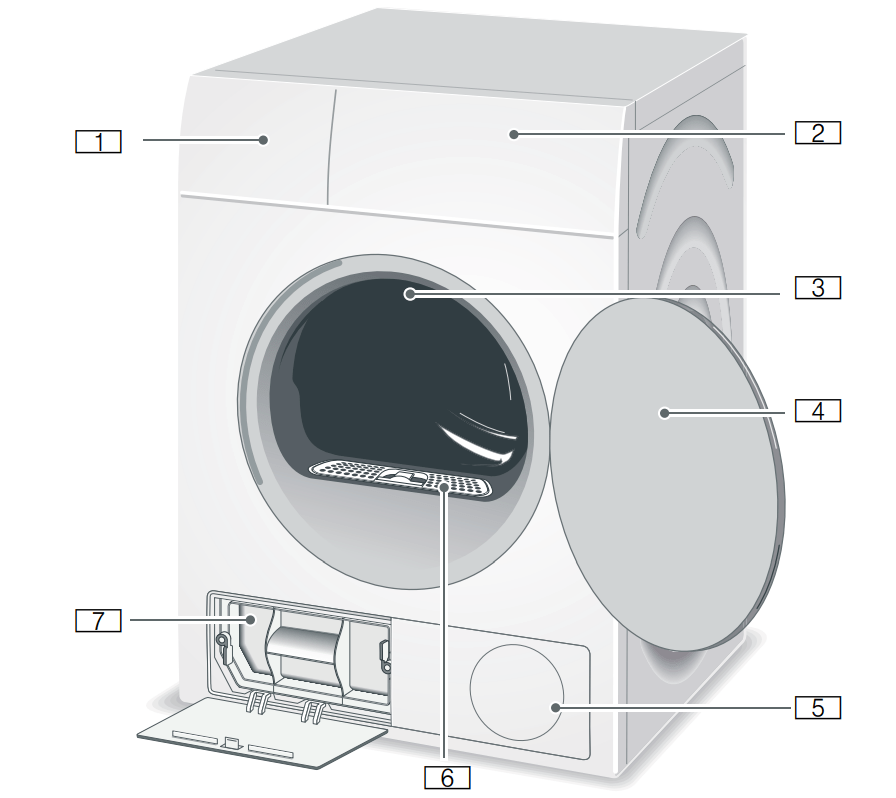
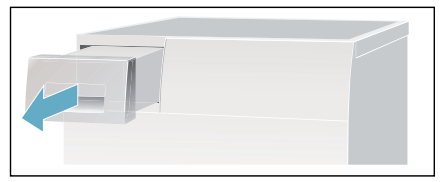
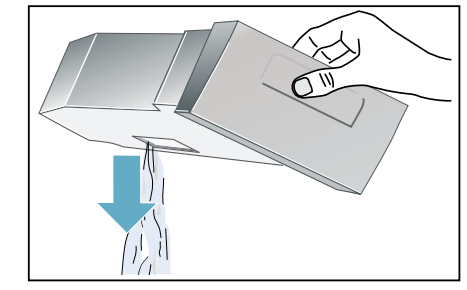
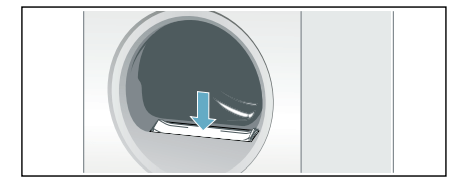
Emptying the condensate container
By default, the condensation from the appliance runs into the condensation container.
Alternatively, you have the option of discharging the condensation water* supplied depending on the model. If you choose to discharge the condensation water into the waste-water system, you will not need to empty the condensation container during the drying programme or after each time you use the dryer.
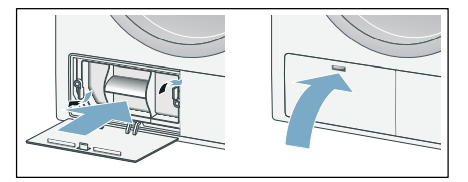
1. Pull out the condensate container horizontally.
2. Pour out the condensation water.
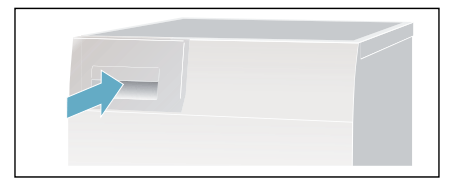
3. Push in the condensate container until you feel it lock back into place in the dryer.
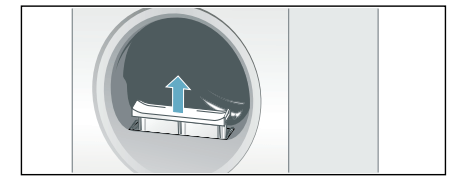
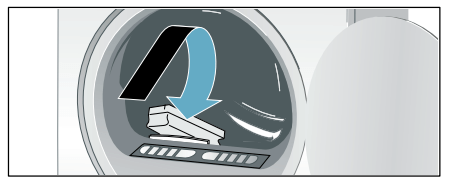
Clean the fluff filter
Clean the fluff filter after each drying cycle:
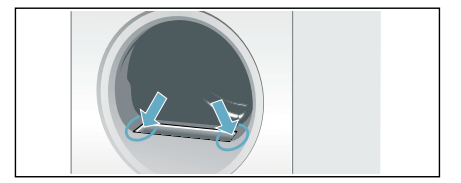
1. Open the dryer door and remove all fluff from the door.
2. Pull out the two-part fluff filter.
3. Remove the fluff from the recess in the fluff filter.
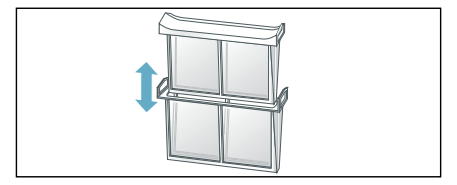
4. Pull apart the two-part fluff filter.
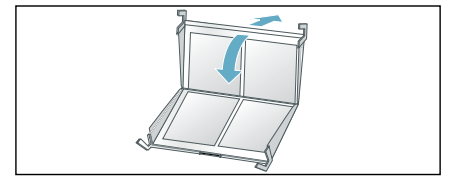
5. Open both filters and remove all the fluff.
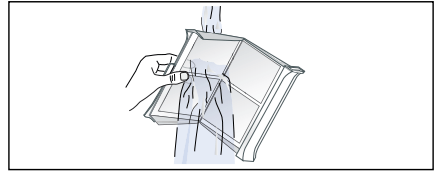
6. Rinse away the fluff under warm, running water.
7. Dry the fluff filter, close it and reinsert the two-part fluff filter.
Cleaning
Cleaning the dryer and the control panel
Clean the dryer using only water and a soft, damp cloth.
Remove all detergent residue, spray residue or other residues immediately. Do not use cleaning agents or agents for pre-treating laundry (e.g. prewash sprays, stain removers). Do not use high-pressure cleaners or steam jet cleaners to clean your appliance.
Cleaning the moisture sensor
Note: The dryer is equipped with a stainless-steel moisture sensor. The moisture sensor measures how damp the laundry is.
After long periods of usage the moisture sensor may become covered by a fine layer of limescale or residues of detergents and care products. Such residues must be removed regularly as the sensor function and in consequence the drying result may be impaired.
Open the door and clean the moisture sensor with a coarse sponge.
Caution! Moisture sensor may be damaged. Do not clean moisture sensors with abrasives and steel wool.
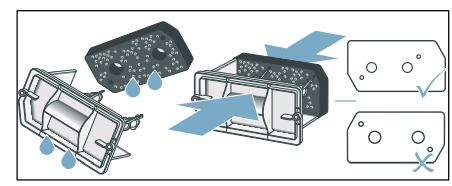
Cleaning the EasyClean filter
When appears in the display panel, clean the EasyClean filter as follows:
1. First clean the fluff filter ~ Page 28.
2. Close the door of the dryer.
3. Open the maintenance flap on the heat exchanger.
4. Release the levers on the EasyClean filter.
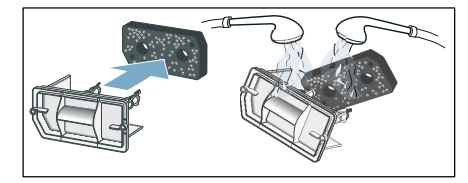
5. Use the grip handle to pull the EasyClean filter out.
6. Now take off the filter mat.
7. Wash out the filter mat by hand using clean water.
Notes
– If the filter mat is covered with stubborn dirt, you can also remove this carefully using a vacuum cleaner.
– Do not use cleaning agents.
8. Dry the filter mat by squeezing the water out.
Note: Only use the filter mat if it is clean and dry.
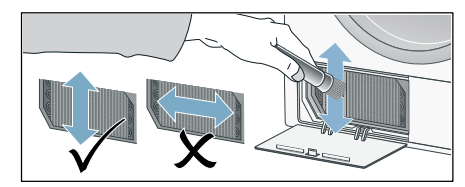
9. Put the filter mat back on
Note: Ensure that the filter mat is not misshapen, torn or clogged. Position the filter mat as shown above.
10.Check how dirty the dryer's heat exchanger is before putting the EasyClean filter back in. If it is very dirty, use a vacuum cleaner with a brush attachment to clean it carefully from top to bottom.
11.Slide the EasyClean filter in and make sure it clicks into place.
12.Close the maintenance flap.
13.Switch the dryer off.
You have now cleaned the EasyClean filter.
Note: If your filter mat is damaged, you can order a new one from the aftersales service using part number: 12007650.
Contact information for all countries can be found on the enclosed after-sales service list.
Faults and what to do about them
Faults
Cause/remedy
in the display panel and drying was interrupted.
■ Empty the condensation container and press the Start button.
■ If the optional condensation drain has been installed, the drain hose may be blocked or kinked.If the optional condensation drain has been installed, the drain hose may be blocked or kinked. Check the hose for deposits and flush the hose through. Lay the hose without any kinks.
in the display panel
■ Clean the fluff filter ~ Page 28.
■ Clean the EasyClean filter ~ Page 31.
The dryer will not start.
■ Start button selected?
■ Mains plug plugged in or fuse/circuit breaker checked?
■ Programme selected? Select a programme.
■ Dryer door open? Close the door.
■ Childproof lock activated? Deactivate the childproof lock.
■ "Ready in" time selected? Programme starts after a delay.
Creasing.
■ Creasing occurs when you have exceeded the maximum load or selected the wrong programme for the type of fabric. All the required information can be found in the programme table.
■ Remove clothes immediately after drying; creasing may occur if they are left in the drum.
Water is leaking out.
Not a fault; the dryer may be positioned on an incline. Level the dryer.
Programme duration displayed changes during drying.
Not a fault. The moisture sensors detect the remaining moisture in the load and adjust the programme length accordingly (except timed programmes).
Laundry is not dried correctly or is still too damp
■ After the end of the programme, warm laundry feels damper than it actually is. Spread the laundry out and allow the heat to disperse.
■ Fine tune the dryness level. This extends the drying time but does not increase the temperature. Your laundry will become drier ~ Page 25.
■ Select a programme with a longer drying time or increase the dryness level. This does not increase the temperature.
■ Select a timed programme to add extra drying time for laundry that is still damp ~ Page 23.
■ If you have exceeded the maximum load for the programme, the laundry may not be dried properly.
■ Clean the moisture sensor in the drum. The sensor may become covered in a fine layer of limescale or detergent and care product residue, which then impairs its performance. This prevents your laundry from being dried properly ~ Page 31.
■ Drying has stopped as a result of a power cut, because the condensation container is full or because the maximum drying time has been exceeded.
Note: See also the laundry tips ~ Page 22.
Drying time too long?
■ The fluff filter or the EasyClean filter may be dirty, which will make the drying time longer. Clean the fluff filter or the EasyClean filter.
■ If the air inlet on the dryer is blocked or not freely accessible, this may increase the drying time. Make sure that the air inlet remains unobstructed.
■ The optimum ambient temperature for drying is between 15 °C and 30 °C. Outside of this range, the drying time may increase.
■ Insufficient air circulation in the room may increase the drying time. Ventilate the room.
Display panel goes out and Start button flashes.
Not a fault. Energy saving mode is active ~ Page 12.
Humidity in the room is increasing.
Not a fault. Make sure the room is adequately ventilated.
Power failure.
The drying programme is stopped. Remove the laundry and spread it out, or restart the programme.
Unusual noises when drying.
Not a fault; see also ~ Page 30.
The dryer feels cold despite drying.
Not a fault. The dryer can dry effectively at low temperatures using a heat pump
* Depending on the model
Note: If you cannot rectify the fault yourself by turning the dryer off and then on again, please contact our after-sales service.


 : Programme progress for Dry, Iron Dry, Cupboard Dry, Anti-crease, Pause and End of programme.


 appears in the display panel.
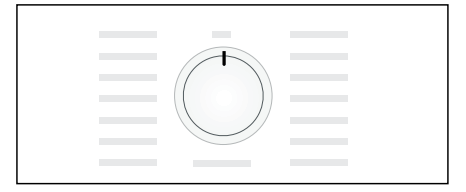
 appears in the display panel, clean the EasyClean filter as follows:
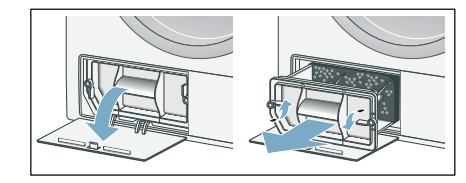
 in the display panel and drying was interrupted.
 in the display panel