Loading ...
Loading ...
Loading ...
en Cleaning and servicing
8
9 Cleaning and servicing
To keep your appliance working efficiently for a long
time, it is important to clean and maintain it carefully.
9.1 Cleaning products
You can obtain suitable cleaning products from after-
sales service or the online shop.
ATTENTION!
Unsuitable cleaning products may damage the sur-
faces of the appliance.
▶
Do not use harsh or abrasive detergents.
▶
Do not use cleaning products with a high alcohol
content.
▶
Do not use hard scouring pads or cleaning
sponges.
▶
Do not use any special cleaners for cleaning the ap-
pliance while it is hot.
▶
Only use glass cleaners, glass scrapers or stainless
steel care products if recommended in the cleaning
instructions for the relevant part.
▶
Wash sponge cloths thoroughly before use.
9.2 Cleaning the appliance
Clean the appliance as specified. This will ensure that
the different parts and surfaces of the appliance are
not damaged by incorrect cleaning or unsuitable clean-
ing products.
WARNING‒Risk of electric shock!
An ingress of moisture can cause an electric shock.
▶
Do not use steam- or high-pressure cleaners to
clean the appliance.
WARNING‒Risk of burns!
The appliance will become hot during operation.
▶
Allow the appliance to cool down before cleaning it.
1.
Observe the information regarding the cleaning
agents.
2.
Clean as follows, depending on the surface:
‒ Clean stainless steel surfaces in the direction of
the finish using a sponge cloth and hot soapy
water.
‒ Clean painted surfaces using a damp sponge
cloth and hot soapy water.
‒ Clean aluminium using a soft cloth and glass
cleaner.
‒ Clean plastic using a soft cloth and glass
cleaner.
‒ Clean glass using a soft cloth and glass cleaner.
3.
Dry with a soft cloth.
4.
Apply a thin layer of the stainless steel cleaning
product to stainless steel surfaces using a soft
cloth.
You can obtain stainless steel cleaning products
from the after-sales service or the online shop.
9.3 Cleaning controls
WARNING‒Risk of electric shock!
Penetrating moisture may cause an electric shock.
▶
Do not use wet sponge cloths.
1.
Observe the information regarding the cleaning
agents.
2.
Clean using a damp sponge cloth and hot soapy
water.
3.
Dry with a soft cloth.
9.4 Saturation indicator
The saturation indicator informs you when the grease
filters need to be cleaned or the odour filter needs to
be replaced.
The saturation indicators for the following LEDs are
shown in the LED display:
¡ Grease filter: The LEDs for the fan settings 1 and 2
flash and the LED for the saturation indicator lights
up
¡ Odour filter: The LEDs for fan setting 3 and intensive
mode flash and the LED for the saturation indicator
lights up
After cleaning the grease filters or after replacing the
odour filter, you should reset the saturation indicator.
→"Resetting the saturation indicator", Page10
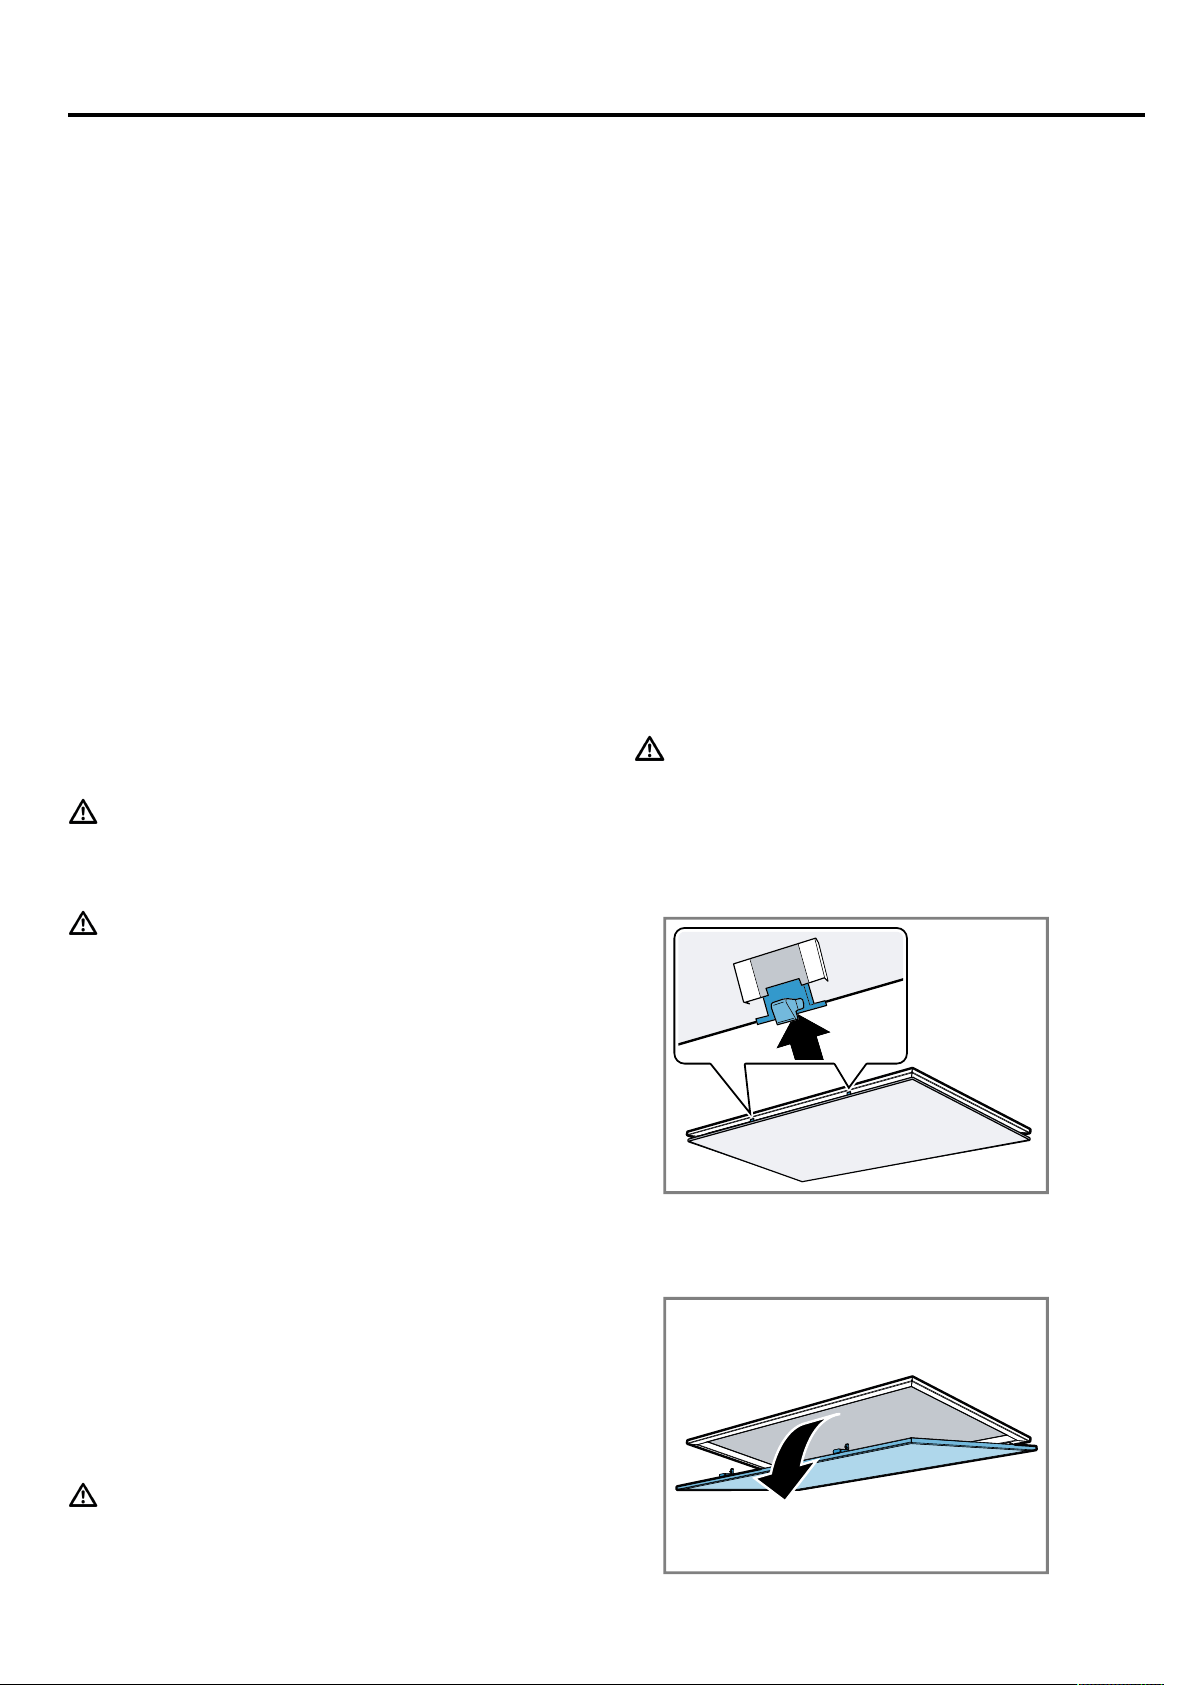
9.5 Removing the grease filter
WARNING‒Risk of injury!
The filter cover may swing out.
▶
Open the filter cover slowly.
▶
Take hold of the filter cover after opening until it no
longer swings out.
▶
Close the filter cover slowly.
1.
Press the lock on the filter cover.
To prevent the filter cover from swinging down sud-
denly, hold onto the filter cover firmly with two
hands.
2.
Open the filter cover by pulling it downwards.
Loading ...
Loading ...
Loading ...