Loading ...
Loading ...
Loading ...
13
English
Switching on the system
1 After completing all the connections, connect the AC
power cord of the DVD system and subwoofer to the
power outlet.
● The first time you turn on power,
"AUTO INSTALL - PRESS PLAY" may appear on the
display screen. PressÉÅ on the system to start
installation or press Ç to exit (refer to “Radio Reception –
Plug and Play”).
2 Press SOURCE button (or press TV/AV, DISC,
TUNER or AUX/ DI) to select the input source.
➜ The selected source will be displayed.
● For viewing a DVD or VCD, a TV needs to be connected
(refer to “Connections – Connecting a TV”).
Switch on the TV and set it to the correct video in channel
(for example, EXT1, EXT2, AV1, AV2). Refer to your TV
instruction manual for details.
➜ The default screen appears on the TV.
● You can connect other equipment to the DVD system in
order to use the Home Cinema Audio System’s surround
sound capabilities. For example, connect to a TV and select
TV/AV as the input source or connect to a VCR and select
AUX as the input source.
IMPORTANT!
– If your TV screen is only showing a black/ white
picture or the picture is completely distorted,
please refer to “NTSC/PAL setting” or “System
Setup (DVD) – TV system”.
– If you do not get a proper picture or sound,
please refer to “System Setup (DVD)” in order to
change the pre-settings as necessary to
accommodate your TV system or change to your
preferred settings.
NTSC/PAL setting
Set the DVD system to NTSC or PAL, whichever matches
your TV. The factory default setting is PAL. This setting is
necessary if you connected the DVD system to a
NTSC TV only.
1 Press SOURCE or DISC to
select disc mode.
➜ Make sure that no disc is
inside the disc tray.
2 Hold down DISC on the
remote control until the
current setting (NTSC or
PAL) appear on the display.
3 If you want to change the setting, repeat step 2.
System Setup (DVD)
The system setup is carried out via the TV, enabling you to
customise the DVD system to suit your particular
requirement. If the options selected are not available on a
disc, then the disc’s own preference will be used.
To enter System Setup menu
1 Press SYSTEM MENU then 4 to select icon from
the menu bar on the TV screen.
➜ Playback will stop.
2 Use 34 1 2 to toggle through the functions (
) and select your preferred option.
3 Press OK to confirm a highlighted selection.
4 To remove the menu, press SYSTEM MENU again.
Setting the picture
TV Shape
Black Level shift
Video shift
On
1en
1en
st1
panscan
Adv. Picture Options
Settings...
Personal colour
Settings...
Colour settings
1 Personal
P-Scan Aspect Ratio
Off
PScan Output
480P
TV System
PAL
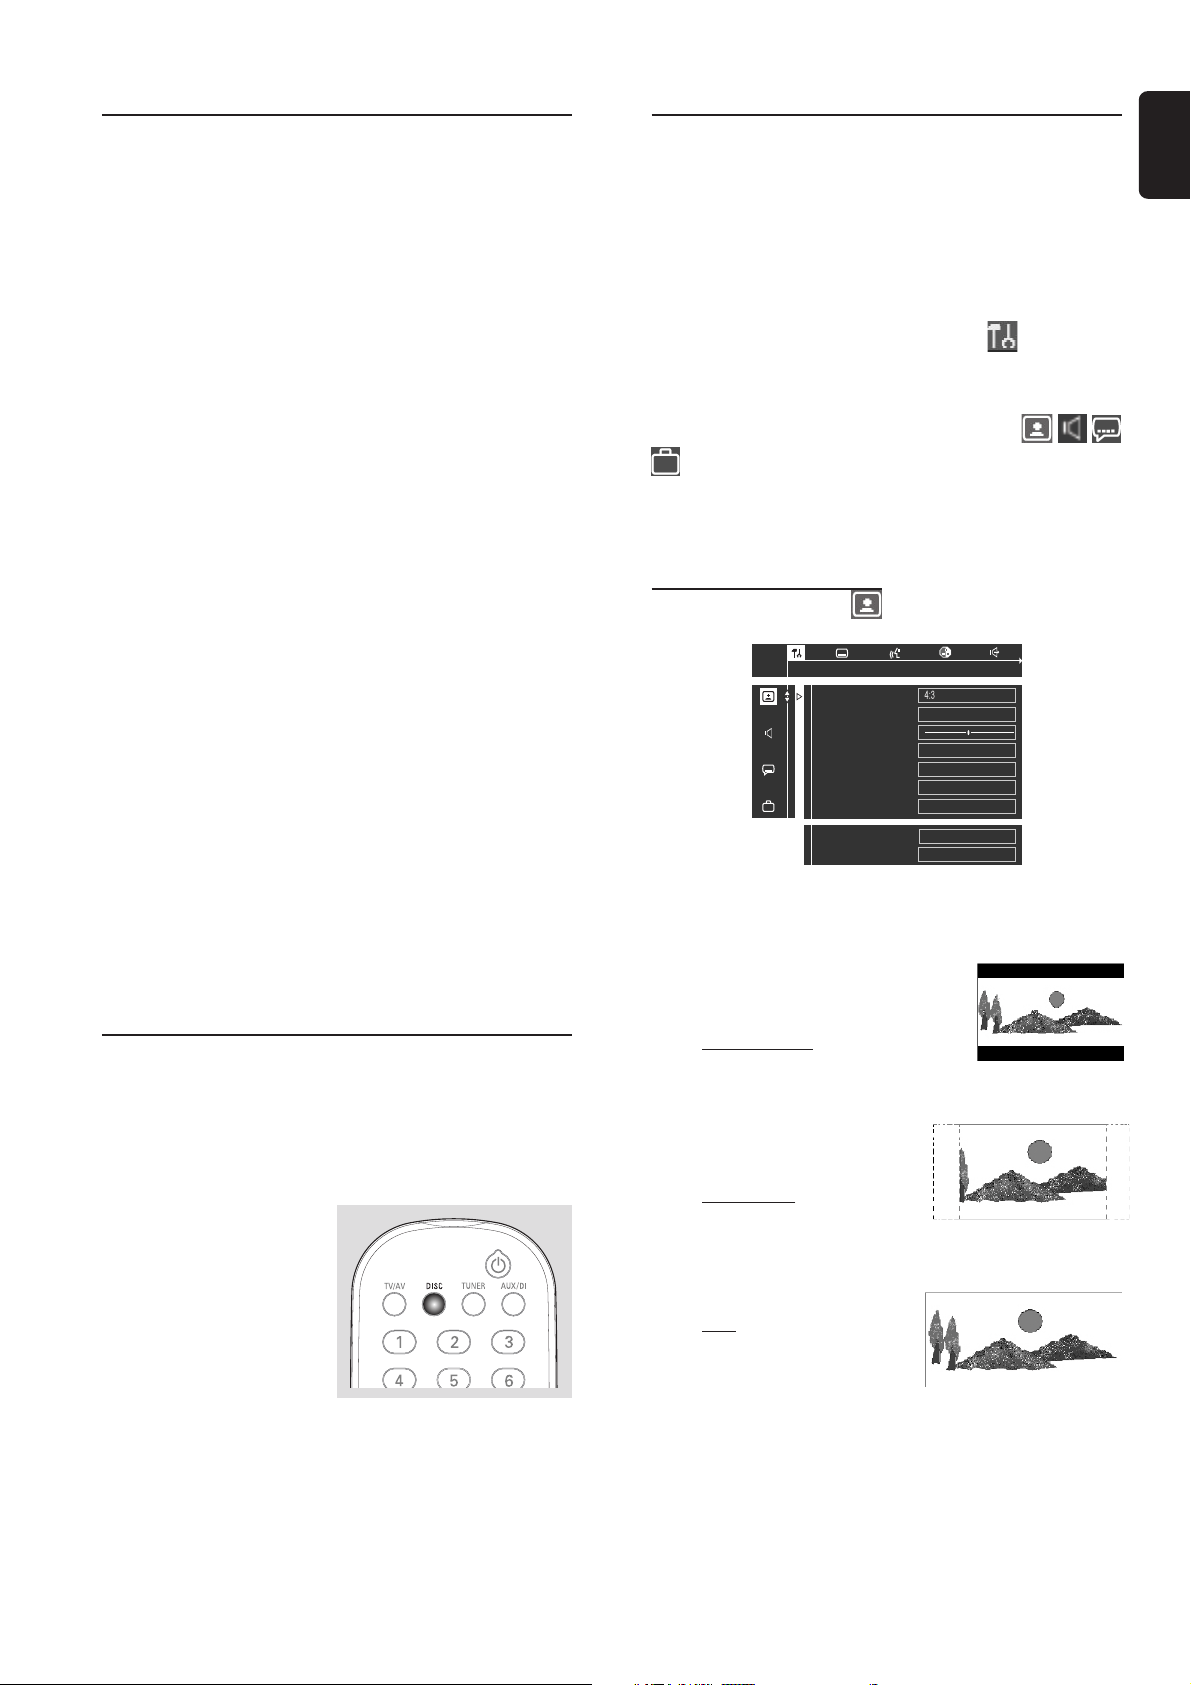
ö TV Shape
Select the aspect ratio of the connected TV.
If you have a normal TV and
your DVD is formatted for
wide screen viewing,
select 4:3 letter box. Wide picture
with black bands will be displayed
on the upper and lower portions of the TV screen.
If you have a normal TV and
your DVD is not formatted
for wide screen viewing,
select 4:3 panscan (default
setting). A picture is displayed on
the whole TV screen (or
“reformatted to fit your TV”).
If you have a wide screen TV,
select 16:9 (you must also set
your wide screen TV to “full
size”).
Notes:
– If you have connected the DVD system to a Progressive
Scan TV using the component (Pr/Cr Pb/Cb Y) video
connection, refer to “P-Scan Aspect Ratio” for proper aspect
ratio settings.
– The format you select must be available on the disc. If it is
not, the settings for TV Shape will not affect the picture during
playback.
PREPARATIONS
☞
Loading ...
Loading ...
Loading ...