Loading ...
Loading ...
Loading ...
12
Need help? Call 1-800-620-2790 (U.S. and Canada)
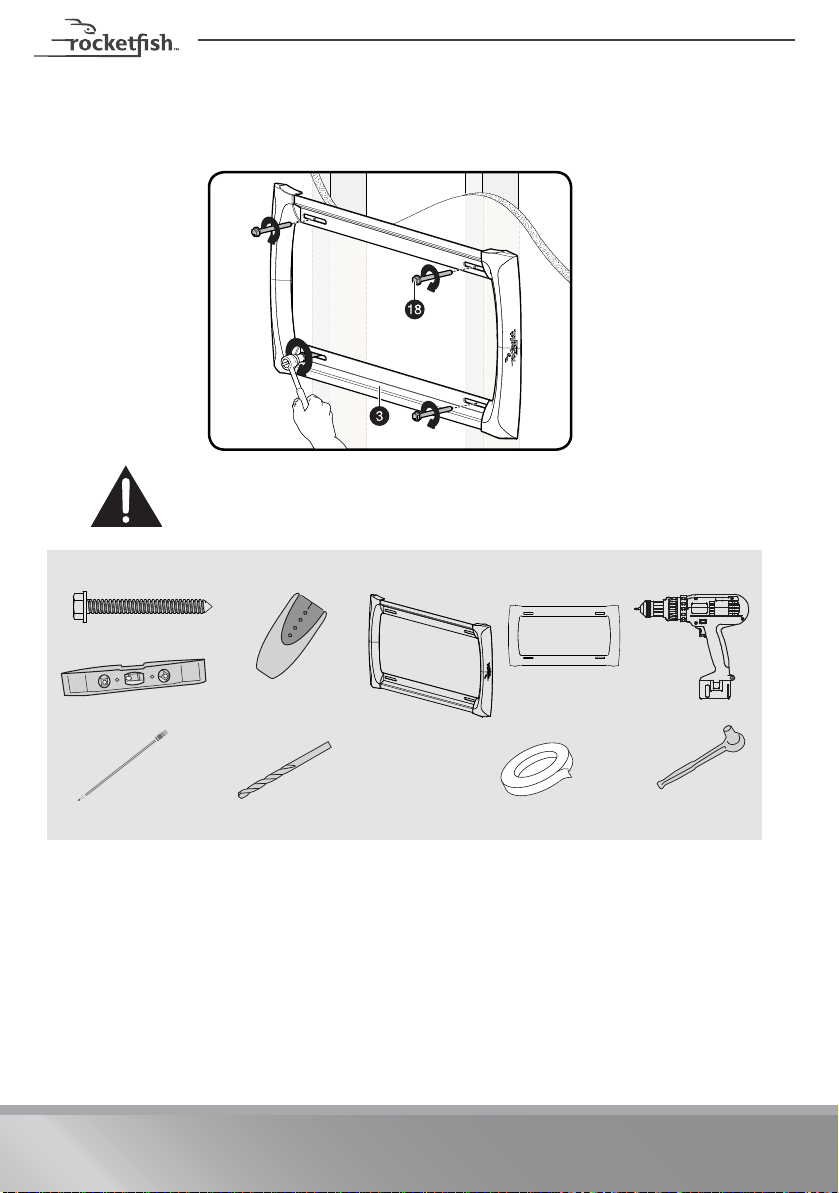
5 Align the wall plate (3) with the pilot holes, insert the lag screws (18) through the
holes in the wall plate assembly, then tighten the lag screws only until they are
firm against the wall plate assembly.
CAUTION: Avoid potential injuries or property damage!
DO NOT over-tighten the lag screws (18).
You’ll nee d
Edge-to edge
stud finder
Lag screw 18 (Qty.4)
Pencil
Drill
7/32" wood drill bit
1/2" socket wrench
Level
Template 5
Tape
Wall plate 3
RF-HTVMM170C_16-0577_MAN_V2_ENG_web.fm Page 12 Friday, August 5, 2016 11:18 AM
Loading ...
Loading ...
Loading ...