Loading ...
Loading ...
Loading ...
Version 7/11 - Page 7
Three Screws
Rangehood Body
Front
Strip
CUSTOMIZING YOUR RANGEHOOD
The front strip of the rangehood can be customized. The
front strip is attached to the rangehood by three recessed
screws and three key hole slots on the back side of the strip
as indicated in FIGURE 15. It is necessary only to remove
the three lower screws to remove the front strip. The top
screws will slide out of the key holes once the three lower
screws are removed.
The front strip dimensions are given in FIGURE 16. If you
wish to keep the frame of the front panel and only replace the
glass panel, the dimensions follow: Height = 5 11/16", Depth
= 1/8", Width = 29 11/16" (for 30" model) 35 11/16" (for 36"
model) 23 5/8" (for 24" model).
FIGURE 16
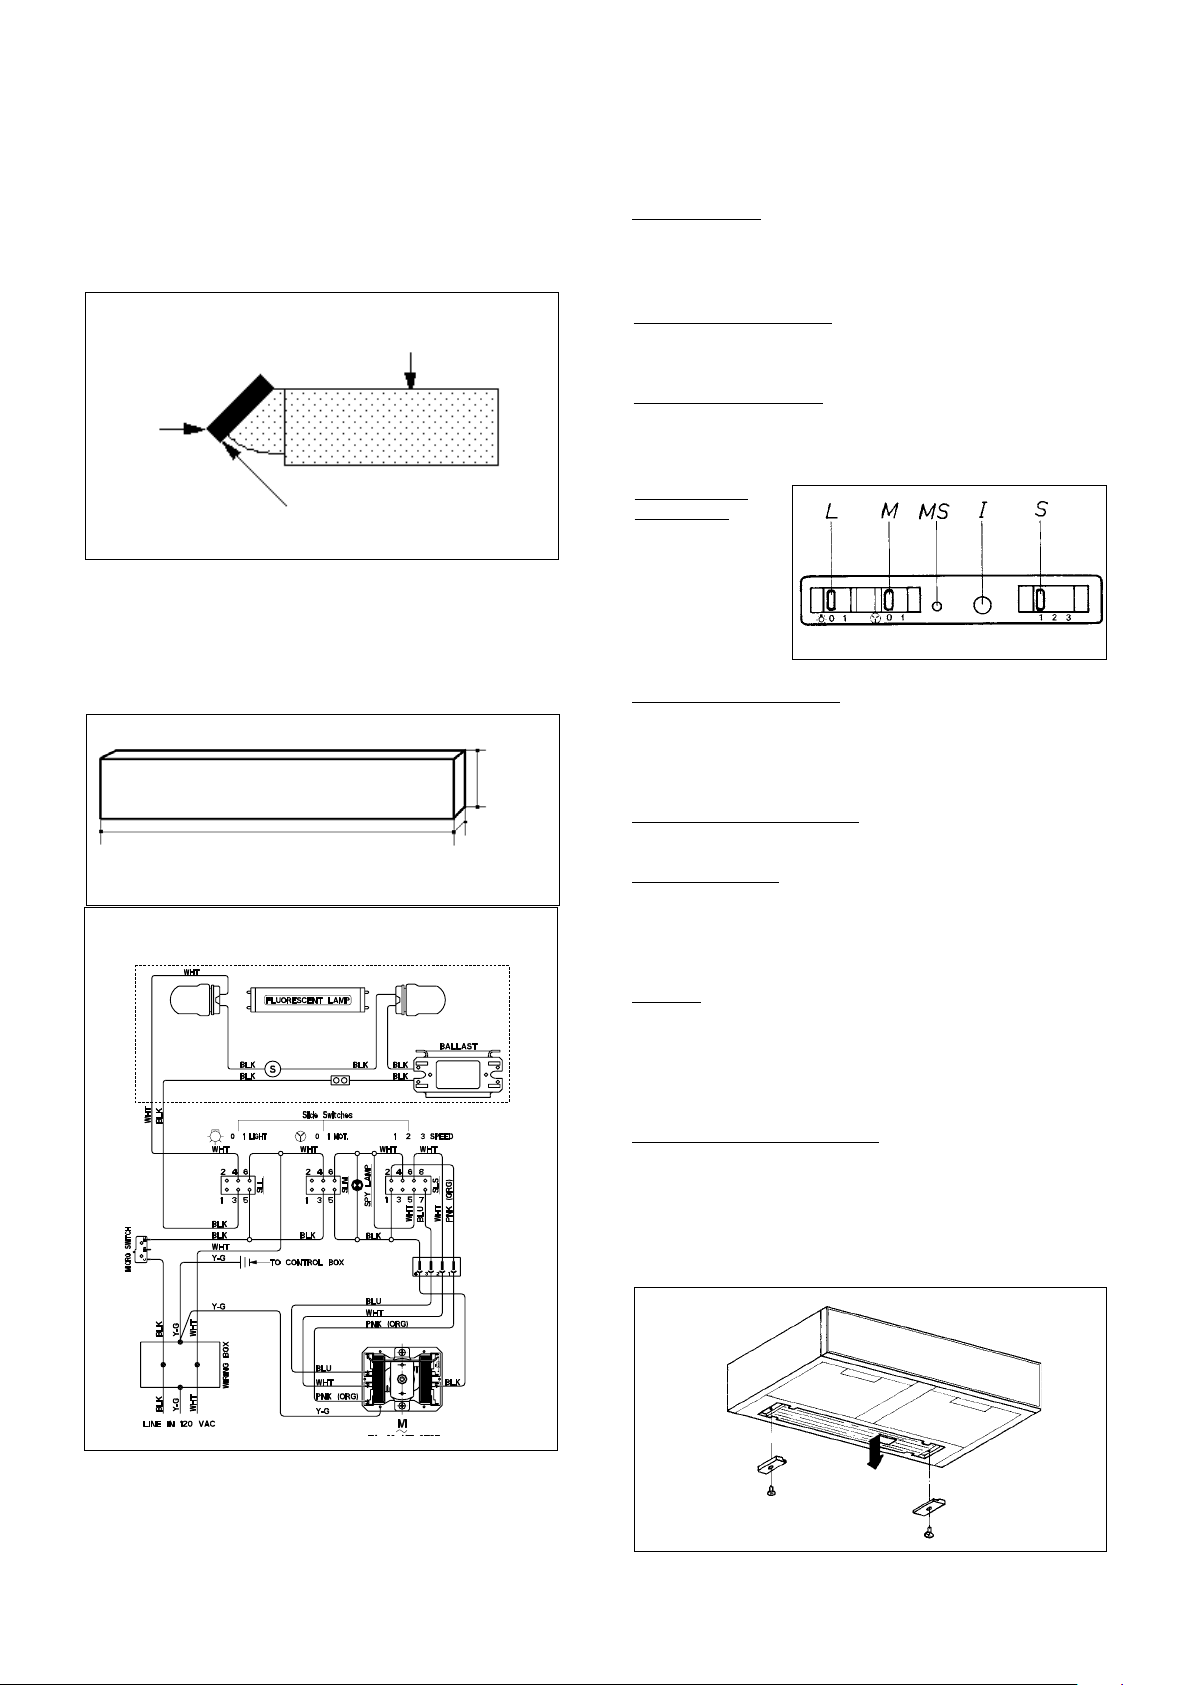
WIRING DIAGRAM
• This rangehood uses Flourescent Lamp Type 18", 15W T8 and
Starter Type S2.
Rangehood Control Panel
All controls are located under the front panel and are shown in
FIGURE 17.
On/Off switch for the uorescent light. Moving the switch to the
1 Position turns the light On. Moving the switch to the 0 Position
turns the light Off.
FIGURE 15
FIGURE 17
FIGURE 18
Controls blower speed. Moving the switch to the 1 Position turns
the blower on LOW. Moving the switch to the 2 Position turns the
blower on MEDIUM. Moving the switch to the 3 Position turns the
blower on HIGH.
Red light will be on when the rangehood is operating.
When the front panel of the rangehood is closed, the rangehood
will turn off by a microswitch. This turns the rangehood On and
Off without adjusting the switches for the Light or Blower and it
remembers the last speed setting.
Cleaning
The metal grease lters should be cleaned frequently in hot deter-
gent solution or placed in the dishwasher. Clean exterior surfaces
with hot soapy water. Using abrasives and scouring agents can
scratch rangehood nishes and should not be used to clean nished
surfaces.
Replacing the Fluorescent Light
To replace the uorescent light, remove the retainer clips from both
ends of the glass diffuser as indicated in FIGURE 18. Carefully
slide the glass diffuser all the way to the left. Lower the right end
of the glass below the support ange, then remove the glass by
sliding it back to the left. Replace the diffuser glass by reversing
these directions.
23 5/8" or 29 15/16" or 35 15/16"
5 7/8"
13/16"
USE AND CARE INFORMATION
This rangehood system is designed to remove smoke, cooking
vapors and odors from the cooktop area.
For Best Results
Start the rangehood several minutes before cooking to develop proper
airow. Allow the unit to operate for several minutes after cooking
is complete to clear all smoke and odors from the kitchen.
Blower On/Off
On/Off switch for the
blower. Moving the
switch to the 1 Posi-
tion turns the blower
On. Moving the switch
to the 0 Position turns
the blower Off.
Loading ...
Loading ...
Loading ...