
Loading ...
Loading ...
Loading ...
8
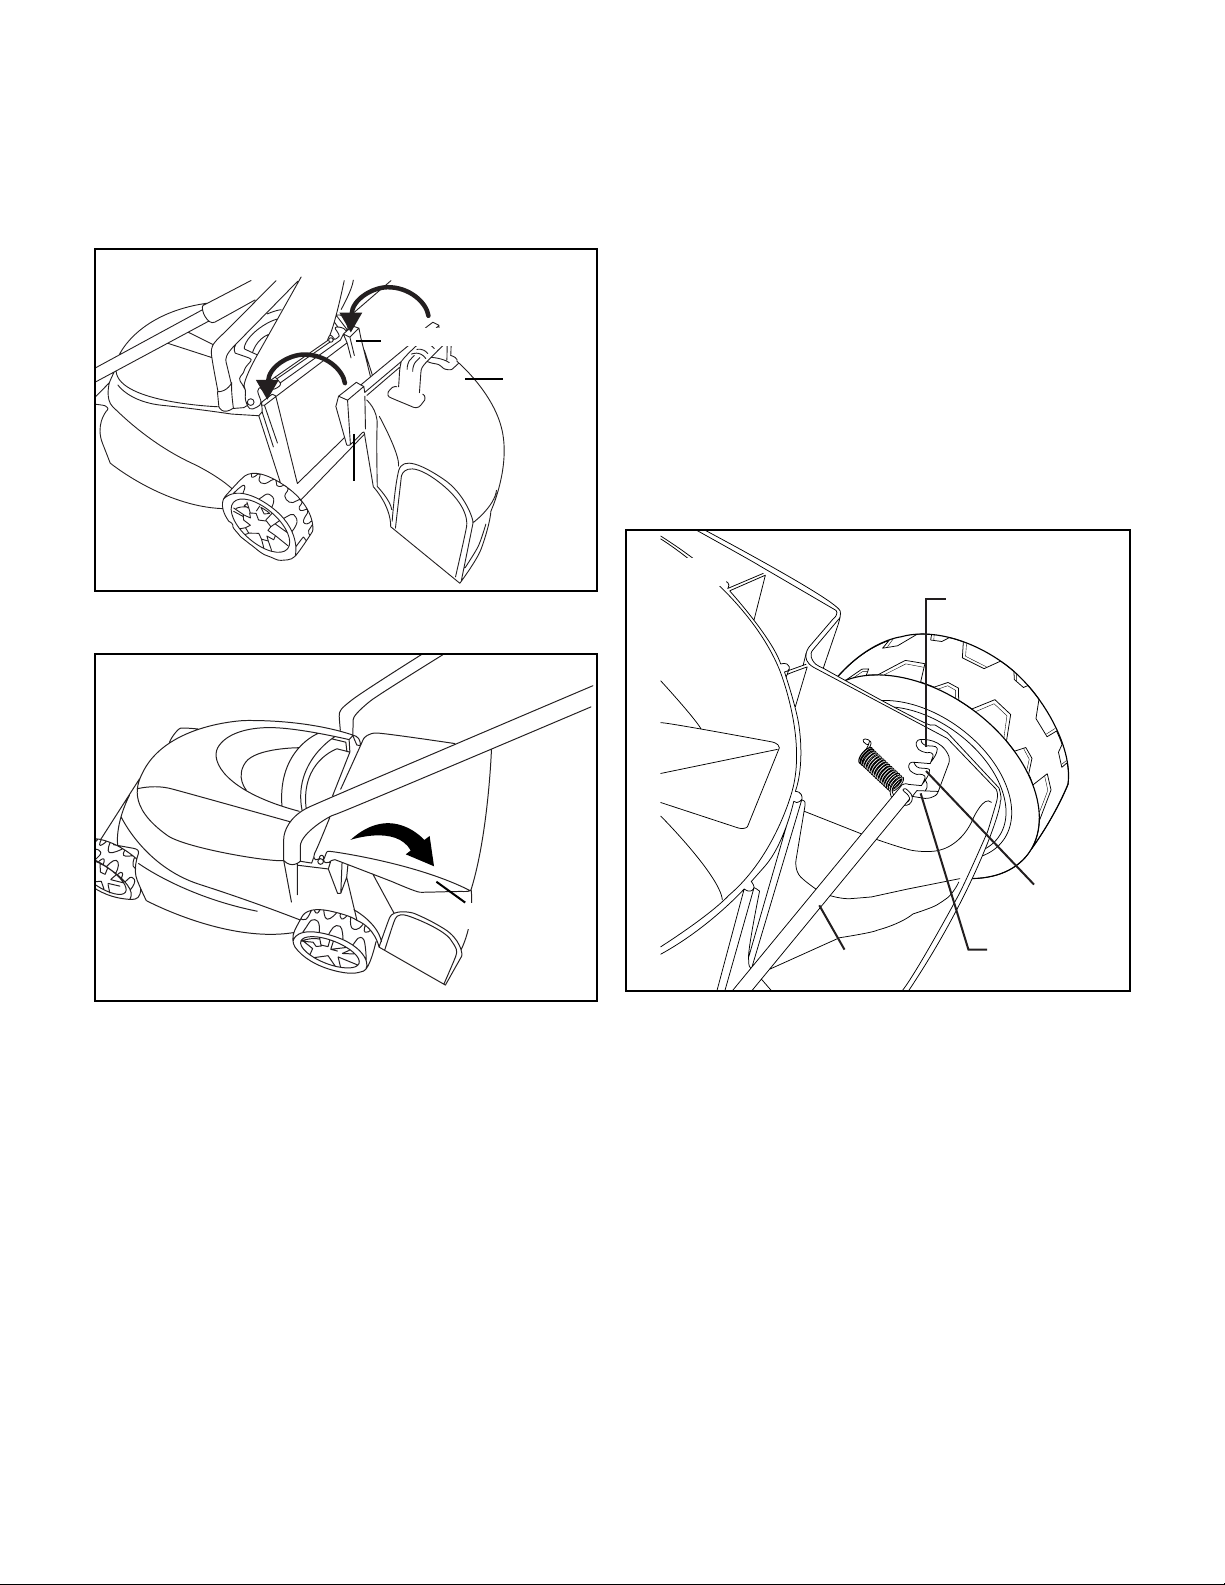
1. Raise the spring-loaded ejector ap. Fasten the side-
discharge chute to the mower body by sliding the chute
tabs onto the coupling hooks found under the ejector ap.
Check to make sure the chute is securely fastened (Fig. 8).
2. Lower the ejector ap and rest it on top of the chute
(Fig. 9).
Operation
This lawn mower is intended for private residential use to cut
grass in small lawns and gardens. This lawn mower is not
intended to cut grass in public parks, playing elds, farms, or
forests. Do not use this lawn mower for any application other
than that for which it is intended.
Adjusting the Cutting Height
Follow these instructions to adjust the cutting height of the
lawn mower.
mWARNING! Before making these adjustments,
disconnect the power supply to the mower and wait until the
rotating blade has come to a complete standstill. Wearing
gloves is recommended due to the close proximity of the
cutting blade.
ALWAYS FOLLOW ALL SAFETY PRECAUTIONS AND
RECOMMENDATIONS LISTED PREVIOUSLY IN THIS
MANUAL.
1. Power o and unplug the lawn mower.
2. Remove and empty the grass bag.
3. Place the lawn mower on its side.
4. The rod axles can be placed into 3 dierent cutting
heights: low (will cut grass the shortest), medium, and
high (Fig. 10).
3-Position Height Adjustment:
1. Low: 1.18 in. (30 mm)
2. Medium: 1.93 in. (49 mm)
3. High: 2.52 in. (64 mm)
The cutting height tolerance is +/- 0.2 in. (5 mm).
5. Move all four wheels to the desired cutting height by
pulling back on the rod axle and setting it to the correct
position. Make sure all four wheels are at the same cutting
height position. (Fig. 10).
NOTE: Set the mower to the highest cutting height when
mowing on uneven ground or in tall weeds.
6. Place the lawn mower back on to its wheels and reattach
the grass bag.
7. Reconnect the power supply to the mower and resume
normal use.
Power Connection
Do not switch on the mower until it has been completely
assembled. Before switching on the unit, always check the
appliance cord and the extension cord for signs of damage.
Use only intact cords.
Fig. 8
Coupling hook
Chute
tab
Side-
discharge
chute
Fig. 9
Ejector ap
Fig. 10
High setting
Medium setting
Low setting
Rod axle
Loading ...
Loading ...
Loading ...