Ed :
Rev : Cod :
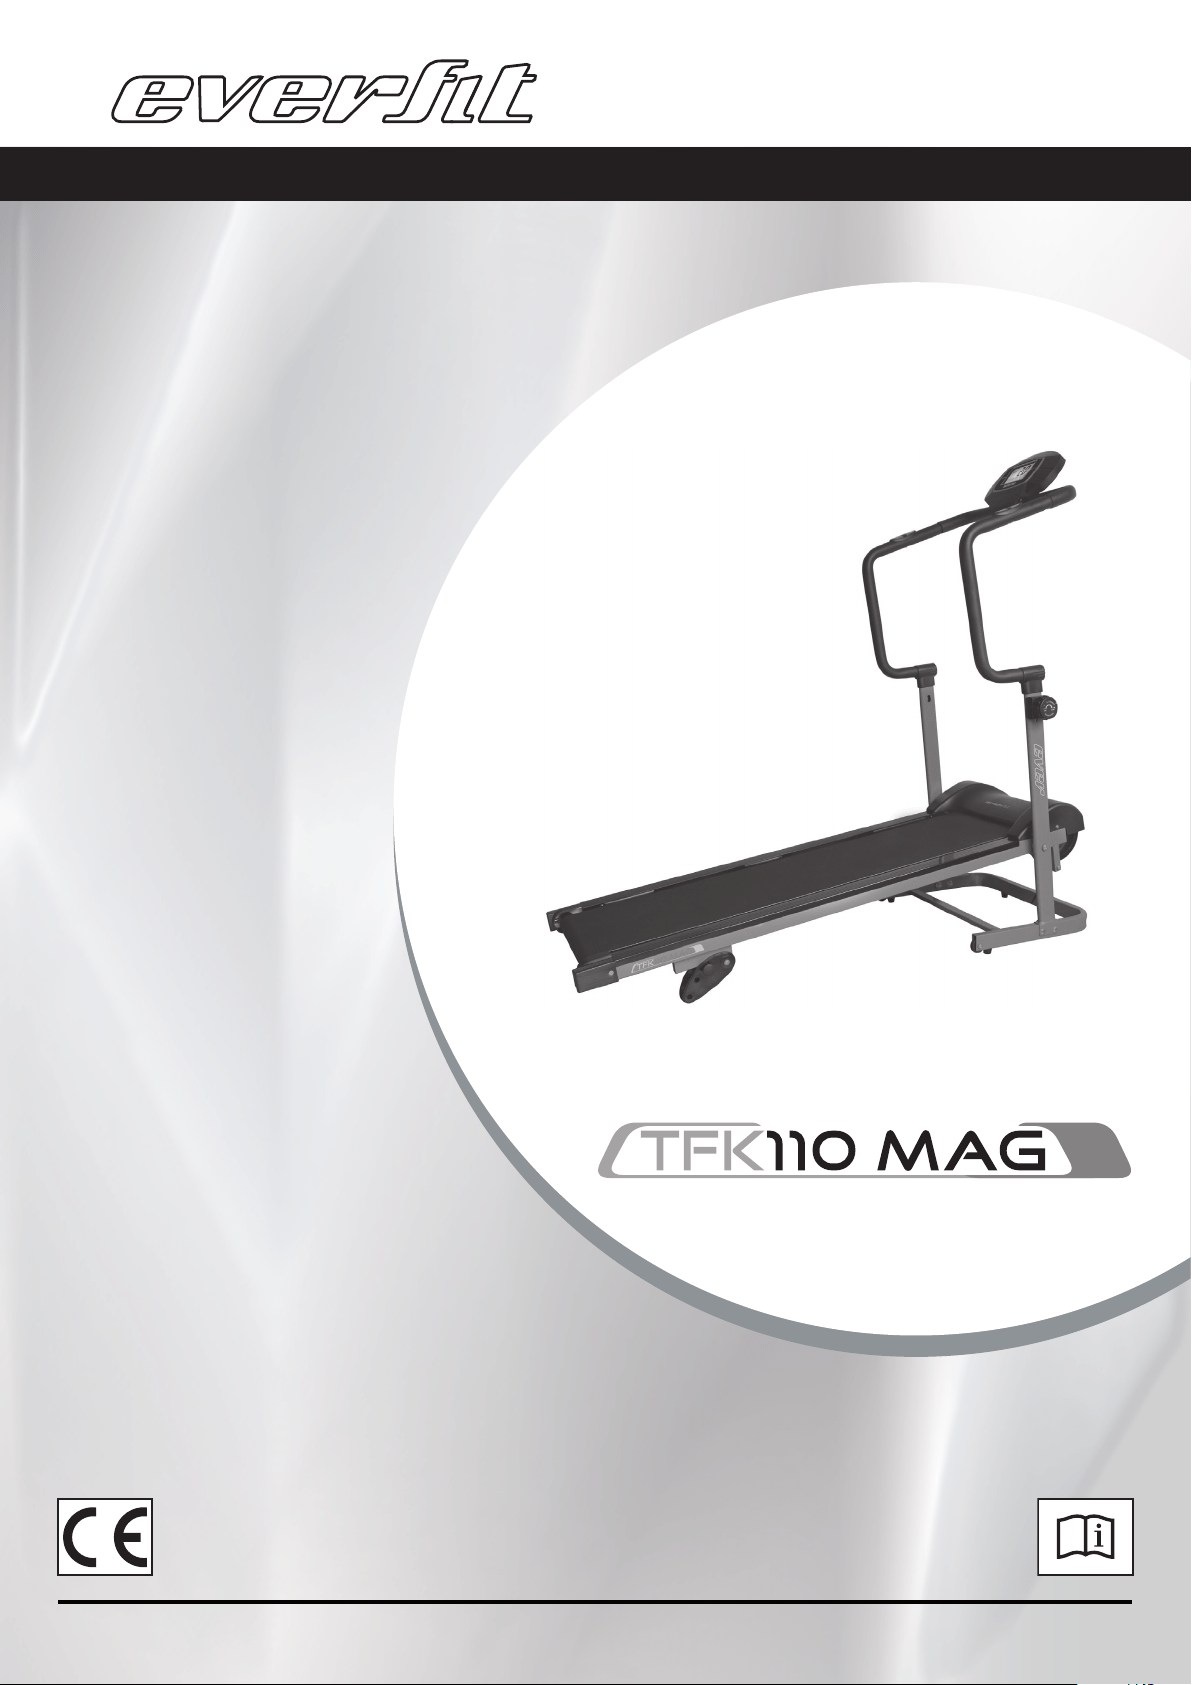
INSTRUCTION
06/20 GRLDEVEFTFKMAG1
01
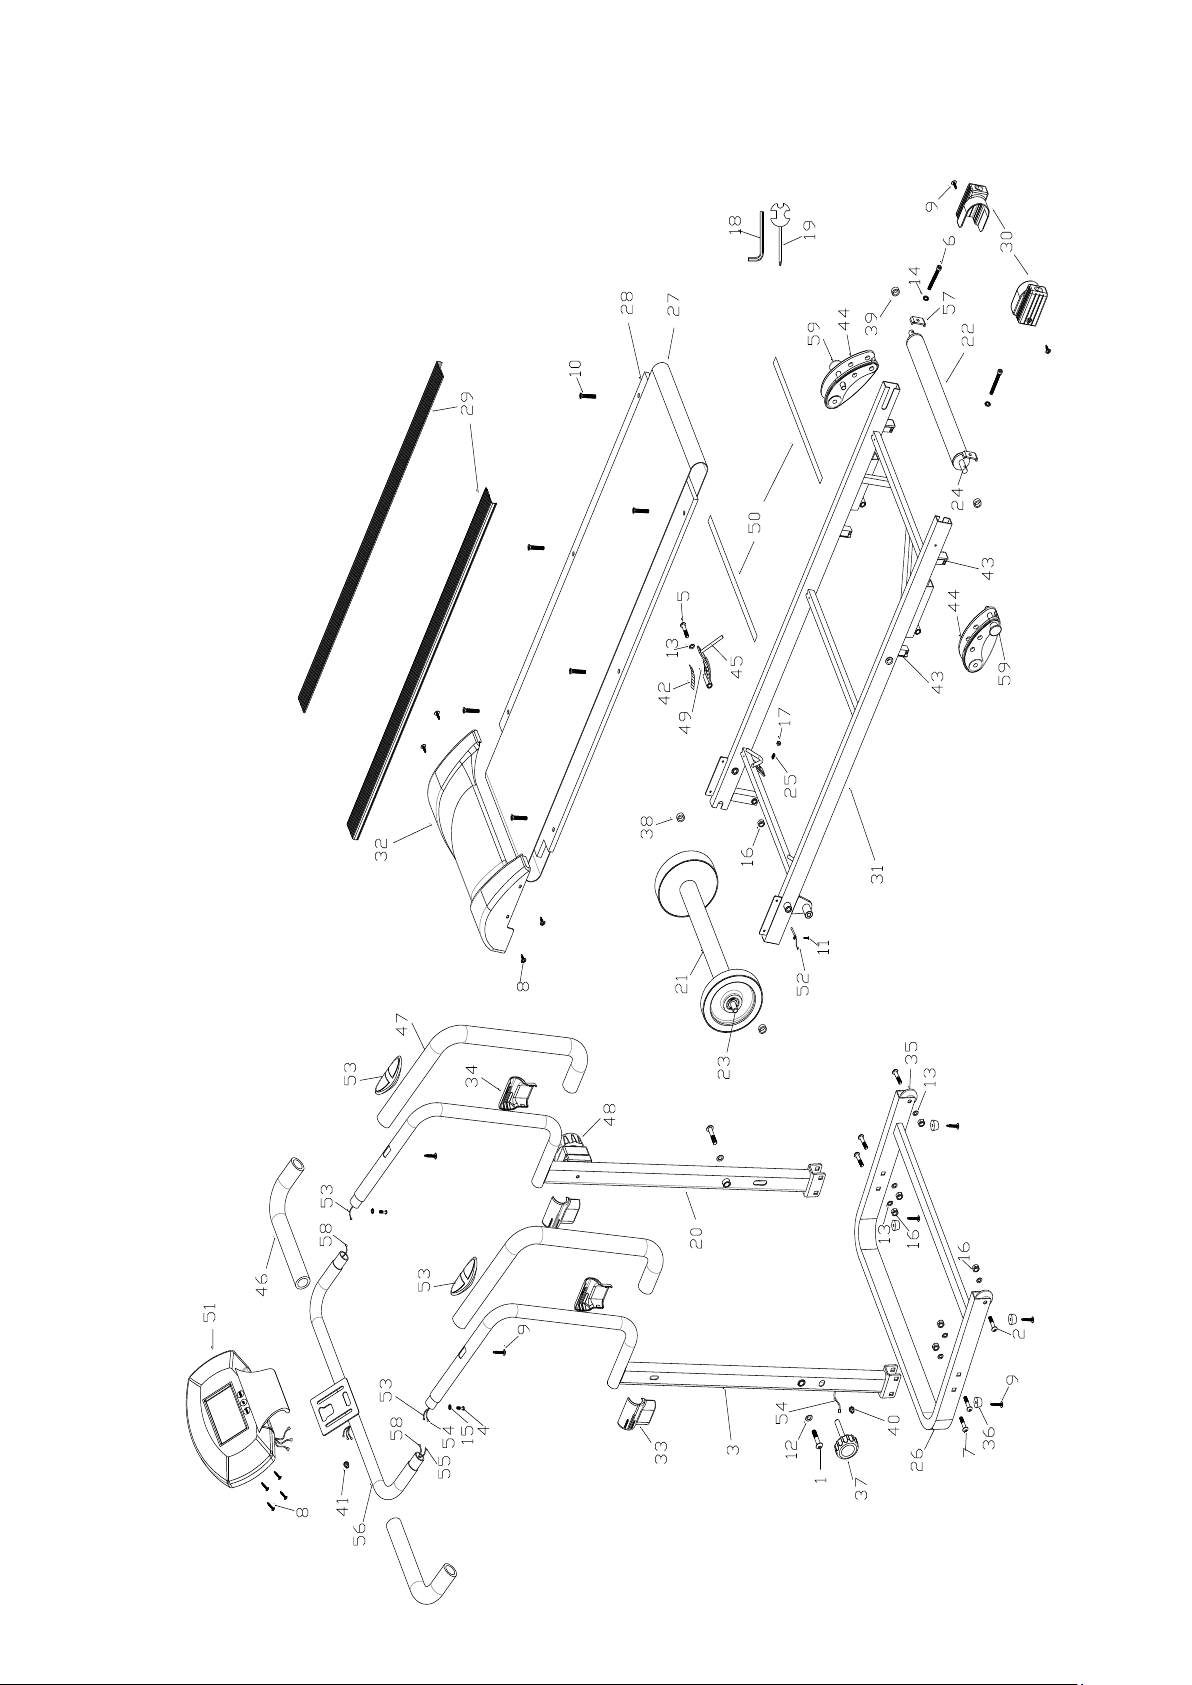
EXPLODED DIAGRAM

PARTS LIST
No. Name & Specification QT
Y
No. Name & Specification QTY
01 Allen bolt M10*50 2 27 Running belt 1
02
Allen bolt M8*30
2 28 Running board 1
03 Left upright 1 29 Side rail 2
04 Allen bolt M6*10 2 30 Rear cover 2
05 Allen bolt M8*75 1 31 Main frame 1
06 Allen bolt M6*60 2 32 Motor cover 1
07 Carriage bolt M8*35 4 33 Decorative cover left 2
08 Cross head screw M5*12 4 34 Decorative cover right 2
09 Philips screw ST4.2*20 8 35 Transportation wheel 2
10 Philips screw ST4.8*25 6 36 Cushion pad 4
11 Philips screw ST4.2*12 1 37 Locking knob 1
12 Flat washer Φ10.5*Φ22*1.5 2 38 Front roller spacer 2
13 Flat washer Φ8.5*Φ20*1.5 7 39 Rear roller spacer 2
14 Flat washer Φ6.5*Φ15*1.5 2 40
spout plug φ12.5
1
15 Arc washer D6 2 41 spout plug 23*18*12*9 1
16 Nylon nut M8*8H 7 42 Magnet positioning frame 1
17 Nylon nut M6*6H 1 43 Rectangle inner plug for
tube 40*20
4
18 L wrench 1 44 Adjustable back foot 2
19 Cross complex wrench 1 45 plate Magnetic
combination
1
20 Right upright 1 46 Electronic watch stand foam 2
21 Front roller 1 47 Foam for hand pulse handle 2
22 Rear roller 1 48 Eight gear position trimming 1
23 Front roller shaft 1 49 Strong magnetic 3
24 Rear roller shaft 1 50 EVA mat 2
25 Spring 1 51 Computer 1
26 Base tube 1 52 magnetic Needle type
induction 150mm
1

53 Heart rate slice 170mm 2 58 Heart rate slice Sensor
wire 460mm
2
54 Sensor wire 1 1380mm 1 59 Ring insert pin 2
55 Sensor wire 2 460mm 1
56 Electronic watch stand 1
57 Adjustment U base 1
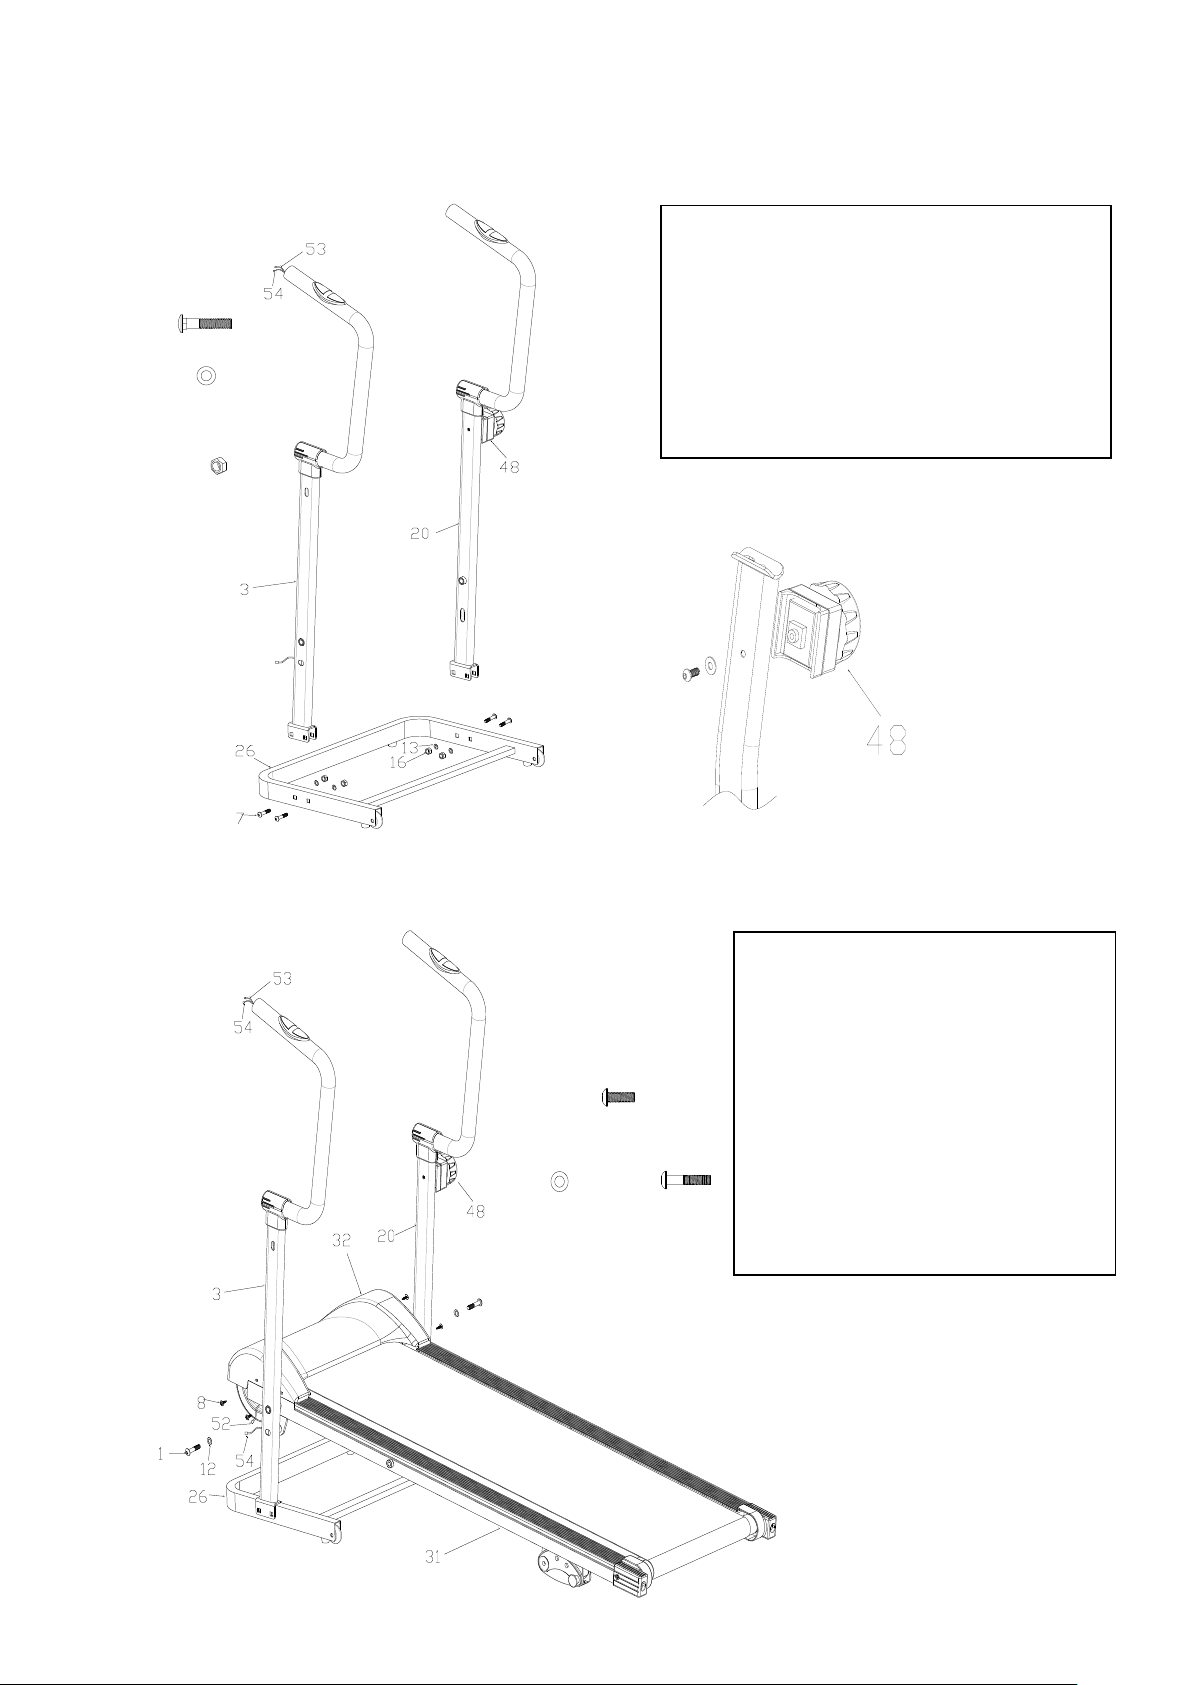
ASSEMBLY STEPS
Step 1
7# M8*35 4PCS
13# ¦ µ8.5*¦ µ20*1.5
4PCS
16# Nylon nut
M8*8H 4PCS
Step 2
1# M10*50
2PCS
12# ¦ µ10.5*¦ µ22*2.0
2PCS
8# M5*12 4PCS
1.Fasten the Motor cover (32)
onto the Main frame (31) with
Cross head screw (8) .
2.Fasten the main frame (31)
onto the left/right uprights (3, 20)
with Allen bolt (1) and flat washer
(12).
3.Connect Needle type magnetic
induction out line ( 52 ) with
Sensor wire 1(54).
1. put the eight gear position trimming
the right upright (20), fasten it with the
philips screw and flat washer.
2. Fasten the left/right uprights (3,20)
onto the base tube (26) with carriage
bolt (7), flat washer (13) and nylon nut
(16).
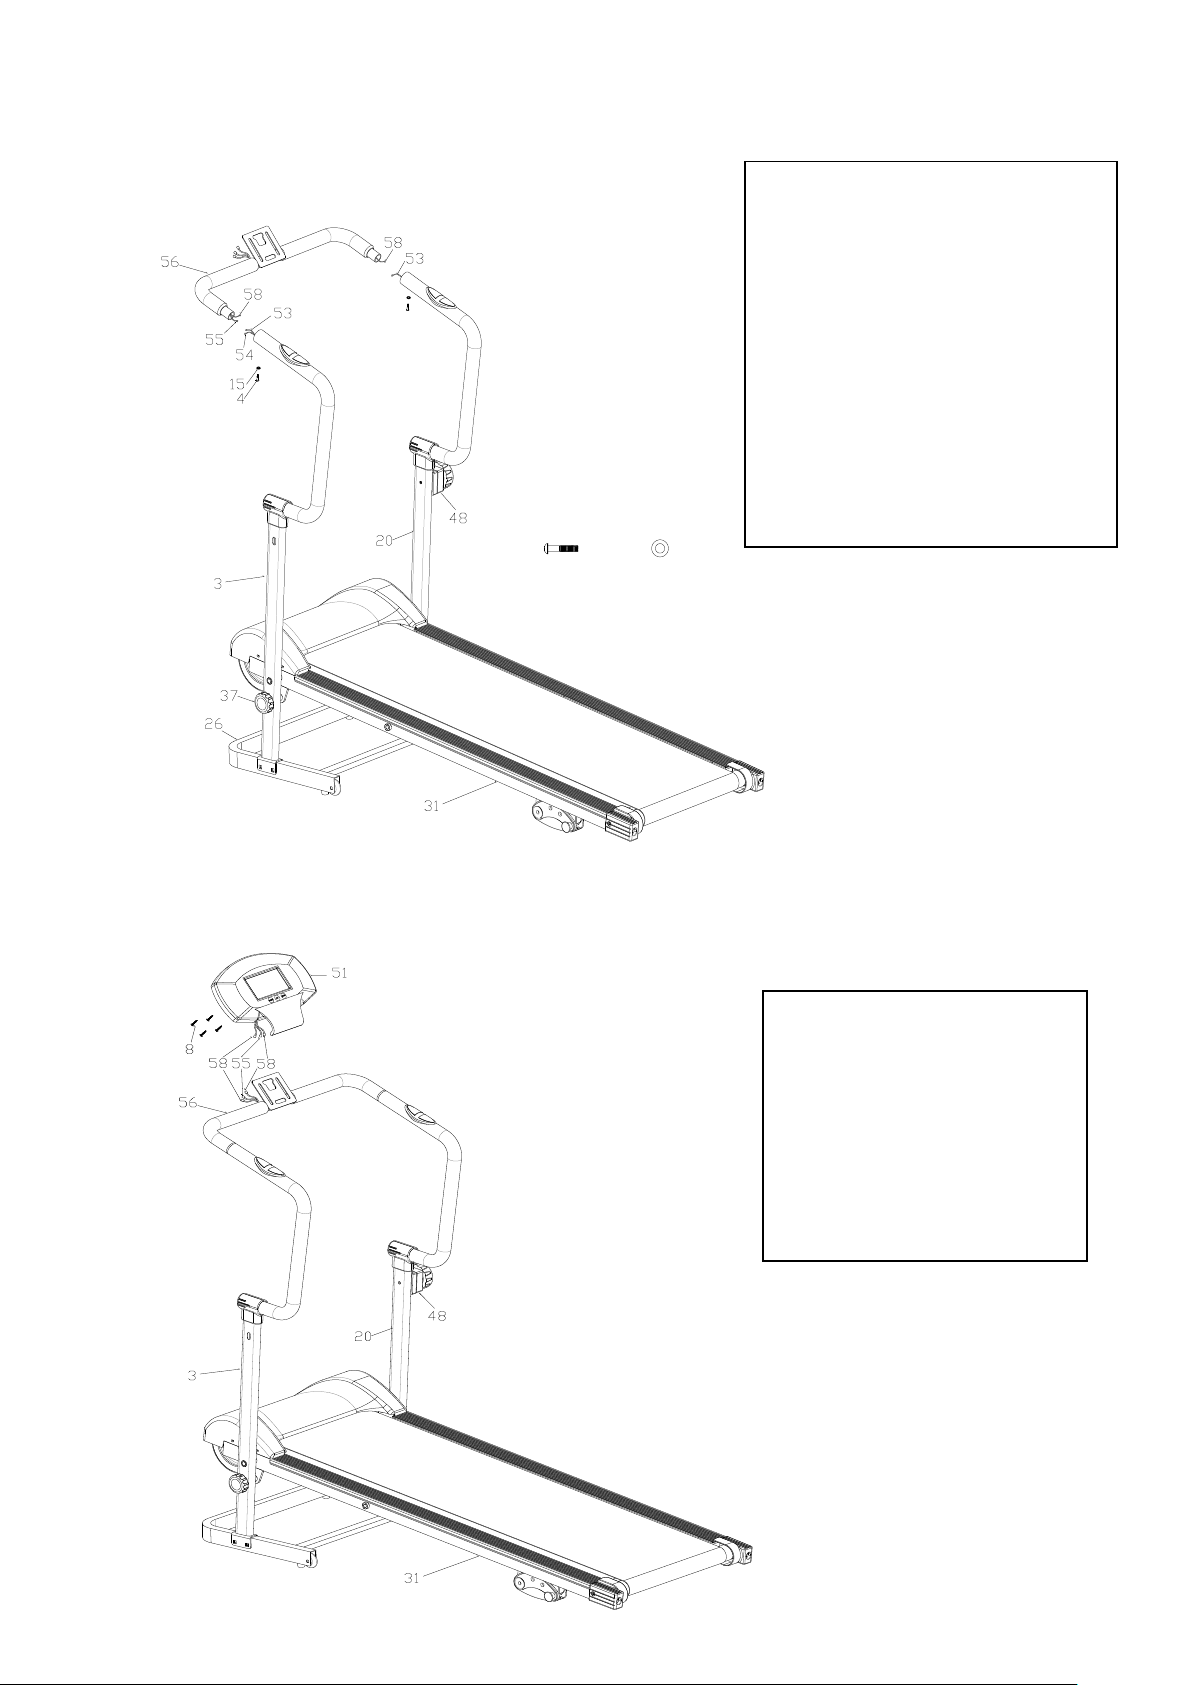
Step 3
4# M6*10 2PCS
15# D6 2PCS
Step 4
1. Connect Sensor wire 2 (55)
with Sensor wire 1(54);Connect
Heart rate slice (53) with Heart
rate slice Sensor wire (58).
2. Fasten the computer frame
(56) onto the left/right uprights
(3,20) with Allen bolt (4) and arc
washer (15).
3. Fasten the main frame (31)
with locking knob (37) by getting
through the left upright (3).
1. Fasten the Computer
(51) onto the Computer
frame (56) with Cross head
screw (8)
2. Connect Sensor wire 2
(55)\Heart rate slice Sensor
wire (58) with Computer
(51) out line .
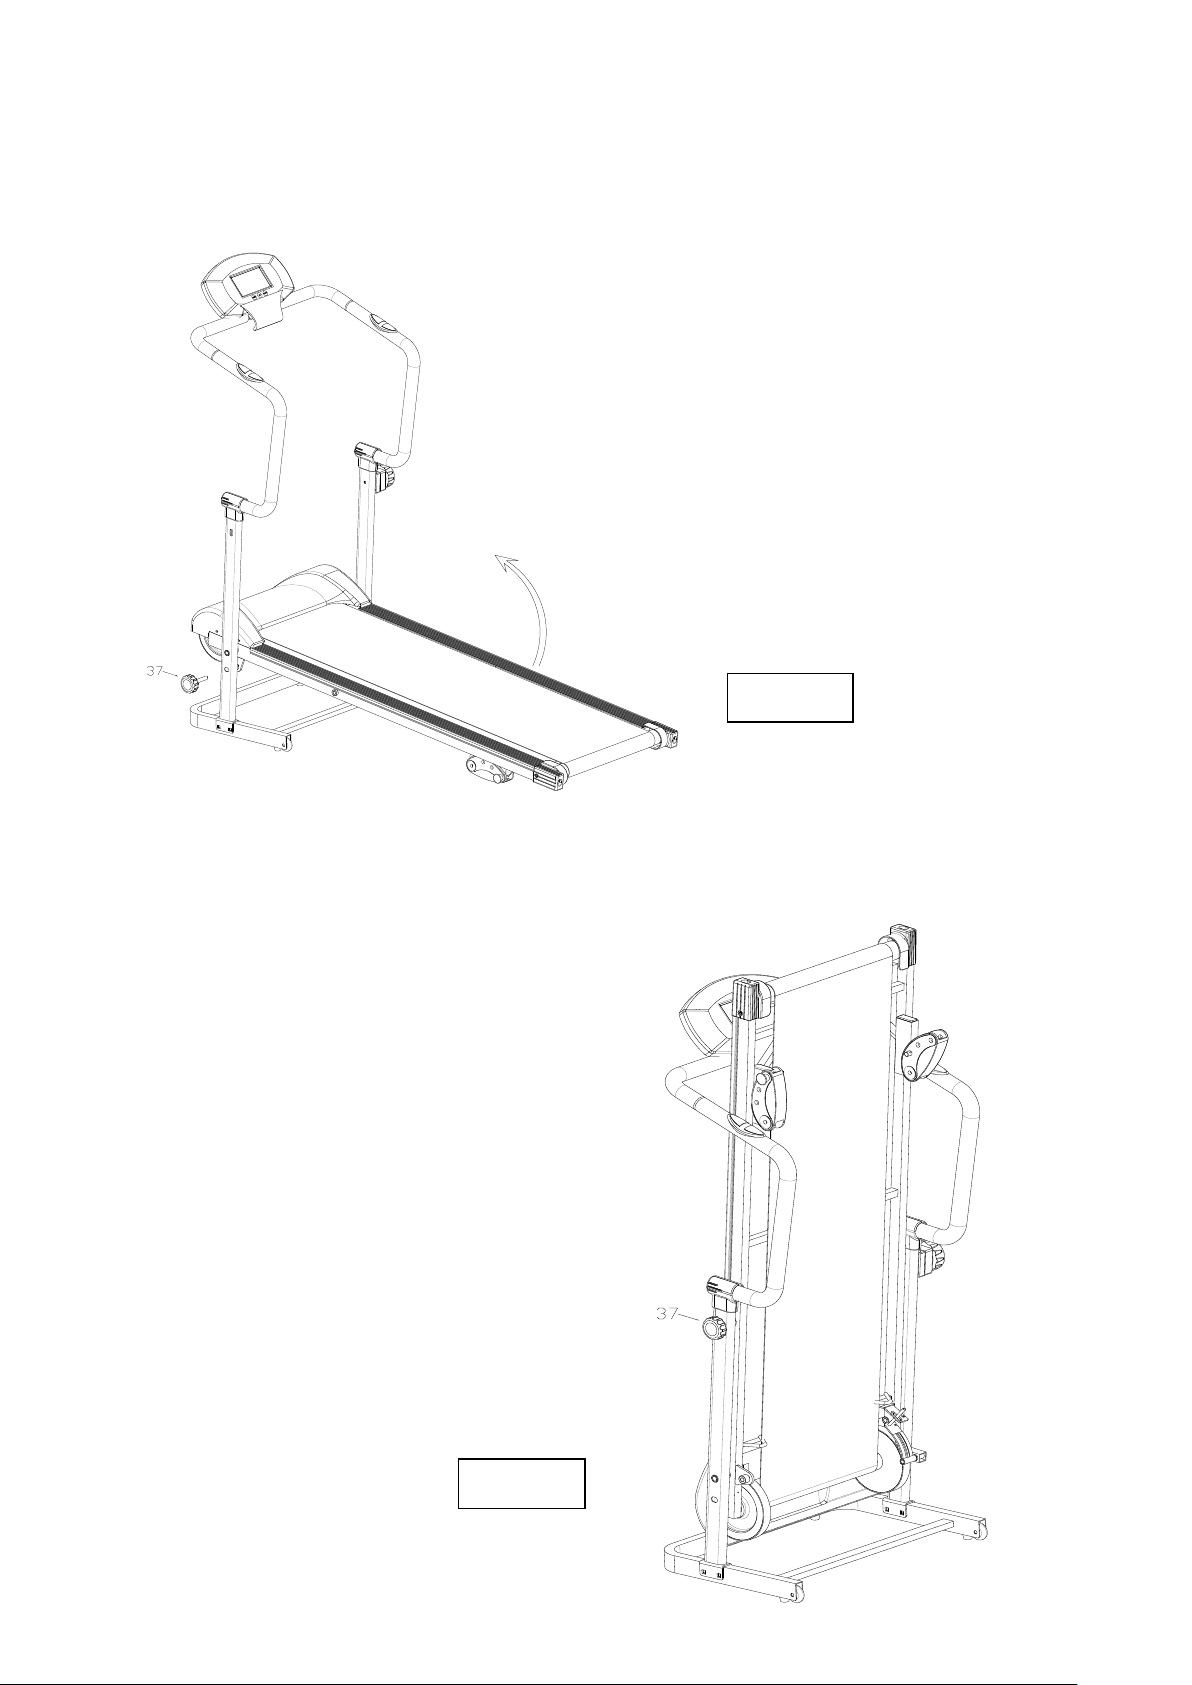
Folding Images
Image 1
Image 2
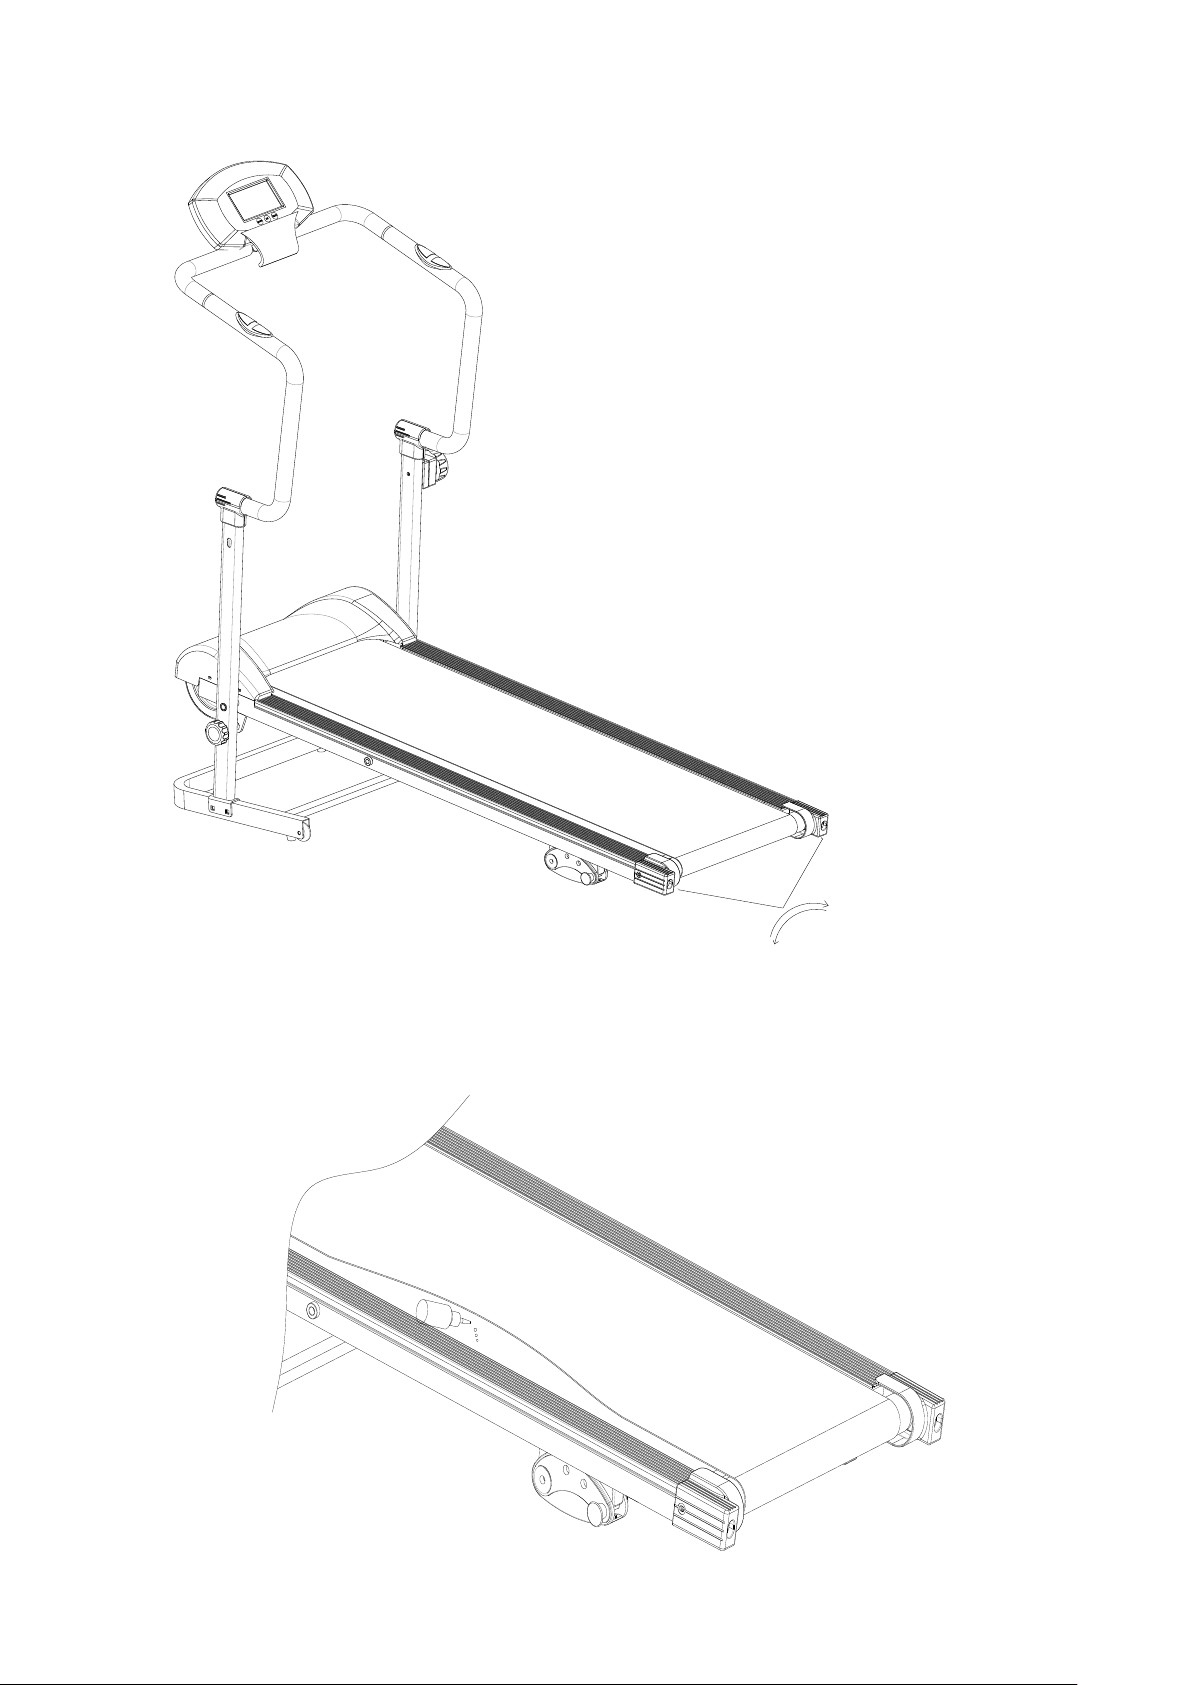
Running Belt Adjustment Image
Add lube oil image
OPERATIONAL INSTRUCTIONS
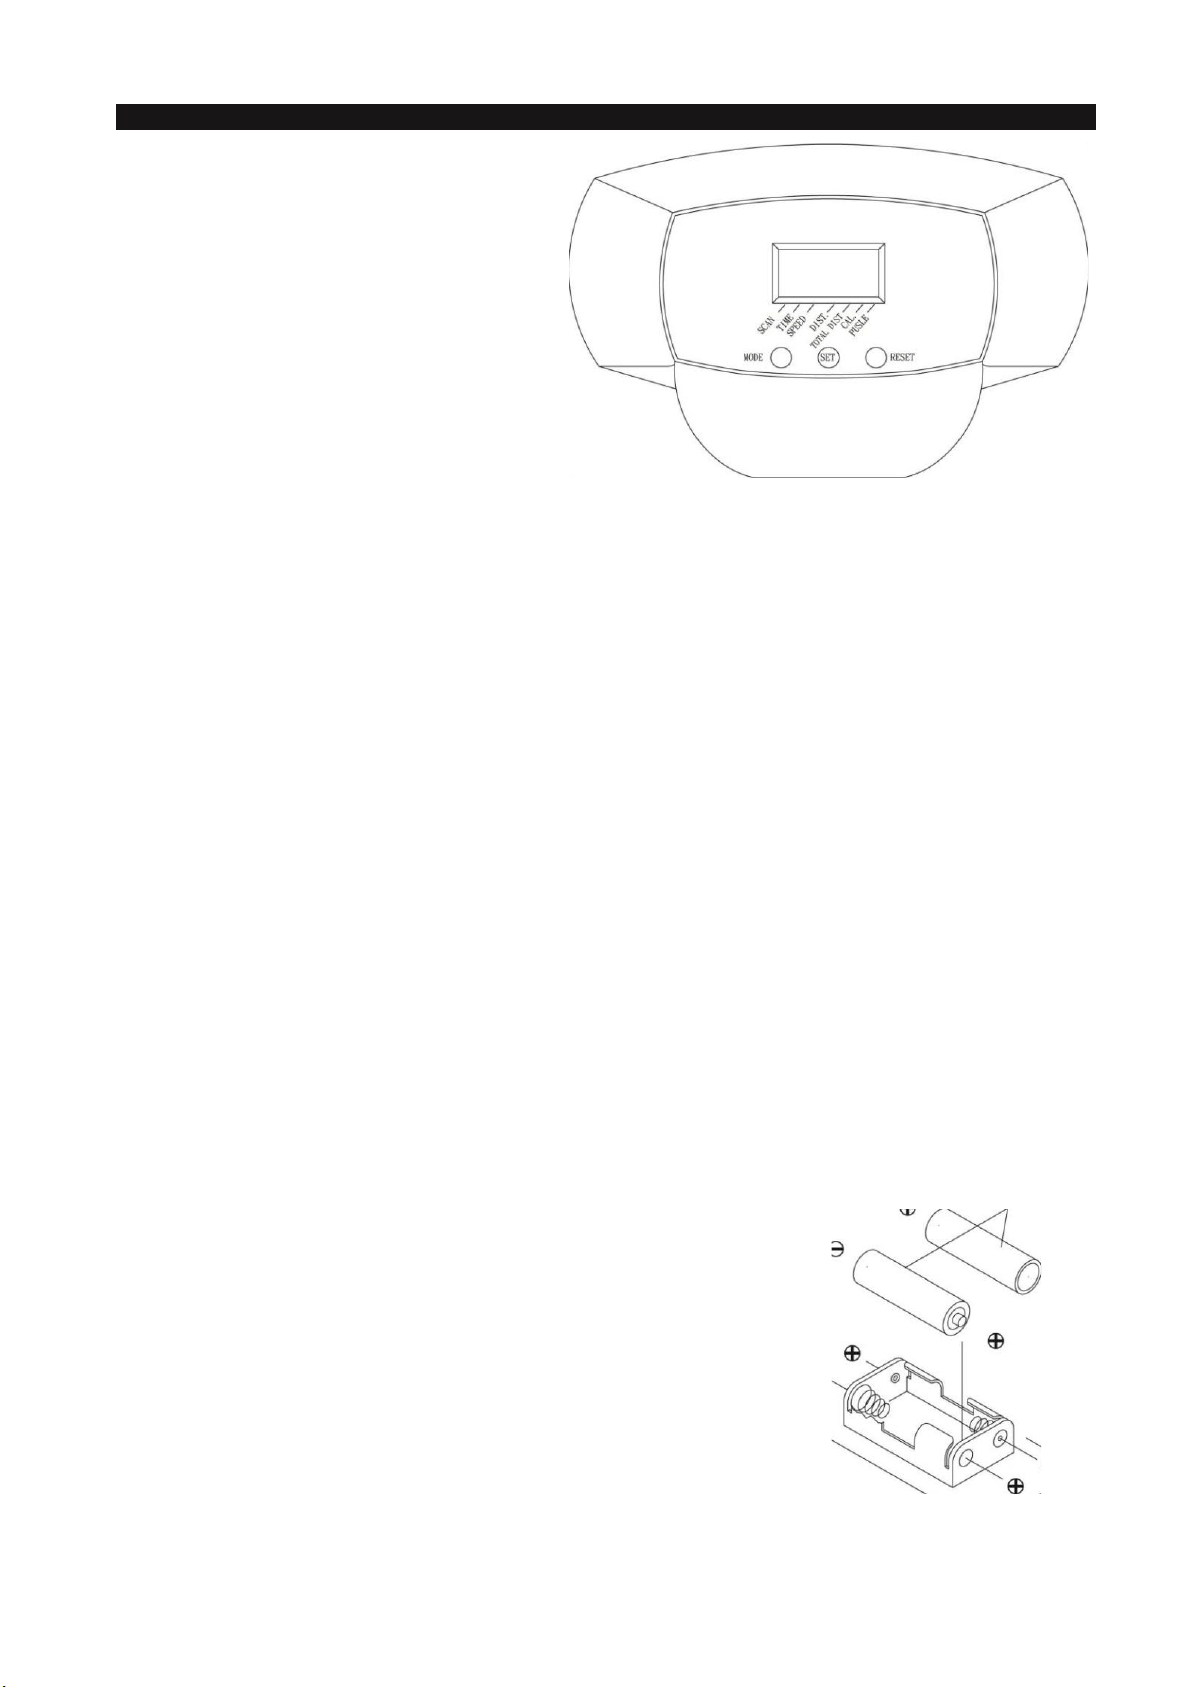
USING THE FITNESS METER
POWER ON: Walking Belt movement or press
any button.
POWER OFF: Automatic shut off after 4 minutes
of inactivity.
FUNCTION BUTTONS:
MODE: Press and release to select each function
for display or preset target values.
Press the button and hold it down for three
seconds to reset all functions to zero.
SET: Press to set target values for TIME, DISTANCE, and CALORIES.
RESET: This button will reset each function to zero.
To reset all functions to zero, press the button and hold it down for four seconds.
PRESET VALUES OPERATION:
Stop walking for four seconds. Press the MODE button to select functions for preset target values. The meter will
cycle through the functions as follows and allow you to set the function values.
TIME (0:00 to 99:00) - DISTANCE (0.0 to 99.99 mile) - CALORIES (0 to 999.9 Kcal)
Use SET & RESET buttons to enter desired values and press MODE button to confirm and move to next function
for presetting. To pass the setting of some functions, just press the MODE button. Start to run the Meter functions by
Walking.
FUNCTIONS:
SCAN: Automatically scans SPEED, TIME, DISTANCE, TOTAL DIST, and CALORIES in sequence with a
change every six seconds.
TIME: Counts upward to 99:59 in one second increments. Counts down from preset value.
SPEED: Displays the current speed, from zero to 999.9 Mile/Hr.
DISTANCE: Displays distance up to 99.99 miles in increments of 0.01 miles. Counts down from preset value.
TOTAL DIST: Displays the total accumulated distance you have taken from zero to 99.99 miles. The total
accumulated distance is retained when the meter is turned off.
CALORIES: Displays the calories consumption, from zero to 999.9 Kcal. Counts down from preset value.
The calories readout is an estimate for an average user. It should be used only as a comparison
between workouts on this unit.
PULSE: Heartbeat sensor for you Heart beat
NOTE: The TOTAL DIST will be reset to zero after batteries are removed for battery replacement or storage
of the unit.
AA Batteries
HOW TO INSTALL AND REPLACE BATTERIES:
1. Open the Battery Door on the back of the meter.
2. The meter operates with two AA batteries, the batteries are not included.
Refer to the illustration to install or replace the batteries.
NOTE:
1. Do not mix a new battery with an old battery.
2. Use the same type of battery. Do not mix an alkaline battery with another
type of battery.
3. Rechargeable batteries are not recommended.

GARLANDO SPA
Via Regione Piemonte, 32 - Zona Industriale D1
15068 - Pozzolo Formigaro (AL) - Italy
www.evert.it - info@evert.it