Owner 's Manual for GE JCB630DJ2WW
Table of Contents
- Safety Information
- Operating Instructions
- Clock, Timer and Convenience Outlet
- Controls
- Cookware
- Oven
- Sabbath Feature
- Self-Cleaning
- Special
- Steam Clean
- Features
- Surface Units
- Temperature Conversions
- Thermostat
- Timed Baking and Roasting
- Care and Cleaning
- Troubleshooting Tips
- Accessories
- Consumer Support
- Consumer Support
- Product Registration
- Warranty
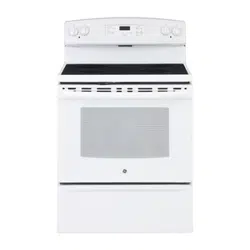
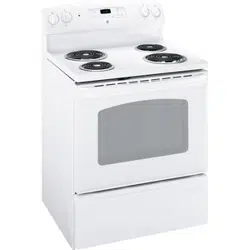
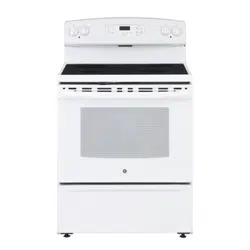
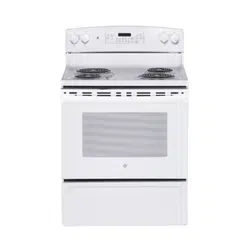
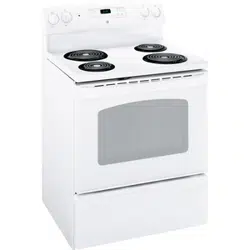
Using the surface units.
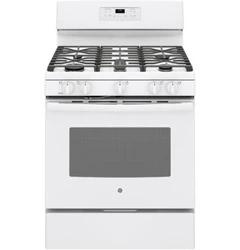
Throughout this manual, features and appearance may vary from your model.
How to Set
Push the knob in and turn in either direction to the setting you want. At both OFF and Max the control clicks into position. You may hear slight clicking sounds during cooking, indicating the control is keeping the power level you set.
Indicator Lights (on radiant glass models only)
A Hot indicator light will glow when any radiant element is turned on, and will remain on until the surface is cool enough to touch.
A Burner On indicator light will glow when any surface unit is on.
NOTE: The Hot indicator light may glow between the surface control settings of Min and OFF, but there is no power to the surface units.
Oven Control, Clock and Timer Features and Settings
BAKE Pad
Touch this pad to select the bake function.
BAKE Light
Flashes while in edit mode―you can change the oven temperature at this point. Glows when the oven is in bake mode.
START/ON Pad
Must be touched to start any cooking or cleaning function.
Display
Shows the time of day, oven temperature, whether the oven is in the bake, broil or self-cleaning mode and the times set for the timer or automatic oven operations. The display will show PRE while preheating. When the oven reaches the selected temperature, the oven control will beep and the display will show the oven temperature. If “F– and a number or letter” flash in the display and the oven control signals, this indicates a function error code. If your oven was set for a timed oven operation and a power outage occurred, the clock and all programmed functions must be reset. The time of day will flash in the display when there has been a power outage. Reset the clock. If the function error code appears during the self-cleaning cycle, check the oven door latch. The latch handle may have been moved, even if only slightly, from the latched position. Make sure the latch is moved to the right as far as it will go. Touch the OFF pad. Allow the oven to cool for one hour. Put the oven back into operation. If the function error code repeats, disconnect the power to the range and call for service.
TIMER Pad
Touch this pad to select the timer feature. Then touch the + and – pads to adjust the timer.
TIMER Light
Flashes while in edit mode―you can change the set time at this point. Glows when the timer has been activated. Flashes again when the time has run out until the control is reset.
CLOCK Pad
To set the clock, press this pad twice and then press the + and – pads. The time of day will flash in the display when the oven is first turned on.
START TIME Pad (on some models)
Use along with the COOK TIME or CLEAN pads to set the oven to start and stop automatically at a time you set. START TIME Light Flashes while in edit mode―you can change the start time at this point. Glows when the function has been activated. COOK TIME Pad (on some models) Touch this pad and then touch the + or – pads to set the amount of time you want your food to cook. The oven will shut off when the cooking time has run out. COOK TIME Light Flashes while in edit mode―you can change the set time at this point. Glows when the function has been activated. Flashes again when the time has run out until the control is reset.
START TIME Pad (on some models)
Use along with the COOK TIME or CLEAN pads to set the oven to start and stop automatically at a time you set.
START TIME Light
Flashes while in edit mode―you can change the start time at this point. Glows when the function has been activated.
COOK TIME Pad (on some models)
Touch this pad and then touch the + or – pads to set the amount of time you want your food to cook. The oven will shut off when the cooking time has run out.
COOK TIME Light
Flashes while in edit mode―you can change the set time at this point. Glows when the function has been activated. Flashes again when the time has run out until the control is reset.
AUTOMATIC OVEN Light (on some models)
This lights anytime the oven has been programmed using the COOK TIME or START TIME functions.
OVEN LIGHT or Pad
Touch this pad to turn the oven light on or off. – Pad Short taps to this pad will decrease the time or temperature by small amounts. Touch and hold the pad to decrease the time or temperature by larger amounts.
+ Pad
Short taps to this pad will increase the time or temperature by small amounts. Touch and hold the pad to increase the time or temperature by larger amounts.
CLEAN Pad (on some models)
Touch this pad to select the self-cleaning function. See the Using the self-cleaning oven section.
STEAM CLEAN pad
Touch this pad for easier cleaning of light soiling off the oven cavity or door. See using steam clean section.
CLEAN Light
Flashes while in edit mode―you can change the length of time for the self-clean cycle at this point. Glows when the oven is in the self-clean cycle. After the self-clean cycle, the light will turn off. Unlatch the door.
OFF Pad
Touch this pad to cancel ALL oven operations except the clock and timer.
BROIL Pad
Touch this pad to select the broil function.
BROIL Light
Flashes while in edit mode―you can switch from HI to LO BROIL at this point. Glows when the oven is in broil mode.
Indicator Lights (on some pads)
EDIT mode lasts several seconds after the last pad press. START TIME and COOK TIME will be the only pads lit if either of these options is selected.
Example: START TIME is selected with BAKE―the START TIME pad will remain lit until the clock reaches the programmed time, at which point it will turn off and the BAKE pad light will light up.)
Using the oven.
Before you begin…
The racks have stops, so that when placed correctly on the supports, they will stop before coming completely out, and will not tilt. When placing and removing cookware, pull the rack out until it stops.
- To remove a rack, pull it toward you, tilt the front end up and pull it out.
- To replace, place the end of the rack (stop-locks) on the support, tilt up the front and push the rack in.
CAUTION: When you are using a rack in the lowest position (R), you will need to use caution when pulling the rack out. We recommend that you pull the rack out several inches and then, using two pot holders, pull the rack out by holding the sides of it. The rack is low and you could be burned if you place your hand in the middle of the rack and pull all the way out. Be very careful not to burn your hand on the door when using the rack in the lowest position (R).
How to Set the Oven for Baking or Roasting (on models without an oven temperature knob)
- Touch the BAKE pad.
- Touch the + or – pads until the desired temperature is displayed.
- Touch the START/ON pad. The oven will start automatically. The display will show PRE while preheating.When the oven reaches the selected temperature, the oven control will beep and the display will show the oven temperature. To change the oven temperature during BAKE cycle, touch the BAKE pad and then the + or – pads to get the new temperature.
- Check food for doneness at minimum time on recipe. Cook longer if necessary.
- Touch the OFF pad when baking is finished and then remove the food fromthe oven.
How to Set the Oven for Broiling
NOTE: Close the door before start any broiling function.
Use LO Broil to cook foods such as poultry or thick cuts of meat thoroughly without overbrowning them.
- Place the meat or fish on a broiler grid in a broiler pan designed for broiling.
- Follow suggested rack positions in the Broiling Guide.
- Touch the BROIL HI/LO pad once for HI Broil. To change to LO Broil, touch the BROIL HI/LO pad again.
- Touch the START pad.
- When broiling is finished, touch the CLEAR/OFF pad.