User manual Vacuum Cleaners Max for Bissell 2596
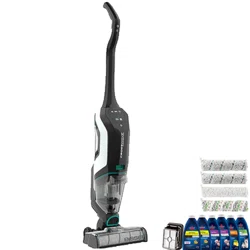
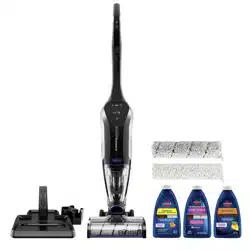
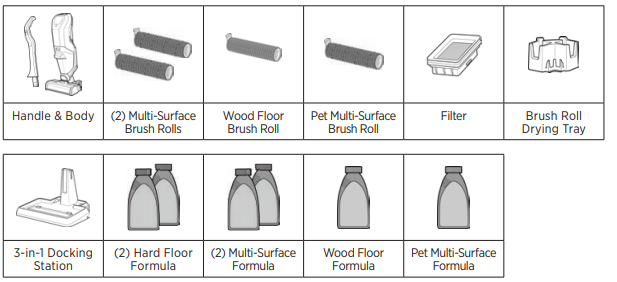
What’s in the Box?
Standard accessories may vary by model. To identify what should be included with your purchase, please refer to the “Carton Contents” list located on the carton top flap.
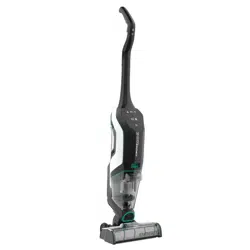
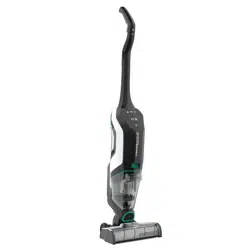
Product View
Product View
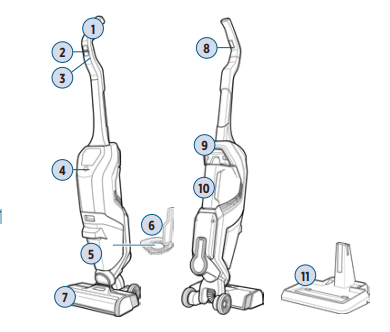
1. Upper Handle
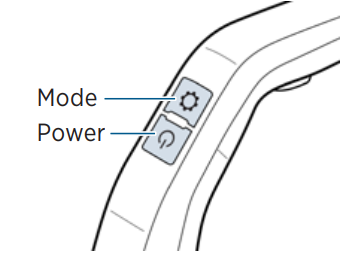
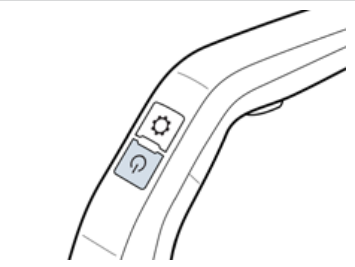
2. Mode Button
3. Power Button
4. Clean Cycle Button
5. Dirty Water Tank
6. Strainer
7. Brush Roll Window
8. Solution Spray Trigger
9. Carry Handle
10. Clean Water Tank
11. 3-in-1 Docking Station
Digital Display
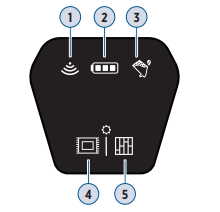
1. Wi-Fi Connected
2. Battery Status
3. Dirty Water Tank Full
4. Area Rug Mode
5. Hard Floor Mode
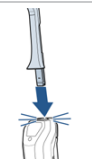
Assembly
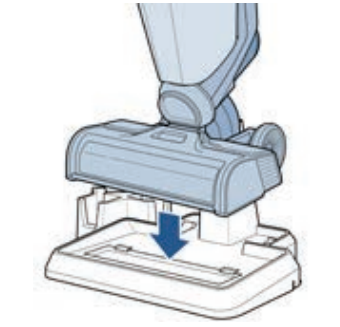
1. Insert handle into body of machine until you hear a “click”.
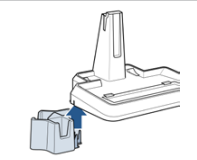
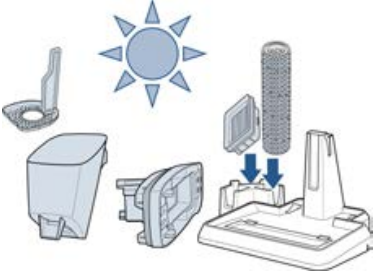
2. Slide the Brush Roll Drying Tray into place on the side of the 3-in-1 Docking Station
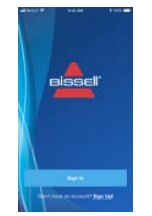
Connecting to the BISSELL Connect App
Downloading the BISSELL Connect App lets you track filter, brush roll and formula life, access usage tips, cleaning history, how-to videos, and set up automatic reordering.
1. In the App or Google Play Store search “BISSELL Connect” and download.

2. Once downloaded, open the app to sign in or create a new login.
3. Make sure you are near a Wi-Fi router and your machine is charged or on the 3-in-1 Docking Station prior to pairing.
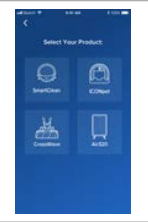
4. Select your product.
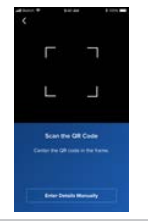
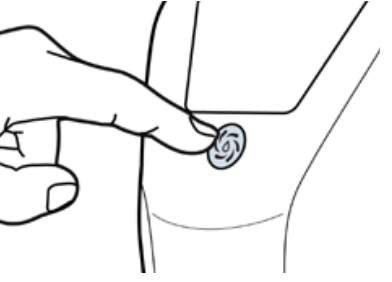
5. The QR code needed for setup can be found behind the Clean Water Tank.
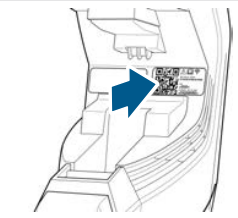
6. Once you find and scan the QR code, follow the instructions in the app to pair.
You can set up automatic reordering for formulas through the BISSELL Connect App.
Keep plenty of CrossWave® formulas on hand so you can clean whenever it fits your schedule.
Note: Always use CrossWave® formulas in your machine. Other formulas may harm the machine and void the warranty. Do not use Hard Floor Formula on area rugs or carpet.
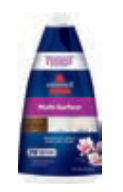 Multi-Surface Formula: Great for cleaning all sealed floors and area rugs.
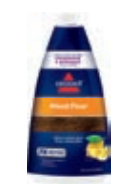 Wood Floor Formula: Restores your wood floors’ natural shine.
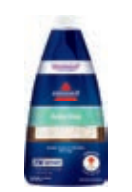 Area Rug Formula: Removes stuck-on and embedded dirt from area rugs.
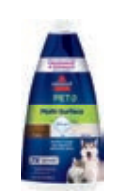 Multi-Surface Pet with Febreze Formula: Removes pet odors to clean and refresh.
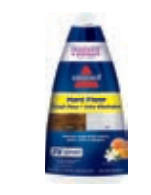 Hard Floor Formula: Removes tough sticky messes, grime, odors & allergens.
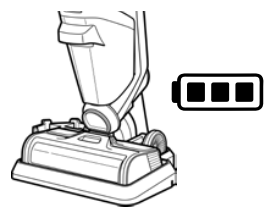
Charging the Battery
Download the BISSELL Connect App to watch helpful how-to videos.
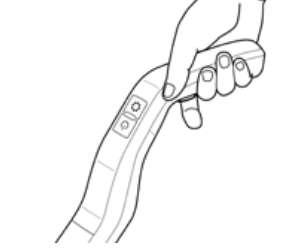
Make sure machine is fully charged before first use. To check the battery status, remove the machine from the dock and turn it ON by pressing the Power Button. You’ll know the battery is fully charged when all three white status lights are illuminated.
1. Place your CrossWave® Cordless Max onto the 3-in-1 Docking Station to charge.
2. Plug the adapter into a suitable wall outlet. The Battery Life Indicator will illuminate when charging.
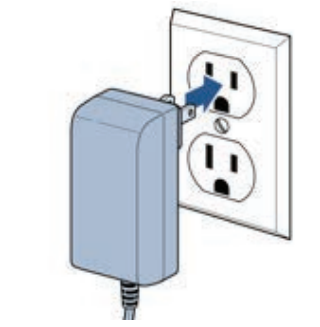
3. For maximum run time, charge the machine for 4 hours.

WARNING: To reduce the risk of fi re and electric shock due to internal component damage, use only BISSELL cleaning formula intended for use with the hard fl oor device.
Filling the Clean Water Tank
Use the BISSELL Connect App to watch additional how-to videos.
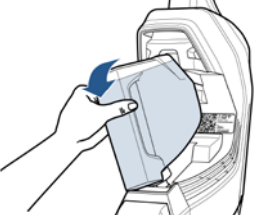
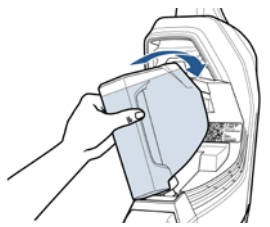
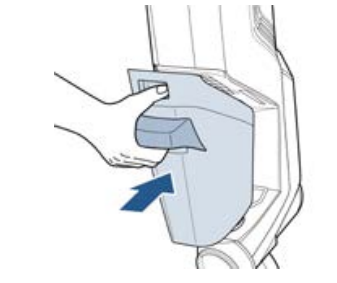
1. The Clean Water Tank is located on the back of the machine. To remove, use the finger groove at the top of the tank to grab and pivot the tank backwards.
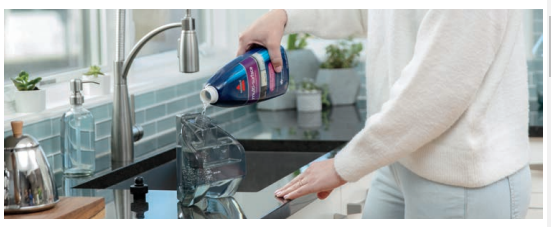
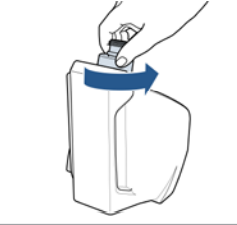
2. Unscrew the cap from the bottom of the Clean Water Tank.
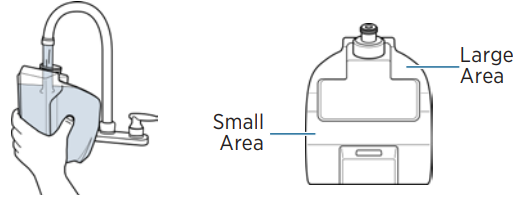
3. Choose the right BISSELL® formula from the ‘Cleaning Formulas’ section .
4. The Clean Water Tank has a Large Area volume and a Small Area volume. Pick one of the measuring volumes that best suits the space that you would like to clean.
The Large Area fill lines are for areas up to 700 sq ft. The Small Area fill lines are for areas under 350 sq ft.
Use warm (140°F/60°C max) tap water and add the appropriate BISSELL formula. Tap water with hardness greater than 35 ppm is recommended for use in machine to ensure the Dirty Water Tank full detection sensor works properly.
5. Screw the cap back on the Clean Water Tank. On the back of the machine, align the bottom of the Clean Water Tank with the grooves and pivot the tank until it “clicks” into place.
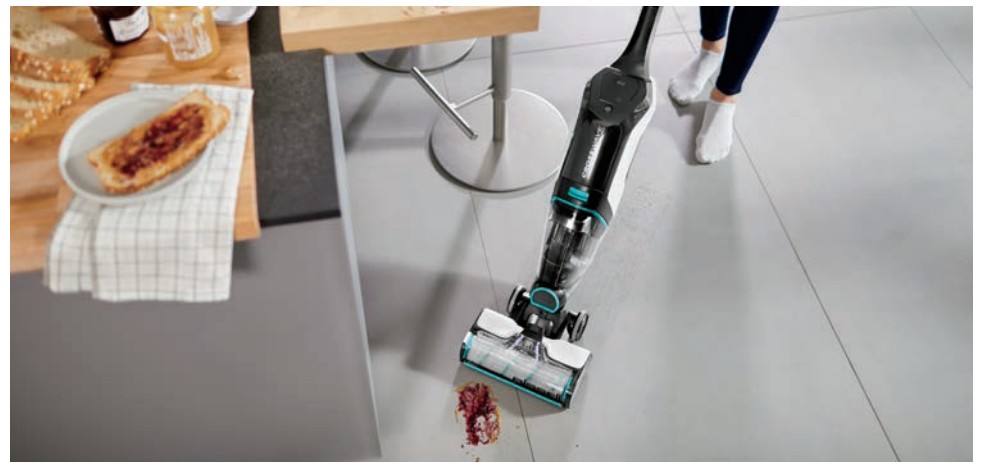
Cleaning Your Floors
1. To clean hard floors, turn machine ON by pressing the Power Button. Press the Mode Button to switch between the Hard Floor and Area Rug Modes. Area Rug Mode dispenses twice as much solution as Hard Floor Mode. Before cleaning area rugs, check the manufacturer’s tag and test an inconspicuous spot on the rug for colorfastness. Don’t use on silk or delicate rugs
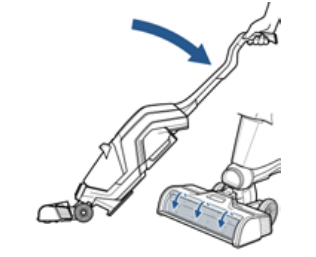
2. Recline the machine to start the Brush Roll spinning. Stand the machine upright to stop the Brush Roll spinning.
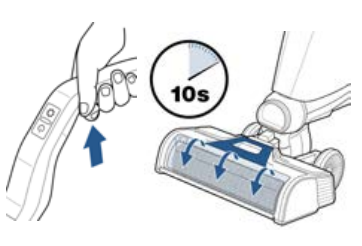
3. Before each use, hold the Solution Spray Trigger for 10 seconds to prime the system with cleaning solution. LED lights illuminate when holding the trigger. Bubbles will appear in the Brush Roll window when the solution is flowing.
4. To clean, hold the Solution Spray Trigger to apply solution on forward and backward passes.
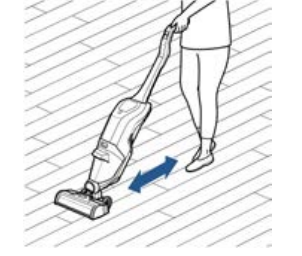
5. To dry floors faster, release the trigger and make a second pass without dispensing solution.
6. Turn OFF the machine by pressing the Power Button (  ).
).
ATTENTION Do not overwet carpet. Be careful not to run over loose objects or edges of area rugs. Stalling the brush may result in premature belt failure.
Emptying the Dirty Water Tank
When the Dirty Water Tank is full, your machine will turn OFF, beep and the Dirty Water Tank Full icon will blink orange on the Digital Display.
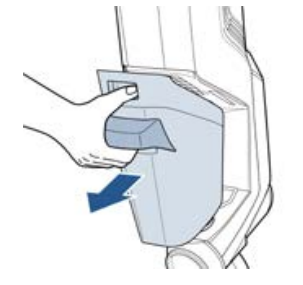
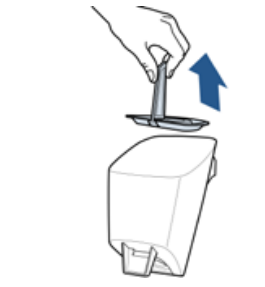
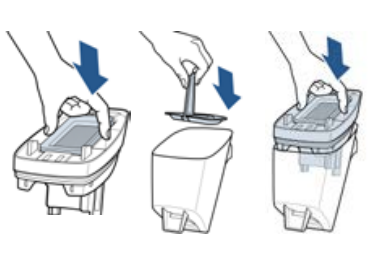
1. To remove the Dirty Water Tank, press the button on top of the tank, grab the front handle and pull the tank out.
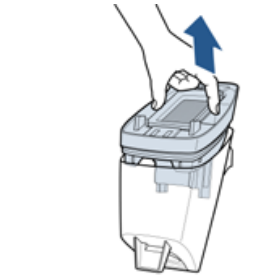
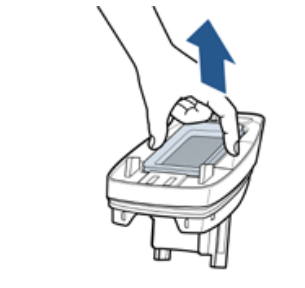
2. Remove the top of the Dirty Water Tank by grasping the recessed areas on each side of the filter and pulling up.
3. Separate the hair and debris from the dirty water by grasping the strainer tab and pulling up. Throw the debris into the trash.
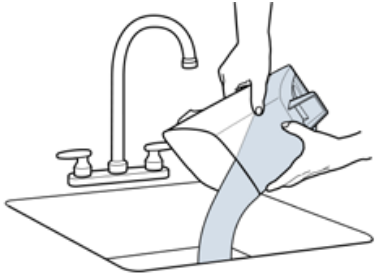
4. Pour the dirty water into the sink and rinse the Dirty Water Tank.
5. Remove the filter from the top of the Dirty Water Tank by pulling it up.
6. Hand wash the filter and screen with warm water and mild detergent. Rinse the bottom of the Dirty Water Tank cover.
7. Leave the parts out to dry before reassembling.
8. Once all parts are dry, reassemble the filter and the Dirty Water Tank cover.
9. Angle the Dirty Water tank back into the body of the machine. Insert the bottom of the tank first, then pivot the top toward the machine until it “clicks” into place
WARNING: To reduce the risk of electrical shock, turn Power Button OFF before performing maintenance or troubleshooting checks
Using the 3-in-1 Docking Station
Open the BISSELL Connect App to watch a full walkthrough video on the dock.
Charging starts once the machine is placed onto the plugged-in dock. Charging stops once the Clean Out Cycle runs, then resumes once the cycle completes.
1. Place the machine on the 3-in-1 Docking Station. Ensure there is enough solution in the Clean Water tank to run the Clean Out Cycle. The level of the solution should reach the Clean Out Cycle line. If the level of solution does not reach the line, then fill with water to that line.
2. Push the Clean Out Cycle Button to start the 40-second cycle. After the cycle is complete, empty the Dirty Water Tank. See page 9 for detailed instructions.
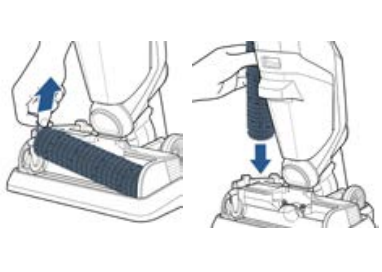
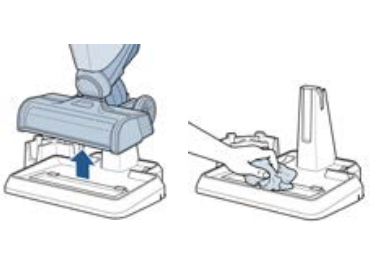
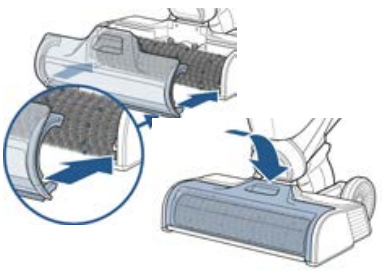
3. Remove the Brush Roll so it can dry. Grab the front of the Brush Roll window and pull up to remove. Pull up on the Brush Roll tab to remove. Put the Brush Roll in the drying tray. The Brush Roll and window can be hand washed.
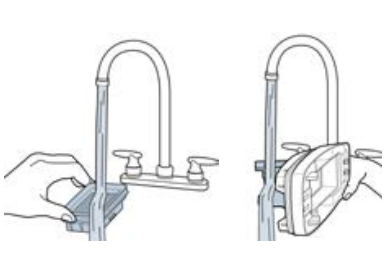
4. Remove the machine from the dock and wipe out the tray. Do NOT rinse directly under faucet. This keeps water out of the charging plug.
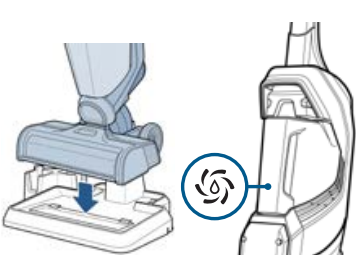
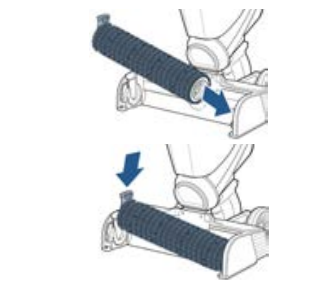
5. Once the Brush Roll is dry, place the end of the roll into the right side of the foot of the machine. Press the tab of the Brush Roll down to lock into place.
6. Replace the Brush Roll Window by lining up the window tabs with the edges of the foot. Then, press the window back into place until you hear a “click”.
Storing Your Machine
Download the BISSELL Connect App for more useful tips on storing and maintaining CrossWave Cordless Max.
Store CrossWave® Cordless Max in a protected, dry area. Since this product uses water, it must not be stored where there is danger of freezing. Freezing will damage internal components and may void the warranty.
WARNING To reduce the risk of fire, electric shock or injury, turn power OFF and disconnect plug from electrical outlet before performing maintenance or troubleshooting on the dock.
NOTICE To reduce the risk of a leaking condition, do not store machine where freezing may occur. Damage to internal components may result.
Disposing of the Battery
Before disposing the battery, make sure:
- The machine is disconnected from the 3-in-1 Docking Station.
- The Clean and Dirty Water Tanks are empty or removed from the machine.
- A Phillips-head screwdriver, electrical tape and rubber handled wire cutters are available for disassembly
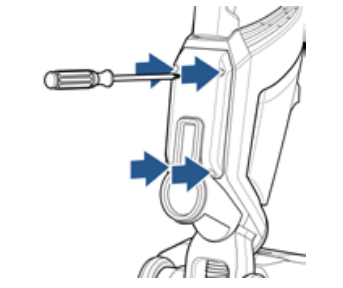
1. With a Phillips-head screwdriver, remove the 4 screws on the back of the machine. Lift off the back cover.
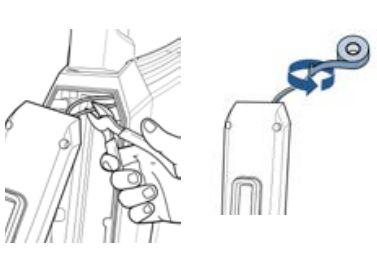
2. Cut the yellow positive (+) battery wire with wire cutters. Wrap the end of the cut wire with electrical tape. Individually cut and wrap the remaining battery wires.
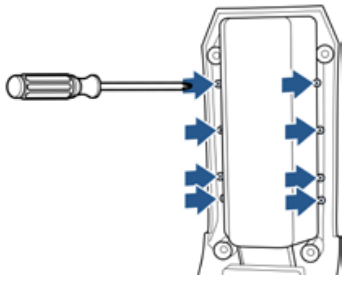
3. Using a Phillips-head screwdriver, remove the 4 screws located on the sides of the battery pack and remove it from the back cover.
Troubleshooting
This guide features everything you need to get ready for first use, including setting up, using and maintaining your machine, but join us online for a comprehensive walkthrough. Our online support includes tips and troubleshooting, videos, product registration, parts and more.
NOTICE: Disconnecting the battery will destroy the appliance and invalidate the warranty
WARNING: This product contains lithium-ion rechargeable batteries. According to Federal and State regulations, removal and proper disposal of lithium-ion batteries is required. For removal of the batteries in your appliance, see instructions on this page. For specific disposal instructions of batteries, please contact the RBRC