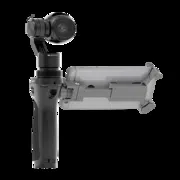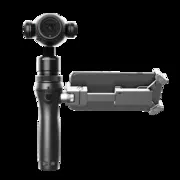
RONIN-MX
2016.06
V1.2
User Manual

Searching for Keywords
Search for keywords such as “battery” and “install” to find a topic. If you are using
Adobe Acrobat Reader to read this document, press Ctrl+F on Windows or Command+F
on Mac to begin a search.
Navigating to a Topic
View a complete list of topics in the table of contents. Click on a topic to navigate to that
section.
Printing this Document
This document supports high resolution printing.
©
2016 DJI All Rights Reserved.
1
Disclaimer and Warning
Congratulations on purchasing your new DJI
TM
product. The information in this document
affects your safety and your legal rights and responsibilities. Read this entire document
carefully to ensure proper conguration before use. Failure to read and follow instructions
and warnings in this document may result in serious injury to yourself or others, or damage
to your DJI product or damage to other objects in the vicinity. This User Manual and all
other collateral documents are subject to change at the sole discretion of DJI. For up-to-
date product information, visit http://www.dji.com and click on the product page for this
product.
Do not modify or adjust the RONIN
TM
-MX.
The Ronin-MX has been calibrated before it leaves the factory. No modification or
adjustment of the Ronin-MX is required or recommended. Be sure to use the original
battery, otherwise performance may be hindered and internal malfunctions or damage may
occur. Please download the corresponding Assistant.
By using this product, you hereby signify that you have read this disclaimer and warning
carefully and that you understand and agree to abide by the terms and conditions herein.
You agree that you are solely responsible for your own conduct while using this product,
and for any consequences thereof. You agree to use this product only for purposes that are
proper and in accordance with all applicable laws, rules, and regulations, and all terms,
precautions, practices, policies and guidelines DJI has made and may make available.
DJI accepts no liability for damage, injury or any legal responsibility incurred directly or
indirectly from the use of this product. The user shall observe safe and lawful practices
including, but not limited to, those set forth in this User Manual.
DJI is a trademark of SZ DJI Technology Co., Ltd. (abbreviated as “DJI”) and its afliated
companies. Names of products, brands, etc., appearing in this manual are trademarks or
registered trademarks of their respective owner companies.
Using this Manual
Legend
WARNING
Warning: Failure to properly follow procedures may result in property damage,
collateral damage, and serious or supercial injury.
CAUTION
Caution: Failure to properly follow procedures may result in property damage
and serious injury.
NOTICE
Notice: Failure to properly follow procedures may result in property damage, a
small possiblity of injury, or no possibility of injury.
TIPS
Tips
Ronin-MX
User Manual
2
©
2016 DJI All Rights Reserved.
Before You Begin
The following documents have been produced to help you safely operate and make full
use of your Ronin-MX:
Ronin-MX Quick Start Guide
Ronin-MX User Manual
Ronin-MX Intelligent Battery Safety Guidelines
Conrm that all parts listed in the In the Box section below are included in your box. Read
this entire User Manual and watch the informational and tutorial videos on the product
page of DJI’s ofcial website (http://www.dji.com/product/ronin-mx). Read the disclaimers
and warnings above to understand your legal rights and responsibilities. If you have any
questions or problems during the installation, maintenance or use of this product, please
contact DJI or a DJI authorized dealer.
Download the DJI Assistant (or DJI Ronin Assistant) App
Download and install the DJI Assistant (for iOS) app or the DJI Ronin Assistant (for
Android) app.
Note: Although the iOS version of the app is called “DJI Assistant” and the Android
version is called “DJI Ronin Assistant”, both versions of the app have the same functions.
Search “DJI Assistant” on the App Store and then follow instructions for iOS installation.
Search “DJI Ronin” on Google Play and then follow instructions for Android installation.
TIPS
For the best experience, use a mobile device that runs iOS 7.1 or Android 4.3,
or a later version.
iOS 7.1 or above
http://m.dji.net/dji-ronin
Android 4.3 or above
©
2016 DJI All Rights Reserved.
3
Contents
Disclaimer and Warning
1
Using this Manual
1
Legend
1
Before You Begin
2
Download the DJI Assistant (or DJI Ronin Assistant) App
2
Introduction
4
In the Box
5
Ronin-MX Diagram
7
Getting Started
8
Tuning Stand
8
Assembling the Handle Bar
8
Installing the Handle Bar onto the Gimbal
9
DJI Intelligent Battery
9
Mounting the Camera
12
Conguring the Handle Bar
15
Balancing
15
Step 1: Balancing the Vertical Tilt
15
Step 2: Balancing the Roll Axis
16
Step 3: Balancing the Tilt Axis
16
Step 4: Balancing the Pan Axis
17
Advanced Roll Adjustment
17
Using the Ronin-MX on the Ground
18
Tuning with the DJI Assistant (or DJI Ronin Assistant) App
18
Tuning with the DJI Assistant Software for PC/MAC
26
Remote Controller Operation
33
Operation Modes
36
Using with the Matrice 600
37
Mounting the Ronin-MX onto the Matrice 600
37
DJI GO App Tuning
40
Remote Controller Operation
42
Adding a Third-Party Transmitter/Receiver
43
Maintenance
43
Troubleshooting
44
Specications
46
Compliance Notice
47
4
©
2016 DJI All Rights Reserved.
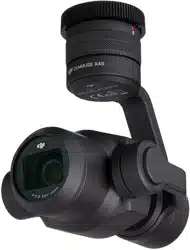
Introduction
Developed for lmmaking professionals, the DJI Ronin-MX is designed for both handheld
use and mounting to a DJI Matrice 600 aircraft for capturing amazing footage from the air.
It can also be used on moving vehicles, camera jibs or wirecams. The technology built
into the DJI Ronin-MX allows a broad spectrum of camera setups of varying sizes and
weights to be stabilized during lming.
The built in slip ring on the Ronin-MX allows for 360 degrees of continuous rotation. When
used with the DJI SRW-60G, the Ronin-MX can rotate unobstructed while transmitting HD
video. It can also be connected to DJI Lightbridge 2 for long range video transmission
during aerial use. The Ronin-MX is also compatible with the DJI Focus.
The brushless gimbal stabilization system is more than just three brushless motors
moving on three axes. The motors work with position feedback and the IMU (Inertial
Measurement Unit) to communicate with DJI’s custom-built 32-bit processor, which
processes movement calculations in milliseconds. This reduces angular vibration to less
than 0.02˚ of translated movement, meaning that the camera will remain steady and the
motor can be absolutely silent. The Ronin-MX can be used in different operation modes
such as Underslung Mode, Upright Mode and Briefcase Mode.
©
2016 DJI All Rights Reserved.
5
In the Box
Gimbal ×1
The gimbal includes DJI’s built-in motor drive
modules, an independent IMU module, a 32-bit DSP
processor, a power supply module, a Bluetooth
module, a transmitter/receiver module, a camera
shelf, a power breakout box and slip ring.
Handle Bar ×1
Customizable handle bar for the gimbal. The
handle bar is assembled from ve parts, including
a top handle, two bars and two grips.
Remote Controller – 2.4 GHz ×1
Control the gimbal’s movements, switch working
modes, and select gimbal speed.
Tuning Stand ×1
For suspending or storing the gimbal.
Charger ×1
100-240V automatic switching charger.
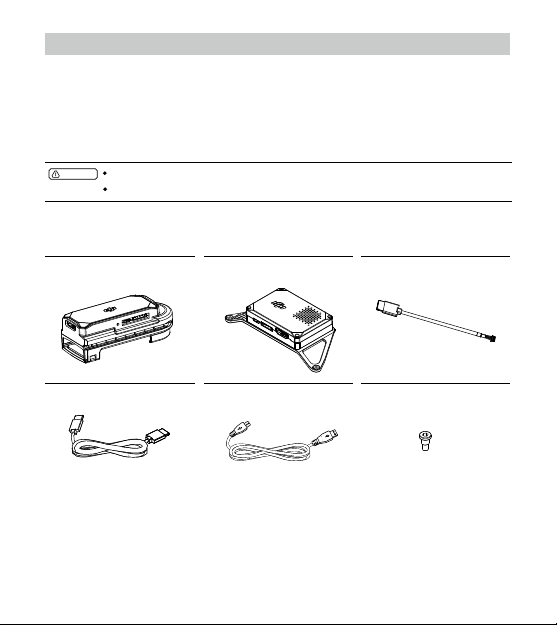
DJI Intelligent Battery ×2
Power source for the gimbal as well as other
external devices, including the DJI Focus,
Lightbridge, etc.
Cable Pack ×1
ANSI cable:
JIS or CE cable (varies by region)
Ronin-MX
User Manual
6
©
2016 DJI All Rights Reserved.
Micro USB Cable ×1
For rmware upgrades.
CAN Cable ×1
For connecting the gimbal to the Matrice 600.
Camera Mounting Plate ×1
For mounting your camera onto the gimbal.
Camera Upper Mounting Plate ×1
For mounting your camera onto the gimbal.
Vibration Absorber ×1
For mounting the gimbal onto the Matrice 600 and
reducing aircraft vibrations. The gimbal connector
can be removed and mounted to other devices
such as camera jibs or wirecams by using the
1/4''-20 or 3/8''-16 screws.
Accessories Package ×1
Camera Screw A (1/4'') ×2
Camera Screw B (3/8'') ×2
Camera Screw C (1/4'') ×2
Camera Screw D (3/8'') ×2
Lens Support ×1
Lens Support Screw ×1
Allen Wrench ×3 (2 mm, 3 mm, 3/16'')
Vibration Absorber Screw ×12
Camera Upper Mounting Plate Screw ×2

©
2016 DJI All Rights Reserved.
7
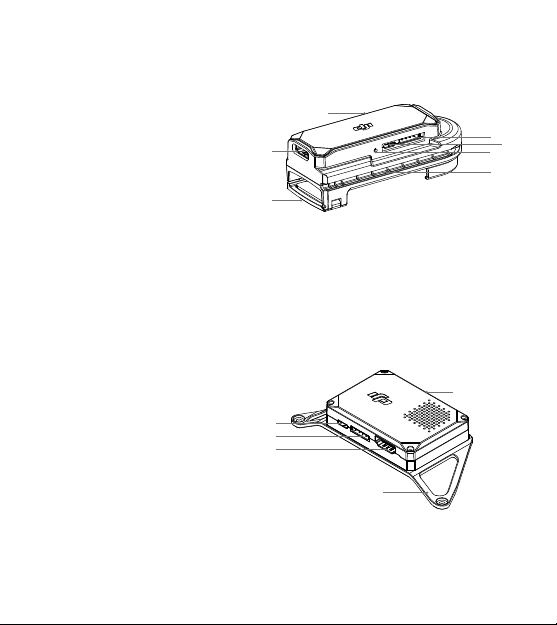
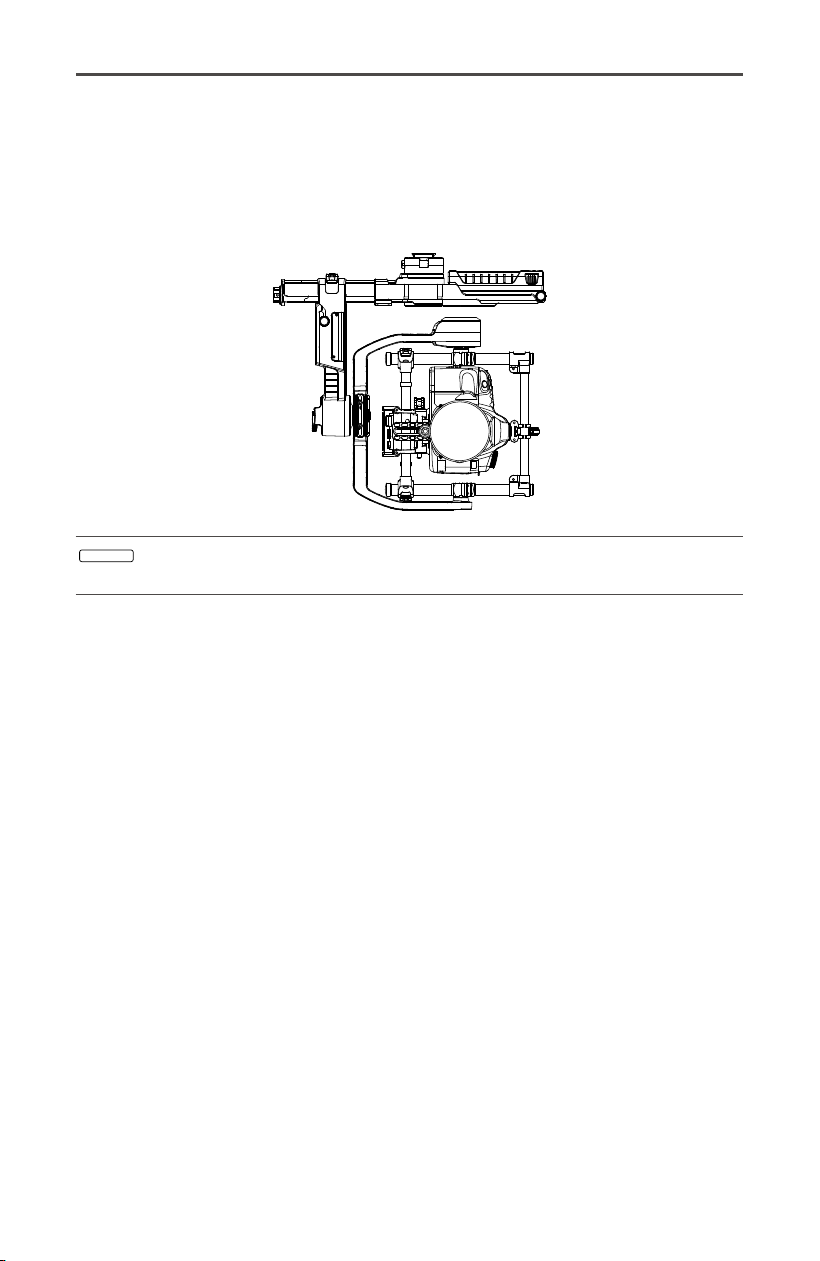
Ronin-MX Diagram
[1] Top Handle Bar
[2] Side Handle
[3] Gimbal Connector
[4] CAN2 Bus Port
[5] Pan Motor
[6] DJI Intelligent Battery
[7] Safety Lock
[8] Pan Adjustment Slider
[9] Intelligent Battery Power Distributor
Mounting Plate
[10] D-BUS Receiver Port
[11] Micro USB Port & CAN1 Bus Port
[12] Bind Button
[13] Gimbal LED Indicator
[14] Camera Upper Mounting Plate
[15] Roll Motor
[16] Tilt Motor
[17] Fore and Aft Adjustment
[18] Tilt Vertical Adjustment
[19] Roll Adjustment
[20] IMU Port
[21] P-TAP Accessory Power Port
[22] USB Accessory Power Port
[23] P-TAP Accessory Power Port (rear side)
[24] DJI Lightbridge Port (rear side)
[25] GCU Port (rear side)
[
1
]
[
3
]
[
4
]
[
14
]
[
8
]
[
10
]
[
9
]
[
11
]
[13]
[
12
]
[
15
]
[
16
]
[
18
]
[
19
]
[
17
]
[
5
]
[
6
]
[
7
]
[
20
]
[
21
]
[
22
]
[
23
] [
24
]
[
25
]
[
2
]

8
©
2016 DJI All Rights Reserved.
Getting Started
Tuning Stand
You can use the tuning stand to hold the Ronin-MX during setup or for storage. To unfold
the tuning stand, follow the steps below.
1. Hold the stand in the upright position as shown in the picture below and tighten the knob.
2. Press the buttons [1] on the outside of the lower legs and rotate the legs downwards,
away from the stand. Then press the buttons [2] on the outside of the upper support
arms and pull them upwards, away from the stand. Press the button [3] on the vertical
support and slide it up to extend the stand, as shown.
3. The upper half of this tuning stand can be removed by loosening the knob on the rear
of the stand. You can use it with any C-stand style stud that ts into the hole where the
support arms converge.
Hole
[
1
]
[
2
]
[
3
]
NOTICE
When mounting this section to a C-stand, always be sure to check the balance of
the stand so that the Ronin-MX, if it is tted with a camera, does not tip over.
When setting on a table, make sure the table is at and level.
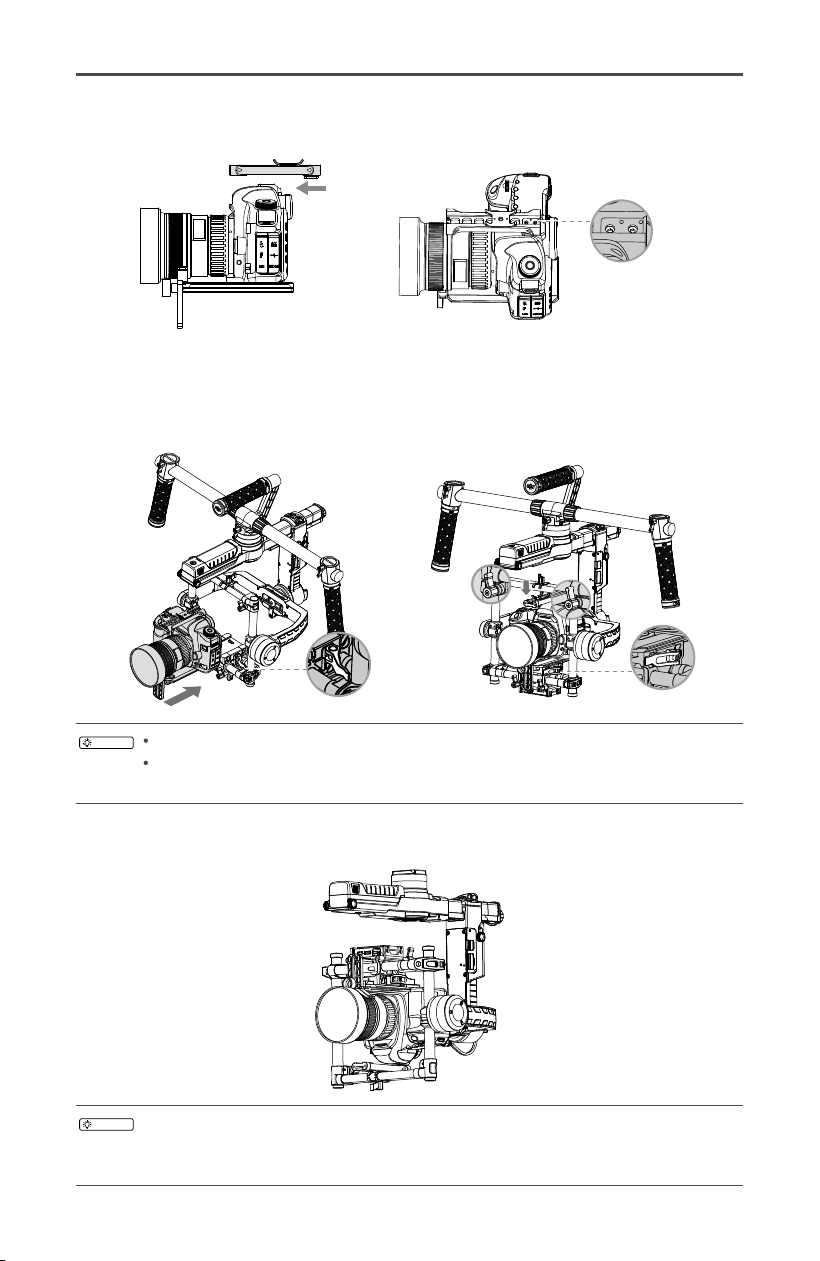
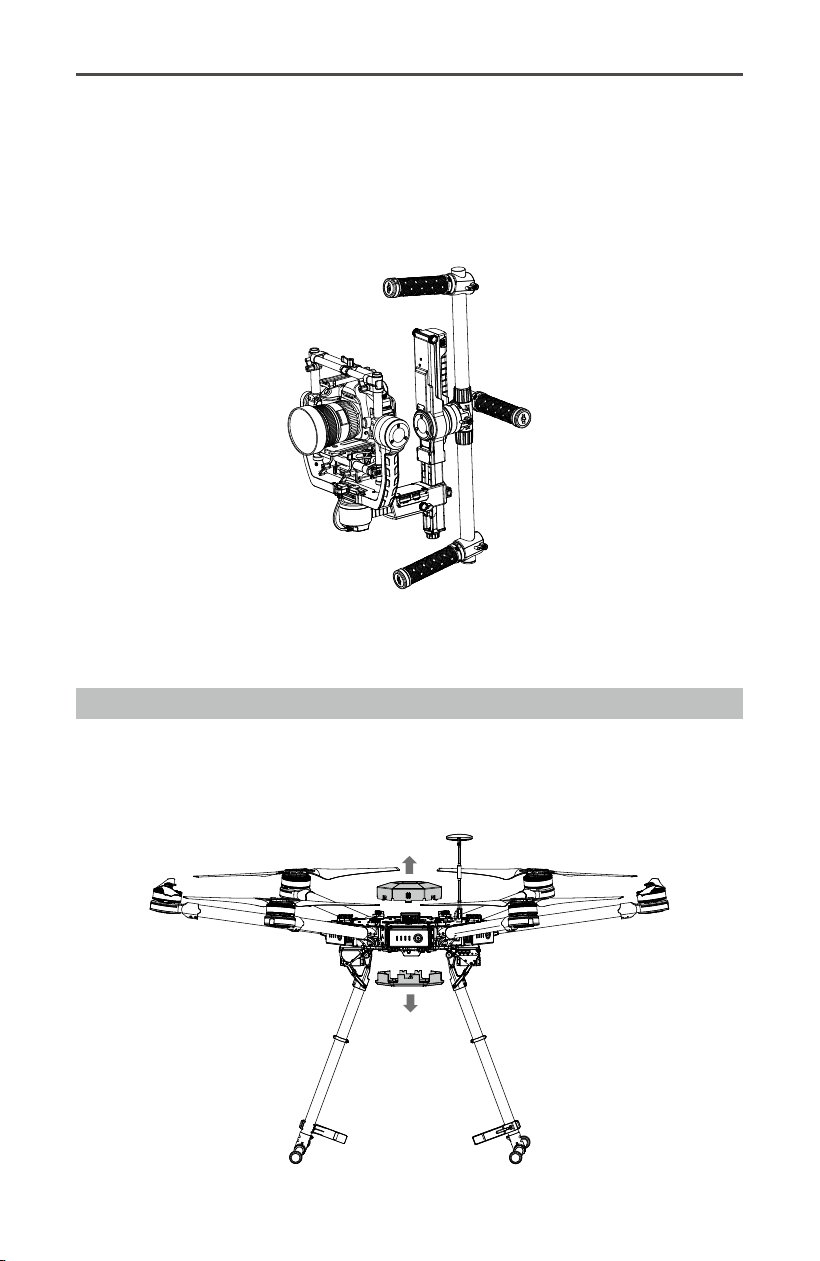
Assembling the Handle Bar
1. Attach the bars to both sides of the top handle by tightening the grip screws.
Ronin-MX
User Manual
©
2016 DJI All Rights Reserved.
9
2. Attach the grips to the bar and lock them in the preferred position.
Installing the Handle Bar onto the Gimbal
1. Place the handle bar in position, as shown below, then slide the gimbal horizontally
into the handle bar, tighten the knob when you hear a “click”, which indicates that the
safety lock has engaged.
2. Holding the gimbal by the grips, make sure the gimbal is not obstructed during a 360
degree pan. The installation is complete.
NOTICE
To remove the gimbal, pull down the safety lock and then loosen the knob.
DJI Intelligent Battery
Before you start using your Ronin-MX, be sure to charge the battery. The DJI Intelligent
Battery was specially designed for the Ronin-MX. It has a capacity of 1580 mAh, a voltage
of 14.4 V, and a variety of power management functions. Only charge the DJI Intelligent
Battery with the DJI approved Charger (MODEL BC235144015). When the DJI Intelligent
Battery is fully charged, the Ronin-MX has a maximum run-time of three hours.
DJI Intelligent Battery Charger

Ronin-MX
User Manual
10
©
2016 DJI All Rights Reserved.
DJI Intelligent Battery Functions
Balanced Charging Automatically balances the voltage of each battery cell during
charging.
Battery Level Display Displays current battery levels.
Overcharge Protection Charging stops automatically when the battery voltage is too
high.
Over-Discharge
Protection
Discharging stops automatically when battery voltage is too
low.
Short-Circuit Protection Automatically cuts power supply when a short circuit is
detected.
Sleep Protection Sleep mode is activated after 20 minutes of inactivity, saving
power.
Charging Temperature
Detection
The battery will charge only when the temperature is between
32° F and 131° F (0° C and 55° C).
BatterySpecications
Type LiPo
Capacity 1580 mAh
Voltage 14.4 V
Charging Environment Temperature 40° to 104° F (5° to 40° C)
Operating Environment Temperature 14° to 104° F (-10° to 40° C)
Charging/Discharging Environment Relative Humidity < 80%
WARNING
Read the User Manual, Disclaimer, and Battery Safety Guidelines before use.
Users take full responsibility for all operations and usage.
Always use DJI approved chargers. DJI takes no responsibility for any
consequences resulting from the use of non-DJI approved chargers.
Charging the DJI Intelligent Battery
1. Connect the Charger to a wall socket (100-240V, 50/60Hz).
2. Connect the DJI Intelligent Battery to the Charger.
3. The battery level indicator lights display the current charge level as the DJI Intelligent
Battery charges.
4. The DJI Intelligent Battery is fully charged when the battery level indicator lights turn
off. Disconnect the battery from the charger when charging is complete.
Socket
Ronin-MX
User Manual
©
2016 DJI All Rights Reserved.
11
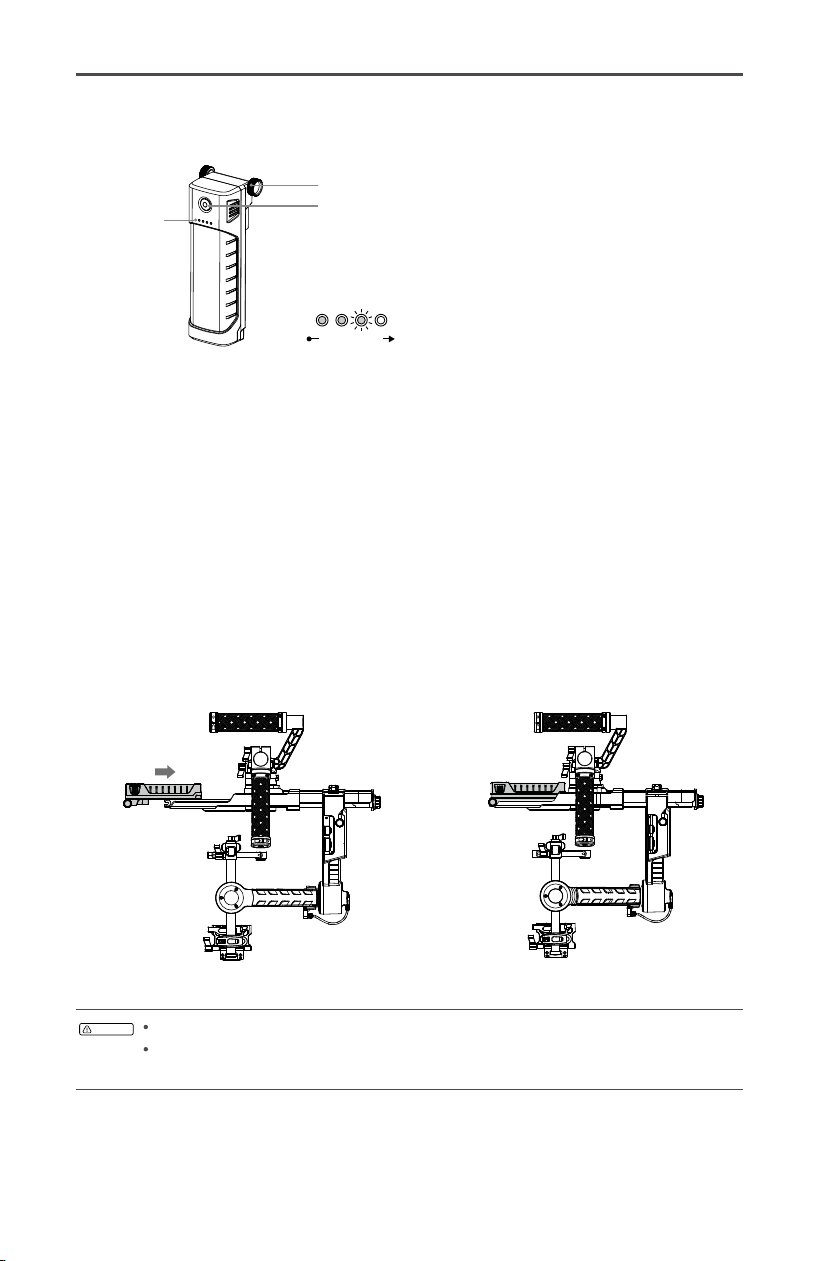
Using the DJI Intelligent Battery
[1] Battery Level Indicators
[2] Power Button (with LED indicator)
[3] Thumb Screws
Checking the Battery Level: When the DJI Intelligent Battery is turned off, pressing the
battery power button once will display the current battery level.
Powering On: When the DJI Intelligent Battery is turned off, press and hold the power
button for 1 second to turn on the DJI Intelligent Battery.
Powering Off: When the DJI Intelligent Battery is turned on, press and hold the power
button for 1 second to turn off the DJI Intelligent Battery.
DJI Intelligent Battery Installation
1. Loosen the screws on either side of the DJI Intelligent Battery. Slide the DJI Intelligent
Battery directly into the top part of the gimbal in front of the pan motor and then tighten
the thumb screws. Be sure the battery’s thumb screws t into the positioning slots so
that the DJI Intelligent Battery makes full contact with the gimbal’s electrical leads.
2. Tighten the screws on the DJI Intelligent Battery to lock it in place.
[
3
]
[
1
]
[
2
]
WARNING
Make sure the DJI Intelligent Battery is turned off during installation.
An incorrectly installed battery may lead to (1) Dropping out during ight, (2) Poor
battery connection, or (3) Unavailable battery information.
High
Low
Battery Level
Ronin-MX
User Manual
12
©
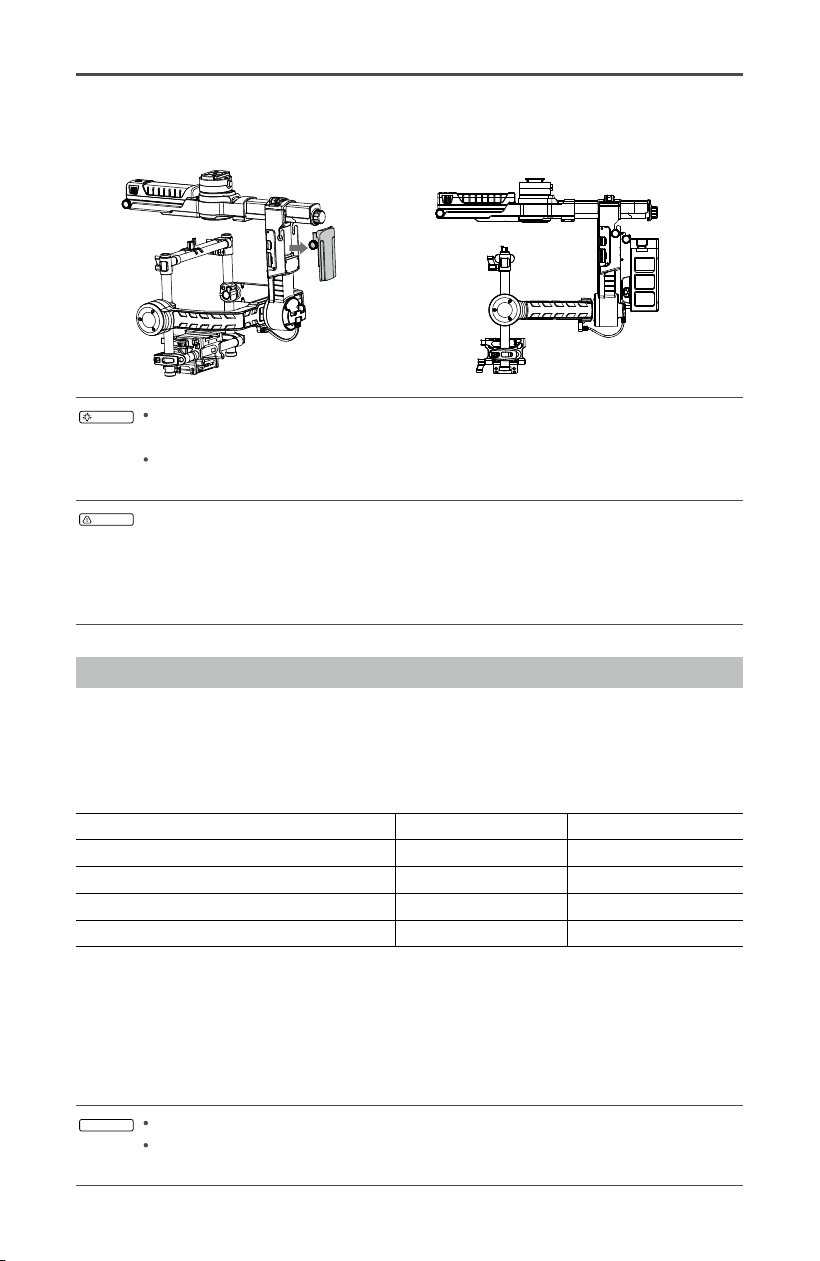
2016 DJI All Rights Reserved.
3. The optional Intelligent Battery Power Distributor with an Intelligent Battery is
mounted here to supply power to a RED camera or other accessories if needed.
TIPS
Visit the Ofcial DJI Online Store to learn more about the Intelligent Battery
Power Distributor.
Note that the Intelligent Battery Power Distributor can only supply power to the
camera or other accessories and will not power the Ronin-MX.
WARNING
If using the P-TAP Accessory Power Port at the bottom of the Ronin-MX as a power
source for your camera or accessory, make sure the combined total P-TAP output
is below 3 A. Do not use the P-TAP Accessory Power Port to supply power for RED
cameras or accessories with rated currents exceeding 3 A, otherwise the Ronin-MX
may become damaged.
Mounting the Camera
The Ronin-MX uses an adjustable camera mounting plate that allows you to easily balance,
install, and remove the camera. The Ronin-MX has been tested with the following types of
cameras. Other cameras similar in size and weight may also be compatible.
Supported Cameras
ARRI ALEXA Mini* Canon 5D MK III Panasonic GH3
Black Magic Cinema Camera* Canon 6D Panasonic GH4
Black Magic Pocket Cinema Camera Canon 7D RED EPIC*
Canon 1Dc Canon C100 Sony Alpha 7 Series
Canon 5D MK II Nikon D800
* Must be used with dedicated camera accessories. Visit the Ofcial DJI Online Store to learn more.
Camera Size Requirements
The maximum depth from the center of gravity on the camera base plate is 120 mm.
The maximum height, measured from the top of the camera base plate, is 130 mm. The
maximum width is 160 mm.
NOTICE
Make sure the camera is powered off during installation.
It is recommended to use soft connection cables to avoid obstructing camera
movement.

Ronin-MX
User Manual
©
2016 DJI All Rights Reserved.
13
130mm
120mm
160mm
How to mount the camera
1. Attach the camera mounting plate to your camera using the provided camera screws A,
B, C or D. Choose the correct screw holes according to your camera’s conguration.
Some cameras have two tripod mounting holes. If two mounting holes are available on
your camera, use them both. Secure the camera as rmly as possible.
2. Install the lens support by gently pushing it up, so that it is applying light pressure to
the lens. Then tighten the thumbscrew.
NOTICE
Camera screws A and B only t the holes of the mounting plate, while camera
screws C and D only t the slot of the mounting plate. Be sure to use the correct
1/4" or 3/8" screws.
The lens support can be installed facing outward or inward to accommodate
different lens types.
Ensure alignment of the camera mounting plate and then tighten the mounting
screw before tightening the lens support.
TIPS
Why do you need to use a lens support?
Certain cameras have a very tight lens securing system, and some cameras
such as the Canon 5D MK II and MK III have very loose lens securing systems.
The Ronin-MX balances the camera as one solid unit. If the mounted camera
has a loose lens securing system, the lens support must be used. This is
because a loose connection between the lens and the camera body may allow
vibrations that travel through to the camera but not directly to the lens, resulting
in the two masses shaking at different frequencies. The resulting oscillations
will be transmitted to the IMU, causing the whole gimbal to shake. If the lens
support ts, it’s best to use it at all times.
Ronin-MX
User Manual
14
©
2016 DJI All Rights Reserved.
4. With the gimbal facing outward on the tuning stand, slide the mounting plate into the
receiver until the safety lock engages. Adjust the vertical position of the crossbar to
meet the camera upper mounting plate.
5. When the camera achieves a rough balance, tighten the camera base side clamp and
the lock-knobs.
TIPS
You can adjust the tightness of the clamp with an M3 Allen wrench.
The steps above are suitable for most cameras. When mounting a RED or ARRI
camera, the proper camera accessories must be used.
6. You can also rotate the camera mounting plate 180 degrees to mount a camera upside-
down when necessary in certain congurations.
3. Mount the Camera Upper Mounting Plate to the top of the camera through the hot shoe
and then tighten the screws.
TIPS
When mounted on an aircraft, make sure the camera has a full, unobstructed range
of motion when pointed down at 90 degrees. If the power distribution box prevents a
full range of motion after it is balanced, try mounting the camera upside-down.

Ronin-MX
User Manual
©
2016 DJI All Rights Reserved.
15
Balancing
To obtain the best performance from the Ronin-MX, proper balancing is a must. Accurate
balance is critical for shots where the Ronin-MX will be subjected to extreme movements
or accelerations (running, biking, moving cars, aircraft, etc.). Proper balance will also
offer a longer battery runtime. There are three axes that need to be accurately balanced
prior to turning on the Ronin-MX and setting up the software.
NOTICE
The camera needs to be fully configured, with all accessories and cable
connections, prior to installing and balancing the camera on the gimbal. If the
camera has a lens cap, be sure to remove it prior to balancing.
Be sure that the Ronin-MX’s power and camera are turned off while balancing the
camera.
Step 1: Balancing the Vertical Tilt
To adjust the vertical balance, you will need to change the camera’s vertical position.
Adjust the height of the crossbar to achieve vertical tilt balance.
1. Rotate the tilt axis so that the camera lens is pointing upward, then loosen the two
vertical adjustment tabs and the lock-knobs on the top crossbar.
2. Gently slide the camera mount crossbar forwards or backwards until the camera
points upwards when released.
3. Tighten the tabs and lock-knobs, then manually rotate the assembly, simulating tilt, to ensure
there is no binding in the tilt motor. When proper balance is achieved, you can rotate the
camera to any tilt angle and it will stay in that position (while holding the roll axis in position).
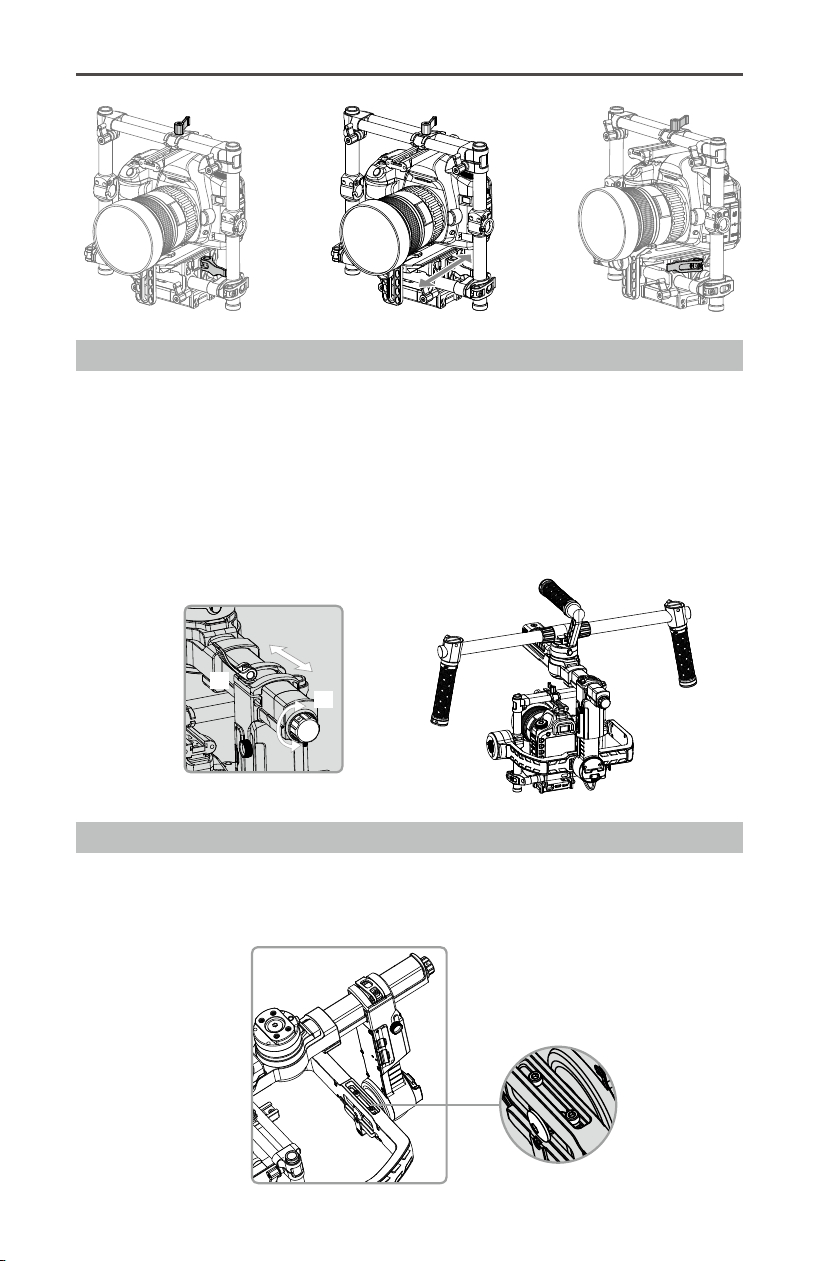
ConguringtheHandleBar
The customizable handle bar on the Ronin-MX can be removed, if necessary. Loosen
the two grip screws where the handle bar meets the gimbal and then remove the grips
from the handle bar. You can remove one or both sides of the handle bar. The resulting
conguration is shown below.
TIPS
You may need to reduce the stiffness of the pan motor in this conguration.
Ronin-MX
User Manual
16
©
2016 DJI All Rights Reserved.
NOTICE
Ensure that the measurement marks match up on both of the vertical bars. If
they do not match up, the assembly may be skewed higher or lower on one
side which could cause the tilt motor to bind.
Step 2: Balancing the Roll Axis
Balancing the camera from left to right on the roll axis is also required. When the proper
left/right roll balance is achieved, the camera will remain level.
1. Loosen the three lock-knobs to allow the camera and mounting plate to slide left and
right.
2. Slide the camera left or right until the roll axis remains level.
3. Tighten the three lock-knobs to lock the camera mounting plate in position.
NOTICE
When adjusting the roll balance position of the camera, only loosen the three lock-
knobs a few turns to allow the camera base to slide. Do not loosen the lock-knobs
excessively.
The lock-knob can be pulled outwards and repositioned if there is an obstruction.
Step 3: Balancing the Tilt Axis
1. Loosen the camera base’s side clamp and the lock-knob on the center of the crossbar
to allow the camera and mounting plate to slide forwards and backwards.
2. Slide the camera forwards or backwards until the tilt axis remains level. Only very small
adjustments are required to achieve the proper balance.
3. Tighten the side clamp and the lock-knob to lock the camera and mounting plate in
position. When the proper fore and aft tilt balance is achieved, the camera will stay
level when you remove your hand (while holding the roll axis in position).
Ronin-MX
User Manual
©
2016 DJI All Rights Reserved.
17
Step 4: Balancing the Pan Axis
To balance the pan axis, you must adjust the pan axis slide.
1. Open the clamp [1] on the pan axis and turn the knob [2] to slide the assembly.
Identify if the Ronin-MX is front heavy or rear heavy. Rotate the Ronin-MX on the stand
so one side is higher than the other, if the front end rotates from the higher position to
the lower position and that means the Ronin-MX is currently front heavy, then you will
need to slide the gimbal backward, otherwise you need to slide the gimbal forward.
2. Tighten the clamp after balancing is completed. While the Ronin-MX is resting on the
tuning stand, try rotating the Ronin-MX. If the camera does not swing, the pan axis is
properly balanced.
Advanced Roll Adjustment
In cases where the camera itself is too light in comparison to the tilt motor assembly,
advanced roll adjustment can be achieved by loosening the indicated screws and
pushing the assembly to the right or left.
[1]
[2]

18
©
2016 DJI All Rights Reserved.
N/A
?
Gimbal
Mode:
Wizard
Pan SmoothTrack
Tilt SmoothTrack
Roll SmoothTrack
Speed
Pan Axis
Tilt Axis
Deadband Accel
SmoothTrack Adjustments
0
0 0
0
0
0
Roll Axis
0 0
0
Test Pan Speed
SmoothTrack Test
Test Tilt Speed
Gimbal Control Viewer More
Gimbal Control Viewer More
Pan
Thumb
Controller
Remote
Operator
Tilt
Control Speed Adjustment
15
1515
40
Speed
Pan Axis
Tilt Axis
Deadband Accel
0
0 0
0
0
0
Roll Axis
0 0
0
Test Pan Speed
SmoothTrack Test
Test Tilt Speed
Test Roll Speed
?
Gimbal
Wizard
Using the Ronin-MX on the Ground
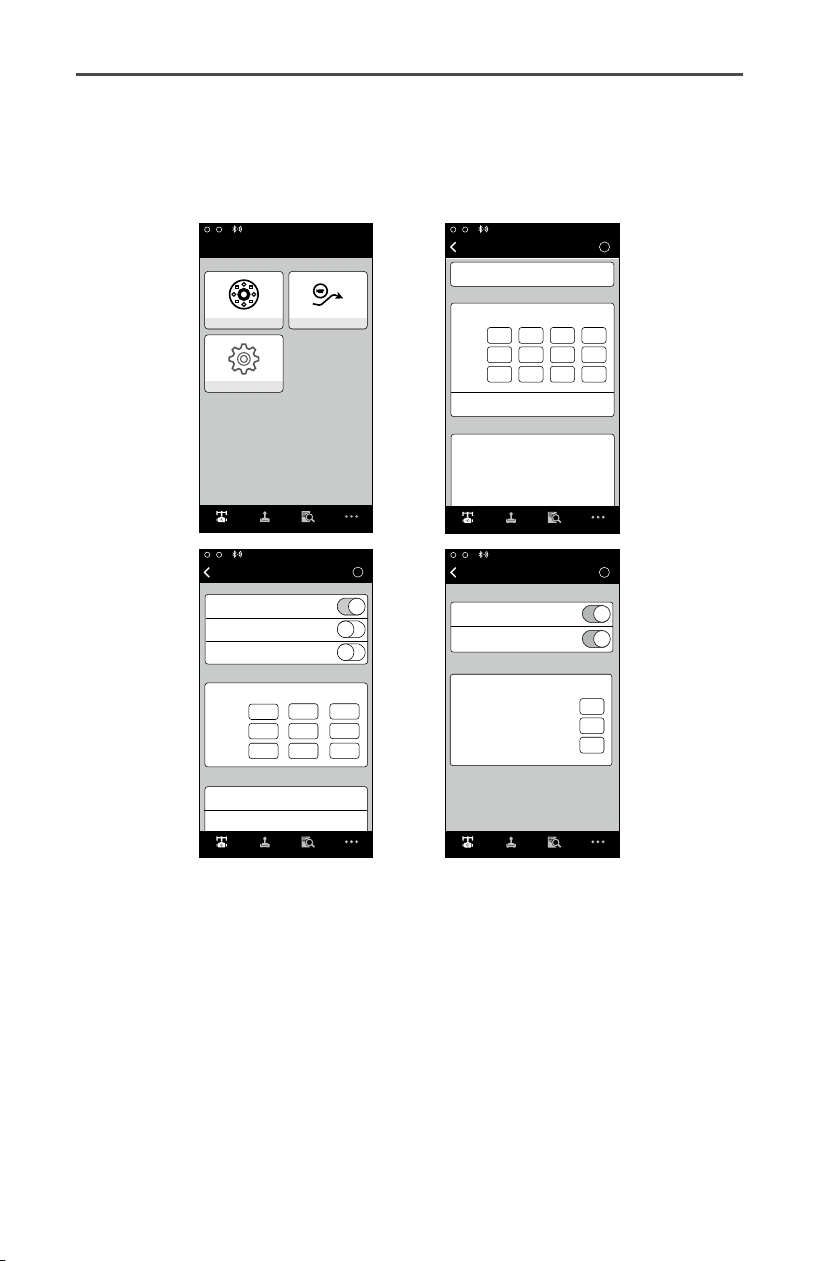
Tuning with the DJI Assistant (or DJI Ronin Assistant) App
After balancing the camera, you can adjust parameters in the DJI Assistant (for iOS) or
DJI Ronin Assistant (for Android) app, and congure your Ronin-MX.
Download and Install
1. Download the DJI Assistant app. For the iOS version, search “DJI Assistant” in the App
Store, then follow the installation instructions. Search “DJI Ronin” in Google Play, then
follow the installation instructions for the Android version.
2. Ensure that Bluetooth is enabled on your mobile device and orient the camera in the
standard operating position (facing forwards). Turn on your Ronin-MX, then launch the
DJI Assistant app.
3. When using the DJI Assistant app for the rst time, you will be prompted to register
using a valid e-mail address.
4. Connect your device to the Ronin-MX by following the step-by-step instructions in the
DJI Assistant app. After connecting to the gimbal’s main control, you will see the Wizard
menu. When the indicator at the top of the screen displays solid green and the blue light is
blinking, the connection is complete. The green LED on the Ronin-MX will also light up.
5. Activation is required when using the Ronin-MX for the rst time, otherwise the gimbal
will not work. To activate your Ronin-MX, connect your mobile device to the Internet,
then enter the “More” page in the DJI Assistant app and tap the “Activate” button.
TIPS
After enabling Bluetooth on your mobile device, return to the DJI Assistant app
to connect to the Ronin-MX. The Ronin-MX will not appear in the mobile device’s
Bluetooth device list. It can only be connected via the DJI Assistant app.
The functions in the iOS version and Android version of the DJI Assistant app are
the same. DJI Assistant pages shown in this manual are from the iOS version.
Basic Settings
The Wizard menu provides the most basic functions you may want to adjust upon receiving
your Ronin-MX. These options are also the most frequently used functions during standard
operation. You can adjust all of these settings in the Wizard menu.
N/A
?
Gimbal
Mode:
Wizard
Live Data
0
0
0
0
0
0
Power
Pan
Tilt
Roll
Angle
Gimbal Control Viewer More
Configuration
55
45
45
40
40
40
0
0
0
20
60
60
Camera Type
DSLR Camera
Stiffness Strength Outfilter Control
Pan Axis
Tilt Axis
Roll Axis
Ronin-MX
User Manual
©
2016 DJI All Rights Reserved.
19
1. Camera Type
It is highly recommended to choose the Camera Type (DSLR Camera, Mirrorless or RED
Camera) to obtain the best Stiffness, Strength, Outlter and Control value.
2. Live Data
This data represents the feedback from each motor axis. If a particular motor axis
indicates a power reading greater than 10, this often means the mechanical balance of
the camera hasn’t been properly adjusted. A properly balanced camera rig will display
readings close to 0 power on each axis, but these values may vary. The angle reading
indicates the current angle of each axis in relation to the center.
3. Briefcase Mode
When Briefcase Mode is switched on, the Ronin-MX seamlessly transforms into a slim
prole that can be held close to your body. With Briefcase Mode turned off, the Ronin-
MX will allow the camera to roll when the Ronin-MX is tilted beyond the standard roll axis
parameters.
4. SmoothTrack Mode
When SmoothTrack Mode is enabled, the Ronin-MX can be “steered”, on the selected
axis, by the camera’s operator. The steering/translation speed can be adjusted for each
axis independently. When the Ronin-MX’s top bar is rotated left or right, the camera
will move, smoothly following the user’s input, and stop at the appropriate angle. In the
SmoothTrack options menu, the settings for the pan axis, roll axis and the tilt axis can be
independently adjusted.
The Speed will determine how fast the camera will travel while translating a pan/roll/
tilt movement. The Deadband setting determines how much movement the gimbal will
tolerate prior to translating the camera’s pan/roll/tilt. The Acceleration setting determines
how closely the camera will follow the translated pan/tilt/roll movement.
TIPS
When mounting a heavy camera (such as a RED camera) on the Ronin-MX,
the Acceleration setting should be adjusted properly. If there is too much
acceleration, the camera might shake. If there is too little acceleration, the
SmoothTrack speed of the gimbal might not reach maximum speed.
The SmoothTrack pan, roll, and tilt speed can be tested by tapping the Test button. To
avoid damaging the camera, make sure nothing is obstructing the camera before testing.
5. Control Speed Adjustment
The Remote Controller speed can be adjusted here. This setting represents the maximum
speed in the pan and tilt axis when the Remote Controller sticks are pushed all the way in
any given direction.
Ronin-MX
User Manual
20
©
2016 DJI All Rights Reserved.
?
Gimbal
Test Pan Speed
Test Tilt Speed
SmoothTrack
SmoothTrack Adjustments
Test
Speed
Deadband Accel
Pan Axis
Tilt Axis
0
0 0
0 0
0
Roll Axis
0
0
0
Gimbal Control Viewer More
Pan SmoothTrack
SmoothTrack Mode
Tilt SmoothTrack
Roll SmoothTrack
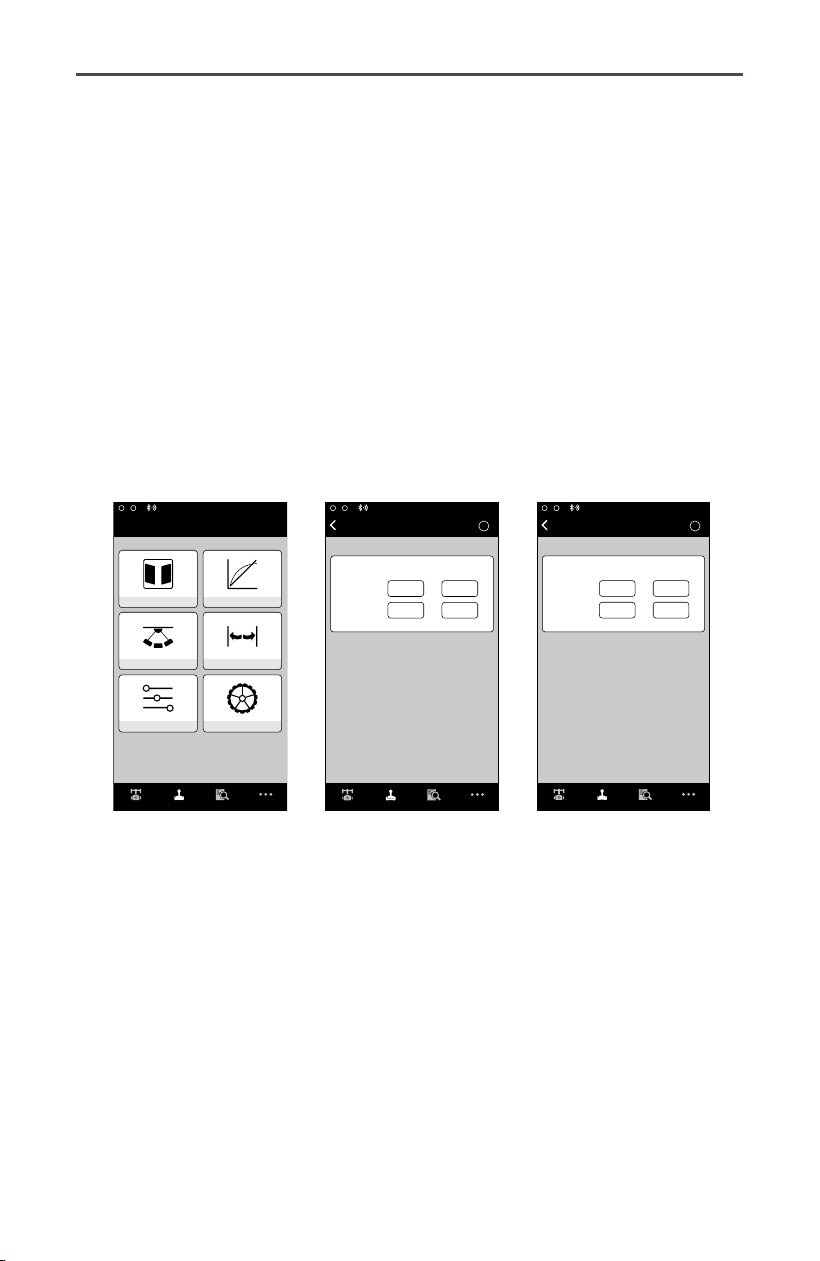
Advanced Settings
More advanced functions can be adjusted here to meet your needs.
Gimbal Menu
1. Motor Adjustment
It is highly recommended to choose the Camera Type (DSLR Camera, Mirrorless or RED
Camera) to obtain the best Stiffness, Strength, Outlter and Control value.
Only tap the Auto Tune Stability button when the Ronin-MX performance is not good
enough after choosing the Camera Type. The Auto Tune Stability allows for automatic
adjustment of each motor’s stiffness (as relayed from the sensors and interpreted by the
Ronin-MX) to accomplish an optimized setting.
The motor stiffness adjustment allows the user to ne tune the amount of power that is
applied by the motors as they react and balance the weight on each axis. The higher you
adjust the stiffness settings, without causing any vibrations or oscillations on the gimbal,
the better your experience will be.
N/A
?
Gimbal
Mode:
Push Mode
Gimbal Control Viewer More
Manual Adjustment
Pan Axis
Tilt Axis
Trim
Pan Axis
Tilt Axis
Roll Axis
Trim
0
0
0
Wizard
Gimbal
Motor
Push Mode
Mode:N/A
SmoothTrack
Gimbal Control Viewer More
N/A
?
Gimbal
Mode:
Motor
Auto Tune Stability
Live Data
0
0
0
0
0
0
Power
Pan
Tilt
Roll
Angle
Gimbal Control Viewer More
Configuration
55
45
45
40
40
40
0
0
0
20
60
60
Camera Type
Stiffness Strength Outfilter Control
Pan Axis
Tilt Axis
Roll Axis
DSLR Camera
Ronin-MX
User Manual
©
2016 DJI All Rights Reserved.
21
Without causing any vibrations or oscillations, (1) Increasing the Strength value will
reduce gimbal attitude errors; (2) If the gimbal experiences high frequency vibrations,
increase the Outfilter value, otherwise it should be set to 0; (3) Increasing the Control
value will compensate for angular vibrations.
Do not adjust the default Strength, Outlter or Control values unless you are an advanced
user.
2. SmoothTrack Mode
Refer to the Basic Settings section for details relating to SmoothTrack Mode.
3. Push Mode
Enable Manual Adjustment to allow the pan and tilt axes to be adjusted by hand when the
Ronin-MX is turned on.
The trim adjustment controls the amount of trim that is applied to each off-centered axis.
The default setting for the center is 0˚.
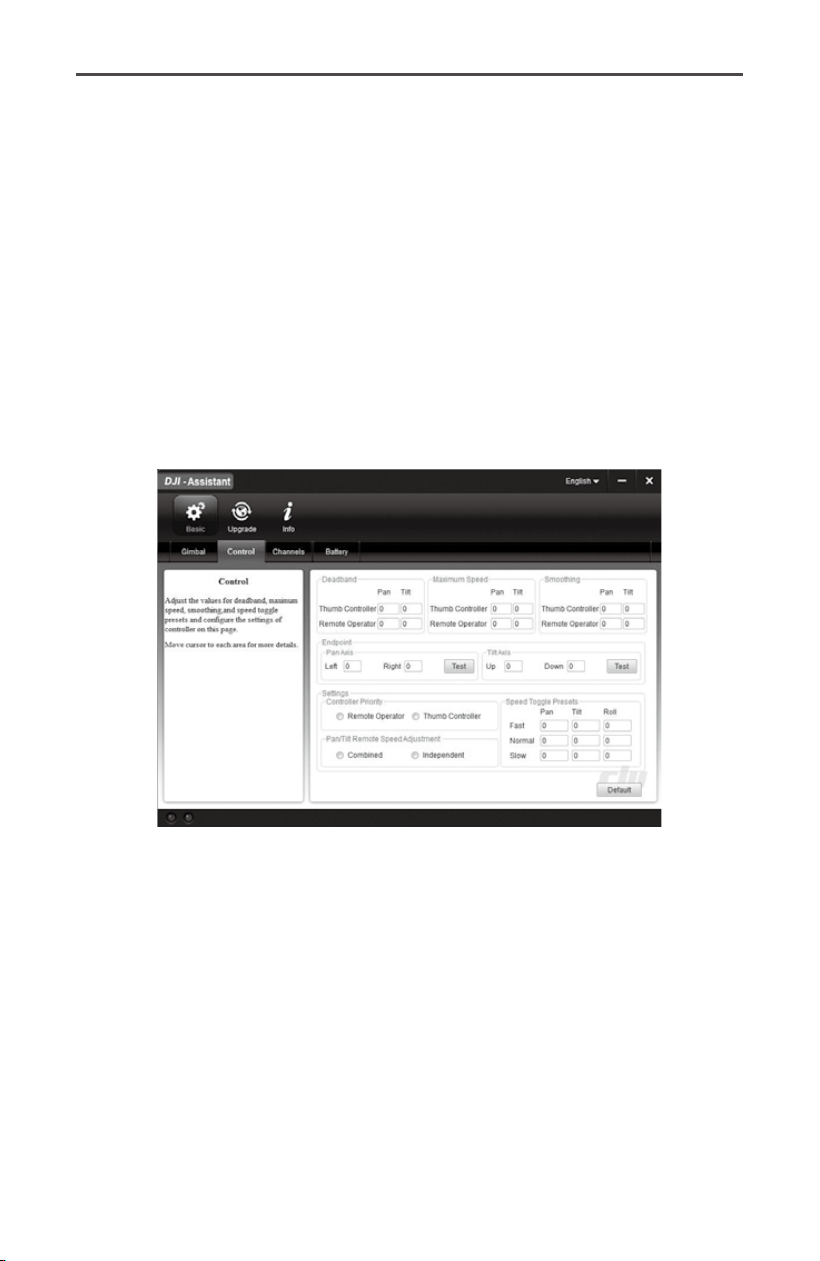
Control Menu
1. Deadband
The Thumb Controller and the remote operator controller can have independently
adjusted pan and tilt deadband settings. The larger the deadband, the more stick
movement will be required to translate into actual movement of the gimbal.
2. Maximum Speed
Maximum Speed is a function that prevents the control stick response from being a linear
response, which is also known as an increasing response curve. This means the amount
that the gimbal moves on the pan or tilt axis is not directly proportional to control stick
manipulation. Control stick response can be adjusted to be milder below the rst half of the
control stick’s travel and increased to a higher speed towards the last half of the control
stick’s travel. The preset exponential curve is calibrated based on maximum speed input.
The maximum speeds of the Thumb Controller and the Remote Controller sticks can be
set independently of each other.
Gimbal Control Viewer More
N/A
Mode:
Wizard
Control
Deadband Maximum Speed
Smoothing Endpoint
Channels Settings
?
Gimbal Control Viewer More
Deadband Adjustment
Thumb
Controller
Remote
Operator
Pan
Tilt
Control
Deadband
6
6
6
6
?
Gimbal Control Viewer More
Control Speed Adjustment
Thumb
Controller
Remote
Operator
Pan
Tilt
Control
Maximum Speed
40
15
15
15
Ronin-MX
User Manual
22
©
2016 DJI All Rights Reserved.
3. Smoothing
When the control stick input is released, the translated movement will be smoother and
slower than if the smoothing is increased. If smoothing is set to 0, the slowdown will be
translated as an abrupt stop. The Thumb Controller and remote operator control sticks
can be set independently. Pan and tilt smoothing can also be independently adjusted.
4. Endpoint
Pan axis endpoint settings determine the farthest points to which the gimbal will rotate left
or right during controller input. Pan axis endpoints can be adjusted independently, for left
and right movement, when used with a Remote Controller or the Thumb Controller.
Tilt axis endpoint settings control the maximum points to which the gimbal can rotate up
or down. Tilt axis endpoints can be adjusted independently for up and down movement
when used with a Remote Controller or the Thumb Controller.
The pan and tilt endpoints can be tested. Ensure the camera is unobstructed before
tapping the Test buttons.
TIPS
If the endpoint settings for pan axis are set to 0, which means there are no endpoints
for the pan axis so that the gimbal can rotate 360 degree continuously. If set to 0, the
pan axis will not move when the “Test Pan Endpoints” button is pressed.
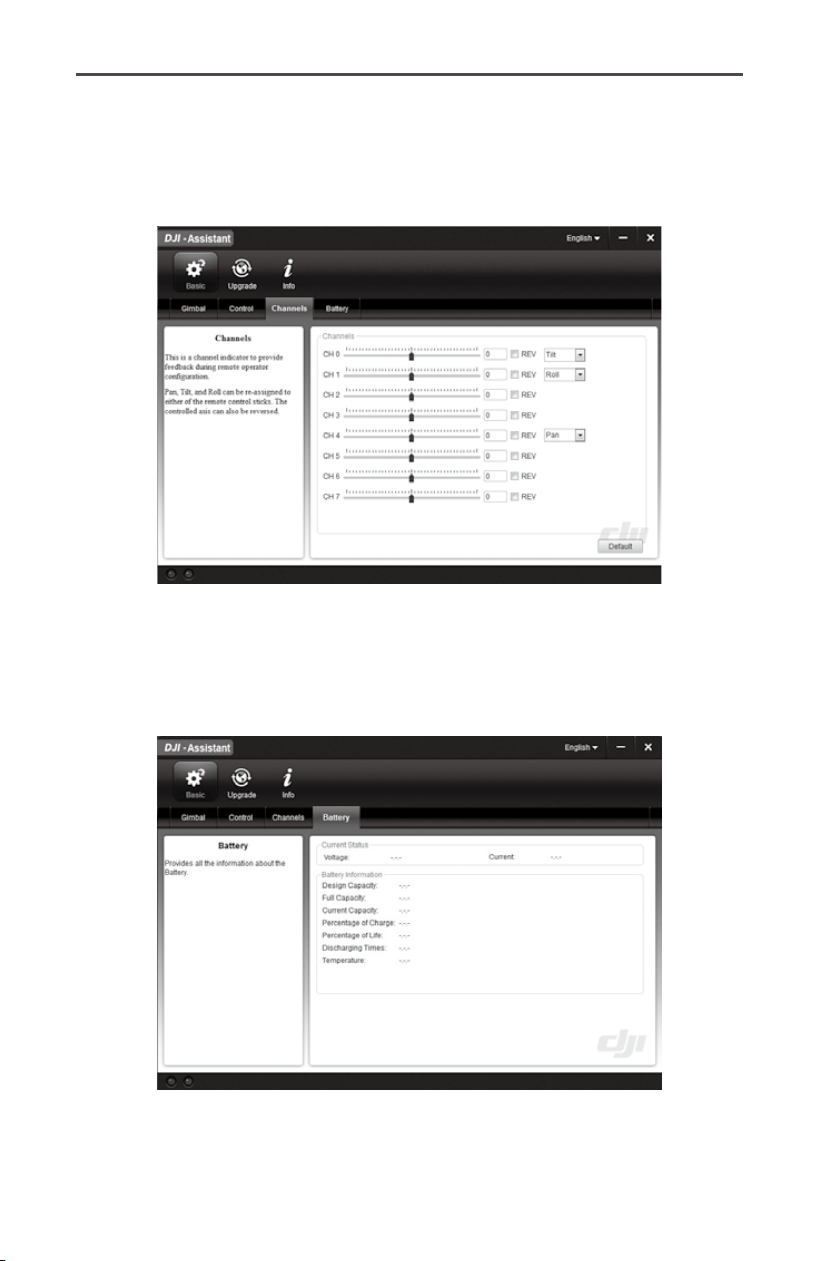
5. Channels
The channel indicator provides feedback during remote operator conguration. Pan, tilt,
and roll can be re-assigned to either of the Remote Controller sticks. Each axis can also
be reversed.
6. Settings
Controller Priority: If both input devices simultaneously send control signals to the gimbal,
the input from the selected controller will take priority and will control the device at that
given time.
?
Gimbal Control Viewer More
N/A
Mode:
Test Pan Endpoints
Test Tilt Endpoints
Endpoint Adjustments
Test
Pan Axis
Left Right
Up Down
Tilt Axis
Control
Endpoint
0 0
0 0
?
Gimbal Control Viewer More
Smoothing Adjustment
Thumb
Controller
Remote
Operator
Pan
Tilt
Control
Smoothing
15
15
15
15
Ronin-MX
User Manual
©
2016 DJI All Rights Reserved.
23
Pan/Tilt Remote Speed Adjustment: Click to choose combined or independent settings.
Speed Toggle Presets: These presets will allow you to change the SmoothTrack speed
remotely. If the Remote Controller is turned on, the Speed Toggle Presets for SmoothTrack
will take precedence over the DJI Assistant settings. Once the Remote Controller is
turned off, the SmoothTrack settings in DJI Assistant will take over.
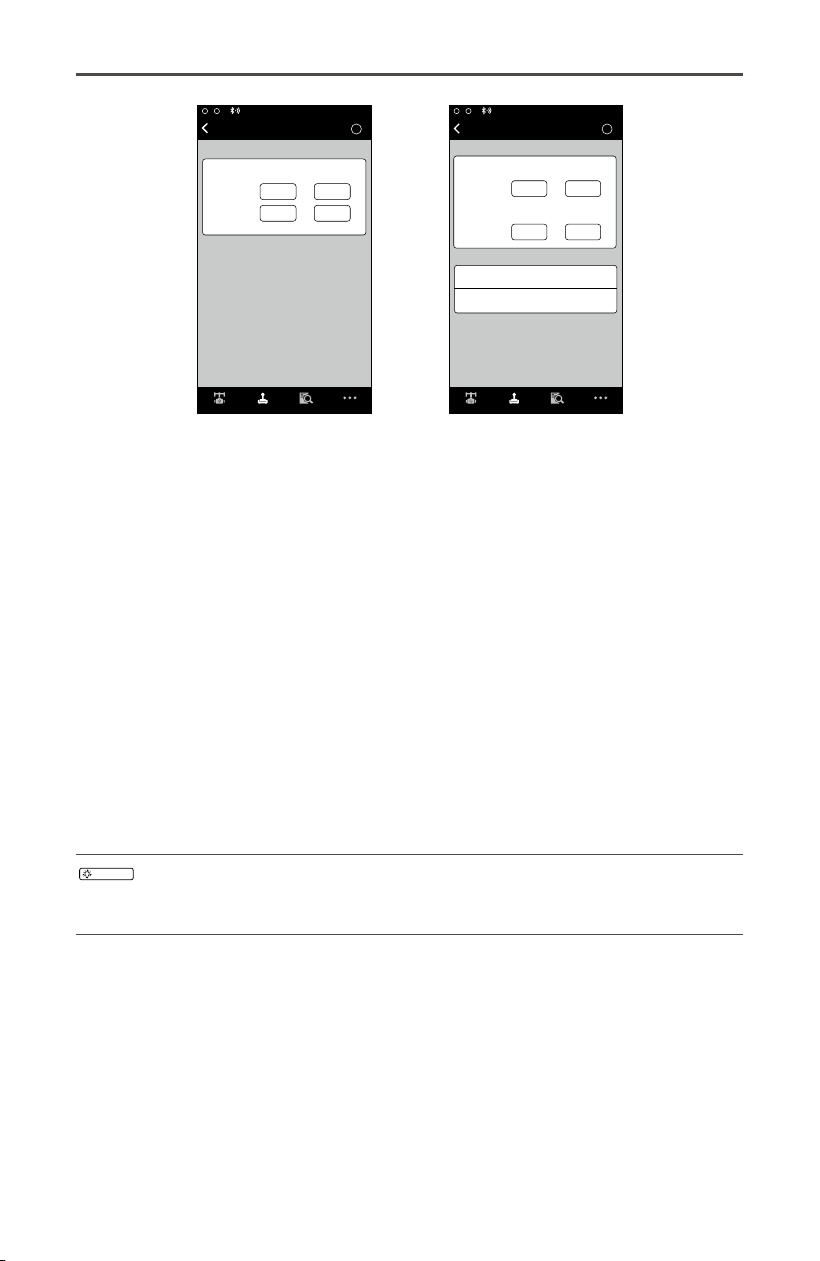
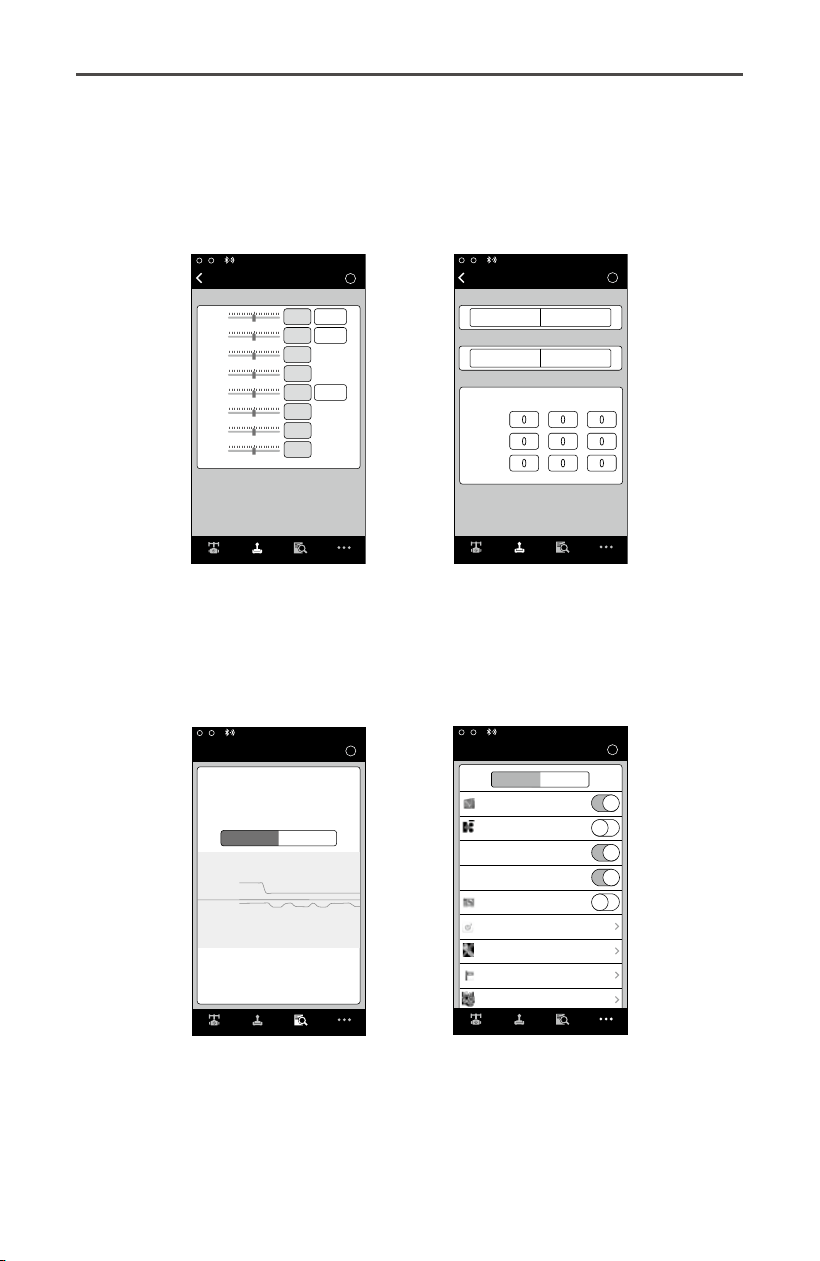
Viewer Menu
The Viewer menu displays all essential data for live monitoring of the gimbal’s electronics,
as well as feedback from the motors. Power is indicated for each axis. The current
angle of each axis is also indicated. The voltage of the battery, temperature of the main
electronics, and also current uptime can also be monitored via this menu.
More Menu
Handheld/Car Mount Mode
Enable the Car Mount mode when using the Ronin-MX on a car or jib. When this mode is
activated, the horizon will not drift when the car is making a turn at high speeds so that
the footage will try to remain level with the car. Be sure the Ronin-MX is set to Underslung
Mode when using on a car and ensure the gimbal is mounted perfectly level.
Gimbal Control Viewer More
?
N/A
Mode
:
Control
Settings
Controller Priority
Remote Operator
Thumb Controller
Pan/Tilt Remote Speed Adjustment
Combined
Independent
Speed Toggle Presets
Pan
Fast
Normal
Slow
RollTilt
?
CH 0
CH 1
CH 2
CH 3
CH 4
CH 5
CH 6
CH 7
Gimbal Control Viewer More
Control
Channels
Channels
Pan
Normal
Normal
Normal
REV
REV
REV
Normal
Normal
Tilt
Roll
?
Viewer
Control Viewer More
14.50V
0:01:59
35.40
。
Power
Power
Angle
Angle
Pan Axis
Tilt Axis
Roll Axis
Voltage
Temperature
Time
2
-2
0
-0.01
。
-0.45
。
1.89
。
Gimbal
Gimbal Control Viewer More
?
N/A
Mode:
More
Calibrate System
Restore Default Settings
Briefcase Mode
Motor Kill
Roll Control
Internal Receiver
Camera Base Invert
Auto Sleep
Banlace Test
Handheld
Car Mount Mode

Ronin-MX
User Manual
24
©
2016 DJI All Rights Reserved.
Briefcase Mode
When Briefcase Mode is switched on, the Ronin-MX seamlessly transforms into a slim prole
that can be held close to your body. With Briefcase Mode turned off, the Ronin-MX will allow
the camera to roll when the Ronin-MX is tilted passed the standard roll axis parameters.
Motor Kill
When the Motor Kill switch is activated, the Ronin-MX is still powered on, but the motors
will be powered off. This will allow an adjustment to the gimbal or camera without having
to turn it off completely. Prior to turning off the Motor Kill Switch, make sure the gimbal
is positioned in the standard operating position. The Motor Kill Switch can also be used
if the gimbal operator experiences an issue or needs to make a quick mechanical
adjustment to the gimbal or camera setup.
Roll Control
When the Roll Control is off, the roll axis movement cannot be controlled by a Remote
Controller or the Thumb Controller.
Internal Receiver
When the Internal Receiver is off, the gimbal cannot be controlled by a Remote Controller
or the Thumb Controller, and can only be controlled by other devices via a D-Bus or
Lightbridge connection.
Camera Base Invert
Enable this function to invert the camera base to mount your camera upside-down. This is
helpful when the Ronin-MX is mounted in Upright Mode on a vehicle, so that the captured
footage will remain upright.
CAUTION
The Camera Base Invert function must be enabled when the camera is
mounted upside-down, otherwise the gimbal will automatically rotate to return
to its normal position and hit the lens upon startup. This function is enabled by
default.
Ronin-MX
User Manual
©
2016 DJI All Rights Reserved.
25
CAUTION
Do not adjust the gimbal to the above position if Auto Sleep is disabled,
otherwise the gimbal may become damaged.
Calibrate System
Calibrate System is only used if you notice any kind of drift on any of the axes. To calibrate
the system, place the Ronin-MX on the tuning stand and make sure it is completely steady.
Be sure the camera can rotate 90 degrees with the lens pointing straight down, without
any interference from video monitor wires. Then tap the Calibrate System button and let the
process nish before picking up the Ronin-MX.
Do not touch or move the Ronin-MX during calibration.
Balance Test
Tap to check the balance status of the tilt and roll axis. Ensure there are no obstacles
present when running the Balance Test.
Activation
Activation is required when using your Ronin-MX for the rst time, otherwise the gimbal
will not work. To activate your Ronin-MX, connect your mobile device to the Internet, then
tap the “Activate” button.
Restore Default Settings
This will restore all of the factory default settings that can be congured through the DJI
Assistant app.
Device List
To force the DJI Assistant app to nd the Ronin-MX, open the “Device List” and the app
will search for Bluetooth devices it recognizes.
Auto Sleep
When Auto Sleep is enabled, adjust the Ronin-MX roll axis to 75 degrees or more (as
shown below), and the gimbal will turn off without turning off the Intelligent Battery or
other accessories. Recenter the tilt, pan and roll axes and position them horizontally to
bring the gimbal back out of Sleep mode.
Ronin-MX
User Manual
26
©
2016 DJI All Rights Reserved.
Tuning with the DJI Assistant Software for PC/MAC
You can also tune the Ronin-MX and upgrade the firmware through the DJI Assistant
software for PC or MAC.
NOTICE
The conguration settings in the DJI Assistant app and the DJI Assistant software
for PC/MAC are automatically synced. There is no need to adjust the settings in
both the mobile app and the desktop software.
The DJI Assistant app and the DJI Assistant software for PC/MAC cannot be
connected to the Ronin-MX at the same time. If running the mobile app, be sure
to disconnect the Micro USB cable before using the desktop software.
Installing the DJI Assistant Software for PC/MAC
Installing and Running on Windows
1. Download the DJI WIN DRIVER INSTALLER from the Ronin-MX product page on DJI.com.
Connect the Ronin-MX to your PC via the provided USB cable and be sure the Ronin-MX
is powered on prior to installing the DJI WIN DRIVER.
2. Download the appropriate Assistant installer from DJI.com.
3. Double click the Assistant installer and follow the steps to nish the installation.
4. Run the Assistant.
5. Upgrade the rmware or congure parameters using the Assistant as needed.
TIPS
The Assistant installer supports Windows XP or above.
Installing and Running on Mac OS X
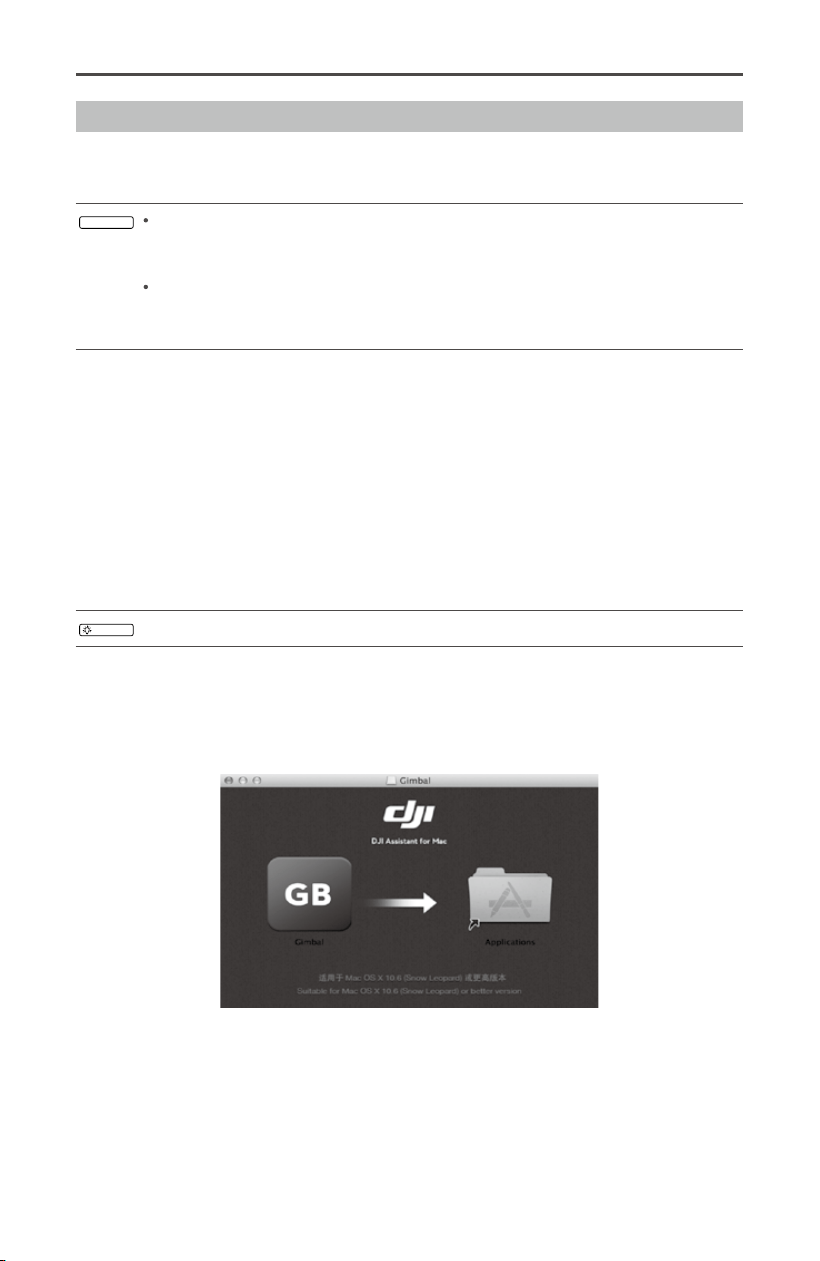
1. Download the Assistant installer (.DMG) from the Ronin-MX product page on DJI.com.
2. Run the installer and follow the prompts to nish the installation.
Ronin-MX
User Manual
©
2016 DJI All Rights Reserved.
27
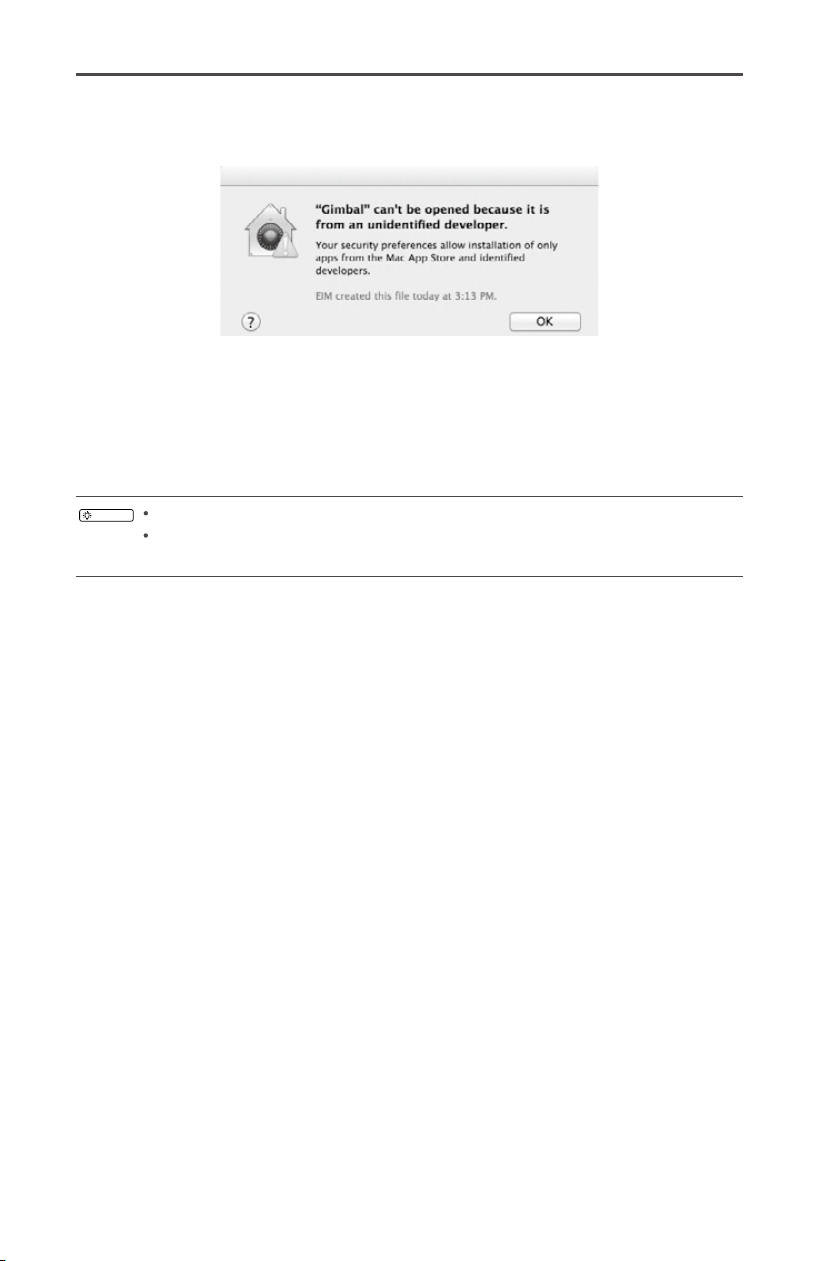
3. If using Launchpad to launch DJI Assistant for the first time, Launchpad will block
access because DJI Assistant has not been reviewed by Apple.
4. Locate the Gimbal app using Finder, then press “Control” and click the icon (or right-
click the icon if using a mouse). Choose Open from the shortcut menu, then click
Open in the dialog box to launch the program.
5. After successfully launching the program for the rst time, double-click the Gimbal app
icon, as usual, to launch the program using Finder or Launchpad.
TIPS
The DMG installer supports Mac OS X 10.9 or above.
DJI Assistant on Mac OS X and Windows are the same. DJI Assistant pages
shown in this manual are from the Windows version.
Settings
Adjust the parameters for the following functions before using the Ronin-MX: Camera
Type, Briefcase Mode, SmoothTrack, and Maximum Speed Adjustment.
The definitions and functions of every button in the DJI Assistant app and the DJI
Assistant software for PC/MAC are the same. Refer to the section describing the DJI
Assistant app for more details.
Ronin-MX
User Manual
28
©
2016 DJI All Rights Reserved.
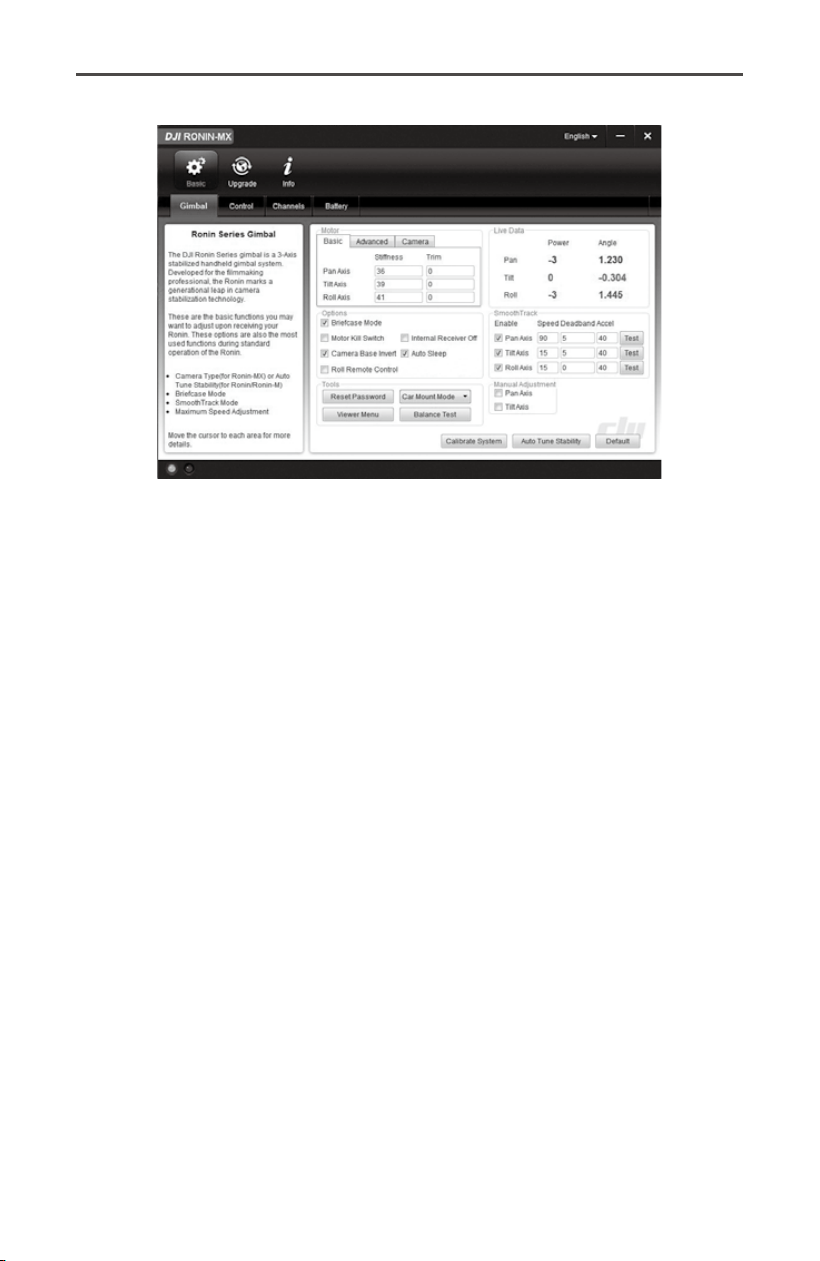
Basic
1. Gimbal
Motor
Basic: Each axis has its own stiffness and trim adjustment.
Advanced: Allows you to adjust the Strength, Outlter and Control values. Do not change
the default values unless you are an advanced user.
Camera: Select the Camera type will obtain the best conguration for Stiffness Strength,
Outlter and Control values.
Live Data: This monitors the feedback from the motors on each axis.
Briefcase Mode: Select the checkbox to enable Briefcase Mode.
Motor Kill Switch: Select the checkbox to enable the Motor Kill Switch.
Internal Receiver Off: Select to prevent the gimbal from being controlled by the included
Remote Controller or the optional Thumb Controller. The gimbal can then only be controlled
by other devices via a D-Bus or Lightbridge connection when the Internal Receiver is off.
Camera Base Invert: Select the checkbox to allow the camera base to invert.
Auto Sleep: Select the checkbox to enable the Auto Sleep function.
Roll Remote Control Off: Select this checkbox to prevent the roll axis movement from
being controlled by the included Remote Controller or the optional Thumb Controller.
Handheld/Car Mount Mode: Select Car Mount when using the Ronin-MX on a vehicle or jib.
SmoothTrack: Select this checkbox to enable SmoothTrack. Note that the pan axis and
the tilt axis can be adjusted independently.
The pan and tilt SmoothTrack speed can be tested. Ensure that there is nothing
obstructing the camera when running the test procedures.
Reset Password: If you forgot your Bluetooth connection password, click here to reset
your password.
Viewer Menu: The Viewer menu provides essential live data for monitoring the Ronin-MX’s
electronics and feedback from the motors. Power is indicated for each axis. The current
angle of each axis is also indicated.
Ronin-MX
User Manual
©
2016 DJI All Rights Reserved.
29
Balance Test: Select the checkbox to check the balance status of the roll and tilt axis.
Manual Adjustment: Enable Manual Adjustment to allow the pan and tilt axes to be
adjusted by hand when the Ronin-MX is turned on.
Calibrate System: Calibrate System is only used if you notice any kind of drift in any of the
axes. To calibrate the system, place the Ronin-MX on the tuning stand and make sure it is
completely steady.
Be sure the camera can rotate 90 degrees with the lens pointing straight down, without
any interference from video monitor wires. Then click the Calibrate System button and
let the process nish before picking up the Ronin-MX. Do not move the Ronin-MX during
calibration.
Auto Tune Stability: The Auto Tune Stability button allows for automatic adjustment of each
motor’s stiffness settings (as relayed from the sensors and interpreted by the Ronin-MX).
Default: Click here to restore all settings to the factory defaults.
2. Control
The Thumb Controller and the remote operator control sticks have a Deadband, Maximum
Speed, and Smoothing adjustment, all of which can be set independently.
Endpoint: Pan axis endpoints can be adjusted independently for left and right movement
when used with a Remote Controller or the Thumb Controller. Tilt axis endpoints can be
adjusted independently for up and down movement when used with a Remote Controller
or the Thumb Controller.
The pan and tilt endpoints can be tested. Ensure that the camera is unobstructed when
clicking the test buttons.
Controller Priority: If both input devices simultaneously send control signals to the gimbal,
the input from the selected controller will take priority and will control the device at that
given time.
Pan/Tilt Remote Speed Adjustment: Click to choose combined or independent settings.
Speed Toggle Presets: These presets will allow you to change the SmoothTrack speed
Ronin-MX
User Manual
30
©
2016 DJI All Rights Reserved.
remotely. If the Remote Controller is turned on, the Speed Toggle Presets for SmoothTrack
will take precedence over the DJI Assistant settings. Once the Remote Controller is
turned off, the SmoothTrack settings in DJI Assistant will take over.
3. Channels
This is a channel indicator to provide feedback during remote operator conguration. Pan,
tilt, and roll can be re-assigned to either of the Remote Controller sticks. The controlled
axis can also be reversed.
4. Battery
This page provides all of the essential information regarding the Ronin-MX’s battery.
Ronin-MX
User Manual
©
2016 DJI All Rights Reserved.
31
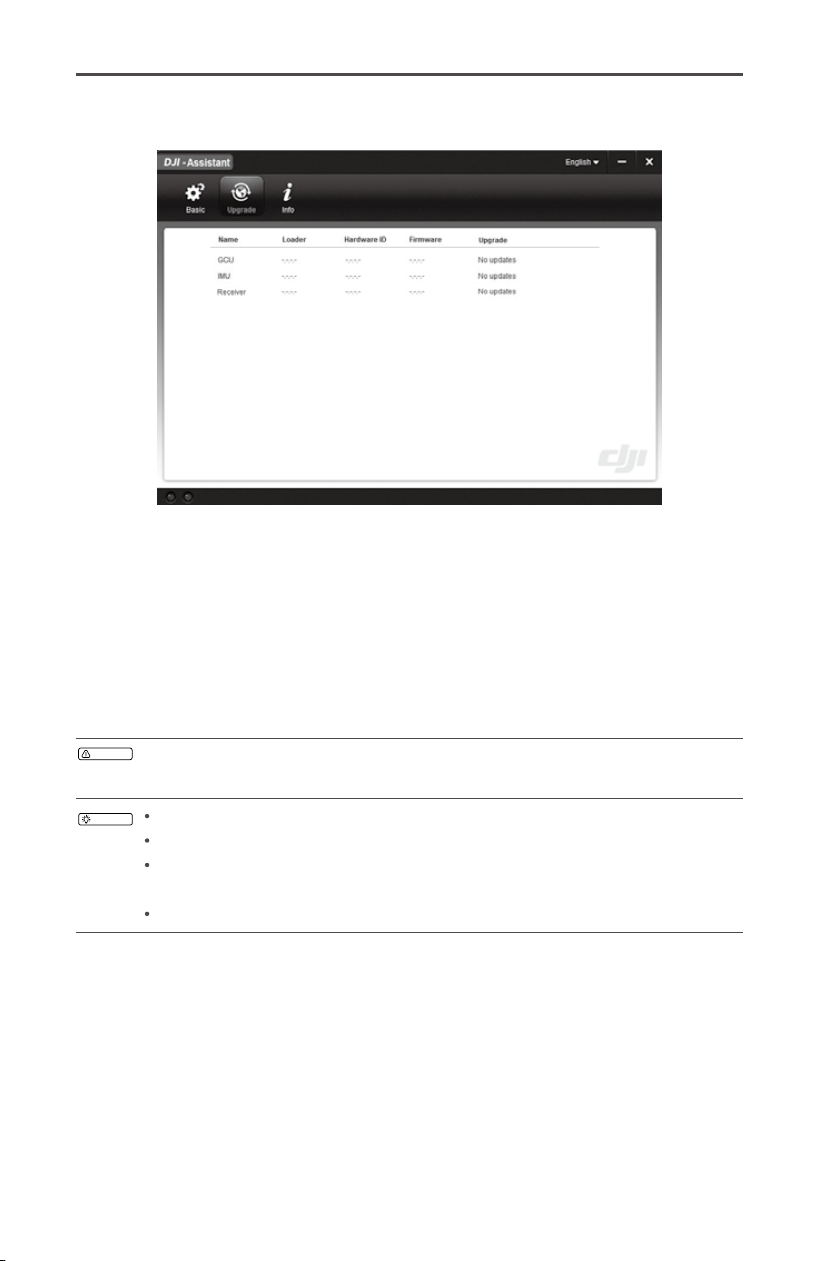
You can view the latest rmware version information on this page. Upgrade the rmware
by following the steps below:
1. Connect the Ronin-MX to your computer via the Micro USB cable and wait until the
indicator LED in the DJI Assistant blinks blue.
2. Click “Upgrade”.
3. Wait for the download to nish.
4. Click “Upgrade” again and then click “Conrm”.
5. Power the Ronin-MX off and then on after the upgrade is complete.
WARNING
If upgrading the Ronin-MX on the Matrice 600, make sure to power off the
Matrice 600 or disconnect the CAN cable rst. Otherwise the upgrade will fail.
TIPS
Ensure that your computer is connected to the Internet.
Close any antivirus programs and network rewalls.
Ensure that the Ronin-MX is powered on during the upgrade. Do not power off
the Ronin-MX until the upgrade is complete.
Do not disconnect the USB cable during the upgrade.
Upgrade
Ronin-MX
User Manual
32
©
2016 DJI All Rights Reserved.
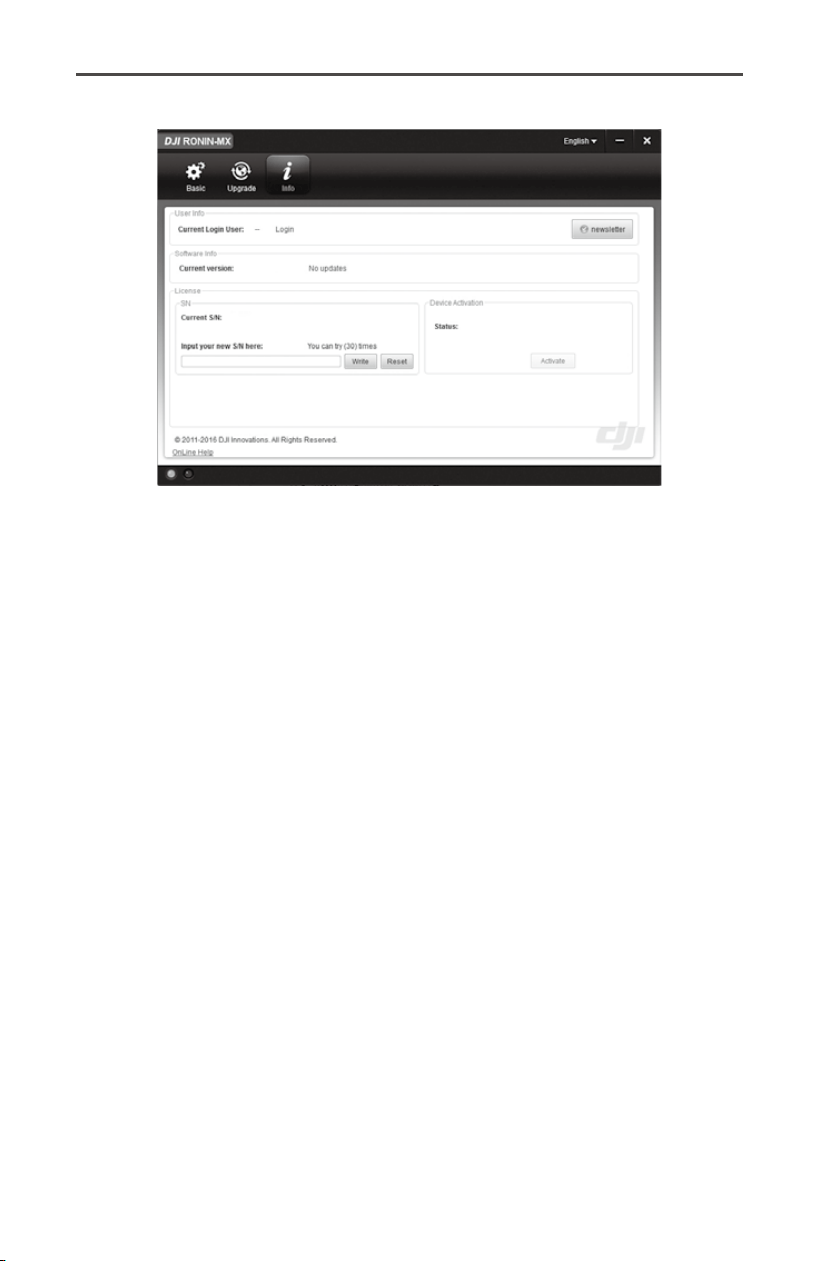
Info
The Ronin-MX must be activated for rst time use. Click the Activate button to activate
your Ronin-MX, otherwise the gimbal will not work.
You can check which version of the DJI Assistant you are using in the Info tab.
The S/N is a 32-digit authorization code that is used to activate certain functions. The
authorization code for your unit is entered after it is manufactured. You may be asked
to enter a new S/N after upgrading. Fill in the S/N and then click the Write button. If you
enter an invalid S/N more than 30 times, the Ronin-MX will be locked and you will need to
contact DJI Support.
Ronin-MX
User Manual
©
2016 DJI All Rights Reserved.
33
Remote Controller Operation
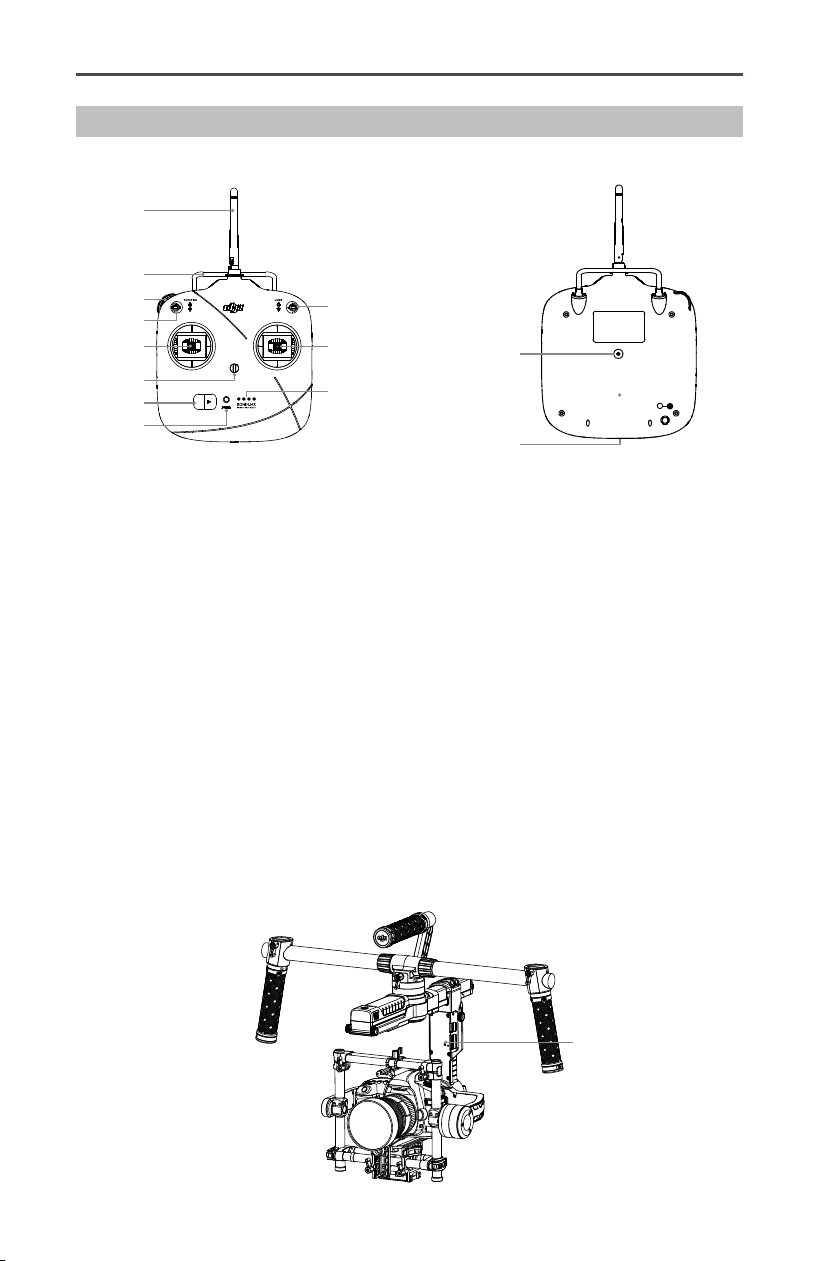
Remote Controller Diagram
[
2
]
[
4
]
[
6
]
[
5
]
[
3
]
[
7
]
[
8
]
[
9
]
[
10
]
[
11
]
[
1
]
[
12
]
[
13
]
[1] Antenna
[2] Carrying Handle
[3] Left Dial (reserved)
[4] 3-Position Switch (MODE)
[5] 3-Position Switch (FUNCTION)
[6] Right Stick
[7] Left Stick
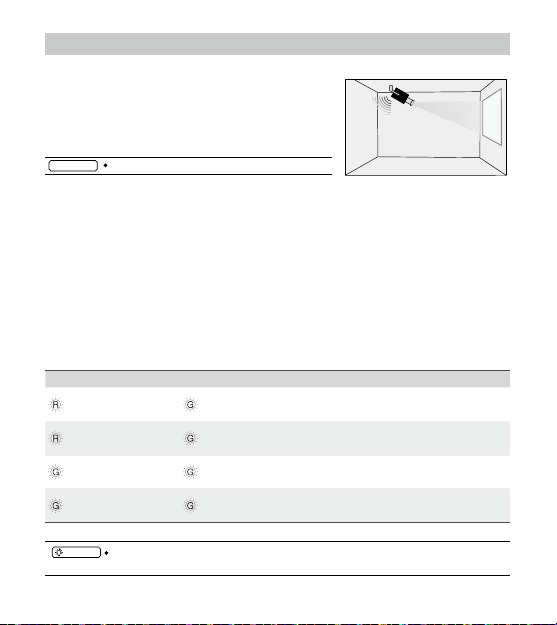
Connecting the Remote Controller to the Ronin-MX
1. Turn on the Ronin-MX.
2. Press the Bind Button (shown below) of the Ronin-MX once. The Ronin-MX’s LED
indicator will blink green quickly at that time.
3. Slide the power switch to the right to power on the Remote Controller. If the LED of
gimbal turns solid green light, the Remote Controller and the Ronin-MX have been
successfully bound.
The binding process only needs to be done once, unless the bind button is pressed or if
the Ronin-MX needs to be bound to another Remote Controller.
Bind Button
[8] Neck Strap Attachment
[9] Power Switch
[10] Power Indicator
[11] Battery Level Indicators
[12] Battery Charging & RC Assistant Port
(Micro USB port)
[13] Reserved Port
Ronin-MX
User Manual
34
©
2016 DJI All Rights Reserved.
TIPS
Make sure that the Remote Controller is sufciently charged before use. If the
low-battery alert sounds, please recharge the battery as soon as possible.
Charge the Remote Controller’s battery using the included Micro USB cable.
Using the incorrect type of charging cable may cause damage.
Turn off the Remote Controller before charging. The power LED indicator will glow
solid green when the battery is fully charged.
NOTICE
When using the Remote Controller, ensure that the antenna is at least 20 cm
away from any person.
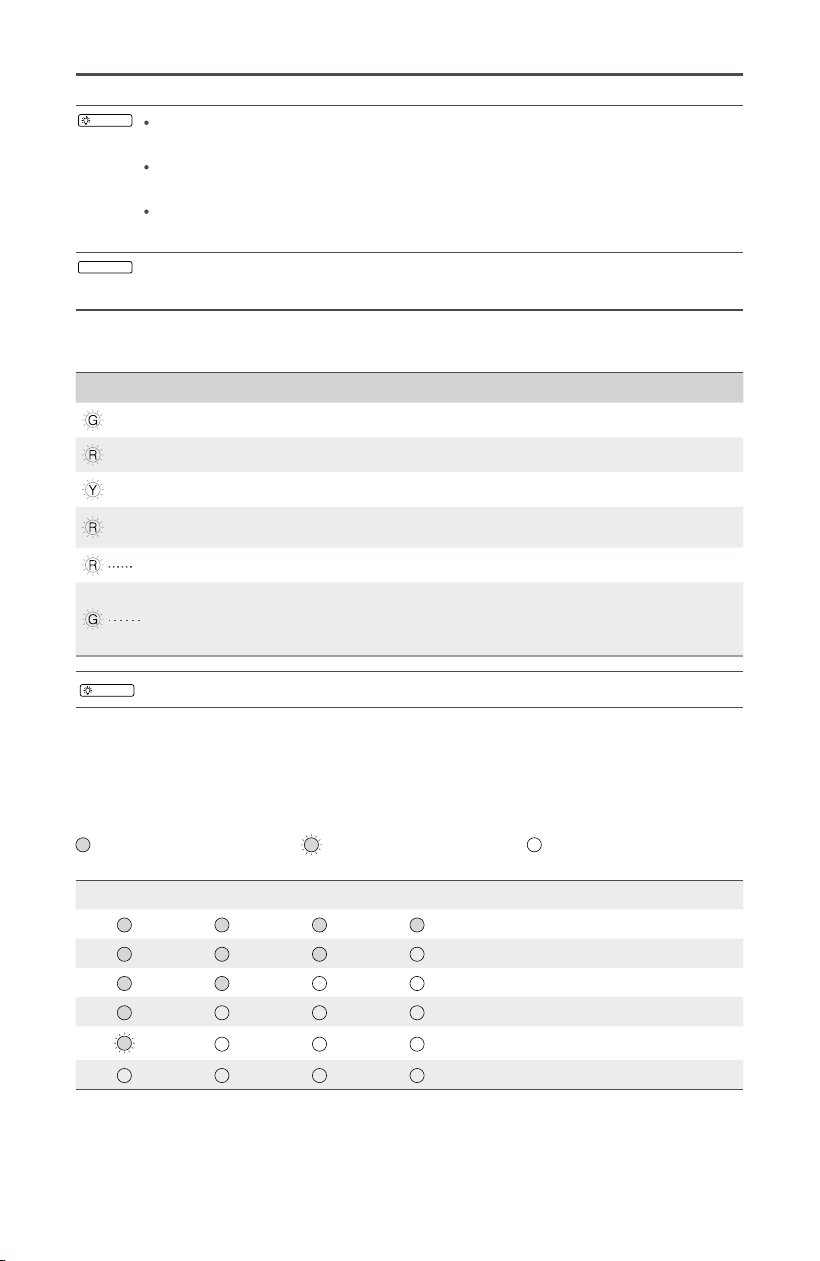
Remote Controller Power LED Indicator Status
Power LED Indicator Sound Remote Controller Status
—
Solid
Green None Functioning normally or fully charged
—
Solid Red None Charging (Remote Controller is powered off)
—
Solid Yellow None Control stick calibration error, re-calibrate
—
Solid Red BB---BB---BB Low voltage warning
Quick Red ashing BBBB…… Critical low voltage warning
Slow Green ashing B--B--B……
Alert will sound after 15 minutes of inactivity.
It will stop once you start using the Remote
Controller.
TIPS
The Remote Controller will turn off automatically when battery voltage is too low.
Remote Controller Battery Level Indicator Status
The battery level indicator displays the current battery level. The following is a description
of the indicators.
:
The LED is solidly lit
:
The LED is blinking
:
The LED is off
LED1 LED2 LED3 LED4 Current Battery Level
75% to 100%
50% to 75%
25% to 50%
12.5% to 25%
0% to 12.5%
<0%
Ronin-MX
User Manual
©
2016 DJI All Rights Reserved.
35
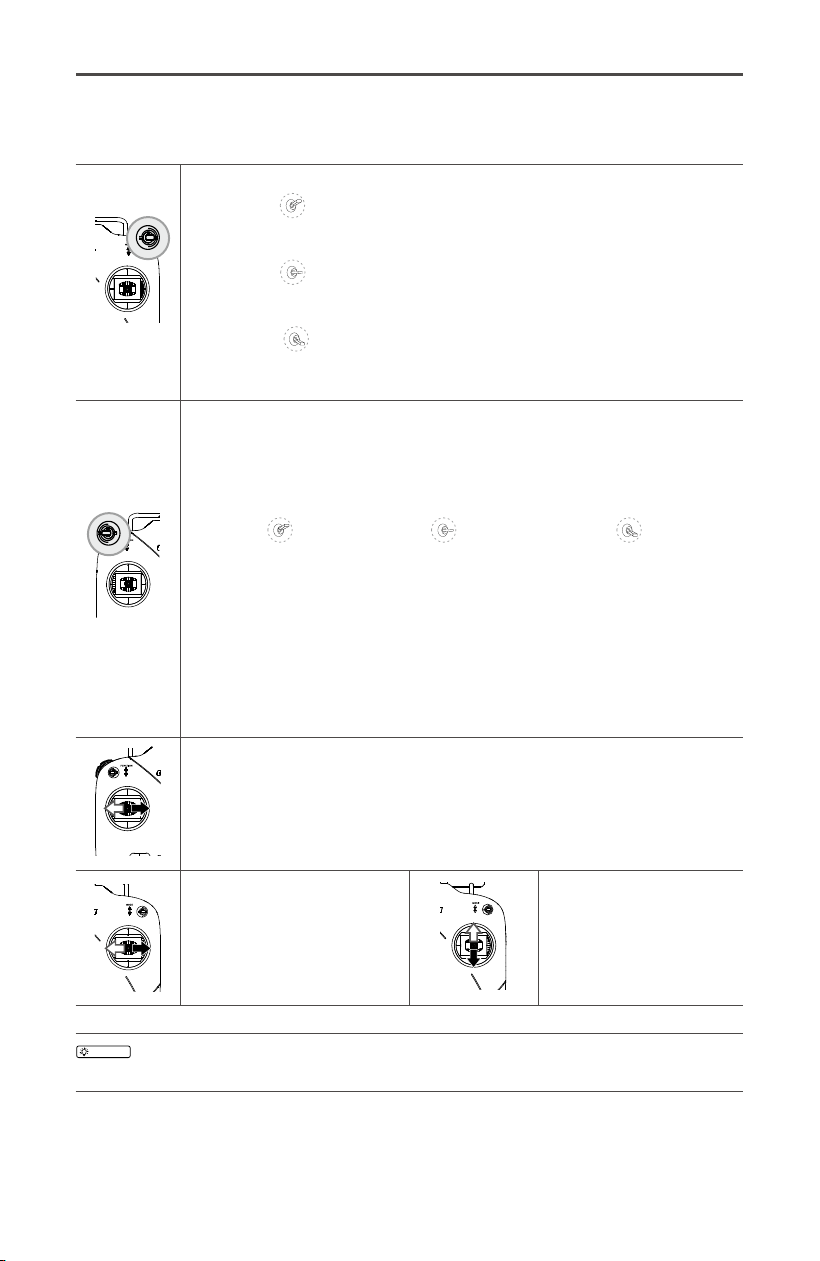
Remote Controller Features
MODE: The MODE switch is used for toggling SmoothTrack.
In Position 1
, SmoothTrack is off. The Remote Controller is free to control
the pan axis and stops and holds the last position determined by the pan
axis control stick.
In Position 2 , SmoothTrack is on. The Remote Controller is free to control
the pan axis and stops and holds the last position determined by the pan
axis control stick.
In Position 3 , SmoothTrack is on. The gimbal will reorient and reset the
pan angle to the forward-facing direction when the pan axis control stick is
released.
FUNCTION
1. The FUNCTION switch is used to select the SmoothTrack speed.
There are 3 possible selections: Fast, Normal, and Slow. The value of
each speed can be preset in the DJI Assistant app or DJI Assistant
software for PC/MAC.
Position 1
-Fast Position 2 -Normal Position 3 -Slow
2. Activating Motor Kill Switch
Quickly ip the FUNCTION Switch between Position 1 and Position 3 at
least three times to activate the Motor Kill Switch. Repeat this process
to turn off the Motor Kill Switch. Be sure to position the camera in the
standard operating position before re-activating the gimbal’s motors.
The Motor Kill Switch is useful if the gimbal operator runs into an issue or
needs to make a quick mechanical adjustment to the gimbal or camera
setup.
Left Stick (Default settings): Horizontal movements on the left stick control
the roll axis. Vertical movements have no denition.
Right Stick (Default
settings): Horizontal
movements on the right
stick control the pan axis.
Right Stick (Default
settings):
Vertical movements on
the right stick control the
tilt axis.
TIPS
These stick settings can be customized in the DJI Assistant app or the DJI
Assistant software for PC/MAC.
Ronin-MX
User Manual
36
©
2016 DJI All Rights Reserved.
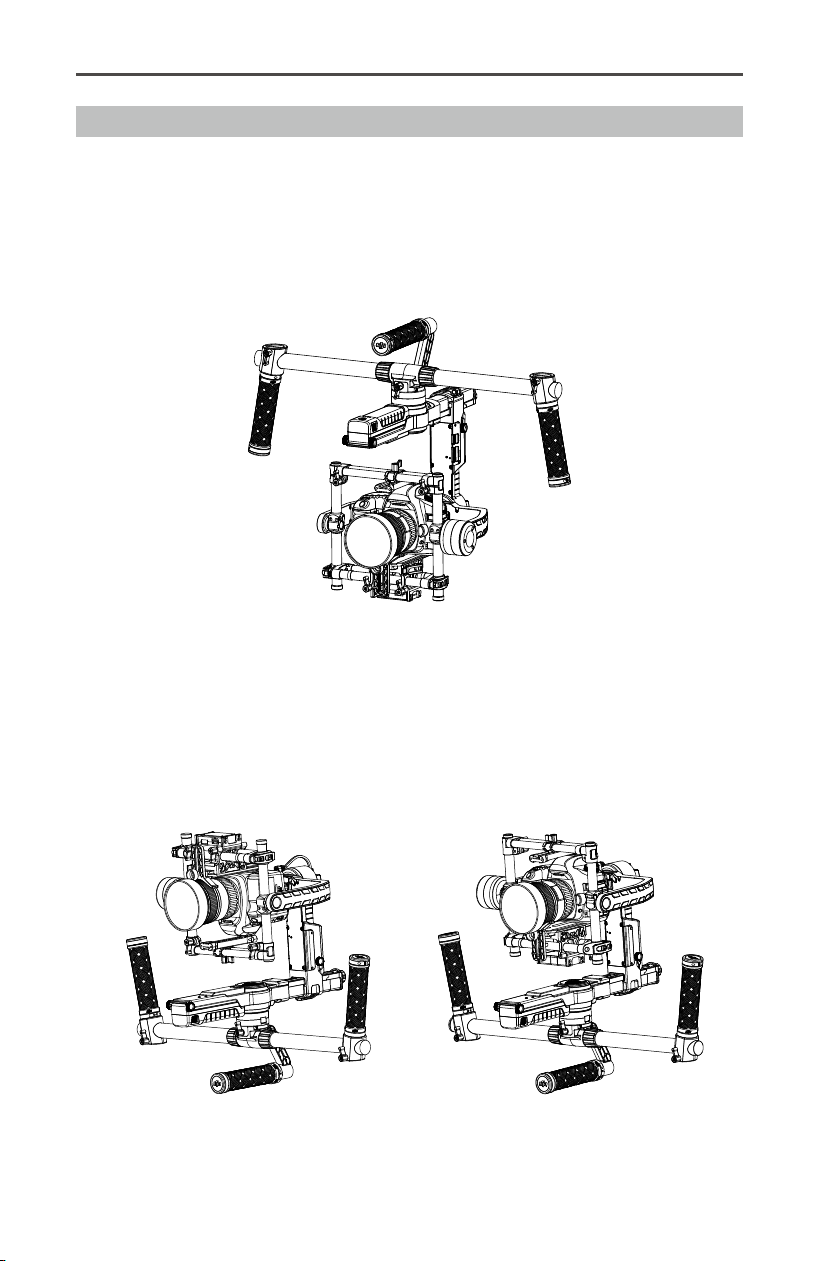
Operation Modes
The Ronin-MX has three operation modes: Underslung Mode, Upright Mode and Briefcase
Mode.
Underslung Mode
Underslung Mode is the standard, default mode. The Ronin-MX can be used in this mode
without any adjustments.
Upright Mode
Flip the gimbal forward 180 degrees and it will automatically change to Upright Mode.
Alternatively, you can change the gimbal into Upright Mode before turning it on. Upright
Mode is ideal for car mounts or other top down perspective camera positions, as it allows
you to shoot higher and/or at eye level. Upright Mode can also be used without any
adjustments. Do not ip the gimbal sideways (left or right) to convert to Upright Mode.
Ronin-MX
User Manual
©
2016 DJI All Rights Reserved.
37
Briefcase Mode
Briefcase Mode allows you to hold the Ronin-MX in a slim profile close to your body.
To use Briefcase Mode, tilt the gimbal 90˚ to the left or right vertically on the roll axis.
You can turn Briefcase Mode off in the DJI Assistant app, in which case the Ronin-MX
will never automatically transform into Briefcase Mode. In Briefcase Mode, the Remote
Controller cannot pan, tilt, or roll the gimbal.
Using with the Matrice 600
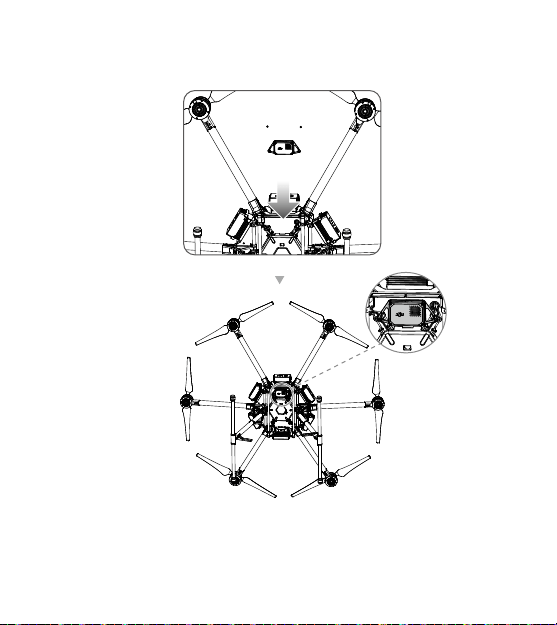
Mounting the Ronin-MX onto the Matrice 600
Before mounting the Ronin-MX onto a Matrice 600, ensure the camera is mounted
securely on the Ronin-MX and the balance is adjusted properly.
1. Remove the upper cover and lower cover from the Matrice 600’s center frame and the
expansion mounting kit.
Ronin-MX
User Manual
38
©
2016 DJI All Rights Reserved.
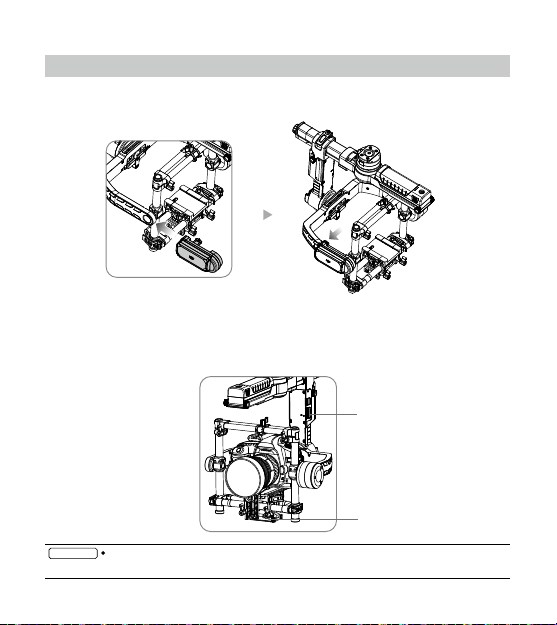
3. Adjust the Ronin-MX vibration absorbtion mounting plate, then tighten the screws on
the connector.
4. Mount the vibration absorber onto the bottom of the Matrice 600 with the lock-knob
facing forward, then tighten the 12 vibration absorber screws provided.
2. Connect one end of the provided CAN cable to the CAN1 port on the Matrice 600’s
main controller, and pull the other end through the outlet of the center frame. Then re-
mount the Matrice 600’s upper and lower covers.
Ronin-MX
User Manual
©
2016 DJI All Rights Reserved.
39
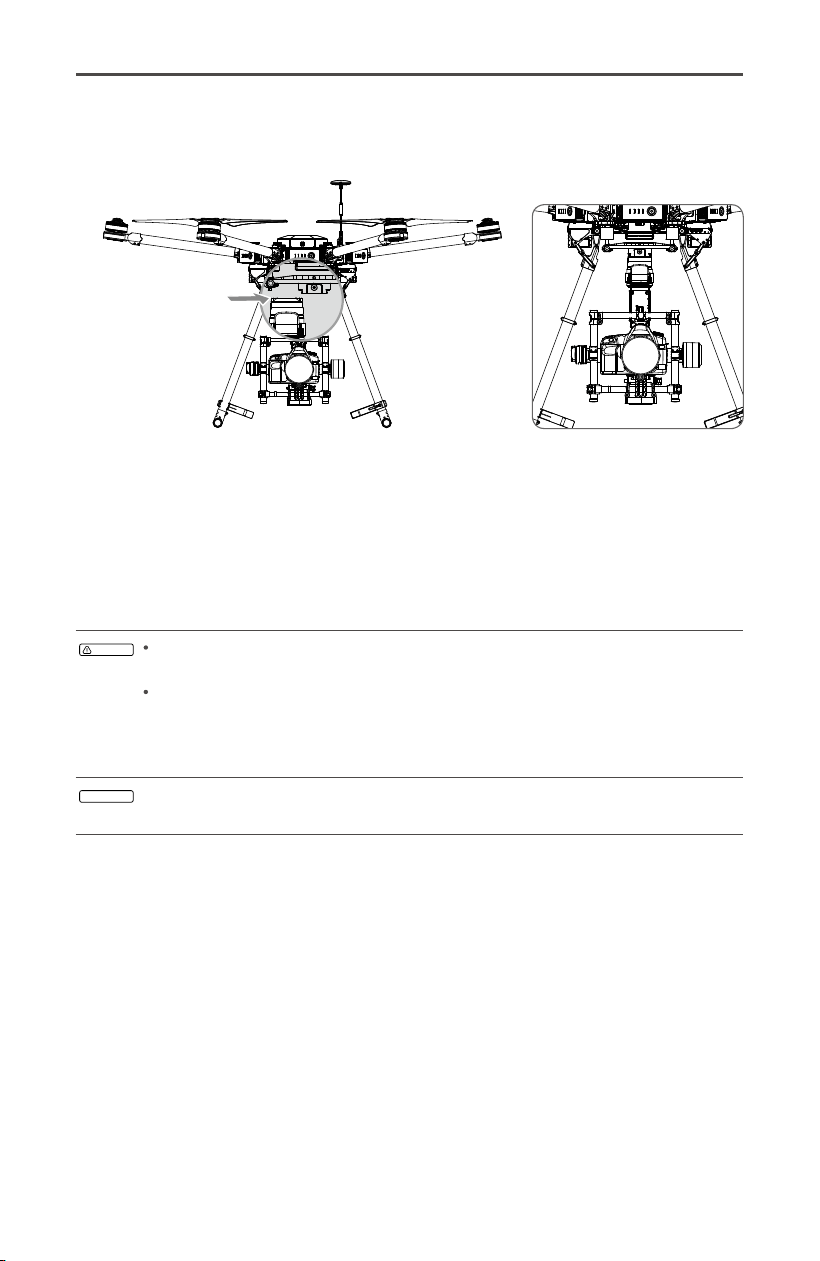
5. Slide the gimbal into the gimbal connector of the vibration absorber, then tighten the
lock-knob when you hear a “click”, which indicates the lock has engaged.
6. Connect the CAN cable to the CAN2 port on the Ronin-MX.
7. Use the DJI SRW-60G wireless video link to transmit HD images without obstructing
the pan axis movements of the Ronin-MX. Refer to the SRW-60G User Manual for
instructions.
8. If not using the DJI SRW-60G, HD images can also be transmitted by connecting the
DJI Lightbridge 2’s Air System to the camera’s HDMI port.
WARNING
Be sure the Ronin-MX is mounted properly and rmly, and all the connections
are correct and will not obstruct the Ronin-MX’s movements.
For users of the Matrice 600 and Ronin-MX in the United States, Federal
Communications Commission (FCC) regulation prohibits the operation of
unlicensed devices transmitting in the 57-64 GHz on aircraft or satellites. The
SRW-60G operates on an unlicensed basis in the 57-64 GHz band.
NOTICE
Note that wire connections for the video link will obstruct the pan axis movement
at certain angles. The pan axis cannot rotate 360 degrees continuously.
Ronin-MX
User Manual
40
©
2016 DJI All Rights Reserved.
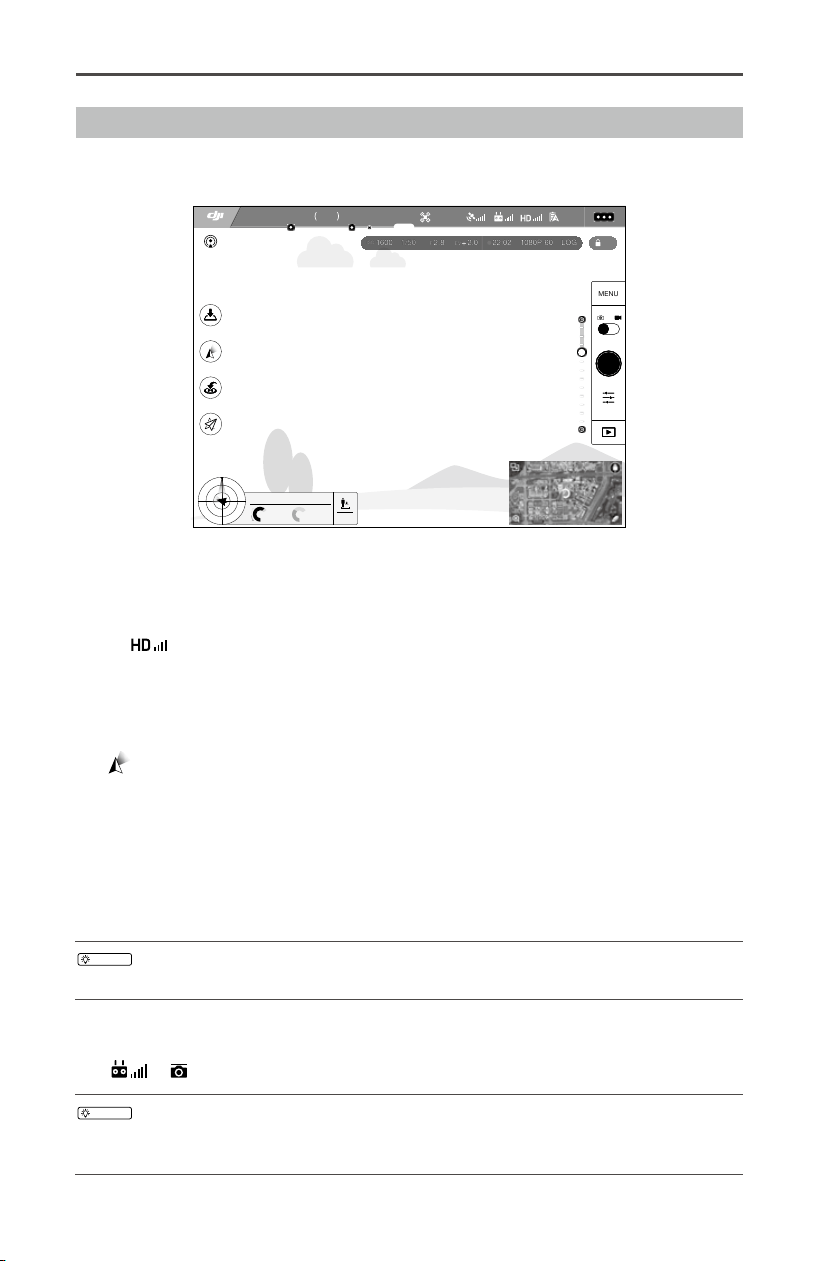
DJI GO App Tuning
You can adjust software parameters and congure your Ronin-MX by using the DJI GO
app. Launch DJI GO and then enter Camera view.
AE
22:02
LOG
60
1080P
ISO
F
EV
1600
2.8
2.0
1/50
09:29
61%
P-GPS
12
M/S
M/S
H: D:
V.S
H.S
4.22.3
39M 210M
232M
MENU
SAFE TO FLY GPS
Setting App Output Mode
Set the App Output Mode in the DJI GO app to display the image on your mobile device
from the camera used with the Ronin-MX.
1. Tap
and then Disable EXT Port.
2. Adjust the Bandwidth Allocation to ensure that the “HDMI” percentage is more than 0%.
3. Set the App Out Mode to HDMI.
Gimbal Working Mode
Tap to select a gimbal work mode: Follow Mode, FPV Mode and Free Mode.
Follow Mode: the angle between the gimbal’s orientation and the aircraft’s nose remains
constant at all times. The pan, tilt and roll axes can be adjusted by the Remote Controller.
FPV Mode: The gimbal will synchronize with the movement of the aircraft to provide a
rst-person perspective ying experience.
Free Mode: The gimbal’s pan axis is not aligned with the aircraft’s nose. The pan, tilt and
roll axes can be adjusted by the Remote Controller.
TIPS
The pan axis of Ronin-MX will be only able to rotate within ±30 degrees if the
landing gear of the Matrice 600 is lowered.
Gimbal Settings
Tap > to congure the gimbal.
TIPS
The denition and function of every button in the DJI GO app and DJI Assistant
app are the same, refer to the section describing the DJI Assistant app for
more details.
Ronin-MX
User Manual
©
2016 DJI All Rights Reserved.
41
Camera Type
It is recommended to select the DSLR Camera, Mirrorless or RED Camera according to
the mounted camera to obtain optimized settings for the Stiffness, Strength, Outlter and
Control values.
The default settings for the Strength, Outlter and Control values are complicated and
should not be adjusted unless you are an advanced user.
Adjust Gimbal Roll
Tap to ne tune the gimbal’s roll if you notice the roll axis is not level.
SmoothTrack Settings
Deadband and the speed can be adjusted separately for pan and tilt axes.
Remote Controller Settings
Deadband, Maximum Speed and the Smoothing can be adjusted separately for pan and
tilt axis control.
Endpoint Settings
The endpoints for the pan and tilt axes can be adjusted to limit the maximum left/right or
up/down angles.
Camera Base Invert
Tap to allow the camera mount on the gimbal to invert.
TIPS
When the camera is mounted upside-down, enable the Flip Image function by
tapping
> Flip Image to obtain a proper image.
Motor Kill
When the Motor Kill Switch is activated, the Ronin-MX is still powered on even though the
motors are powered off. This allows you to adjust the gimbal or camera without having
to turn it off completely. Prior to turning off the Motor Kill Switch, make sure the gimbal is
positioned in the standard operating position.
WARNING
Do not activate Motor Kill during ight.
Gimbal Calibration
Only calibrate the gimbal when the Ronin-MX’s axes are drifting.
Place the aircraft in a steady at area before performing the calibration. The Ronin-MX
will be powered off and powered on again automatically when calibration is complete.
Observe the roll axis position and recalibrate as needed if the roll axis is off level.
Ensure there is nothing obstructing the gimbal’s movements during calibration.
Balance Test
Tap to check the balance status of the tilt and roll axis. Ensure there is nothing obstructing
the gimbal’s movements.
Default Settings
Tap to restore all the gimbal settings to the default settings.
Ronin-MX
User Manual
42
©
2016 DJI All Rights Reserved.
Remote Controller Operation
Single Remote Controller
The Ronin-MX can be controlled completely by the Matrice 600’s Remote Controller
instead of the Ronin-MX’s Remote Controller.
Adjust the Ronin-MX’s tilt or pan by using the gimbal dial on the Remote Controller.
(Congure the C1 and C2 buttons according to the on-screen instructions in DJI GO.)
Dual Remote Controller
The operation of the Master Remote Controller stays the same. Tap to finish the
“Remote Controller Settings” of the Slave Remote Controller according to the tips
appearing in the DJI GO app.
Gimbal Dial
©
2016 DJI All Rights Reserved.
43
Adding a Third-Party Transmitter/Receiver
The Ronin-MX supports third-party transmitters/receivers, such as D-Bus. Connect the
transmitter through the integrated port (refer to the Ronin-MX Diagram for the location of
the D-Bus port).
Maintenance
The gure below shows the proper conguration for transporting the Ronin-MX with the
Tuning Stand. Using the hook-and-loop straps, lock the Ronin-MX in place, as shown. Be
sure to remove the straps prior to turning the Ronin-MX on again.
The Ronin-MX is a precise machine and is not waterproof. Keep it away from sand and
dust when in use. After use, it is recommended that you wipe the Ronin-MX down with a
soft dry cloth. Never spray any cleaning liquids onto the Ronin-MX.

44
©
2016 DJI All Rights Reserved.
Troubleshooting
Problem Solution
1 Motors appear to be weak After balancing the camera, launch the DJI Assistant
app or the DJI Assistant software for PC/MAC and
select Camera Type.
2 The gimbal is vibrating,
even after selecting the
Camera Type
1) Check to make sure all knobs are tight, including
the pan motor knob.
2) Check to make sure the camera screw is tight.
Push on the camera plate to make sure it is not
loose or sliding on the gimbal’s camera mount.
3) Ensure the lens support has been mounted.
4) When using a RED camera, make sure the
Ronin Intelligent Power Distributor and the
844297-4350mAh-15.2V Intelligent Battery have
been mounted securely. If the Ronin Intelligent
Power Distributor is not properly mounted, or you
are using another battery as the power supply for
a RED camera, the gimbal will vibrate.
5) Be sure to select the correct Camera Type for
the mounted camera: RED Camera is for a RED
or similar weight cameras; Mirrorless is for the
Panasonic GH4 and other similar weight cameras;
DSLR is for the Canon 5D Mark III or similar weight
cameras.
6) If the gimbal vibrates when using a predened
camera setting, identify which gimbal axis is
vibrating and then reduce the Stiffness value
accordingly.
7) If the problem persists, try increasing the Outlter
value.
3 Ronin-MX seems to be
drifting
Place the Ronin-MX on the Tuning Stand and enter
the DJI Assistant app or the DJI Assistant software
for PC/MAC. Tap/click the Calibrate System button
and let the process nish before picking up the
Ronin-MX.
4 SmoothTrack does not
work
1) Turn on the Remote Controller and be sure that the
MODE switch is not in Position 1 (the uppermost
position).
2) Check whether SmoothTrack is turned off in the
DJI Assistant app or the DJI Assistant software for
PC/MAC.
3) Check whether the SmoothTrack deadband is
turned up too high. If it is, reduce the Deadband
value in the SmoothTrack Menu.

Ronin-MX
User Manual
©
2016 DJI All Rights Reserved.
45
5 Motors appear to be weak
suddenly after it works for
a while
This may be caused by the high temperature of the
motor. If an overheated motor is detected, the gimbal
will enter protection mode. Turn off the gimbal for a
while, then restart the gimbal after the motor cools
down.
6 Forgot the Bluetooth
password
Connect the Ronin-MX to the DJI Assistant software
for PC/MAC and click the “Reset Password” button to
reset the password.
7 Video footage appears to
wobble from side-to-side
or up-and-down when
using the Ronin-MX on the
ground
SmoothTrack speed is too high or SmoothTrack
deadband is too low. Decrease the SmoothTrack
speed or increase the Deadband value.
8 The aerial footage
appears to be shaking
Identify which gimbal axis is vibrating and reduce the
Stiffness or the Control value until the vibrations stop.
You can identify which gimbal axis is vibrating by:
1) Touching the camera lens,
2) While on a level surface, tilting the Matrice 600
forwards, backwards, left and right, or
3) Tapping on the arms of the Matrice 600.
9 The aerial footage only
appears to be wagging
slightly side-to-side or up-
and-down when using a
RED or heavier camera
Try to raise the Stiffness value up to a point before
the gimbal vibrates. With the Matrice 600 turned
and sitting on a level surface, tilt the Matrice 600
forwards, backwards, left and right while checking
the gimbal for vibrations.
10 The roll axis starts to drift
after mounting the Ronin-
MX onto the Matrice 600
Go to DJI GO > Gimbal Settings > Gimbal Calibration
to calibrate the gimbal. Ensure the Matrice 600 is on
a level and stable surface.
11 If you appear to be
getting a “jello” effect in
your videos
When shooting in 30fps or 24fps, try to keep your
shutter speeds to just double your frame rate to avoid
a "jello" effect in your videos. For 30fps, the shutter
speed should be 1/60. For 24fps, it should be 1/48,
or 1/50 if 1/48 is not available on your DSLR. Cinema
cameras should use a shutter angle of 180 degrees.
If you cannot achieve these shutter speeds, then
you'll need to apply an ND lter to your lens.
46
©
2016 DJI All Rights Reserved.
Specications
General
Built-In Functions
Operation Modes
Underslung Mode
Upright Mode
Briefcase Mode
Aerial Mode
Jib or Wirecam Mode
Built-in, independent IMU module
DJI Specialized Gimbal Drive
Motors with Encoders
Bluetooth Module
USB Connection
2.4 GHz Receiver
Temperature Sensor
DJI Advanced 32-Bit
DSP Processor
D-Bus Receiver
Supported
Peripheral
Camera Tray Dimensions Maximum depth from the center of gravity on camera
base plate: 120 mm.
Maximum height measured from top of the camera base
plate: 130 mm.
Maximum width: 160 mm
Accessory Power
Connections
12V Regulated P-Tap x 2
USB 500 mW x 1
DJI Lightbridge x 1
GCU Input Power Intelligent Battery: 423496-1580 mAh-14.4 V
Connections 2.4 GHz Remote Controller
Bluetooth 4.0
USB 2.0
PC/MAC Assistant
Requirements
Windows XP or above
Mac OS X 10.9 or above
Mobile Assistant Software
Requirements
iOS 7.1 or above
Android 4.3 or above
Mechanical & Electrical Characteristics
Working Current
Static current: 300 mA (@16 V)
Dynamic current: 600 mA (@16 V)
Locked motor current: Max 10 A (@16 V)
Operating Temperature 5° to 122° F (-15° to 50° C)
Weight Including handle bar: 6.11 lb (2.77 kg)
Including vibration absorber: 4.74 lb (2.15 kg)
Dimensions Excluding handle bar:
280 mm (W) x 370 mm (D)x 340 mm (H)
Including handle bar:
560 mm (W) x 370 mm (D) x 440 mm (H)

Ronin-MX
User Manual
©
2016 DJI All Rights Reserved.
47
Compliance Notice
FCC Compliance Notice
This device complies with Part 15 of the FCC Rules. Operation is subject to the following two
conditions: (1) This device may not cause harmful interference, and (2) This device must
accept any interference received, including interference that may cause undesired operation.
Any changes or modifications not expressly approved by the party responsible for
compliance could void the user’s authority to operate the equipment.
This equipment has been tested and found to comply with the limits for a Class B digital
device, pursuant to part 15 of the FCC Rules. These limits are designed to provide
reasonable protection against harmful interference in a residential installation. This
equipment generates, uses and can radiate radio frequency energy and, if not installed
and used in accordance with the instructions, may cause harmful interference to radio
communications. However, there is no guarantee that interference will not occur in a
particular installation. If this equipment does cause harmful interference to radio or
television reception, which can be determined by turning the equipment off and on, the user
is encouraged to try to correct the interference by one or more of the following measures:
- Reorient or relocate the receiving antenna.
- Increase the separation between the equipment and receiver.
- Connect the equipment into an outlet on a circuit different from that to which the receiver is
connected.
- Consult the dealer or an experienced radio/TV technician for help.
RF Exposure Information
This equipment complies with FCC radiation exposure limits set forth for an uncontrolled
environment. In order to avoid the possibility of exceeding the FCC radio frequency exposure
limits, human proximity to the antenna shall not be less than 20cm during normal operation.
Working Performance
Load Weight
(Reference Value)
10 lb (4.5 kg)
Angular Vibration Range ±0.02°
Maximum Controlled
Rotation Speed
Pan axis: 200°/s
Tilt axis: 100°/s
Roll axis: 30°/s
Mechanical Endpoint
Range
Pan axis control: 360° continuous rotation
Tilt axis control: +270° to -150°
Roll axis control: ± 110°
Controlled Rotation Range Pan axis control: 360° continuous rotation
Tilt axis control: +45° to -135°
Roll axis control: ± 25°
Ronin-MX
User Manual
48
©
2016 DJI All Rights Reserved.
IC RSS Warning
This device complies with Industry Canada licence-exempt RSS standard (s). Operation
is subject to the following two conditions: (1) this device may not cause interference,
and (2) this device must accept any interference,including interference that may cause
undesired operation of the device.
Le présent appareil est conforme aux CNR d’Industrie Canada applicables aux appareils
radio exempts de licence.
L’exploitation est autorisée aux deux conditions suivantes:
(1) l’appareil ne doit pas produire de brouillage, et
(2) l’utilisateur de l’appareil doit accepter tout brouillage radioélectrique subi, même si le
brouillage est susceptible d’en compromettre le fonctionnement.
IC Radiation Exposure Statement:
This equipment complies with IC RF radiation exposure limits set forth for an uncontrolled
environment. This transmitter must not be co-located or operating in conjunction with any
other antenna or transmitter.
This equipment should be installed and operated with minimum distance 20cm between
the radiator& your body.
Any Changes or modifications not expressly approved by the party responsible for
compliance could void the user’s authority to operate the equipment.
KCC Warning Message
“해당무선설비는 운용 중 전파혼신 가능성이 있으므로 인명안전과 관련된 서비스는 할 수 없습니다 .”
“해당 무선설비는 운용 중 전파혼신 가능성이 있음”
NCC Warning Message
低功率電波輻射性電機管理辦法
第十二條 經型式認證合格之低功率射頻電機,非經許可,公司、商號或使用者均不得擅自變
更頻率、加大功率或變更原設計之特性及功能。
第十四條 低功率射頻電機之使用不得影響飛航安全及干擾合法通信;經發現有干擾現象時,
應改善至無干擾時方得繼續使用。前項合法通信,指依電信法規定作業之無線電通信。低功
率射頻電機須忍受合法通信或工業、科學及醫療用電波輻射性電機設備之干擾。
EU Compliance Statement
SZ DJI TECHNOLOGY CO., LTD. hereby declares that this device is in compliance with
the essential requirements and other relevant provisions of the R&TTE Directive.
A copy of the EU Declaration of Conformity is available online at www.dji.com/euro-compliance
EU contact address
DJI GmbH, Industrie Strasse. 12, 97618, Niederlauer, Germany

The content is subject to change.
Download the latest version from
http://www.dji.com/product/ronin-mx/info#downloads
If you have any questions about this document, please contact DJI
by sending a message to [email protected].
RONIN
TM
is a trademark of DJI. Copyright
©
2016 DJI All Rights Reserved.