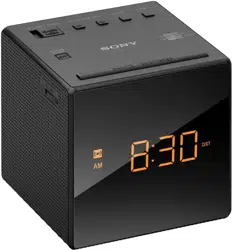
Sony ICFC218 Dream Machine Clock Radio
Product's Documents
Below are documents related to this product, you can read online or download:
- Owner's manual - (English) Read Online | Download pdf
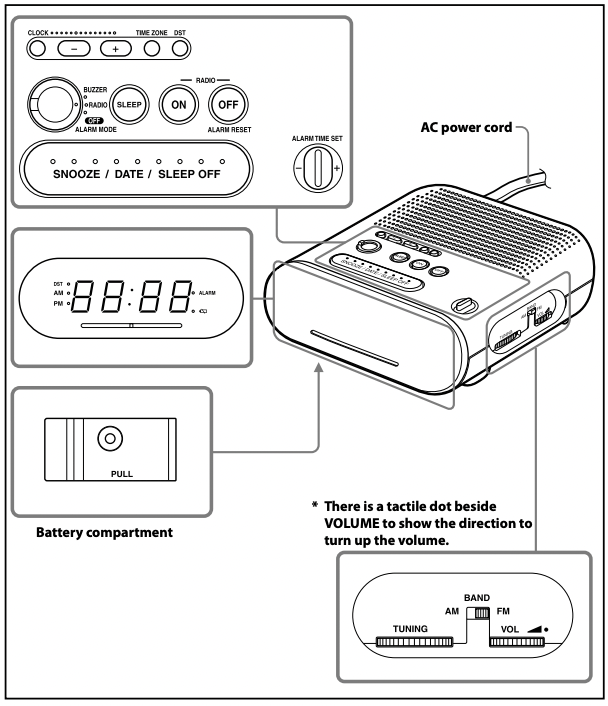
To keep good time, as backup power source, this unit has one CR2032 battery inside of the unit in addition to the house current. The battery keeps the clock in the event of a power interruption.
When the battery becomes weak,  indicator appears in the display.
In the event of a power interruption when the battery is weak, current time and alarm functions will be initialized.
Replace the battery with a Sony CR2032 lithium battery. Use of another battery may present a risk of fire or explosion.
 side facing up. To remove the battery from the battery compartment, push it out from the side marked PUSH. (See Fig. A-2) indicator off in the display
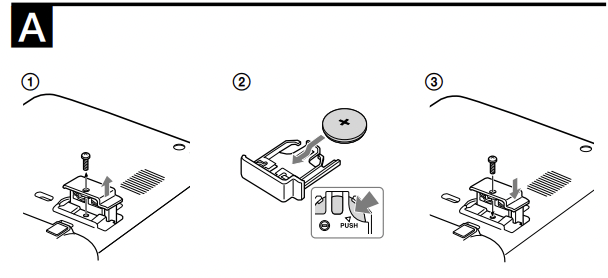
Note If you replace the battery, do not disconnect AC plug from AC outlet. Otherwise, current time and alarm will be initialized.
NOTES ON LITHIUM BATTERY
Battery Warning
When the unit will be left unplugged for a long time, remove the battery to avoid undue battery discharge and damage to the unit from battery leakage.
This unit is preset to the current date and time at the factory, and is powered by the back up battery. All you need to do the first time is just plug it in and select your time zone.
 “year” (about 1 second) “the current EST/EDT (Eastern Standard/Daylight Time)” appears in the display
| Area number | Time zone |
| 1 | Atlantic Standard/Daylight Time |
| 2 (default) | Eastern Standard/Daylight Time |
| 3 | Central Standard/Daylight Time |
| 4 | Mountain Standard/Daylight Time |
| 5 | Pacific Standard/Daylight Time |
| 6 | Yukon Standard/Daylight Time |
| 7 | Hawaiian Standard/Daylight Time |
3. Press TIME ZONE repeatedly until the desired number appears. The display returns to the clock about 4 seconds after the operation is complete.
Note During the shipment and your first use, a clock error may occur. In this case, refer to “Setting the clock and date” to set the correct time.
The following models employ the Automatic Daylight Saving Time/Summer Time adjustment. The DST indicator in the display appears in the display at the beginning of the daylight saving time (summer time), and disappears at the end of it.
The Automatic DST/Summer Time adjustment can be cancelled.
Press and hold DST for more than 3 seconds while the clock is displayed.
A beep sounds, and “Aut OFF” appears in the display to show that the Automatic DST/Summer Time adjustment is cancelled. The display returns to the clock.
Notes
On” appears in the display to show that the Automatic DST/ Summer Time adjustment is activated. The display returns to the clock. To change the setting manually, follow the procedure from step 1.
Press SNOOZE/DATE/SLEEP OFF once for the date, and within about 3 seconds press it again for the year.
The display shows the date or year for about 3 seconds and then changes back to the current time. If you connect the AC plug to AC outlet while this unit is powered from the backup power source, the current date and time appears in the following order. (It is same as when the unit is powered on after the power failure.)
“month and date” (about 1 second) “year” (about 1 second) “current time”
Change the daylight saving time (summer time) adjustment setting according to the following procedures if you have cancelled the Automatic DST/ Summer Time adjustment.
Press DST. DST indicator appears in the display and the time indication changes to the daylight saving time (summer time). To deactivate the daylight saving time (summer time) adjustment, press DST again.
Press RADIO OFF/ALARM RESET.
FM: The AC power cord functions as an FM antenna. Extend the AC power cord fully to increase reception sensitivity.

AM: Rotate the unit horizontally for optimum reception. A ferrite bar AM antenna is built-in to the unit.
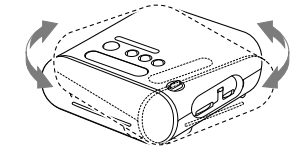
Do not operate the unit over a steel desk or metal surface, as this may lead to interference of reception.
The alarm function can be select from two alarm sounds, RADIO or BUZZER.
Notes
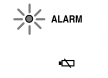
When the alarm time setting operation is complete, the display returns to the clock after a few seconds and the ALARM indicator changes from flashing to fully lit.
– The alarm time appears in the display.
– The alarm sounds.
– Snooze function is turned on.
Press SNOOZE/DATE/SLEEP OFF.
The sound turns off but will automatically come on again after about 10 minutes. Each time you press SNOOZE/DATE/SLEEP OFF, the snooze time changes as follows:

The maximum length of the snooze time is 60 minutes. The display shows the snooze time for about 4 seconds and returns to show the current time. When you press SNOOZE/DATE/SLEEP OFF after the current time appears, the snooze time starts from 10 minutes again.
Press RADIO OFF/ALARM RESET to turn off the alarm. The alarm will come on again at the same time the next day. If RADIO OFF/ALARM RESET is not pressed, the alarm sounds continuously for about 60 minutes, and then it will be stop automatically
Turn ALARM MODE to OFF. ALARM indicator disappears from the display.
Note on alarm in the event of a power interruption
If the alarm set time comes in the event of a power interruption or a power interruption occurs while the alarm is sounding, the display will turn off and the alarm will not sound, and the alarm status will be as follows. If power returns within 60 minutes from the alarm set time, the alarm will sound. If the power interruption occurred while the Snooze function was operating, the snooze function will continue. If the snooze time had passed when the power interruption occurred, the alarm will sound after power returns.
In this status, if the indicator does not light up, RADIO OFF/ALARM RESET, SNOOZE buttons and ALARM MODE functions are available. SNOOZE time will be fixed only 10 minutes if the SNOOZE button has been pressed.
You can fall asleep to the radio using the built-in sleep timer that turns off the radio automatically after a preset duration.
Press SLEEP.
The radio turns on. You can set the sleep timer to durations of 90, 60, 30, or 15 minutes. Each press changes the display as follows:
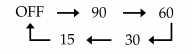
Two short beeps sound when the display returns to “90”. The radio will play for the duration you set, then shut off.
Press RADIO OFF/ALARM RESET or SNOOZE/DATE/SLEEP OFF.
You can fall asleep to the radio and also be awakened by the radio or buzzer alarm at the preset time.
Should any problem occur with the unit, make the following simple checks to determine whether or not servicing is required. If the problem persists, consult your nearest Sony dealer.
The clock flashes “AM 12:00” due to a power interruption.
The radio or buzzer alarm does not sound at the preset alarm time.
The radio alarm is activated but no sound comes on at the preset alarm time
If you have any questions or problems concerning your unit, please consult your nearest Sony dealer.