Loading ...
Loading ...
Loading ...
8 | Use
Tronic 3000T6 720 801 072 (2013/05)
3.4 Electrical connections
The ES8 model must be hard wired. As per the National Electric Code the
ES8 needs to be wired with 12 GA. wire to a 20 amp branch circuit.
▶ Unscrew the junction box cover and remove it.
▶ Insert 12 AWG through conduit into junction box and secure with
conduit strain relief (not supplied).
▶ Connect the wires and screw on the cover of the junction box.
▶ Make appropriate wiring connections to the water heater per the
National Electric Code.
The unit must be grounded with supplied grounding cable inside junction
box.
▶ Secure junction box cover once wiring connections have been made.
When the ES8 is not within sight of the electrical circuit breakers, a
circuit breaker lockout or additional local means of disconnection for all
non grounded conductors must be provided that is within sight of the
appliance. [REF NEC 422.31].
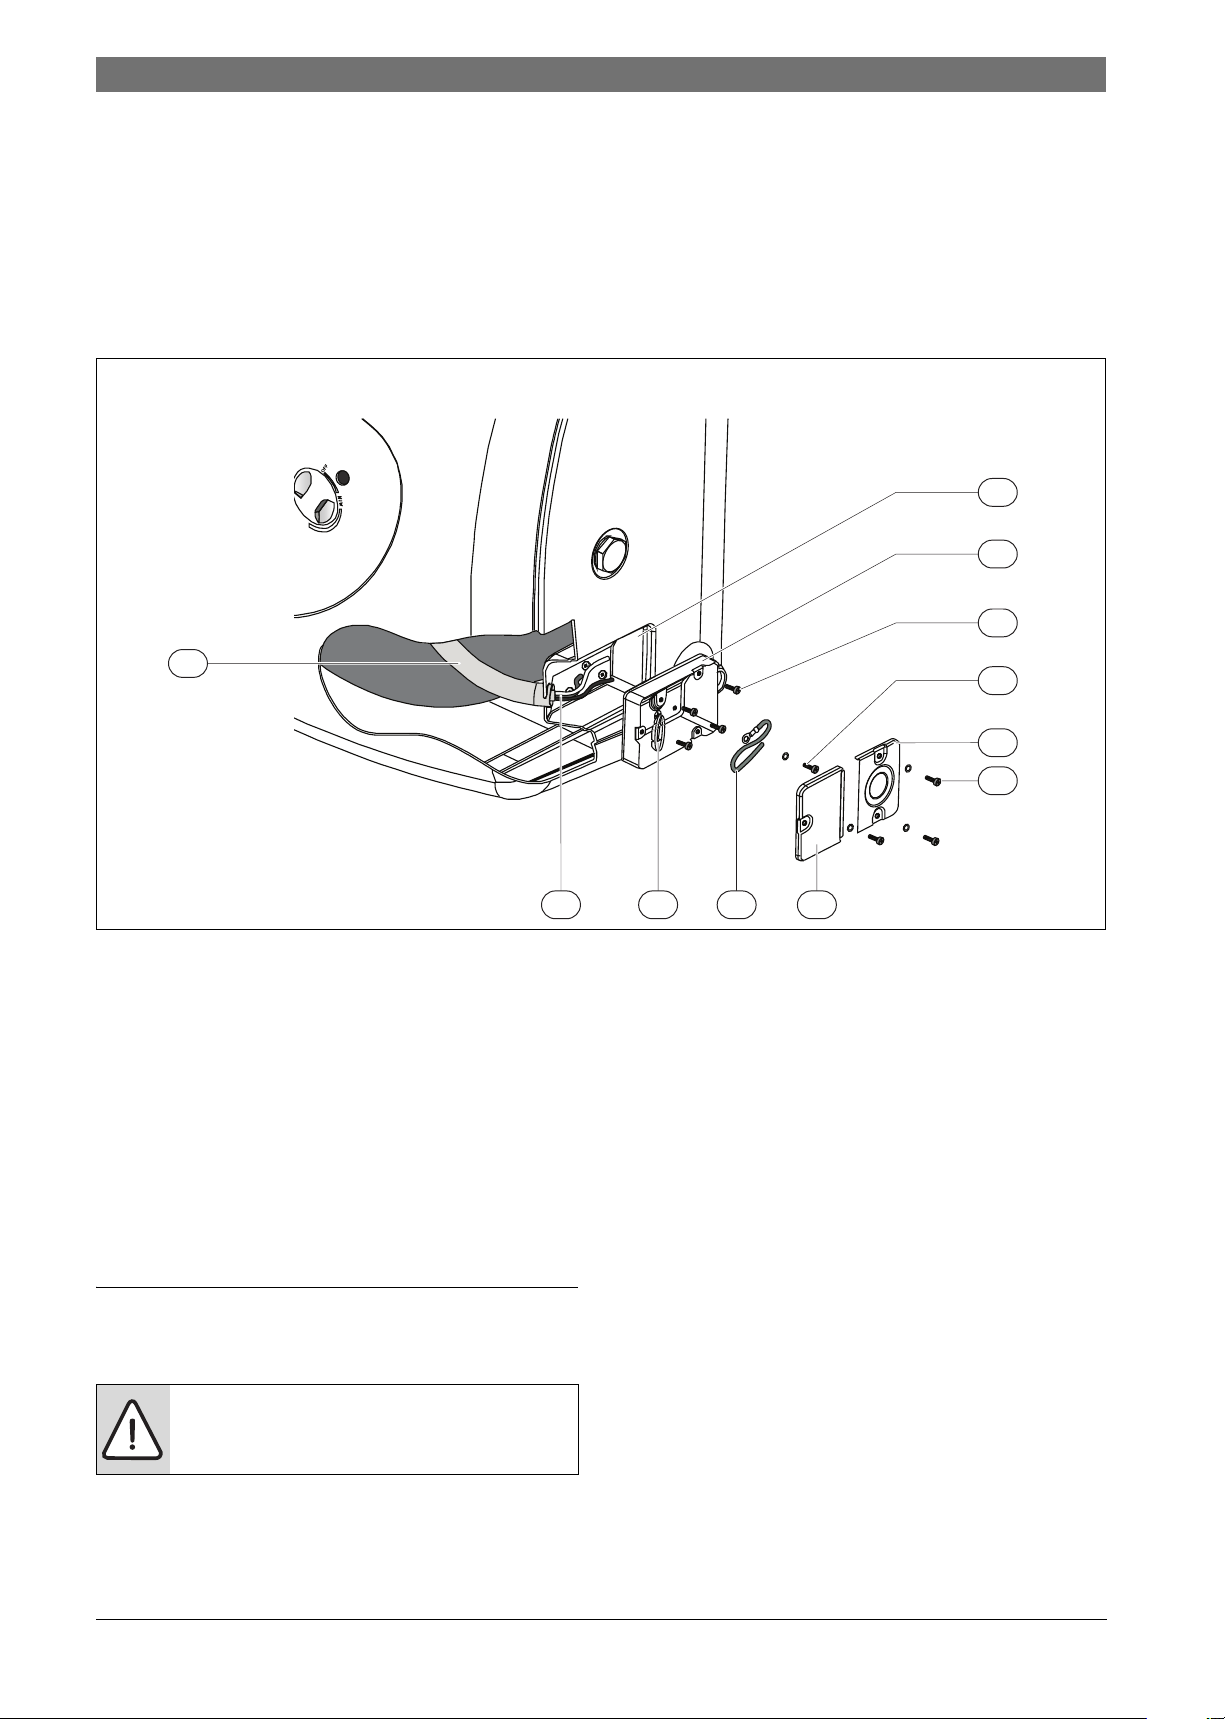
Fig. 8
[1] Cable housing (internal to the unit)
[2] Wiring
[3] Protection ring for wiring.
[4] Additional grounding cable AWG16 (minimum length 152mm)
[5] Junction box left cover
[6] Nº3 self tapping screw for junction box covers fixing (with lock
washer or serrated head)
[7] Junction box right cover
[8] Nº1 self tapping screw for grounding (with lock washer or
serrated head)
[9] Nº4 screws for junction box fixing
[10] Junction box
[11] Housing for junction box (in the plastic front cover)
4Use
4.1 Starting and testing
To fill the heater:
▶ Open supply valve for water heater to fill with water.
▶ Open hot water tap(s) supplied by the water heater to purge air out
of the system. Once air is purged, close hot water tap.
▶ Visually check for any leaks.
Turning heater on
For models which are not fitted with a switch:
▶ Supply power to the water heater by plugging in the power cord
(models ES2.5, ES4) or turning on the circuit breaker (model ES8).
If the light does not come on, turn the control knob in a clockwise
direction.
The light will come on until water temperature has reached the
thermostat temperature setting. The light will come back on any time
the water temperature inside the tank drops below the thermostat
setting.
4.2 Temperature setting
The temperature of the hot water is adjusted by rotating the knob M
(Fig. 9) located on the front cover. Temperature range is 65 - 145 °F.
▶ Turn the knob clockwise to increase temperature.
▶ Turn the knob counter-clockwise to decrease temperature.
1
2 3 4 5
6
7
8
9
10
11
6720801072-14.1V
CAUTION:
▶ DO NOT supply power to water heater until filled with
water.
Loading ...
Loading ...
Loading ...