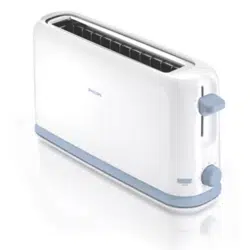
HD2569
E F
A
C D
1
B
2 3 4 5
6 7 8 9

ENGLISH
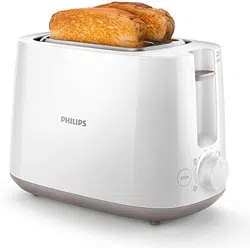
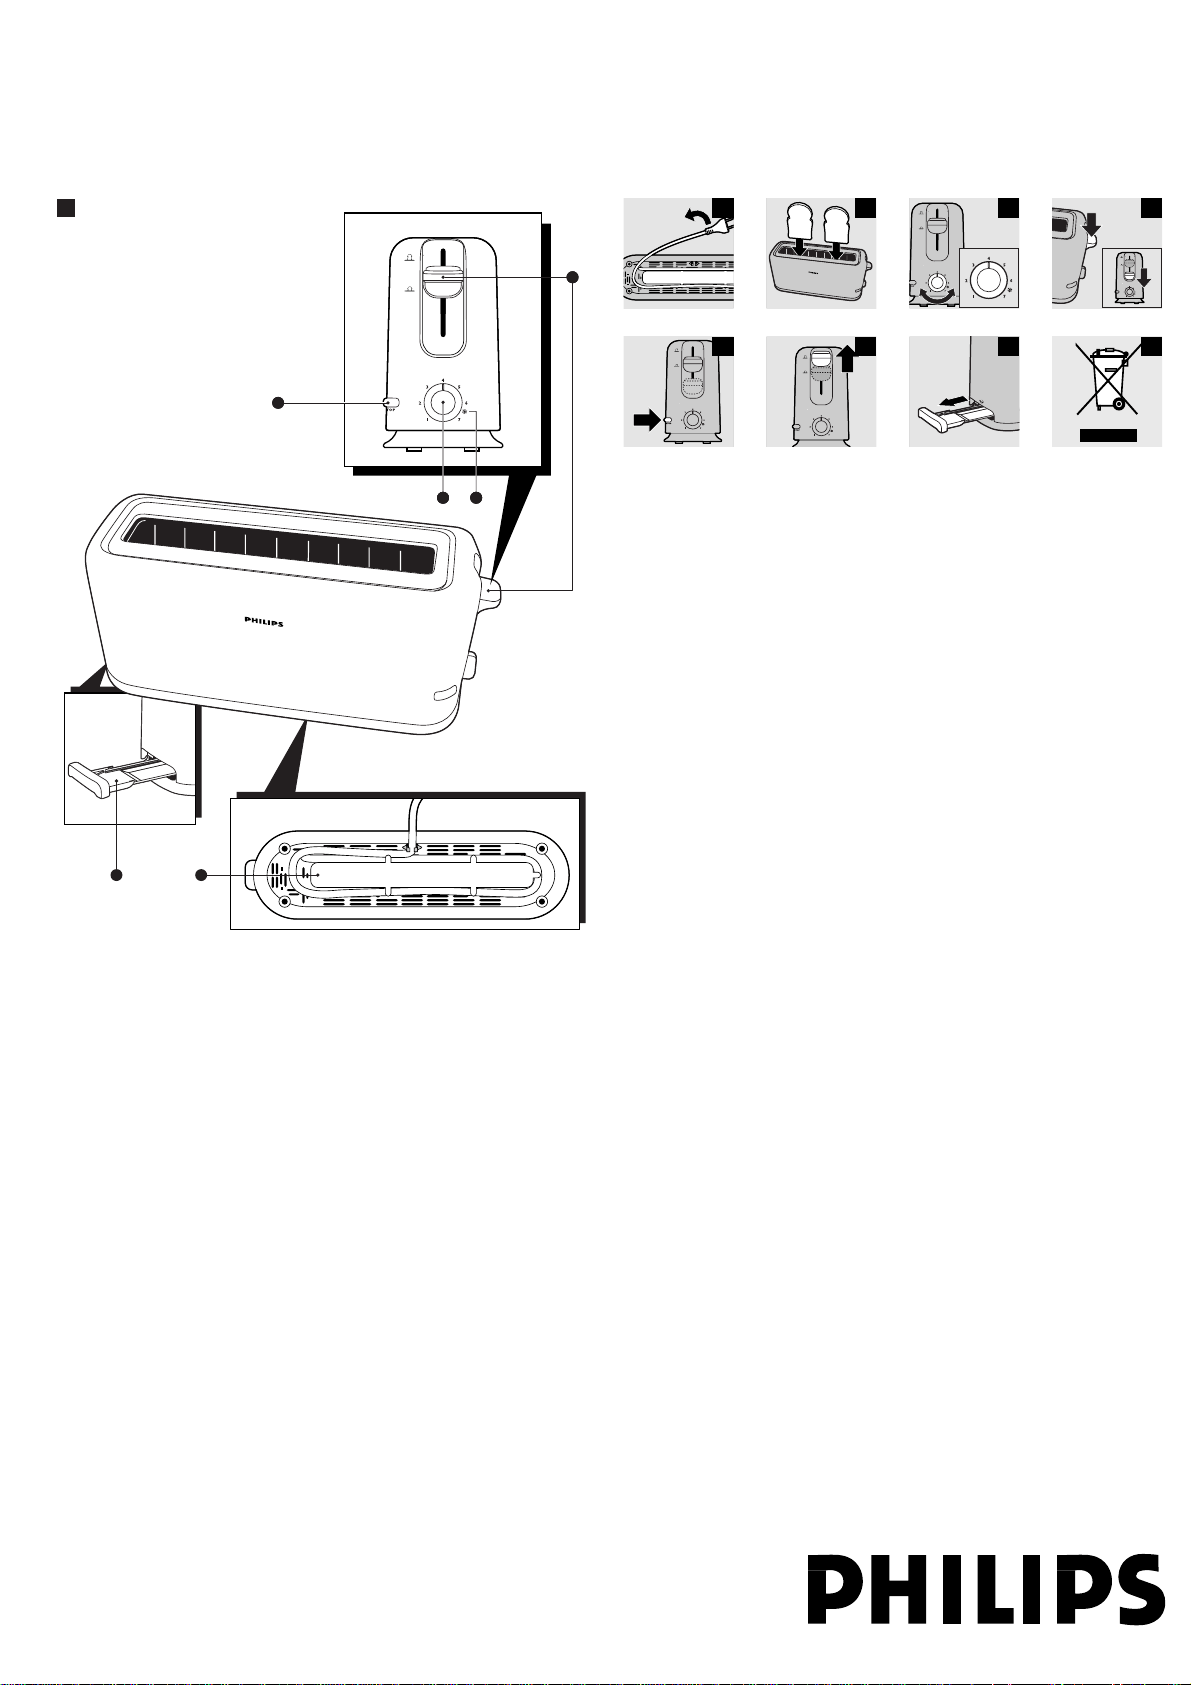
General description (fig. 1)
.
A Toasting lever
B Stop button
C Browning control
D Defrost function
E Crumb tray
F Cord storage facility
Important
.
Read these instructions for use carefully before using the appliance and save
them for future reference.
◗ Check if the voltage indicated on the bottom of the appliance
corresponds to the local mains voltage before you connect the
appliance.
◗ Only connect the appliance to an earthed wall socket.
◗ If the mains cord is damaged, it must be replaced by Philips, a service
centre authorised by Philips or similarly qualified persons in order to
avoid a hazard.
◗ Do not immerse the appliance or the mains cord in water or any
other liquid.
◗ Always unplug the appliance after use.
◗ Keep the appliance out of the reach of children.
◗ Do not let the mains cord hang over the edge of the table or
worktop on which the appliance is standing and keep the cord away
from hot surfaces.
◗ Do not let the appliance operate unattended. Do not operate it
under or near curtains or other flammable materials or under wall
cabinets, as bread may burn.
◗ Avoid touching the metal parts of the toaster as they become very
hot during toasting. Only touch the controls and lift the appliance by
its plastic body.
◗ The toaster is intended for household use only and may only be used
indoors.
◗ To avoid the risk of fire, frequently remove crumbs from the crumb
tray. Make sure the crumb tray is correctly placed.
◗ Immediately unplug the toaster if fire or smoke is observed.
◗ If a slice of bread gets stuck inside the toaster, unplug the appliance
and let it cool down before trying to remove the bread. Do not use a
knife or a sharp tool, as these may cause damage to the heating
elements.
◗ The appliance is only meant for toasting bread. Do not put any other
ingredients in the appliance, as this may lead to a hazardous situation.
◗ Oversized foods and metal foil packages must not be inserted into
the toaster, as this may cause fire or electric shock.
◗ Do not place the toaster on a hot surface.
Before first use
.
Remove any stickers and wipe the body of the toaster with a damp cloth.
Before using the appliance for the first time, we advise you to let the
appliance complete a few toasting cycles without slices of bread on the
highest browning setting in a properly ventilated room. This will burn off any
dust that may have accumulated on the heating elements and will prevent
unpleasant smells when toasting bread.
Using the appliance
.
1 Put the appliance on a stable and flat surface, away from curtains and
other combustible materials. Put the plug in the wall socket.
◗ You can adjust the length of the cord by winding part of it round the
brackets in the base of the appliance (fig. 2).
Toasting bread
Never let the toaster operate unattended.
1 Put one or two slices of bread in the toaster (fig. 3).
2 Select the desired browning setting (fig. 4).
Select a low setting (1-2) for lightly toasted bread and a high setting (5-7)
for darkly toasted bread. Select the defrost function — (settings 6 to 7,
depending on the desired browning degree) for toasting frozen bread.
3 Push the toasting lever down to switch the appliance on (fig. 5).
The toasting lever will only stay down if the appliance has been connected
to the mains.
The metal parts of the toaster will get hot during toasting. Be careful not
to touch them.
4 When the toast is ready, it pops up and the toaster switches off.
◗ The toaster will switch off automatically. You can stop the toasting
process and pop the bread up at any time by pressing the stop button
on the side of the toaster (fig. 6).
◗ To remove smaller items, you can move the toasting lever upwards a
little further (fig. 7).
◗ If bread gets stuck inside the toaster, remove the plug from the wall
socket, let the appliance cool down completely and carefully remove
the bread from the toaster. Do not use a knife or another sharp
metal tool to do this and do not touch the metal internal parts of the
toaster.
Cleaning
.
1 Unplug the appliance.
2 Let the appliance cool down.
3 Clean the appliance with a damp cloth. Do not use abrasive cleaning
agents.
Never immerse the appliance in water.
4 Remove crumbs from the appliance by sliding the crumb tray out of
the appliance (fig. 8).
Do not hold the appliance upside down and do not shake it to remove the
crumbs.
5 Store the cord by winding it round the brackets in the base of the
appliance (fig. 2).
Environment
.
◗ Do not throw the appliance away with the normal household waste
at the end of its life, but hand it in at an official collection point for
recycling. By doing this you will help to preserve the environment
(fig. 9).
Guarantee & service
.
If you need information or if you have a problem, please visit the Philips
website at www.philips.com or contact the Philips Customer Care Centre
in your country (you will find its phone number in the worldwide guarantee
leaflet). If there is no Customer Care Centre in your country, turn to your
local Philips dealer or contact the Service Department of Philips Domestic
Appliances and Personal Care BV.
4222 002 63991
2/9

DEUTSCH
Allgemeine Beschreibung (Abbildung 1)
.
A Schiebeschalter
B Stop-Taste
C Röstgradkontrolle
D Auftaufunktion
E Krümelschublade
F Kabelaufwicklung
Wichtig
.
Lesen Sie diese Bedienungsanleitung vor dem ersten Gebrauch des Geräts
sorgfältig durch und bewahren Sie sie zur späteren Einsichtnahme auf.
◗ Prüfen Sie vor dem Anschließen des Gerätes, ob die
Spannungsangabe auf der Unterseite des Gerätes mit der örtlichen
Netzspannung übereinstimmt.
◗ Schließen Sie das Gerät nur an eine Schuko-Steckdose an.
◗ Wenn das Netzkabel defekt oder beschädigt ist, darf es nur von
einem Philips Service-Center oder einer von Philips autorisierten
Werkstatt durch ein Original-Ersatzkabel ausgetauscht werden, um
Gefährdungen zu vermeiden.
◗ Tauchen Sie das Gerät und das Netzkabel nicht in Wasser oder
andere Flüssigkeiten.
◗ Ziehen Sie nach dem Gebrauch stets den Netzstecker aus der
Steckdose.
◗ Halten Sie das Gerät außer Reichweite von Kindern.
◗ Lassen Sie das Netzkabel nicht über den Rand der Tisch- oder
Arbeitsplatte hängen, auf der das Gerät steht, und halten Sie das
Kabel fern von heißen Oberflächen.
◗ Lassen Sie das eingeschaltete Gerät nicht unbeaufsichtigt. Betreiben
sie es nicht unter Wandschränken oder in der Nähe von Gardinen
oder anderen leicht brennbaren Materialien, da Brot in Brand
geraten kann.
◗ Vermeiden Sie jede Berührung mit den Metallteilen des Geräts, da
diese beim Toasten sehr heiß werden. Berühren Sie nur die Tasten
und Griffe und heben Sie das Gerät am Kunststoffgehäuse an.
◗ Der Toaster ist ausschließlich für den häuslichen Gebrauch
vorgesehen und darf nur drinnen betrieben werden.
◗ Um das Risiko eines Brandes zu vermeiden, sollten Sie die
Brotkrümel regelmäßig aus der Krümelschublade entfernen. Achten
Sie darauf, die Krümelschublade wieder richtig in das Gerät zu
schieben.
◗ Ziehen Sie sofort den Netzstecker aus der Steckdose, wenn Sie
Rauch oder Feuer bemerken.
◗ Wenn eine Scheibe Brot im Toaster klemmt: Ziehen Sie den
Netzstecker aus der Steckdose und lassen Sie das Gerät völlig
abkühlen. Entfernen Sie dann das eingeklemmte Brot aus dem
Toaster. Verwenden Sie hierzu keine Teile aus Metall, weil dies die
Heizelemente des Toasters beschädigen könnte.
◗ Verwenden Sie dieses Gerät ausschließlich zum Toasten von Brot.
Bei anderem Toastgut könnte es zu Brand, Stromschlag und anderen
Unfällen kommen.
◗ Übergroße Brotscheiben und Verpackungen aus Metallfolie dürfen
nicht in den Toaster eingeführt werden, da dies zu Bränden und
Stromschlägen führen kann.
◗ Stellen Sie den Toaster nicht auf heiße Flächen.
Vor dem ersten Gebrauch
.
Ziehen Sie alle Aufkleber ab und reinigen Sie das Gehäuse des Toasters mit
einem feuchten Tuch.
Vor dem ersten Gebrauch des Geräts empfiehlt es sich, den Toaster in
einem gut belüfteten Raum mehrmals ohne Brot auf der höchsten
Röststufe zu betreiben. Dadurch werden Staubpartikel verbrannt, die sich
möglicherweise auf den Heizelementen angesammelt haben und einen
unangenehmen Geruch beim Toasten von Brot verursachen können.
Der Gebrauch des Geräts
.
1 Stellen Sie den Toaster auf eine stabile, ebene Fläche. Achten Sie auf
ausreichende Entfernung zu Gardinen und anderen leicht brennbaren
Materialien. Stecken Sie den Netzstecker in die Steckdose.
◗ Überschüssiges Netzkabel lässt sich um die Vorsprünge an der
Unterseite des Geräts aufwickeln (Abbildung 2).
Brot toasten
Lassen Sie das eingeschaltete Gerät niemals unbeaufsichtigt.
1 Geben Sie eine oder zwei Scheiben Brot in den Toaster
(Abbildung 3).
2 Wählen Sie die Einstellung für den gewünschten Röstgrad
(Abbildung 4).
Wählen Sie eine niedrige Einstellung (1 - 2) für hellen Toast und eine hohe
Einstellung (5 - 7) für dunkelbraunen Toast. Wählen Sie die Auftaufunktion
— (Einstellung 6 oder 7, je nach gewünschtem Röstgrad) zum Toasten von
gefrorenem Brot.
3 Drücken Sie den Schiebeschalter nach unten, um das Gerät
einzuschalten (Abbildung 5).
Nur wenn das Gerät an das Stromnetz angeschlossen ist, rastet der
Schiebeschalter in der unteren Position ein.
Die Metallteile werden während des Toastens heiß. Vermeiden Sie jede
Berührung.
4 Wenn der Toast fertig ist, wird er ausgeworfen, und der Toaster
schaltet sich aus.
◗ Der Toaster schaltet sich automatisch aus. Sie können den
Toastvorgang jederzeit abbrechen, indem Sie die Stopptaste an der
Seite des Toasters drücken. Das Brot wird sofort ausgeworfen
(Abbildung 6).
◗ Zum Entnehmen von kleinem Toastgut können Sie den
Schiebeschalter etwas weiter nach oben heben (Abbildung 7).
◗ Wenn eine Scheibe Brot im Toaster klemmt, ziehen Sie den
Netzstecker aus der Steckdose und lassen Sie das Gerät völlig
abkühlen, bevor Sie das Brot vorsichtig entfernen. Verwenden Sie
hierzu kein Messer oder andere spitze Gegenstände aus Metall, und
vermeiden Sie jede Berührung mit den inneren Metallteilen des
Toasters.
Reinigung
.
1 Ziehen Sie den Netzstecker aus der Steckdose.
2 Lassen Sie das Gerät abkühlen.
3 Reinigen Sie das Gerät mit einem feuchten Tuch. Verwenden Sie
keine Scheuermittel.
Tauchen Sie das Gerät niemals in Wasser!
4 Ziehen Sie die Krümelschublade aus dem Gerät, um Brotkrumen aus
dem Gerät zu entfernen (Abbildung 8).
Schütteln Sie die Krümel nicht aus dem umgekehrt gehaltenen Gerät.
5 Überschüssiges Kabel können Sie an der Unterseite des Geräts um
die Kabelaufwicklung legen (Abbildung 2).
Umweltschutz
.
◗ Geben Sie das Gerät am Ende der Lebensdauer nicht in den
normalen Hausmüll. Bringen Sie es zum Recycling zu einer offiziellen
Sammelstelle. Auf diese Weise helfen Sie die Umwelt zu schonen
(Abbildung 9).
Garantie und Kundendienst
.
Benötigen Sie weitere Informationen oder treten Probleme auf, wenden
Sie sich bitte an Ihren Philips-Händler oder setzen Sie sich mit einem Philips
Service-Center in Ihrem Land in Verbindung (Tel. Nr. 0180/5356767).
Besuchen Sie auch die Philips Website (www.philips.com).
4222 002 63991
3/9

FRANÇAIS
Description générale (fig. 1)
.
A Manette
B Bouton d'arrêt
C Bouton de réglage
D Fonction de décongélation
E Ramasse-miettes
F Rangement du cordon
Important
.
Avant d'utiliser l'appareil, lisez les instructions ci-dessous et conservez ce
mode d'emploi pour un usage ultérieur.
◗ Avant de brancher l'appareil, vérifiez que la tension indiquée sur la
base correspond à la tension secteur locale.
◗ Branchez l'appareil uniquement sur une prise murale mise à la terre.
◗ Si le cordon d'alimentation est endommagé, il doit être remplacé par
Philips ou un Centre Service Agréé afin d'éviter tout accident.
◗ Ne plongez jamais l'appareil ou le cordon d'alimentation dans l'eau ou
dans tout autre liquide.
◗ Débranchez toujours l'appareil après utilisation.
◗ Tenez l'appareil hors de portée des enfants.
◗ Ne laissez pas le cordon d'alimentation pendre d'une table ou d'un
plan de travail et tenez-le à l'écart des surfaces chaudes.
◗ Ne laissez jamais l'appareil fonctionner sans surveillance. N'utilisez
pas l'appareil à proximité de matériaux inflammables tels que les
rideaux. Ne faites pas fonctionner l'appareil sous des placards
suspendus (le pain risque de s'enflammer).
◗ Attention : évitez de toucher les parties métalliques du grille-pain
car, en cours de fonctionnement, celle-ci chauffent et atteignent des
températures élevées. Ne touchez que les boutons et lorsque vous
manipulez l'appareil, veillez à ne toucher uniquement que les parties
en plastique.
◗ Ce grille-pain est destiné à un usage domestique intérieur
uniquement.
◗ Pour éviter tout risque d'incendie, retirez fréquemment les miettes
qui s'accumulent dans le ramasse-miettes et veillez à replacer celui-ci
correctement.
◗ Débranchez immédiatement le grille-pain si vous observez de la
fumée ou des flammes.
◗ Si une tranche de pain reste coincée, débranchez le grille-pain et
laissez-le refroidir complètement avant de retirer le pain. N'insérez
jamais de couteau ou d'objet pointu car vous risqueriez
d'endommager les résistances.
◗ Afin d'éviter tout risque d'accident, utilisez cet appareil uniquement
pour griller du pain.
◗ N'introduisez pas de tranches de pain trop grandes ou de la
nourriture emballée dans du papier en aluminium car vous risqueriez
de provoquer un incendie ou de vous électrocuter.
◗ Ne placez jamais le grille-pain sur une surface chaude.
Avant la première utilisation
.
Retirez tous les autocollants et essuyez le grille-pain à l'aide d'un chiffon
humide.
Lors de la première utilisation, réglez l'appareil sur le niveau de brunissage
maximal et faites-le fonctionner plusieurs fois sans introduire de tranches de
pain, et ce, pour brûler les particules de poussière qui se sont accumulées
sur les éléments chauffants et éviter qu'une odeur désagréable ne se dégage
lorsque vous faites griller votre tranche de pain.
Utilisation de l'appareil
.
1 Placez l'appareil sur une surface plane et stable, loin de tout matériau
inflammable, tel que des rideaux. Ensuite, branchez-le sur la prise
secteur.
◗ Si nécessaire, enroulez le cordon autour des crochets situés en
dessous de l'appareil pour en ajuster la longueur (fig. 2).
Grillage du pain
Ne laissez jamais le grille-pain fonctionner sans surveillance.
1 Insérez une ou deux tranches de pain dans le grille-pain (fig. 3).
2 Sélectionnez le degré de brunissage désiré (fig. 4).
Sélectionnez un faible degré (1-2) si vous souhaitez obtenir un pain
légèrement doré. Pour un brunissage plus prononcé, utilisez un degré élevé
(5-7). Sélectionnez la fonction de décongélation — (réglage 6 à 7, selon le
degré de brunissage désiré) pour faire griller du pain congelé.
3 Abaissez la manette pour mettre l'appareil en marche (fig. 5).
La manette ne restera en position que si l'appareil est branché sur le
secteur.
Étant donné que les parties métalliques chauffent pendant l'utilisation,
veillez à ne pas les toucher.
4 Lorsque le pain est prêt, la manette remonte et l'appareil s'éteint
automatiquement.
◗ L'appareil s'éteint automatiquement. Vous pouvez suspendre le
brunissage et éjecter le pain à tout moment en appuyant sur le
bouton d'arrêt situé sur la face latérale du grille-pain (fig. 6).
◗ Pour retirer des tranches de pain de petite taille, il suffit de relever la
manette un peu plus haut (fig. 7).
◗ Si une tranche reste coincée, débranchez la fiche d'alimentation de la
prise murale, laissez le grille-pain refroidir et retirez soigneusement la
tranche du grille-pain. N'introduisez jamais de couteau ou autre objet
pointu dans le grille-pain et veillez à ne pas toucher les parties
métalliques de l'appareil.
Nettoyage
.
1 Débranchez l'appareil.
2 Laissez refroidir l'appareil.
3 Nettoyez le grille-pain à l'aide d'un chiffon humide. N'utilisez pas de
produits abrasifs.
Ne plongez jamais l'appareil dans l'eau.
4 Pour retirer les miettes de l'appareil, ouvrez le ramasse-miettes
(fig. 8).
Ne retournez pas l'appareil et ne le secouez pas pour enlever les miettes.
5 Pour ranger le cordon d'alimentation, enroulez-le autour des
crochets à la base de l'appareil (fig. 2).
Environnement
.
◗ Lorsqu'il ne fonctionnera plus, ne jetez pas l'appareil avec les ordures
ménagères mais déposez-le à un endroit assigné à cet effet, où il
pourra être recyclé. Vous contribuerez ainsi à la protection de
l'environnement (fig. 9).
Garantie et service
.
Si vous souhaitez obtenir des informations supplémentaires ou si vous
rencontrez un problème, visitez le site Web de Philips à l'adresse
www.philips.com ou contactez le Service Consommateurs Philips de votre
pays (vous trouverez le numéro de téléphone correspondant sur le dépliant
de garantie internationale). S'il n'existe pas de Service Consommateurs
Philips dans votre pays, renseignez-vous auprès de votre revendeur local ou
contactez le Service Department of Philips Domestic Appliances and
Personal Care BV.
4222 002 63991
4/9

NEDERLANDS
Algemene beschrijving (fig. 1)
.
A Roosterknop
B Stopknop
C Bruiningsknop
D Ontdooifunctie
E Kruimellade
F Snoeropbergmogelijkheid
Belangrijk
.
Lees deze gebruiksaanwijzing zorgvuldig door voordat u het apparaat gaat
gebruiken. Bewaar de gebruiksaanwijzing om deze indien nodig te kunnen
raadplegen.
◗ Controleer of het voltage aangegeven op de onderkant van het
apparaat overeenkomt met de plaatselijke netspanning voordat u het
apparaat aansluit.
◗ Sluit het apparaat alleen aan op een geaard stopcontact.
◗ Indien het netsnoer beschadigd is, moet het worden vervangen door
Philips, een door Philips geautoriseerd servicecentrum of personen
met vergelijkbare kwalificaties om gevaar te voorkomen.
◗ Dompel het apparaat en het netsnoer niet in water of een andere
vloeistof.
◗ Haal na gebruik altijd de stekker uit het stopcontact.
◗ Houd het apparaat buiten het bereik van kinderen.
◗ Laat het netsnoer niet over de rand van de tafel of het aanrecht
hangen waarop het apparaat staat en houd het netsnoer uit de buurt
van hete oppervlakken.
◗ Laat het apparaat nooit zonder toezicht werken. Gebruik het
apparaat niet onder of in de nabijheid van gordijnen of andere
brandbare materialen en ook niet onder hangende keukenkastjes,
omdat brood vlam kan vatten.
◗ Raak de metalen delen van de broodrooster niet aan, omdat deze
tijdens het roosteren zeer heet worden. Raak alleen de knoppen aan
en til het apparaat op door de kunststof behuizing vast te pakken.
◗ De broodrooster is uitsluitend bedoeld voor huishoudelijk gebruik en
mag alleen binnenshuis worden gebruikt.
◗ Om brandgevaar te voorkomen moet de kruimellade regelmatig
worden geleegd. Zorg ervoor dat de kruimellade goed in het
apparaat zit.
◗ Haal direct de stekker uit het stopcontact indien u vuur of rook
waarneemt.
◗ Als een sneetje brood vast komt te zitten in het apparaat, haal dan de
stekker uit het stopcontact en laat het apparaat afkoelen voordat u
het brood verwijdert. Gebruik hiervoor geen mes of ander scherp
voorwerp, omdat dit schade aan de verwarmingselementen kan
veroorzaken.
◗ De broodrooster is uitsluitend bedoeld voor het roosteren van
brood. Doe geen andere ingrediënten in het apparaat, aangezien dit
tot gevaarlijke situaties kan leiden.
◗ Grote stukken brood en verpakkingen van aluminiumfolie mogen niet
in de broodrooster worden gestoken, omdat dit brand of elektrische
schokken kan veroorzaken.
◗ Plaats de broodrooster niet op een hete ondergrond.
Voor het eerste gebruik
.
Verwijder eventuele stickers van de broodrooster en maak de behuizing
schoon met een vochtige doek.
Voordat u het apparaat voor de eerste keer gebruikt, raden we u aan het
apparaat in een goed geventileerde kamer enkele keren op de hoogste
bruiningsstand te laten werken zonder dat er brood in zit. Hierdoor zal het
stof dat zich eventueel op de verwarmingselementen heeft verzameld,
worden weggebrand en wordt het ontstaan van onaangename geurtjes
tijdens het roosteren voorkomen.
Het apparaat gebruiken
.
1 Plaats het apparaat op een stabiele en vlakke ondergrond, uit de
buurt van gordijnen en andere brandbare materialen. Steek de
stekker in het stopcontact.
◗ U kunt de lengte van het snoer aanpassen door een deel van het
snoer rond de haken aan de onderzijde van het apparaat te wikkelen
(fig. 2).
Brood roosteren
Laat de broodrooster nooit zonder toezicht werken.
1 Plaats een of twee sneetjes brood in de broodrooster (fig. 3).
2 Stel de gewenste bruiningsstand in (fig. 4).
Kies een lage stand (1-2) voor licht geroosterd brood en een hoge stand
(5-7) voor donker geroosterd brood. Kies de ontdooistand — (standen
6 t/m 7, afhankelijk van de gewenste bruiningsgraad) voor het roosteren van
bevroren brood.
3 Duw de roosterknop naar beneden om het apparaat in te schakelen
(fig. 5).
De roosterknop blijft alleen omlaag indien het apparaat op netspanning
aangesloten is.
De metalen delen van de broodrooster worden heet tijdens het
roosteren. Raak deze delen niet aan.
4 Als het roosterproces is voltooid, springt de roosterknop omhoog en
schakelt de broodrooster uit.
◗ De broodrooster schakelt automatisch uit. U kunt het roosterproces
op ieder gewenst moment onderbreken en het brood omhoog laten
komen door op de stopknop aan de zijkant van de broodrooster te
drukken (fig. 6).
◗ Om kleinere stukken brood te verwijderen, kunt u de roosterknop
iets verder omhoog duwen (fig. 7).
◗ Als er brood in de broodrooster vast komt te zitten, haal dan de
stekker uit het stopcontact, laat het apparaat volledig afkoelen en
verwijder het brood voorzichting uit de broodrooster. Gebruik
hiervoor geen mes of ander scherp metalen voorwerp en raak de
metalen onderdelen in de broodrooster niet aan.
Schoonmaken
.
1 Haal de stekker uit het stopcontact.
2 Laat het apparaat afkoelen.
3 Maak het apparaat schoon met een vochtige doek. Gebruik geen
schurende schoonmaakmiddelen.
Dompel het apparaat nooit in water.
4 Verwijder kruimels door de kruimellade uit het apparaat te trekken
(fig. 8).
Houd het apparaat niet ondersteboven en schud het niet om kruimels te
verwijderen.
5 Berg het snoer op door het rond de haken aan de onderzijde van het
apparaat te wikkelen (fig. 2).
Milieu
.
◗ Gooi het apparaat aan het einde van zijn levensduur niet weg met het
normale huisvuil, maar lever het in op een door de overheid
aangewezen inzamelpunt om het te laten recyclen. Op die manier
levert u een bijdrage aan een schonere leefomgeving (fig. 9).
Garantie & service
.
Als u informatie nodig hebt of als u een probleem hebt, bezoek dan de
Philips-website (www.philips.com) of neem contact op met het Philips
Customer Care Centre in uw land (u vindt het telefoonnummer in het
'worldwide guarantee'-vouwblad). Als er geen Customer Care Centre in
uw land is, ga dan naar uw Philips-dealer of neem contact op met de
afdeling Service van Philips Domestic Appliances and Personal Care BV.
4222 002 63991
5/9

ESPAÑOL
Descripción general (fig. 1)
.
A Palanca de tostado
B Botón de parada
C Control de tostado
D Función de descongelación
E Bandeja recogemigas
F Recogecable
Importante
.
Antes de usar el aparato, lea atentamente estas instrucciones de uso y
consérvelas por si necesitara consultarlas en el futuro.
◗ Antes de enchufar el aparato, compruebe si el voltaje indicado en la
parte inferior del mismo se corresponde con el voltaje de red local.
◗ Conecte el aparato sólo a un enchufe con toma de tierra.
◗ Si el cable de red está dañado, debe ser sustituido por Philips o por
un centro de servicio autorizado por Philips para evitar situaciones
de peligro.
◗ No sumerja el aparato ni el cable de red en agua u otros líquidos.
◗ Desenchufe siempre el aparato después de usarlo.
◗ Mantenga el aparato fuera del alcance de los niños.
◗ No deje que el cable de red cuelgue del borde de la mesa o encimera
donde esté colocado el aparato, y mantenga el cable alejado de
superficies calientes.
◗ No deje nunca el aparato en funcionamiento sin vigilancia. No lo
utilice debajo o cerca de cortinas u otros materiales inflamables, ni
debajo de armarios de pared, ya que el pan se puede quemar.
◗ Evite tocar las partes metálicas del tostador ya que se calientan
mucho durante el tostado. Toque sólo los controles y levante el
aparato sujetándolo por la parte de plástico.
◗ El tostador está diseñado sólo para uso doméstico y se debe utilizar
únicamente en interiores.
◗ Para evitar el riesgo de incendio, quite con frecuencia las migas de la
bandeja recogemigas. Asegúrese de que la bandeja recogemigas está
correctamente colocada.
◗ Desenchufe inmediatamente el aparato si observa fuego o humo.
◗ Si una rebanada de pan se queda encajada en el tostador, desenchufe
el aparato y deje que se enfríe antes de sacar el pan. No utilice
cuchillos ni objetos afilados, ya que podría dañar las resistencias.
◗ Este aparato está diseñado únicamente para tostar pan. No ponga
otros ingredientes en el aparato, ya que podría provocar situaciones
de peligro.
◗ No introduzca en el tostador alimentos demasiado grandes ni
productos envueltos en papel de aluminio, ya que podrían provocar
un incendio o una descarga eléctrica.
◗ No coloque el tostador sobre una superficie caliente.
Antes de utilizarlo por primera vez
.
Quite las pegatinas y limpie el exterior del tostador con un paño húmedo.
Antes de utilizar el aparato por primera vez, recomendamos que encienda
el tostador para que complete algunos ciclos de tostado sin pan en la
posición de tostado más alta en una habitación con ventilación adecuada.
De este modo quemará el polvo que se pueda haber acumulado en las
resistencias y evitará olores desagradables al tostar pan.
Uso del aparato
.
1 Coloque el tostador en una superficie estable y plana, alejado de
cortinas u otros materiales inflamables. Enchufe el aparato a la red.
◗ Puede ajustar la longitud del cable enrollándolo en los soportes de la
base del aparato (fig. 2).
Tostado del pan
No deje nunca el tostador en funcionamiento sin vigilancia.
1 Ponga una o dos rebanadas de pan en el tostador (fig. 3).
2 Seleccione la posición de tostado deseada (fig. 4).
Seleccione una posición baja (1 - 2) si desea pan ligeramente tostado y una
posición alta (5 - 7) para pan muy tostado. Seleccione la función de
descongelación — (posiciones 6 y 7, dependiendo de si desea el pan más o
menos tostado) para tostar pan congelado.
3 Baje la palanca de tostado para encender el aparato (fig. 5).
La palanca de tostado sólo se mantendrá abajo si el aparato está conectado
a la red.
Las partes metálicas del tostador se calentarán durante el tostado. Tenga
cuidado de no tocarlas.
4 Cuando el pan está listo, salta y el tostador se apaga.
◗ El tostador se apagará automáticamente. Puede detener el proceso
de tostado y sacar el pan en cualquier momento pulsando el botón
de parada del lateral del tostador (fig. 6).
◗ Para sacar trozos pequeños, puede subir un poco más la palanca de
tostado (fig. 7).
◗ Si el pan se queda atascado dentro del tostador, desenchufe el
aparato, deje que se enfríe completamente y saque con cuidado el
pan del tostador. Para hacerlo no utilice cuchillos ni objetos afilados,
y no toque las partes metálicas internas del tostador.
Limpieza
.
1 Desenchufe el aparato.
2 Deje que se enfríe el aparato.
3 Limpie el aparato con un paño húmedo. No utilice productos de
limpieza abrasivos.
No sumerja nunca el aparato en agua.
4 Saque la bandeja recogemigas del aparato para quitar las migas (fig. 8).
No dé la vuelta al aparato ni lo sacuda para quitar las migas.
5 Recoja el cable enrollándolo alrededor de los soportes de la base del
aparato (fig. 2).
Medio ambiente
.
◗ Al final de su vida útil, no tire el aparato junto con la basura normal
del hogar. Llévelo a un punto de recogida oficial para su reciclado. De
esta manera ayudará a conservar el medio ambiente (fig. 9).
Garantía y servicio
.
Si necesita información o tiene algún problema, visite la página Web de
Philips en www.philips.com, o póngase en contacto con el Servicio de
Atención al Cliente de Philips en su país (hallará el número de teléfono en
el folleto de la garantía). Si no hay Servicio de Atención al Cliente de Philips
en su país, diríjase a su distribuidor local Philips o póngase en contacto con
el Service Department de Philips Domestic Appliances and Personal Care
BV.
4222 002 63991
6/9

PORTUGUÊS
Descrição geral (fig. 1)
.
A Manípulo
B Botão Stop
C Controlo de torragem
D Função de descongelação
E Tabuleiro das migalhas
F Arrumação do fio
Importante
.
Leia estas instruções com atenção antes de utilizar o aparelho e guarde-as
para uma eventual consulta futura.
◗ Verifique se a voltagem indicada na parte inferior do aparelho
corresponde à voltagem eléctrica local, antes de ligar o aparelho.
◗ Ligue sempre o aparelho a uma tomada com terra.
◗ Se o fio se estragar, deve ser substituído pela Philips, por um centro
de assistência autorizado pela Philips ou por pessoal devidamente
qualificado para se evitarem situações de perigo.
◗ Nunca mergulhe o aparelho nem o fio de alimentação em água ou
outro líquido.
◗ Desligue sempre da corrente após cada utilização.
◗ Mantenha o aparelho fora do alcance das crianças.
◗ Não deixe que o fio de alimentação fique pendurado na extremidade
da mesa ou bancada de trabalho onde o aparelho está situado e
mantenha o fio afastado das superfícies quentes.
◗ Não deixe o aparelho a trabalhar sem vigilância. Não ligue o aparelho
por baixo ou perto de cortinas ou de outros materiais inflamáveis ou
sob armários de parede, porque o pão pode queimar-se.
◗ Evite tocar nas partes metálicas da torradeira porque ficam muito
quentes durante a utilização. Só deverá tocar nos comandos e
segurar na torradeira pela parte plástica.
◗ Esta torradeira destina-se unicamente a uma utilização doméstica e
dentro de casa.
◗ Para evitar o risco de incêndio, retire com frequência as migalhas que
se juntarem no tabuleiro. Verifique se o tabuleiro fica bem encaixado
na posição correcta.
◗ Desligue imediatamente a torradeira da corrente se observar chamas
ou fumos.
◗ Se ficar uma fatia de pão presa dentro da torradeira, desligue da
corrente e deixe arrefecer antes de tentar retirar o pão. Não se sirva
de facas ou de objectos afiados porque poderá estragar as
resistências.
◗ Este aparelho destina-se apenas a torrar pão. Não coloque outros
ingredientes dentro do aparelho para evitar situações de perigo.
◗ Alimentos muito grandes e embalagens de alumínio não devem ser
introduzidos na torradeira para evitar o risco de incêndio ou de
choque eléctrico.
◗ Não coloque a torradeira sobre uma superfície quente.
Antes da primeira utilização
.
Retire todos os autocolantes e limpe o corpo da torradeira com um pano
húmido.
Antes de utilizar pela primeira vez, aconselha-se que efectue alguns ciclos
completos sem colocar as fatias de pão, na regulação de torragem mais alta,
colocando a torradeira num local arejado. Desta forma, as poeiras que
possam ter-se acumulado nas resistências serão queimadas, evitando-se
cheiros desagradáveis quando for torrar o pão.
Utilização do aparelho
.
1 Coloque o aparelho sobre uma superfície estável e plana, afastado de
cortinas e outros materiais combustíveis. Ligue a ficha à tomada
eléctrica.
◗ Pode ajustar o comprimento do fio enrolando o excesso à volta dos
suportes existentes na base do aparelho (fig. 2).
Torrar pão
Nunca deixe a torradeira a funcionar sem vigilância.
1 Coloque uma ou duas fatias de pão na torradeira (fig. 3).
2 Seleccione o grau de torragem pretendido (fig. 4).
Seleccione um grau baixo (1-2) para pão ligeiramente torrado e um grau
alto (5-7) para pão muito torrado. Seleccione a função de descongelação
— (graus 6 a 7, consoante o grau de torragem pretendido) para torrar pão
congelado.
3 Empurre o manípulo do elevador para baixo para ligar o aparelho
(fig. 5).
O elevador só fica preso em baixo se o aparelho estiver ligado à corrente.
As partes metálicas da torradeira ficam quentes durante a utilização.
Tenha o cuidado de não lhes tocar.
4 Quando a torrada fica pronta, salta e a torradeira desliga-se.
◗ A torradeira desliga-se automaticamente. A operação pode ser
interrompida e a torrada pode saltar em qualquer momento
premindo o botão Stop na parte lateral da torradeira (fig. 6).
◗ Para remover pedaços mais pequenos, pode levantar o elevador da
torradeira um pouco mais para cima (fig. 7).
◗ Se o pão ficar preso no interior da torradeira, retire a ficha da
tomada de corrente, deixe arrefecer completamente e remova
cuidadosamente o pão da torradeira. Não se sirva de facas ou de
outros objectos metálicos afiados e não toque nas peças metálicas
internas da torradeira.
Limpeza
.
1 Desligue o aparelho.
2 Deixe o aparelho arrefecer.
3 Limpe o aparelho com um pano húmido. Não utilize produtos de
limpeza abrasivos.
Nunca mergulhe o aparelho em água.
4 Retire o tabuleiro do aparelho e limpe as migalhas (fig. 8).
Não vire a torradeira de cabeça para baixo nem a sacuda para retirar as
migalhas.
5 Guarde o fio enrolando-o à volta dos suportes na base do aparelho
(fig. 2).
Ambiente
.
◗ Não deite fora o aparelho junto com o lixo doméstico normal no
final da sua vida útil, entregue-o num ponto de recolha oficial para
reciclagem. Ao fazê-lo ajuda a preservar o ambiente (fig. 9).
Garantia e assistência
.
Se precisar de informações ou se tiver algum problema, visite o site da
Philips em www.philips.pt ou contacte o Centro de Atendimento ao
Cliente Philips do seu país (encontrará o número de telefone no folheto da
garantia mundial). Se não existir um Centro de Atendimento ao Cliente no
seu país, dirija-se ao distribuidor Philips local ou contacte o Departamento
de Assistência da Philips Domestic Appliances and Personal Care BV.
4222 002 63991
7/9

v<ñUã
©± qJÅ® vKë ÕdÅ
AÊœdë X<u" ÂdÙ«
Bnèu" tLëœ
CÊbÅ v|« ÁuNè Ê«eOî ‰d¶Më
Da| Êœdë “U! œdJKLà
EÊUï Áœd8 vMO<
F
rO< tEHæî
rNî
ÆbOMë Èñ«bN~ï ÁbM|¬ tF3«dî È«d! «ñ UNï¬ Ë bOï«u‹! Xèœ U! ÁU~¶<œ “« ÁœUH¶<« “« q§è «ñ d|“ ÈUNKLFì«ñu¶<œ
æv~MÙULÙ qæî ‚d! U! ÁU~¶<œ ÈËñ ÁbÅ h‹Aî ˛U¶ìË të bOMë Xèœ ‚d! t! ÁU~¶<œ ‰UB"« “« q§è
ÆbÅU! t¶Å«œ
æÆbOMë q1Ë bÅU! t¶Å«œ 5î“ ‰UB"« të Èe|dÄ t! jIã «ñ ÁU~¶<œ
æXëdÅ j<u" ÁbÅ bO|U" f|Ëd< eëdî «ñ ʬ b|U! ¨bÅU! Áb|œ tîb1 ‚d! rO< dÖ«
PhilipsÈœ«dã« U|
ÆbM|U/ i|uF" ¨dD8 œUº|« “« »UM¶3« È«d! d~|œ ÁbÅ bO|U"
æÆbOÙbï ñ«dè d~|œ l|Uî tïuÖ dÙ U| »¬ ñœ «ñ ʬ ‚d! rO< U| ÁU~¶<œ
æÆbOMë ÃñU8 ‚d! “« ÁœUH¶<« “« bF! tAOLÙ «ñ ÁU~¶<œ t8UÅËœ
æÆb|ñ«œ ÁU~ï ñËœ ÊUëœuë ”d¶<œ “« «ñ ÁU~¶<œ
æ‚d! rO< Ë bÅU! Ê«e|ˬ œñ«œ ñ«dè ʬ ÈËñ ÁU~¶<œ të ñUë eOî U| eOî t§ì “« ‚d! rO< të bOÙbï Á“U3«
Æb|ñ«œ ÁU~ï ñËœ ⁄«œ ÕuD< “« «ñ
æq!Uè œ«uî U| ÁœdÄ d|“ U| p|œeï «ñ ÁU~¶<œ ÆbMMë ñUë Vè«dî ÊËb! ÁU~¶<œ të bOÙbï Á“U3« eÖdÙ
Æœ“ufi! ÊUï X<« sJ2 ÊuÇ ¨b|“«bMOï ñUJ! Èñ«u|œ ÈUN¶MO!Uë U| d~|œ ‰UF¶Å«
æjIã ÆœuAOî ⁄«œ ñUOfi! Êœdë X<u" ÂU~MÙ ÊuÇ bOMë Èñ«œœu8 d¶fi" ÈeKã ÈUN¶Lfiè t! Êœ“ X<œ “«
ÆbOMë bMK! ʬ vJO¶<öÄ tïb! “« «ñ ÁU~¶<œ Ë Áœdë f* «ñ ‰d¶Më ÈUÙ tLëœ
æÆœuÅ ÁœUH¶<« tïU8 ñœ b|U! jIã Ë X<« ÁbÅ v4«dÉ v~ïU8 ÁœUH¶<« È«d! d¶fi"
æÆb|ñ«œd! ÊUï Áœd8 vMO< “« «ñ ÊUï ÈUÙ Áœd8 ñU§J| XèË bMÇ dÙ ¨È“u< g"¬ dD8 “« ÈdOÖuK3 È«d!
ÆX<« t¶ãdÖñ«dè `Oæ1 “dD! œu8 qæî ñœ ÊUï Áœd8 vMO< të b|uÅ s£LDî
æÆbOMë ÃñU8 ‚d! “« «ñ d¶fi" tK1Uãö! g"¬ U| œËœ ÁbÙUAî †ñu1 ñœ
æÊUï Êœdë ÃñU8 “« q§è Ë bOMë ÃñU8 ‚d! “« «ñ ÁU~¶<œ ¨œdë dOÖ d¶fi" ñœ ÊUï ‘d! p| tâïUMÇ
ÈUN¶M*« t! X<« sJ2 ÊuÇ bOMJï ÁœUH¶<« eO" tKO<Ë U| œñUë “« ÆœuÅ œd< ÁU~¶<œ U" b|ñ«c~!
ÆbOïe! tîb1 ÁU~¶<œ v"ñ«d4
æÊuÇ ¨bOÙbï ñ«dè ÁU~¶<œ s|« ñœ d~|œ v|« ÁœUî ÆX<« ÁbÅ v4«dÉ ÊUï Êœdë Xfi" È«d! ÁU~¶<œ s|«
ÆœuÅ „UïdD8 XOFèuî œUº|« t! dºMî X<« sJ2 ñUë s|«
æsJ2 ÊuÇ œ«œ ñ«dè d¶<u" ñœ b|U§ï «ñ vîuOMOîuì¬ cäUë È«ñ«œ ÈUÙ ÈbM! t¶fi! Ë ¯ñe! v|«cä œ«uî
ÆbïœdÖ vJ|d¶Jì« „uÅ U| È“u< g"¬ YàU! X<«
æÆbOÙbï ñ«dè ⁄«œ `D< ÈËñ «ñ d¶<u"
ÁœUH¶<« 5ìË« “« q§è
ÆbOMë eO9 v!uÉdî ‰UL¶<œ U! «ñ d¶fi" tïb! Ë b|ñ«œd! «ñ v§fiÇd! Ÿuï dÙ
È«d! ÁU~¶<œ rOEM" ÊËb! «ñ ÊUï ‘d! bMÇ të œuÅ vî tOu" ¨‰Ë« ñU! È«d! ÁU~¶<œ “« ÁœUH¶<« “« q§è
ÈñU§äË œdÖ 78u< YàU! qLà s|« ÆbOMë Xfi" ¨X<« V<UMî t|uN" È«ñ«œ të vèU"« ñœ œU|“ Êœdë t¶Åd!
Êœdë Xfi" rK~Mà Ÿu§DîUï ÈUÙu! bOìu" “« Ë œœdÖ vî bÅU! ÁbÅ lL3 ÁU~¶<œ ÈUN¶M*« ÈËñ X<« sJ2 të
Æœñˬ vî qLà t! ÈdOÖuK3 ÊUï
ÁU~¶<œ “« ÁœUH¶<«
±±
ÆbÅU! ñËœ ‰UF¶Å« q!Uè œ«uî d|U< Ë UÙ ÁœdÄ “« të bOÙœ ñ«dè ñ«b|UÄ Ë ·U1 `D< p| ÈËñ «ñ ÁU~¶<œ
ÆbOÙœ ñ«dè e|dÄ ñœ «ñ t8UÅ Ëœ
æ bO|U/ rOEM" ¨ÁU~¶<œ t|UÄ ÈUN!öè ñËb! ʬ “« vA‹! ÊbïUâOÄ U! «ñ rO< ‰uÉ bOï«u" vî ULÅ
Æ©≤ qJÅ®
ÊUï Êœdë Xfi"
ÆbMMë ñUë Vè«dî ÊËb! d¶<u" të bOÙbï Á“U3« eÖdÙ
±±
Æ©≥ qJÅ® bOÙœ ñ«dè d¶<u" ñœ «ñ ÊUï ‘d! Ëœ U| p|
≤≤
Æ©˘ qJÅ® bOMë »U‹¶ï« «ñ “UOï œñuî ÊbÅ v|« ÁuNè XìU4
È«d! «ñ ©˚≠∑® œU|“ †ñ«d4 XìU4 p| Ë ÊUï r|öî Êœdë t¶Åd! È«d! «ñ ©±≠≤® rë †ñ«d4 XìU4 “« vJ|
a| Êœdë “U! œdJKLà ÆbOMë »U‹¶ï« ÁdO" È« ÁuNè X<u" Êœñˬ X<b!—t3ñœ ”U<« d! ¨∑ U" ˙ XìU4®
ÆbOMë »U‹¶ï« Áœe‹| ÊUï Êœdë X<u" È«d! «ñ ©“UOï œñuî ÊbÅ v|« ÁuNè
≥≥
Æ©˚ qJÅ® bOÙœ ñUAã ÁU~¶<œ Êœdë sÅËñ È«d! «ñ Êœdë t¶Åd! ÂdÙ«
ÆXãdÖ bÙ«u8 ñ«dè 5|UÄ bÅU! ÁbÅ qË ‚d! t! ÁU~¶<œ të vîU~MÙ jIã Êœdë Xfi" ÂdÙ«
ÆbOMJï f* «ñ ÊUï¬ të bOMë Xèœ ÆbÅ bÙ«u8 ⁄«œ Êœdë t¶Åd! 54ñœ d¶<u" ÈeKã †UFDè
˘˘
ÆœuÅ vî ‘uîU8 d¶<u" Ë Ábî¬ ÊËdO! ÊUï ¨bÅ ÁœUî¬ X<u" të vîU~MÙ
ædÙ ñœ «ñ ÊUï Ë Áœdë nèu¶î «ñ Êœdë t¶Åd! qLà bOï«u" vî ÆbÅ bÙ«u8 ‘uîU8 pO"Uîu"« ñuD! d¶fi"
Lëœ Êœ«œ ñUAã U! ÊUî“ t
STOPÆ©˙ qJÅ® b|ñˬ ÊËdO! d¶<u" ñUMë ñœ
æÆb|ñËUO! d"ôU! vLë «ñ X<u" ÂdÙ« bOï«u" vî d¶JÇuë œñ«uî Êœñˬ ÊËdO! È«d!
æU! Ë œuÅ pM8 ÎöîUë ÁU~¶<œ b|ñ«c~! ¨bOMë ÃñU8 ‚d! “« «ñ t8UÅËœ ¨œdë dOÖ d¶fi" ñœ ÊUï tâïUMÇ
bOMJï ÁœUH¶<« ñUë s|« Êœ«œ ÂU$« È«d! d~|œ ÈeKã ñ«e!« U| œñUë “« ÆbOMë ÃñU8 ÁU~¶<œ “« «ñ ÊUï Xèœ
ÆbOMJï f* «ñ d¶fi" ÊËñœ ÈeKã †UFDè Ë
Êœdë eO9
±±
ÆbOMë lDè «ñ ÁU~¶<œ ‚d!
≤≤
ÆœuÅ pM8 ÁU~¶<œ U" bOÙœ Á“U3«
≥≥
ÆbOMJï ÁœUH¶<« vA|U< ÁbMMë „UÄ œ«uî “« ÆbOMë eO9 ñ«b/ tÇñUÄ p| U! «ñ ÁU~¶<œ
Æb|d§ï Ëdã »¬ ñœ «ñ ÁU~¶<œ ÁU~âOÙ
˘˘
Æ©∑ qJÅ® bO|U/ ÃñU8 ÁU~¶<œ “« ¨tÉu!dî vMO< ÁbOAë ÊËdO! U! «ñ ÊUï ÈUÙ Áœd8
ÆbOÙbï ÊUJ" «ñ ʬ UNïUï Áœd8 7‹|ñ ÊËdO! È«d! Ë bOMJï tïËñ«Ë «ñ ÁU~¶<œ
µµ
«d! «ñ rO<
È
ñ«bN~ï
È
UÙ t|UÄ ñËœ t!
È
Æ©≤ qJÅ® bOâOá! ÁU~¶<œ 5|UÄ ñœ œu3uî
Xfi|“ jOæî
æU! Æb|e|d! ñËœ ÁbÅ 5OF" ÈUNKæî ñœ «ñ ʬ Ë ¨b|e|dï ñËœ v~ïU8 ÈUÙ tìU!“ d|U< bMïUî «ñ ÁU~¶<œ
Æ©∏ qJÅ® bOMë vî pLë Xfi|“ jOæî kH4 t! ULÅ ñUë s|« ÂU$«
f|Ëd< Ë XïUL{
vïUAï t! Uî v¶ïd¶M|« X|U< “« ÎUHDì b|bÅ t3«uî vKJAî U! U| t¶Å«œ “UOï †UàöÉ« t! të v"ñu ñœ
www.philips.comÁñULÅ s|« ULÅ® b|dO~! ”U9 œu8 ñuAë ñœ Èd¶Aî “« X§è«dî eëdî U| U| Áœdë b|œ“U!
œu3Ë ÊU|d¶Aî †Uîb8 eëdî ULÅ ñuAë ñœ tâïUMÇ Æ©œdë bOÙ«u8 «bOÄ vïUN3 XïUL{ tÖd! ñœ «ñ sHK"
“«uì ÁbMÅËdã t! ¨œñ«bïPhilips v~ïU8 “«uì g‹! U! U| Áœu/ tF3«dîPhilipsv! ÈË vB‹Å X|UL4 Ë
Æb|dO~! ”U9
4222 002 63991
8/9

á«Hô©dG
(1 º°SQ) ΩÉY ∞°Uh
A
¢üªÙG õÑÿG ™aQ IGOCG
B±É≤j’G ìÉàØe
C¢ü«ªëàdG áLQóH ºµëàdG ìÉàØe
DÖjhòàdG áØ«Xh
EäÉàØdG á«æ«°U
F»FÉHô¡µdG ∂∏°ùdG ¿GõN
GóL º¡e
.πÑ≤à°ùŸG ‘ ∂d ™Lôªc É¡H »¶ØàMGh RÉ¡÷G ΩGóîà°SG πÑb Gó«L ∫ɪ©à°SÓd äGOÉ°TQ’G √òg …CGôbG
æ.RÉ¡÷G π«°UƒJ πÑb »∏ÙG ô°TÉÑŸG QÉ«àdG ™e ≥aGƒàj RÉ¡÷G ´Éb óæY ¬«dG ô°TDƒŸG QÉ«àdG ¿CÉH …ócCÉJ
æ.¢V
q
QDƒe §FÉM ¢ùHÉb ¤G §≤a RÉ¡÷G »∏°UhCG
æhCG ¢ùÑ«∏«a øe πgDƒe äÉeóN õcôe hCG ¢ùÑ«∏«a øe ôNBÉH ¬dGóÑà°SG Öéj ,»FÉHô¡µdG ∂∏°ùdG ∞∏J GPG
.IÒ£N ÉØbGƒe Öæéàd ∂dP h Ú∏gDƒe ¢UÉî°TCG
æ.ôNBG πFÉ°S …CG hCG AÉŸG πNGO »FÉHô¡µdG ∂∏°ùdG hCG RÉ¡÷G …ôª¨J ’
æ.∫ɪ©à°S’G ó©H AÉHô¡µdG øY RÉ¡÷G π°üØH ÉehO »eƒb
æ.∫ÉØWC’G ∫hÉæàe øY Gó«©H RÉ¡÷G ≈∏Y »¶aÉM
æ∂∏°ùdG »≤HCGh RÉ¡÷G É¡«∏Y óLGƒàŸG ádhÉ£dG hCG í£°ùdG ≈∏Y øe ¤óàj »FÉHô¡µdG ∂∏°ùdG »YóJ ’
.áæNÉ°ùdG í£°SC’G øY Gó«©H »FÉHô¡µdG
æá∏HÉb OGƒe …CG hCG ôFÉà°ùdG Üôb hCG â– ¬∏«¨°ûàH »eƒ≤J ’ .áÑbGôe ¿hO πª©j RÉ¡÷G »YóJ ’
.¥Îëj ób õÑÿG ¿CG å«M ±ƒaôdG â– hCG ∫É©à°TÓd
æá«∏ªY ∫ÓN GÒãc øî°ùJ ób É¡fCG å«M ¢ü«ªëàdG RÉ¡L øe á«fó©ŸG AGõLC’G á°ùeÓe »ÑæŒ
.»µ«à°SÓÑdG Aõ÷G ᣰSGƒH RÉ¡÷G ™aQ h ºµëàdG í«JÉØe ¢ùª∏H »eƒb §≤a .¢ü«ªëàdG
æ.§≤a É«∏NGO ¬eGóîà°SG øµÁ h §≤a ‹õæŸG ΩGóîà°SÓd Gòg ¢ü«ªëàdG RÉ¡L º«ª°üJ ” ó≤d
æ‘ äÉàØdG á«æ«°U ™°Vh øe …ócCÉJ .äÉàØdG á«æ«°U øe ΩɶàfÉH äÉàØdG »∏jRCG ,¥hô◊G ô£N Öæéàd
.í«ë°üdG πµ°ûdÉH É¡fɵe
æ.¿ÉNO hCG ≥jôM ∫É©à°TG â¶M’ GPG GQƒa AÉHô¡µdG øY ¢ü«ªëàdG RÉ¡L π°üØH »eƒb
æá©£b ´õf ádhÉfi πÑb OÈj ¬«YOh AÉHô¡µdG øY RÉ¡÷G »∏°üaG ,á°Uɪ◊G πNGO õÑN á©£b â≤∏Y GPG
.ájQGô◊G ô°UÉæ©∏d ∞∏J ÖÑ°ùj ¿CG øµÁ ∂dP ¿ƒc ,IOÉM IGOCG hCG Úµ°S »∏ª©à°ùJ ’ .õÑÿG
æ∂dP ¿CG å«M RÉ¡÷G ‘ iôNCG ô°UÉæY …CG »©°†J ’ .§≤a õÑÿG ¢ü«ªëàd RÉ¡÷G º«ª°üJ ” ó≤d
.Iô£N ∞bGƒe ¤G ¤G …ODƒ«°S
æ¿CG å«M ¢ü«ªëàdG RÉ¡L ‘ Êó©e ±Ó¨H áØ∏¨ŸG hCG ÒѵdG ºé◊G äGP ä’ƒcCÉŸG ∫ÉNOG Öéj ’
.»FÉHô¡c ¢SÉe hCG ≥FGôM ÖÑ°ùj ¿CG øµÁ ∂dP
æ.øNÉ°S í£°S ≈∏Y RÉ¡÷G »©°†J ’
∫hC’G ΩGóîà°S’G πÑb
¢Tɪb á©£b ᣰSGƒH êQÉÿG øe á°Uɪ◊G º°ùL í°ùà ºbh RÉ¡÷G ≈∏Y IOƒLƒe äÉ≤°ü∏e …CG ´õfG
.á∏∏Ñe
õÑÿG ™£b ™°Vh ¿hO á∏eÉc ¢ü«ª– IQhód á°Uɪ◊G 𫨰ûàH ∂ë°üæf Iôe ∫hC’ RÉ¡÷G ΩGóîà°SG πÑb
QÉÑZ …CG ¥ôëH Ωƒ≤j ±ƒ°S ∂dP .Ió«L ájƒ¡J äGP áaôZ ‘ ¢ü«ª– áLQO ≈∏YCG ≈∏Y ∂dPh É¡∏NGóH
¢ü«ª– á«∏ªY AÉæKCG á¡jôc íFGhQ QGó°UG Öæéj ±ƒ°Sh ájQGô◊G ô°UÉæ©dG ≈∏Y ºcGôJ ¿ƒµj ¿CG øµÁ
.õÑÿG
RÉ¡÷G ΩGóîà°SG
1¢ùHÉb ‘ ¢ùÑ≤ŸG »∏°UhCG .á°ûªbC’G h ôFÉà°ùdG øY Gó«©H í£°ùe h âHÉK í£°S ≈∏Y RÉ¡÷G »©°V
.§FÉ◊G
æ.(2 º°SQ) RÉ¡÷G IóYÉb ∫ƒM ¬æe ¢†©ÑdG ∞d ∫ÓN øe »FÉHô¡µdG ∂∏°ùdG ∫ƒW §Ñ°V ∂æµÁ
õÑÿG ¢ü«ª–
.áÑbGôe ¿hO πª©J á°Uɪ◊G »YóJ ’
1.(3 º°SQ) á°Uɪ◊G πNGO Úà©£b hCG õÑN á©£b »©°V
2.(4 º°SQ) áHƒZôŸG ¢ü«ªëàdG áLQO …QÉàNG
(7 ¤G 5 øe) á«dÉY ¢ü«ª– áLQOh Ó«∏b ¢üªfi õÑÿ (2 hCG 1) á°†Øîæe ¢ü«ª– áLQO …QÉàNG
ÖjhòàdG áØ«Xh …QÉàNG .Gô∏«ãc ¢üªfi õÑÿ
—¢ü«ªëàdG áLQO ≈∏Y GOɪàYG 7 hCG 6 äÉLQO)
.è∏ãŸG õÑÿG ¢ü«ªëàd (É¡H ܃ZôŸG
3.(5 º°SQ) RÉ¡÷G 𫨰ûàd πØ°SC’G ¤G ¢ü«ªëàdG á©aGQ »£¨°VG
.AÉHô¡µdÉH ’ƒ°Uƒe RÉ¡÷G ¿Éc GPG §≤a πØ°SC’G ‘ ¢ü«ªëàdG á©aGQ ≈≤Ñà°S
É¡°ùª∏H »eƒ≤J ’ .¢ü«ªëàdG á«∏ªY ∫ÓN áæNÉ°S íÑ°üJ ±ƒ°S á°Uɪ◊ÉH á°UÉÿG á«fó©ŸG ™£≤dG ¿G
.GóHCG
4.πª©dG øY RÉ¡÷G ∞bƒàj h ≈∏YC’G ¤G õÑÿG á©£b õØ≤J ,õÑÿG ¢ü«ª– AÉ¡àfG óæY
æ¤G õÑÿG á©£b Üòbh ¢ü«ªëàdG á«∏ªY ±É≤jG ∂æµÁ .πª©dG øY É«µ«JÉeƒJhCG á°Uɪ◊G ∞bƒàJ ±ƒ°S
.á°Uɪ◊G ÖfÉL ‘ óLGƒàŸG ±É≤j’G ìÉàØe ≈∏Y §¨°†dG ∫ÓN øe âbh …CG ‘ á°Uɪ◊G êQÉN
æ.(6 º°SQ) Ó«∏b ≈∏YC’G ¤G ¢ü«ªëàdG á©aGQ ∂jô– ∂æµÁ ,IÒ¨°üdG ™£≤dG ádGR’
æºK πeɵdÉH OÈj RÉ¡÷G »YO h §FÉ◊G ¢ùHÉb øe ¢ùÑ≤ŸG »YõfG ,á°Uɪ◊G πNGO õÑÿG ≥∏Y GPG
’ h ∂dòH ΩÉ«≤∏d iôNCG IOÉM IGOCG …CG hCG Úµ°S »eóîà°ùJ ’ .¢UôëH á°Uɪ◊G øe õÑÿG »YõfG
.á«∏NGódG á«fó©ŸG á°Uɪ◊G AGõLCG ¢ùª∏H »eƒ≤J
∞«¶æàdG
1.AÉHô¡µdG øY RÉ¡÷G »∏°üaG
2.OÈj RÉ¡÷G »YO
3.ᣰTÉc ∞«¶æJ OGƒe »eóîà°ùJ ’ .Ó«∏b á∏∏Ñe ¢Tɪb á©£≤H RÉ¡÷G ∞«¶æàH »eƒb
.GóHCG AÉŸÉH RÉ¡÷G …ôª¨J ’
4.(7 º°SQ) RÉ¡÷G øe äÉàØdG á«æ«°U Öë°S ∫ÓN øe RÉ¡÷G øe äÉàØdG »∏jRCG
.äÉàØdG ádGR’ √õ¡H »eƒ≤J ’ h Ö≤Y ≈∏Y É°SCGQ RÉ¡÷G »∏ª– ’
5.(2 ºbQ πµ°T) RÉ¡÷G IóYÉb ‘ øjOƒLƒŸG ڵѰûŸG ∫ƒM ¬Ød ≥jôW øY ∂∏°ùdG ßØëH
áÄ«ÑdG
溫∏°ùJ õcôe ¤G ¬ª«∏°ùàH »eƒb πH √ôªY AÉ¡àfG óæY ájOÉ©dG ∫õæŸG äÉjÉØf ™e RÉ¡÷G »eôJ ’
.(8 º°SQ) áÄ«ÑdG ≈∏Y ®ÉØ◊G ≈∏Y äóYÉ°S ób ʃµJ ∂dòH .¬eGóîà°SG IOÉY’ »ª°SQ
áeóÿGh ¿Éª°†dG
¢ùÑ«∏«a ácô°ûH ¢UÉÿG âfÎf’G ¿GƒæY IQÉjR AÉLôdG ,á∏µ°ûe ∂jód âfÉc hCG äÉeƒ∏©e ájC’ âéàMG GPG
www.philips.com¿hóe ∞JÉ¡dG ºbQ óŒ ±ƒ°S) ∑ó∏H ‘ AÓª©dG áeóÿ ¢ùÑ«∏«a õcôà π°üJG hCG
hCG ¢ùÑ«∏«a π«ch á©LGôe AÉLôdG ,∑ó∏H ‘ AÓª©dG áeóÿ õcôe óLGƒàj ⁄ GPG .(»ŸÉ©dG ¿Éª°†dG Iô°ûf ‘
.á«°üî°ûdG ájÉæ©dG h á«dõæŸG äGhOCÓd ¢ùÑ«∏«a ácô°ûd ™HÉàdG áeóÿG õcôà π°üJG
4222 002 63991
9/9