Loading ...
Loading ...
Loading ...
To adjust grill burner air shutters and surface burner air shutters (Some
models):
The left hand air shutter controls the rear half of the grill burner or the rear surface
burner. The right hand shutter controls the front half of the grill burner or the front sur-
face burner.
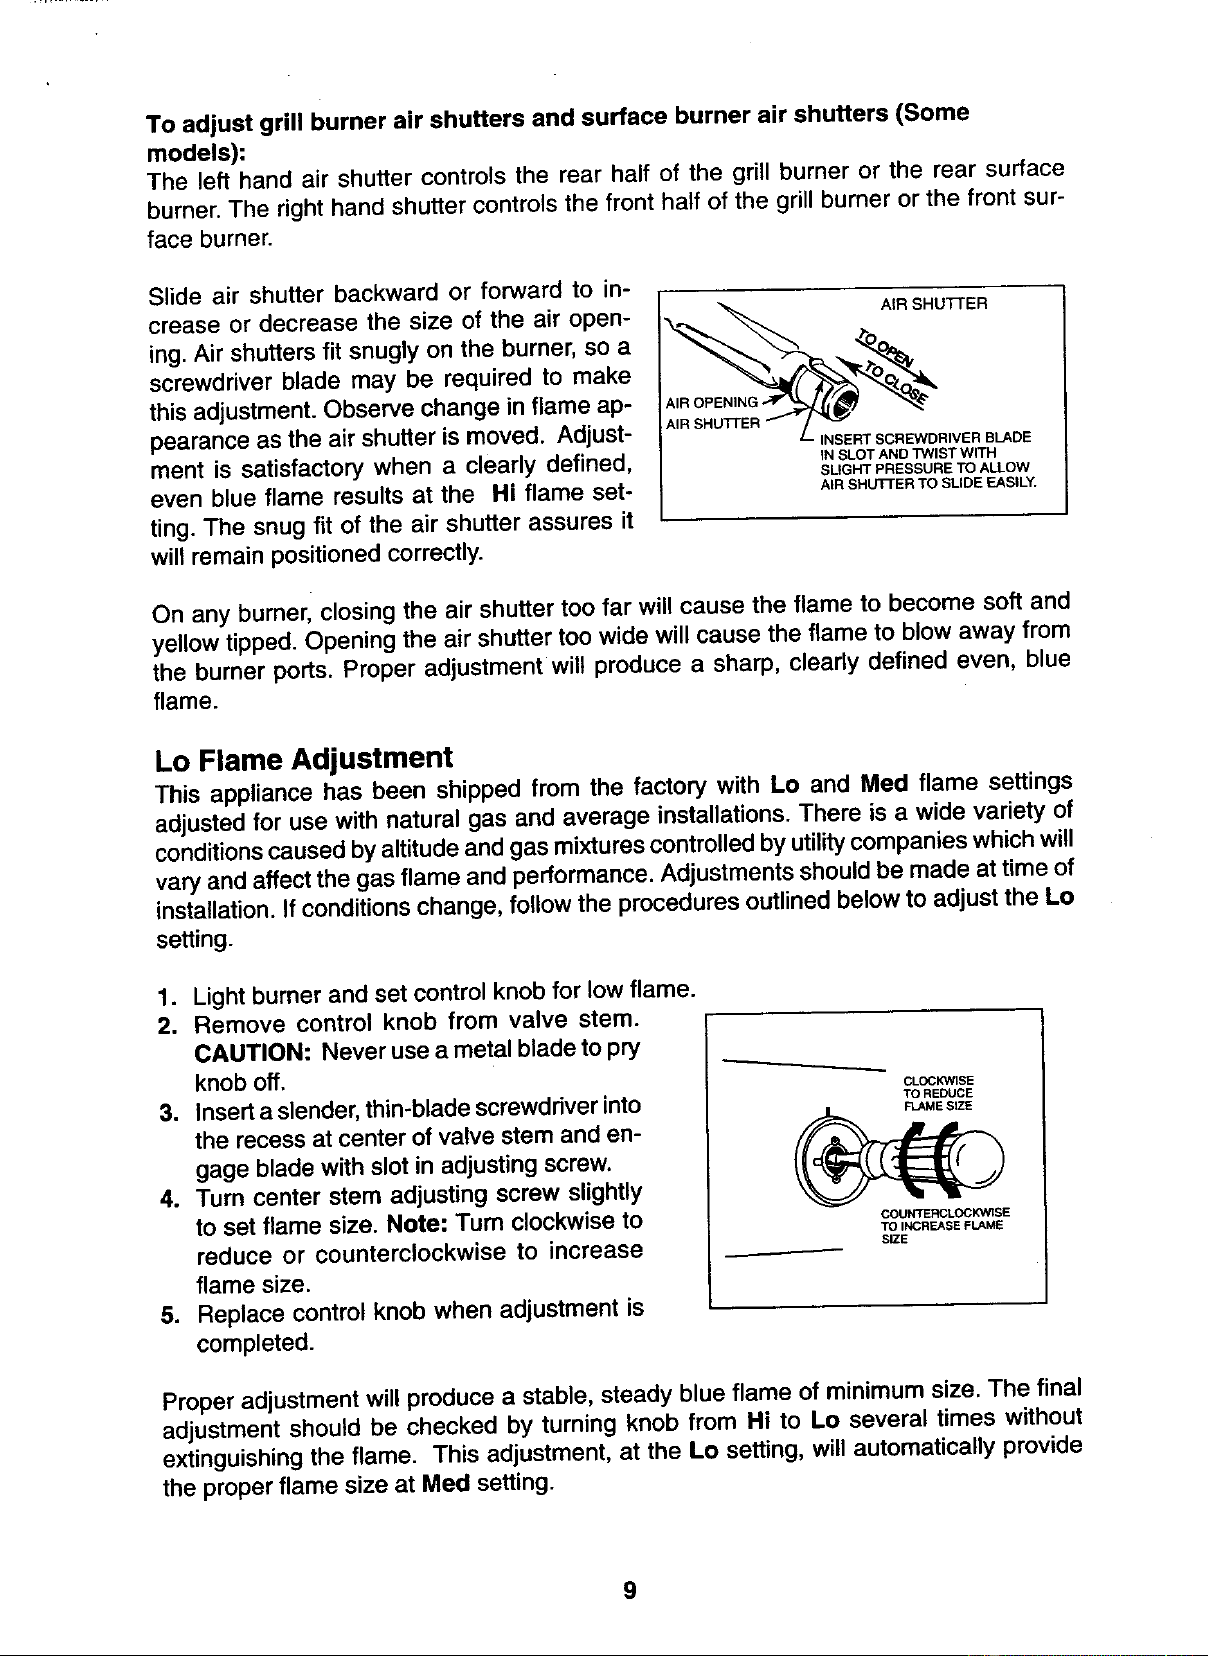
Slide air shutter backward or forward to in-
crease or decrease the size of the air open- AIRSHU'CIER
Air shutters fit snugly on the burner, so a x.__;_
ing.
screwdriver blade may be required to make
this adjustment. Observe change inflame ap- A_RO_NG3;;_. "_
pearance as the air shutter is moved. Adjust- AIRSHUttERi /__,_,-_==
INSERT SCREWDRIVER BLADE
ment is satisfactory when a clearly defined, _ SLOTANDTWISTWITH
SLIGHT PRESSURE TO ALLOW
even blue flame results at the Hi flame set- AIRSHUTrERTOSLIDEEASILY.
ting.The snug fit of the air shutter assures it
willremain positionedcorrectly.
On any burner,closing the air shutter too far will cause the flame to become softand
yellowtipped. Opening the air shuttertoo widewillcause the flame to blowaway from
the burner ports. Proper adjustmentwill produce a sharp, clearly defined even, blue
flame.
Lo Flame Adjustment
This appliance has been shipped from the factory with Lo and Med flame settings
adjustedfor usewith naturalgas and average installations.There is a wide variety of
conditionscaused byaltitudeand gasmixturescontrolledbyutilitycompanieswhichwill
vary and affect the gas flame and performance. Adjustments should be made at time of
installation. If conditions change, follow the procedures outlined below to adjust the Lo
setting.
1. Light burner and set control knob for low flame.
2. Remove control knob from valve stem.
CAUTION: Never use a metal blade to pry
knob off. -- _ CLOC_S_
3. Insert a slender,thin-blade screwdriver into TOREDUOE
jL _MESlZ_
the recess at center of valve stem and en-
gage blade with slot in adjusting screw.
4. Turn center stem adjusting screw slightly
to set flame size. Note: Turn clockwise to cou,_Lcc_s_
TO INCREASE FLAME
reduce or counterclockwise to increase S=E
flame size.
5. Replace controlknob when adjustment is
completed.
Properadjustmentwill producea stable, steady blue flame of minimumsize. The final
adjustmentshould be checked by turning knob from Hi to Lo several times without
extinguishingthe flame. This adjustment,at the Lo setting,willautomaticallyprovide
the properflame size at Med setting.
9
Loading ...
Loading ...
Loading ...