Loading ...
Loading ...
Loading ...
Assembly / Owner’s Manual
48
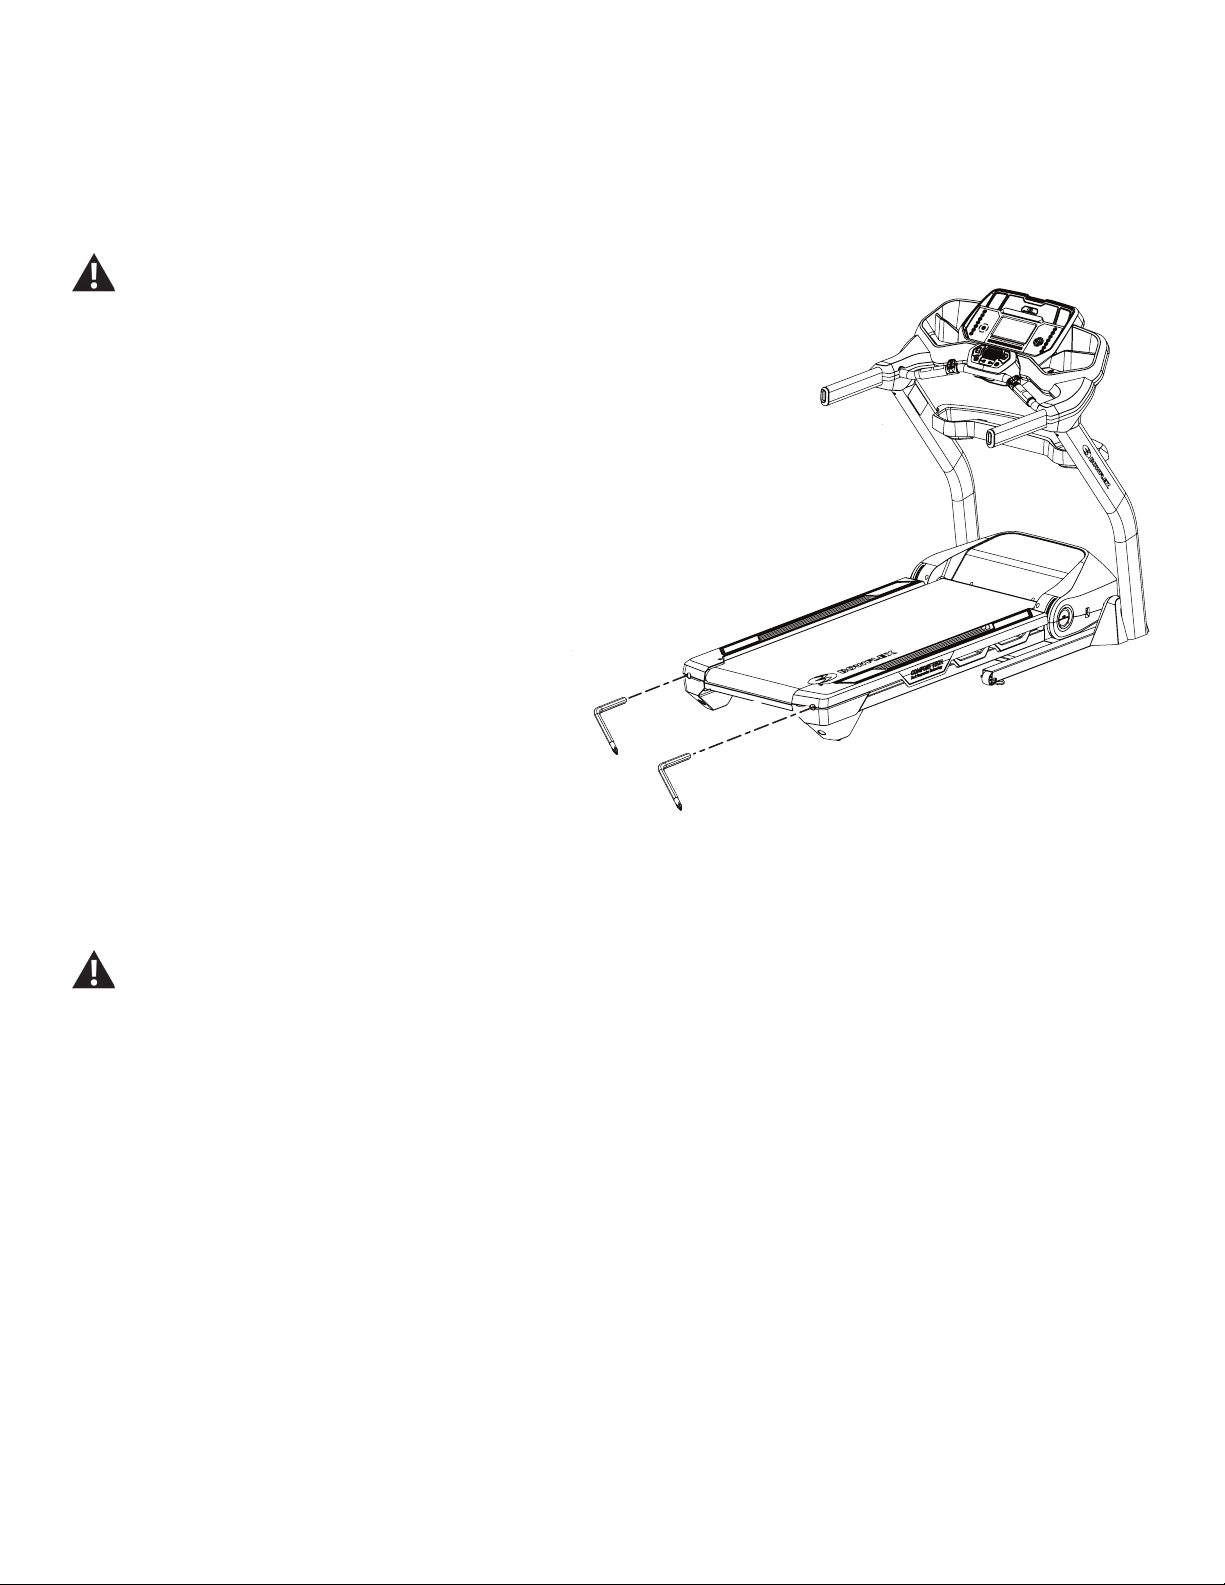
Adjusting the Belt Tension
If the walking belt starts to slip during use, it is necessary to adjust the tension. Your treadmill has tension bolts at the rear of the treadmill.
1. Remove the Safety Key and place it in a secure location.
When this machine is not in operation, remove the Safety Key and keep out of the reach of children.
2. Make sure that the power switch is turned Off, and the
power cord is disconnected.
3. Use a 6 mm hex wrench to turn the right and left belt adjust-
ment bolts clockwise a 1/2 turn, rst one bolt and then the
other bolt.
4. After you adjust each side the 1/2 turn, inspect the walking
belt. From the belt’s midpoint, a correctly tensioned belt
should only have an inch of give. To check, pull the belt
upward at its midpoint and measure the distance to the
deck. If the distance is more than an inch, the belt is loose.
Repeat this step if necessary.
If you turn one side more than the other, the belt will move
away from that side of the treadmill and may need realign-
ment.
NOTICE: Too much tension on the belt causes unnecessary
friction and wears the belt, motor and electronics.
Aligning the Walking Belt
The walking belt should be centered on your treadmill at all times. Running style and a non-level surface can cause the belt to move off center. Minor
adjustments to the 2 bolts at the rear of the treadmill are necessary when the belt is off center.
1. Push the START button to start the walking belt.
Be sure not to touch the walking belt or step on the power cord. Keep bystanders and children away from the product you are
servicing at all times.
2. Stand at the rear of the treadmill to see which direction the belt moves.
3. If the belt moves to the left, turn the left belt adjustment bolt 1/4 turn clockwise and the right belt adjustment bolt 1/4 turn counterclockwise.
If the belt moves to the right, turn the left adjustment bolt 1/4 turn counterclockwise and the right adjustment bolt 1/4 turn clockwise.
4. Monitor the path of the belt for approximately 2 minutes. Continue to adjust the bolts until the walking belt is centered.
5. Push PAUSE/STOP twice to stop the walking belt and end the Quick Start workout.
6mm
Loading ...
Loading ...
Loading ...