User Manual for SmartHub
Set up your Arlo SmartHub
1. Download the Arlo app and follow the setup instructions for an Arlo SmartHub.


2. Connect the power adapter and the Ethernet cable to your Arlo SmartHub.

What’s in the box

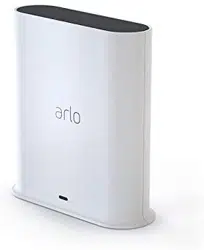
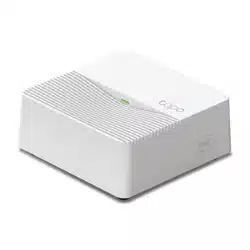
Arlo SmartHub

Power adapter (varies by region)

Ethernet cable
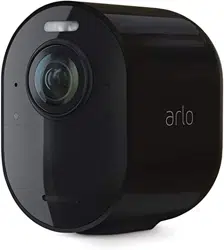
- The Arlo SmartHub securely connects Ultra 2, Ultra, Essential, Pro 4, Pro 3, Pro 3 Floodlight Camera, Pro 2, Pro, Arlo Wire-Free, Video Doorbell and Audio Doorbell to the Internet.
- The smart hub will provide long range connectivity for your cameras.
- Features included Wi-Fi 2.4 GHz, Wave. Zigbee, and ardor Ready, local backup, smart siren and expanded coverage through additional base stations.
- Connect a Micro SD Drive to the Smart Hub for local video backup.
- What's in the Box: (1) SmartHub, (1) Power Adapter, (1) Ethernet Cable, (1) Quick Start Guide, and (1) Arlo Window Decal
Note: Products with electrical plugs are designed for use in the US. Outlets and voltage differ internationally and this product may require an adapter or converter for use in your destination. Please check compatibility before purchasing.
Features
- Works with Arlo: Securely connects Arlo Ultra, Ultra 2, Pro 4, Pro 3, Pro 3 Floodlight Camera, Essential, Pro 2, Pro, Wire-Free, Video Doorbell and Audio Doorbell to the Internet via your home router
- The best Arlo experience: Provides long range connectivity and the best battery life for your cameras.
- Local storage: USB slot for local storage
Overview
- The Arlo Ultra Smart hub securely connects Arlo, Arlo Pro, Arlo Pro 2, Arlo Pro 3 & Arlo Ultra Wire-Free cameras to the Internet.
- The smart hub will provide long range connectivity for your cameras.
- Features included Wi-Fi 2.4 GHz, Wave. Zigbee, and ardor Ready, local backup, smart siren and expanded coverage through additional base stations.
- Connect a Micro USB Drive to the Smart Hub for local video backup
Connect your SmartHub to the Internet
The Arlo SmartHub connects to your home network and allows you to view your camera streams from anywhere.
- Connect the SmartHub to your router with an Ethernet cable.
- Connect the AC adapter to the SmartHub and plug it in. The LED on the front of the SmartHub lights.
SmartHub LED
The SmartHub LED indicates the status of the SmartHub. The SmartHub blinks once when it is first powered on. Then the LED lights as follows:
- Solid blue. The SmartHub is connected to the Internet.
- Slow blinking blue. The SmartHub is ready to sync and pair with a camera or is connecting with a camera.
- Fast blinking blue. The SmartHub paired with a camera.
- Solid amber. An error occurred or something is wrong with the connection.
- Slow blinking amber. The SmartHub can’t connect to the camera. The camera can’t be found, is out of range, or another connection error occurred.
- Alternating blue and amber. A firmware update or a reset is in progress.
Use the Arlo app for installation and setup
You must use the Arlo app to install and set up your Arlo SmartHub and Arlo Ultra Camera. The Arlo app guides you through setup in this order:
- Create your Arlo account. You use the same account to manage all your Arlo devices.
- Connect the Arlo SmartHub to the Internet and add it to your account.
- Add each Arlo Ultra camera and pair it with the Arlo SmartHub.
Once you set up your Arlo account, you can access it by using the Arlo app on a smartphone or tablet, or from a computer using a web browser. If you’re using a computer, enter myarlologin in the address bar of the browser.
After installation, you can use the Arlo app to view your camera feed, customize alerts and notifications, create schedules for your cameras, and more.
Meet your SmartHub
The Arlo SmartHub helps to protect your footage by adding a secure, personal network to your router. The SmartHub also helps regulate WiFi traffic, improves battery life, and comes with local storage (microSD cards are sold separately).
The Arlo SmartHub is compatible with the Arlo Ultra and all previous Arlo wire-free cameras.

Arlo SmartHub features:
• Additional WiFi radios to build the smart security ecosystem.
• Works with other smart home devices for simplified integration.
• A microSD card slot for local storage of streaming content. See Insert a microSD card on page 60.
Do more with Arlo
You can add these Arlo Ultra options, which are sold separately:
• Add more Arlo Ultra Cameras. Cover more areas in and around your home by adding cameras and pairing them to your SmartHub.
• Arlo Solar Panel. Connect an Arlo Solar Panel to your Ultra Camera and harvest power from the sun to keep your Arlo Ultra battery charged. See Connect your Arlo Ultra camera to the Arlo solar panel (sold separately) on page 15.
• Arlo rechargeable battery. Keep fully charged spare batteries on hand.
• Arlo Dual Charging Station. Charge your spare Arlo Ultra camera batteries. See Charge batteries in the Arlo Ultra dual charging station (sold separately) on page 10.
• Upgrade your Arlo subscription. For more information,visit What are the available Arlo subscription plans and how much cloud recording is available?.
Get Started
Connect your SmartHub to the Internet
The SmartHub connects to your home network and allows you to view your camera streams from anywhere.
1. Connect the SmartHub to your router with an Ethernet cable.
2. Connect the AC adapter to the SmartHub and plug it in. The LED on the front of the SmartHub lights.

The SmartHub LED
The SmartHub LED indicates the status of the SmartHub. The SmartHub blinks once when it’s first powered on. Then the LED lights as follows:
• Solid blue. The SmartHub is connected to the Internet.
• Slow blinking blue. The SmartHub is ready to sync and pair with a camera or is connecting with a camera.
• Fast blinking blue. The SmartHub paired with a camera.
• Solid amber. An error occurred or something is wrong with the connection.
• Slow blinking amber. The SmartHub can’t connect to the camera. The camera can’t be found, is out of range, or another connection error occurred.
• Alternating blue and amber. A firmware update or a reset is in progress.
Use the Arlo app for installation and setup
You must use the Arlo app to install and set up your SmartHub and Arlo Ultra Camera. The Arlo app guides you through setup:
1. Create your Arlo account. You use the same account to manage all your Arlo devices.
2. Connect the Arlo SmartHub to the Internet and add it to your account.
3. Add each Arlo Ultra camera and pair it with the Arlo SmartHub.

Once you set up your Arlo account, you can access it by using the Arlo app on a smartphone or tablet, or from a computer using a web browser. If you’re using a computer, enter myarlo/login in the address bar of the browser.
After installation, you can use the Arlo app to view your camera feed, customize alerts and notifications, create schedules for your cameras, and more.
Change your SmartHub settings
You can view or change your SmartHub settings.
Change the SmartHub name
- Open the Arlo app.
- Tap Settings > My Devices.
- Tap the SmartHub.
- Tap Edit
 next to the SmartHub name.
- Enter a new name for the SmartHub.
- Tap Save.
Adjust the SmartHub flicker setting
The combination of certain artificial light sources and the camera shutter speed might result in flickering in recorded video. The default setting for the SmartHub is Auto, but you can change the flicker adjustment.
- Open the Arlo app.
- Tap Settings > My Devices.
- Tap the SmartHub.
- Tap Flicker Adjustment.
- Tap a setting.
Restart the SmartHub
- Open the Arlo app.
- Tap Settings > My Devices.
- Tap the SmartHub.
- Scroll down and tap Restart.
View device information
You can view the firmware version, hardware version, and the serial number.
- Open the Arlo app.
- Tap Settings > My Devices.
- Tap the device.
- Tap Device Info.
Remove a device from your account
- Open the Arlo app.
- Tap Settings > My Devices.
- Tap the camera.
- Scroll down and tap Remove Device.
Verify that the Arlo SmartHub is online
To determine whether your SmartHub is online, check the Internet LED on the front of the SmartHub:
- If the LED is solid blue, the SmartHub is connected to the Internet.
- If the LED is amber, the SmartHub isn’t connected to the Internet.
If you are not at the same location as your Arlo SmartHub, log in to your Arlo account:
- If you can review the video feed from each of your cameras, your SmartHub is connected to the Internet.
- If instead of the video feed, you see an error message (such as “SmartHub Offline” or something similar), your SmartHub isn’t connected to the Internet.
The SmartHub is offline
If you’re not sure whether the SmartHub is offline, see Verify that the Arlo SmartHub is online on page 74.
- Check the Ethernet cable. Make sure that it’s securely connected to the back of your SmartHub and to your router. Also make sure that you’re using the Ethernet cable that came with your system.
- Check the power adapter. Make sure that the power adapter is securely connected to the back of your SmartHub and securely plugged into an outlet.
- Try to connect to the Internet from another device that is connected directly to your router. Try an Ethernet-connected device, not a device that is connected using WiFi (you can turn WiFi off on the device to make sure that the device is connecting through the Ethernet cable). Make sure that you can browse the Internet from this device by doing the following:
- If you can’t browse the Internet from this device, you must restore your router’s connection to the Internet.
- If you can browse the Internet from this device, continue troubleshooting.
4. Power cycle your SmartHub.
Unplug the power adapter from the outlet, wait one minute, and reconnect the power adapter to the outlet. The SmartHub takes one to two minutes to start.
When the LED lights solid blue, your SmartHub is connected to the Internet. If the LED is amber, continue troubleshooting.
5. Check your router’s DHCP settings and client list. Make sure that DHCP is enabled and that router’s DCHP client list supplied an IP address to the SmartHub. (If it did, the SmartHub appears in the client list.) For more information, see your router documentation.
6. If you were previously able to connect your SmartHub to the Internet but now can’t connect, check the router’s security settings and firmware to make sure that no changes were made since the last time it successfully connected. You might want to temporarily lower the security settings on the router or temporarily place the SmartHub in the DMZ to rule out any firewall restrictions. If you make these changes, power cycle your SmartHub as described in Step 4.
7. Check to make sure that ports 443 and 80 are open on your router.
Note: If you don’t manage your Internet environment, contact your IT department for assistance with any firewall or router configurations. The Arlo SmartHub can’t connect through most proxy servers. Check with your IT team and Internet service provider (ISP) about ways to bypass any proxy servers. Ask your IT team to make sure that ports 443 and 80 are open.
8. Perform a factory reset on your SmartHub.
For more information, see Reset the Arlo SmartHub to factory settings on page
If you are still unable to get your SmartHub to connect, visit support.arlo.com and submit a support case describing the steps you took and provide the following information:
- SmartHub serial number.
- User name (email address used to register your Arlo account).
- Internet service provider (ISP) name.
- Internet connection type (DSL, cable, and so on) and speed (Arlo requires at least 1 Mbps upstream).
- Internet router model.
- List of other devices connected directly to your router.
- The last time and place that your SmartHub successfully connected to the Internet.
Reset the Arlo SmartHub to factory settings
Performing a factory reset returns your SmartHub to the default settings. It also removes the serial number from your Arlo account.
- Use a straightened paper clip to press and hold the Reset button on the back of the SmartHub for about 10 seconds. When the SmartHub reset completes, the LEDs on the front of the SmartHub blink amber. When the LEDs stop blinking amber, your SmartHub reboots. The SmartHub is removed from your Arlo account.
- To add the SmartHub and set it up, wait for the LEDs to light solid blue and then open the Arlo app.
- Tap New to Arlo?.
- Follow the setup instructions. If your Arlo cameras were paired to the SmartHub, you might need to pair the cameras to the SmartHub again.