
WEEE Number: 80133970
SAFETY WARNING
1) For INDOOR USE ONLY. Always operate the product from a
power source of the same voltage, frequency rating as indica-
tion on the product label.
2) Remove the unit from its packing and check all parts to
make sure the product is in good condition before.
3) Do not operate the product with damaged cord or plug, or
malfunctioned product or if damaged. Before unplugging the
power cord, be sure to Turn the Power OFF. Do not touch the
product with Wet Hands.
4) Never install the unit where it is exposed to direct sun-
light/excessive moisture/rain/dust/lack of ventilation/near
Heat sources.
5) DO NOT MAKE CONTACT WITH MOVING PARTS of the fan
when it is POWERED ON.
6) Always place the Fan on stable, level surface when operat-
ing to prevent the fan from overturning.
7) Do not run the cord under the carpet. Do not cover the
power cord with throw rugs or runners. Connect the power
cord away from walking path. The power chord should be kept
away from heat, sharp edges & oil.
This marking indicates that this product should
not be disposed of with other household wastes.
Caution, risk of electric shock.
1) For INDOOR USE ONLY. Always operate the product from a
power source of the same voltage, frequency rating as indica-
tion on the product label.
2) Remove the unit from its packing and check all parts to
make sure the product is in good condition before.
3) Do not operate the product with damaged cord or plug, or
malfunctioned product or if damaged. Before unplugging the
power cord, be sure to Turn the Power OFF. Do not touch the
product with Wet Hands.
4) Never install the unit where it is exposed to direct sun-
light/excessive moisture/rain/dust/lack of ventilation/near
Heat sources.
5) DO NOT MAKE CONTACT WITH MOVING PARTS of the fan
when it is POWERED ON.
6) Always place the Fan on stable, level surface when operat-
ing to prevent the fan from overturning.
7) Do not run the cord under the carpet. Do not cover the
power cord with throw rugs or runners. Connect the power
cord away from walking path. The power chord should be kept
away from heat, sharp edges & oil.
8) Switch OFF and unplug the power chord from outlet when
not in use, before assembling or disassembling part or before
cleaning. Make sure no other high current appliance is
plugged into the same circuit as your fan, as an overload can
occur.
9) This appliance is not intended for use by persons (including
children) with reduced physical, sensory or mental capabili-
ties, or lack of experience and knowledge, unless they have
been given supervision or instruction concerning use of the
appliance by a person responsible for their safety. Children
should be supervised to ensure that they do not play with the
appliance.
10) This appliance can be used by children aged from 8 years
and above and persons with reduced physical, sensory or
mental capabilities or lack of experience and knowledge if
they have been given supervision or instruction concerning
use of the appliance in a safe way and understand the haz-
ards involved. Children shall not play with the appliance.
11) Cleaning and user maintenance shall not be made by
children without supervision.
12) If the supply cord is damaged, it must be replaced by
the manufacturer, its service agent or similarly qualified per-
sons in order to avoid a hazard.
Multi-Language Manual - QR CODE
Please scan the QR code to access the manual
in multiple languages.
INSTALLATION INSTRUCTION
works with
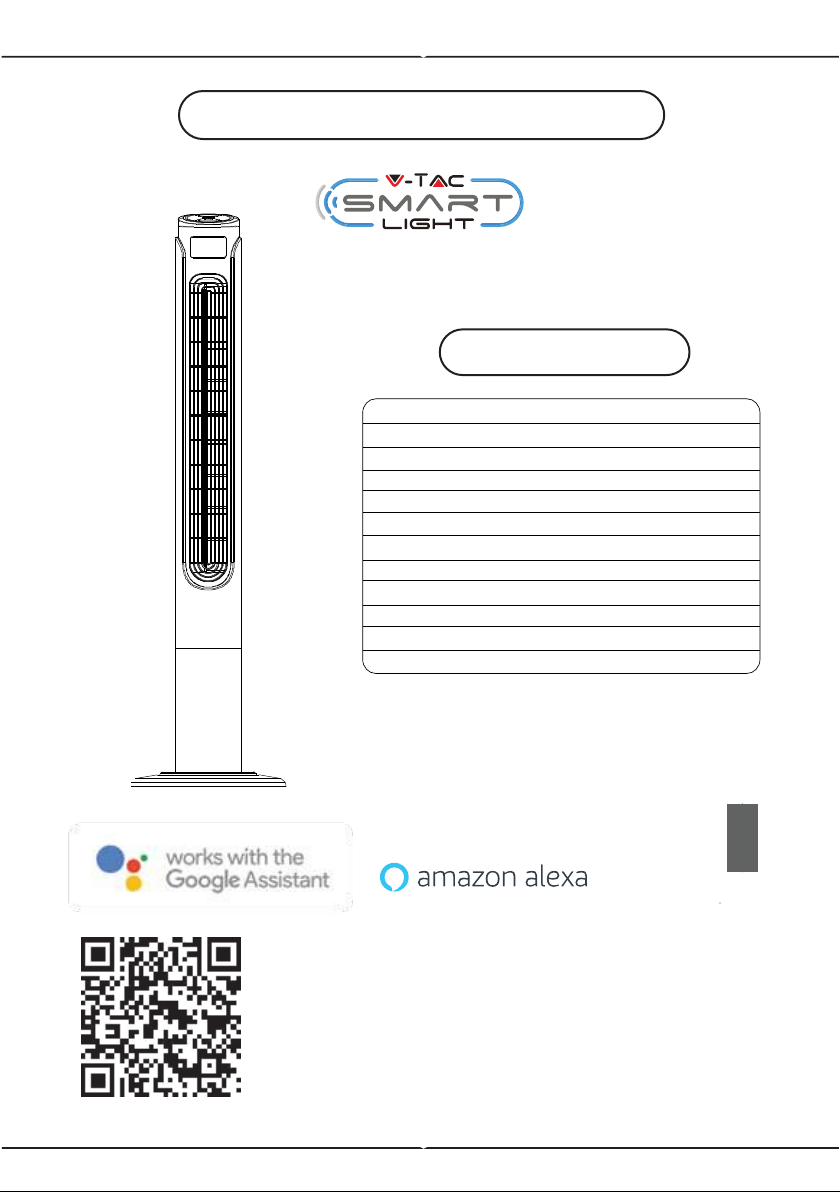
SPECIFICATIONS
SPEED: 3 ( Low , Medium & High )
MODEL NO: VT-5566
Wind Mode: 3 ( Normal / Natural / Sleep )
Size: 46” Inch
Power: 55W
Timer: 1-15Hours (Max)
Voltage: AC: 220-240V, 50Hz
Power Cord length: 1.8 meters
Plug Type: EU plug
Color: White & Black Finish
Protection Rating: IP20
Material: ABS
2
YEARS
WARRANTY
*
INTRODUCTION & WARRANTY
Thank you for selecting and buying V-TAC product. V-TAC will serve you
the best. Please read these instructions carefully before starting the
installing and keep this manual handy for future reference. If you have
any another query, please contact our dealer or local vendor from whom
you have purchased the product. They are trained and ready to serve you
at the best. The warranty is valid for 2 years from the date of purchase.
The warranty does not apply to damage caused by incorrect installation or
abnormal wear and tear. The company gives no warranty against damage
to any surface due to incorrect removal and installation of the product.
The products are suitable for 10-12 Hours Daily operation. Usage of prod-
uct for 24 Hours a day would void the warranty. This product is warranted
for manufacturing defects only.
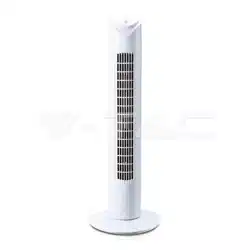
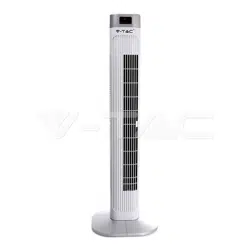
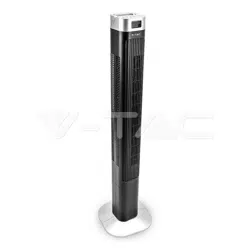
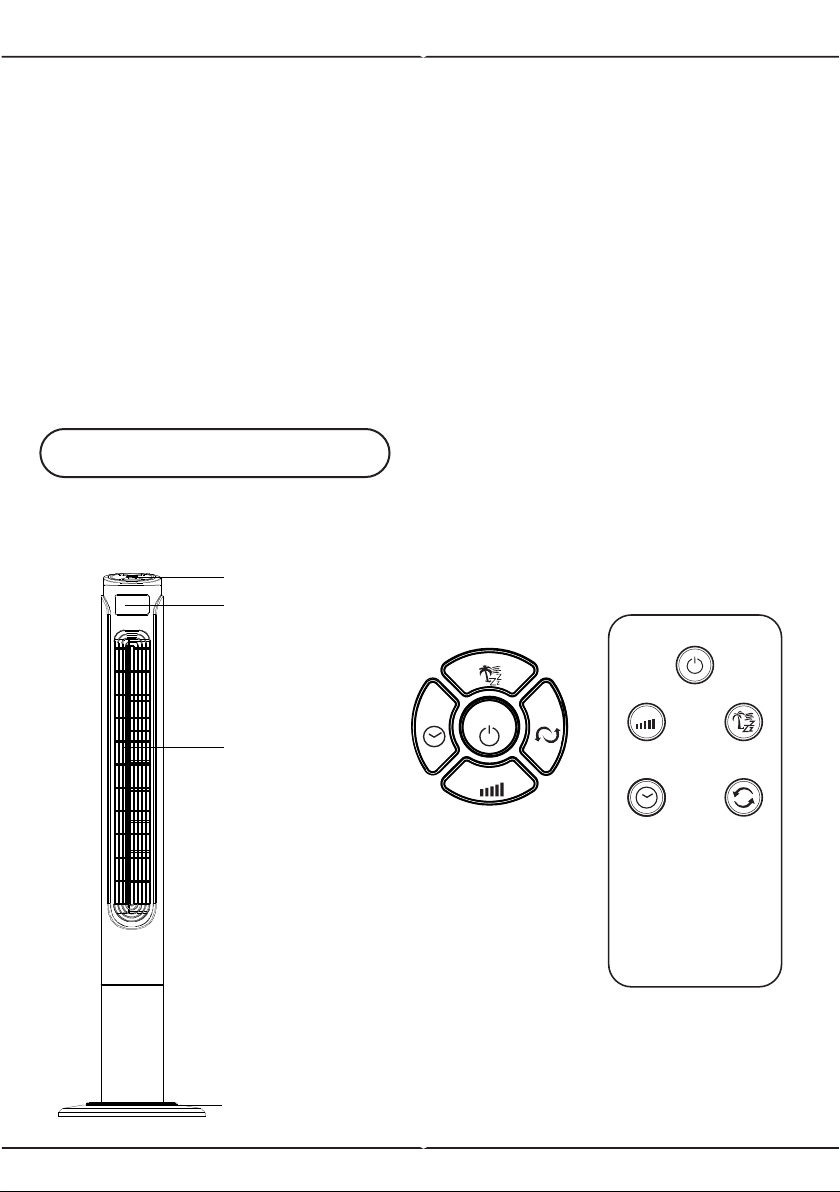
PARTS IDENTIFICATION
MAIN UNIT
REMOTE
CONTROL
CONTROL
PANEL
Control panel
LED display
Air outlet
Stable base
POWER
OSCTIMER
MODE
SPEED
POWER
OSC
TIMER
MODE
SPEED
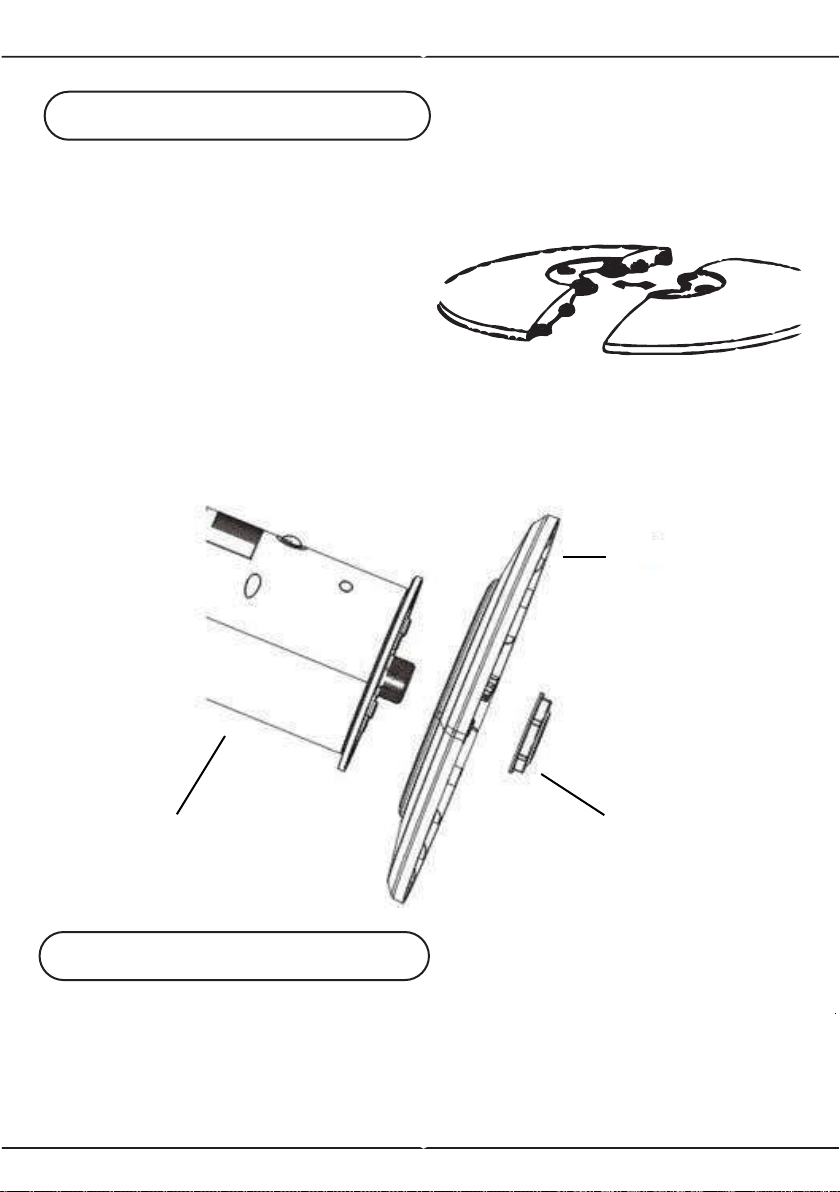
BASE INSTALLATION
1. Remove the parts from packing.
2. Snap the two parts of base
together.
3. Pass the power cord through the
centre of hole of the base, after
snapping the two pieces together.
4. Line up the fan on the base, and
fix with base lock.
No screw(s) is(are) needed to
lock the base.
ASSEMBLY INSTRUCTION
NOTE: Before inserting the plug into a power outlet, make sure that the
correct voltage is being used which corresponds to the information which
is indicated on the rating label, and that the socket has an earth facility.
Caution: Fan must be assembled with the base before use!
Fan can be operated by the control panel located on top of the Fan or by
remote control.
OPERATING INSTRUCTION
Base LockBody
Base
1. Place the Fan on a stable and flat surface. Plug the Power Cord into an
AC:220-240V electrical outlet. The LED screen will display the current room
temperature.
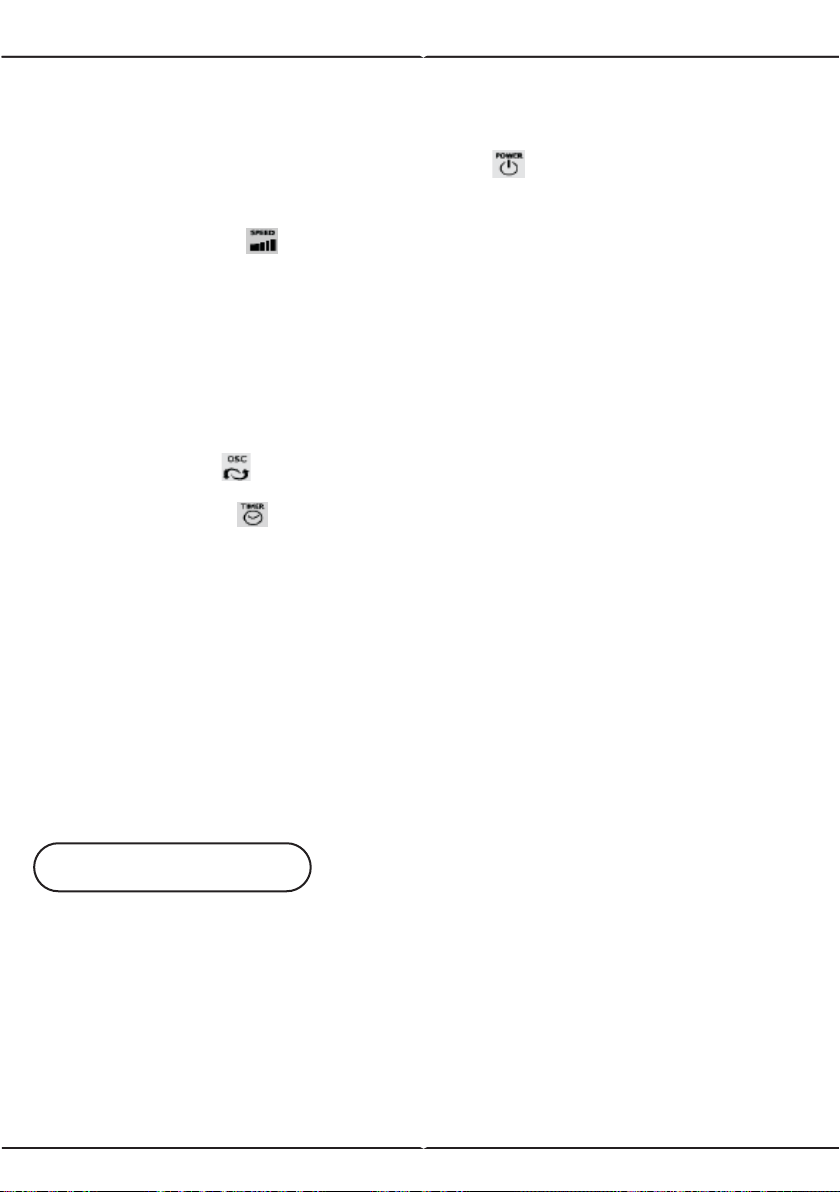
2. POWER: Turn the Fan ON by pressing the button, the Fan will start at
low speed.
3. SPEED: Adjust the Fan speed to the desired level from Low to Medium to
high by pressing the button. The speed setting is displayed on the LED
screen.
4. MODE: Press the MODE button to set the Fan as Normal, Natural or Sleep
mode.
The mode is displayed on the LED screen.
a) Normal mode: Speed is constant.
b) Natural mode: Fan speed varies, mimicking natural wind blowing.
c) Sleep mode: Fan speed slows down over time from the original set speed.
As the mode is adjusted, the display cycles through the different icons.
5. OSC: Press the button to allow the Fan to oscillate from left to right. To
stop the oscillation, press the oscillation button again
6. TIMER: Press the button to set desired auto power-off time. Designed
with 15 time intervals from 1-hour to 15-hour.
7. Power Saving Mode: When the 'Sleep' mode or the 'Timer' is on, the main
display will be off after 30 seconds, and you can press any keys to turn on
the display again.
8. Unplug the Fan when not in use.
Remote Control Instructions:
1) Insert the round button shape battery (included in the product) into the
back of the remote control.
2) The remote control is designed with all the functions same as the base
unit. Follow the same instructions above to operate the fan remotely.
3) Please remove the battery from the remote control if it is not in use for
long time.
Note: If the power cord set of this appliance becomes damaged,
discontinue use. Repairs should be undertaken by qualified technician
ONLY.
1) Always switch power OFF and then unplug power chord before cleaning.
2) Clean the housing with a damp cloth, a vacuum cleaner or a dusting brush.
3) We recommend lightly running a vacuum cleaner brush nozzle over the fan
grill to remove any dust or dirt that may have accumulated.
4) Never use flammable or abrasive cleaning agents such as benzene or
spirits to clean the appliance.
5) Never immerse the appliance in water or rinse under the tap.
CARE & CLEANING
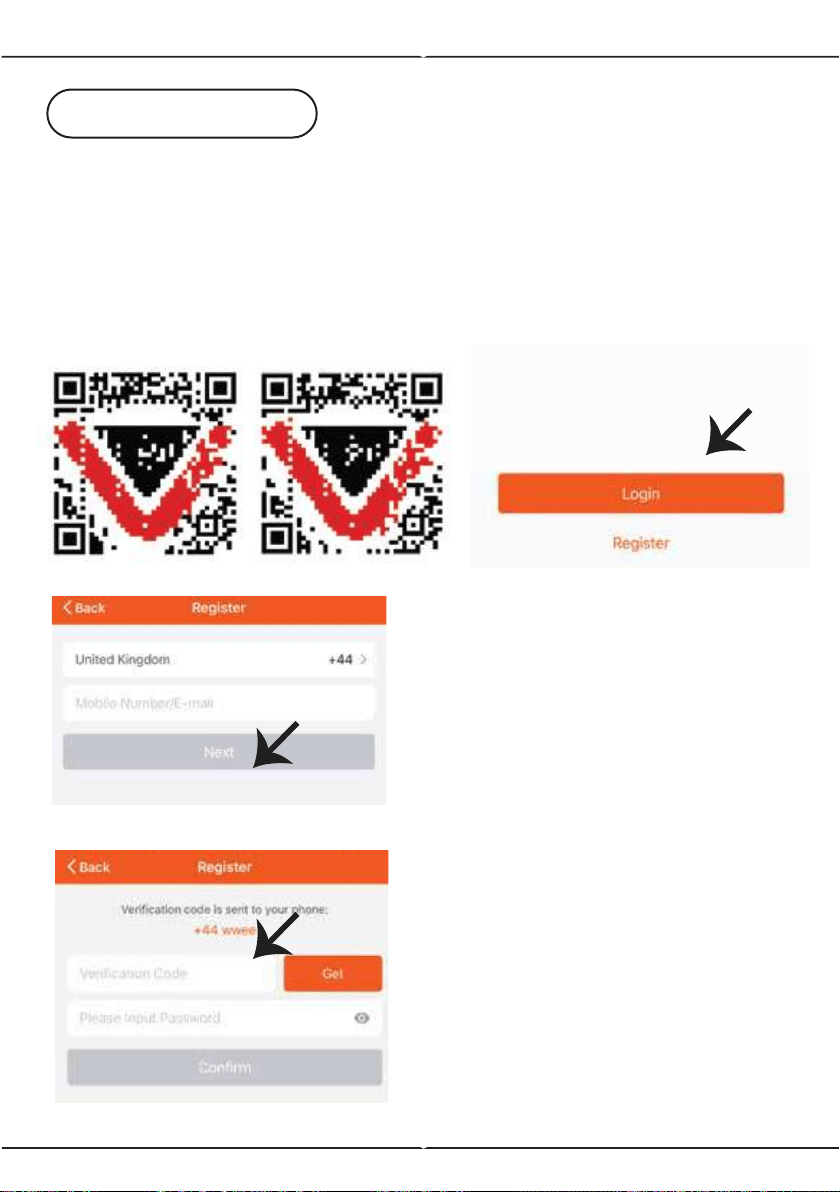
Fig 2
Fig 3
APP INSTALLATION
Step 1: Turn the power button ON of the device.
Step 2: Scan the given QR code, or download “V-TAC Smart Light’ from
the App Store (iOS) or the Google Play Store (Android).
Step 3: Open the V-TAC Smart Light app and tap on register for creating
a new account. If you already have an existing account, please proceed
to please proceed to logging in (Ref Fig 1).
For ANDROID For IOS
Step 4:
A) Mobile Number: Select the
country, then enter your mobile
number. Once done, tap ‘Next’ (Ref
Fig 2).
B) E-Mail: Enter your email id and
tap on ‘Next’ (Ref Fig 2).
Step 5: Enter the verification code
which will be sent to your mobile
number/email id, then assign a new
password to your account and tap
on “Confirm” to complete the regis-
tration process (Ref Fig 3). Once
done you will be redirected to V-TAC
Smart Light Home page.
Fig 1
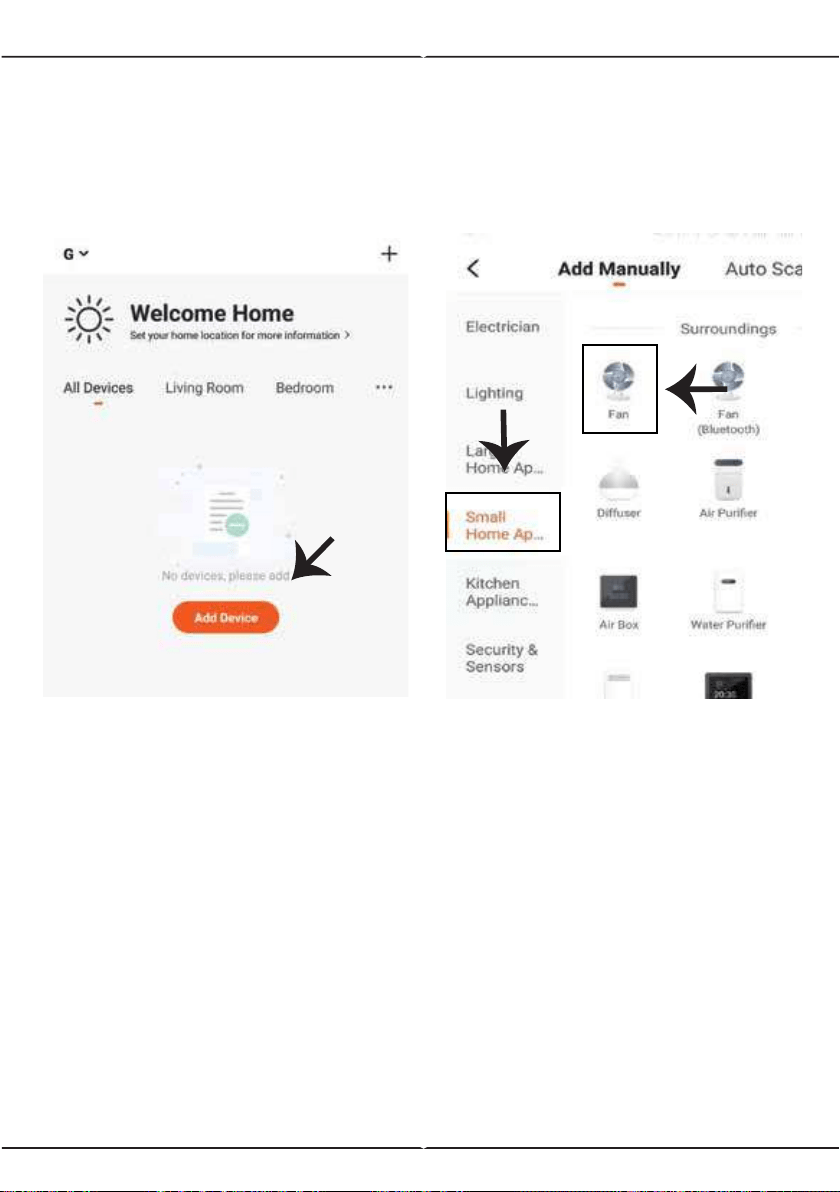
Fig 4
Fig 5
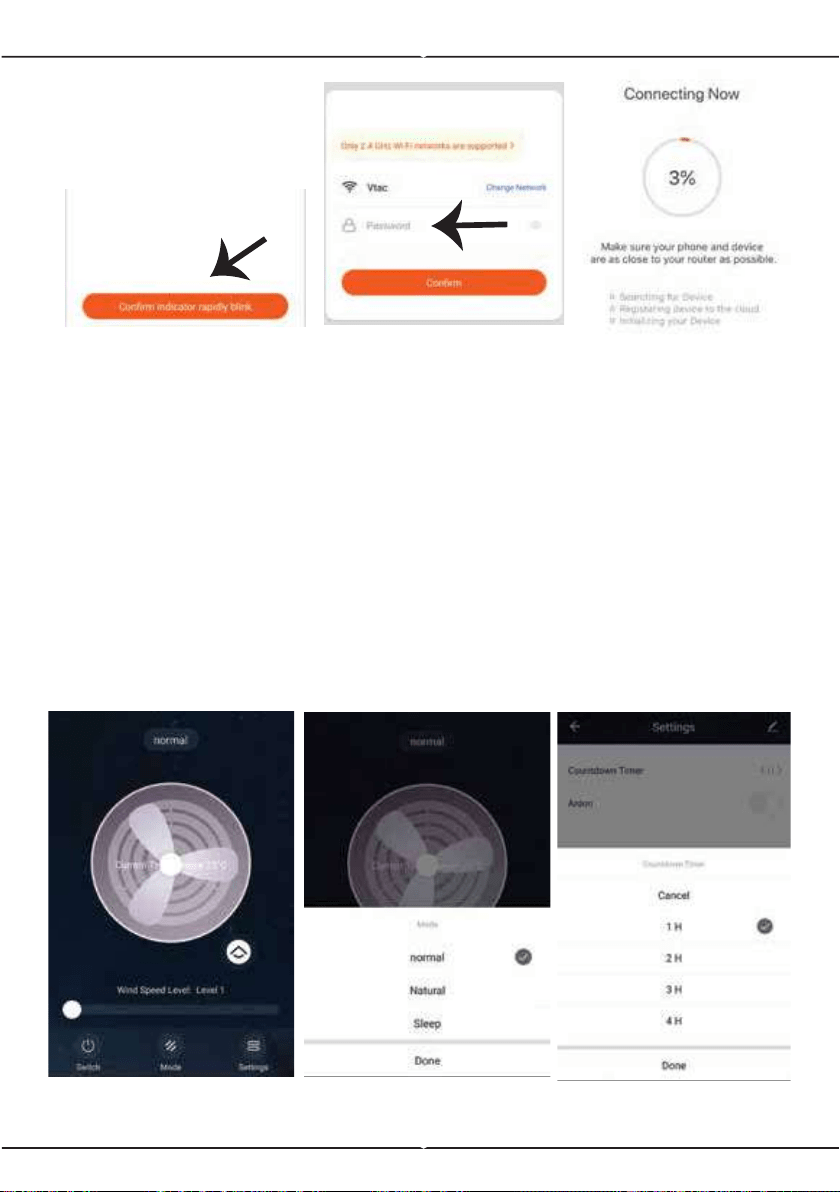
Step 8: Pairing Process
Make sure the Tower fan is connected to power. Switch On the power you
will notice Nory circular signal light. Long press "TIMER" key and wait for
long indicator light to display and flash rapidly. Once the light flashes rapidly
the device can now be paired with the APP.
Confirm if the light blinks rapidly, select the WiFi network, and enter the
password.
Step 9: Once you have successfully completed step 8, you will be redirect-
ed to “Connecting Now” page, where the App searches, registers and
initializes the device (ref Fig 8). Once it is completed your device will be
successfully paired.
Step 6: Tap on ‘Add Device’ or the
+ sign. Make sure the device is
switched on (Ref Fig 4).
Step 7: To select the device, tap
on Small Home Appliances, and
then choose “Fan” to start Pairing
process of the device to the app
(Ref Fig 5).
8
Fig 6
Fig 7
Fig 8
Fig 9
Fig 10
Fig 11
Step10: Once your device is successfully paired, rename the device to your
preference. And then tap on completed.
Step11: You can now start controlling your device with the App. Tap the
device name on the home page to enter the controls and features of the
device.
Step12: Enter the operation interface after the connection is completed.
Conduct wind speed, wind type, and timing (in setting) operation (Refer to the
example images as shown below)
8
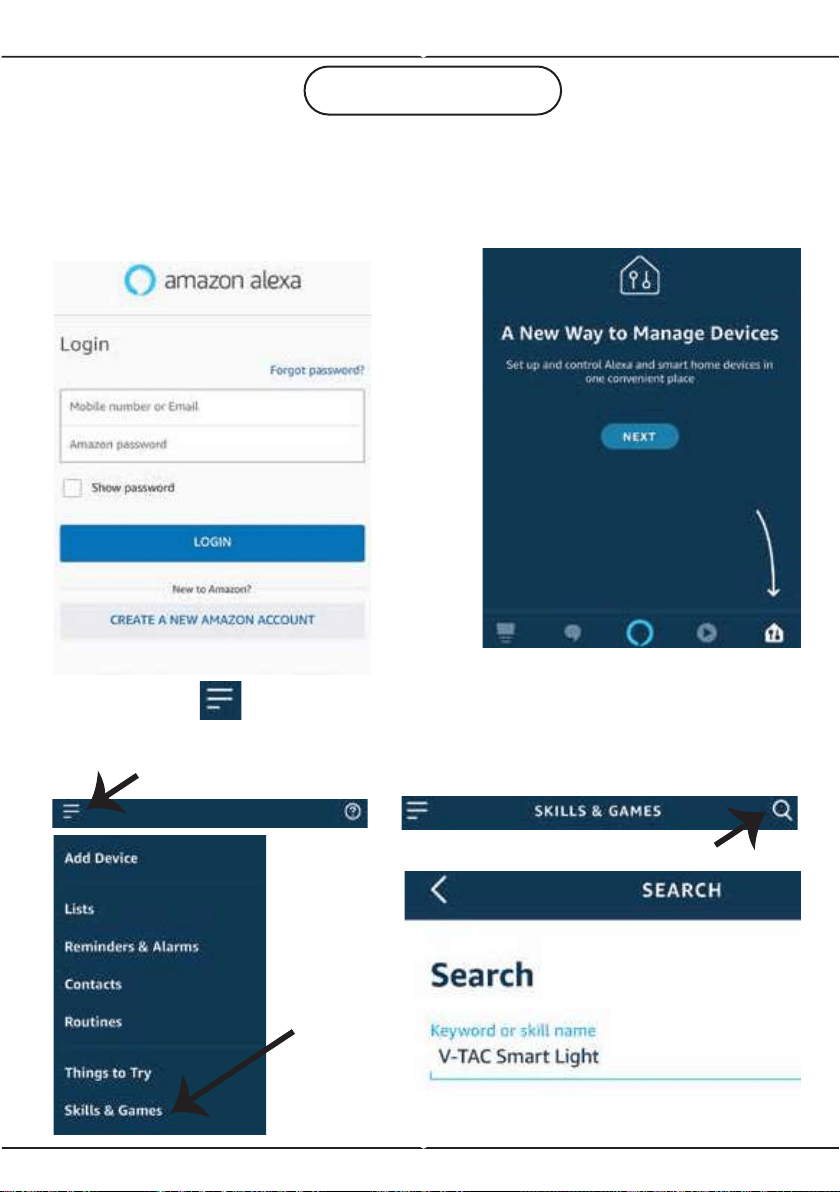
Step1:Install the Amazon Alexa app via
the App Store(iOS) or the Play Store
(Android) and register. If you already
have an existing account with Amazon
Alexa, please proceed to logging in.
Step3: Tap on settings
and tap on “skills and games”
as shown below.
Step4: Search for ‘V-TAC Smart
Light’ on the “Skills & Games” page
as shown below.
Step2: Once you are on the Amazon
Alexa home page, tap on the lower
right icon –– where the arrow is
pointed–– to add a new device and
skill.
ALEXA SETTINGS
8
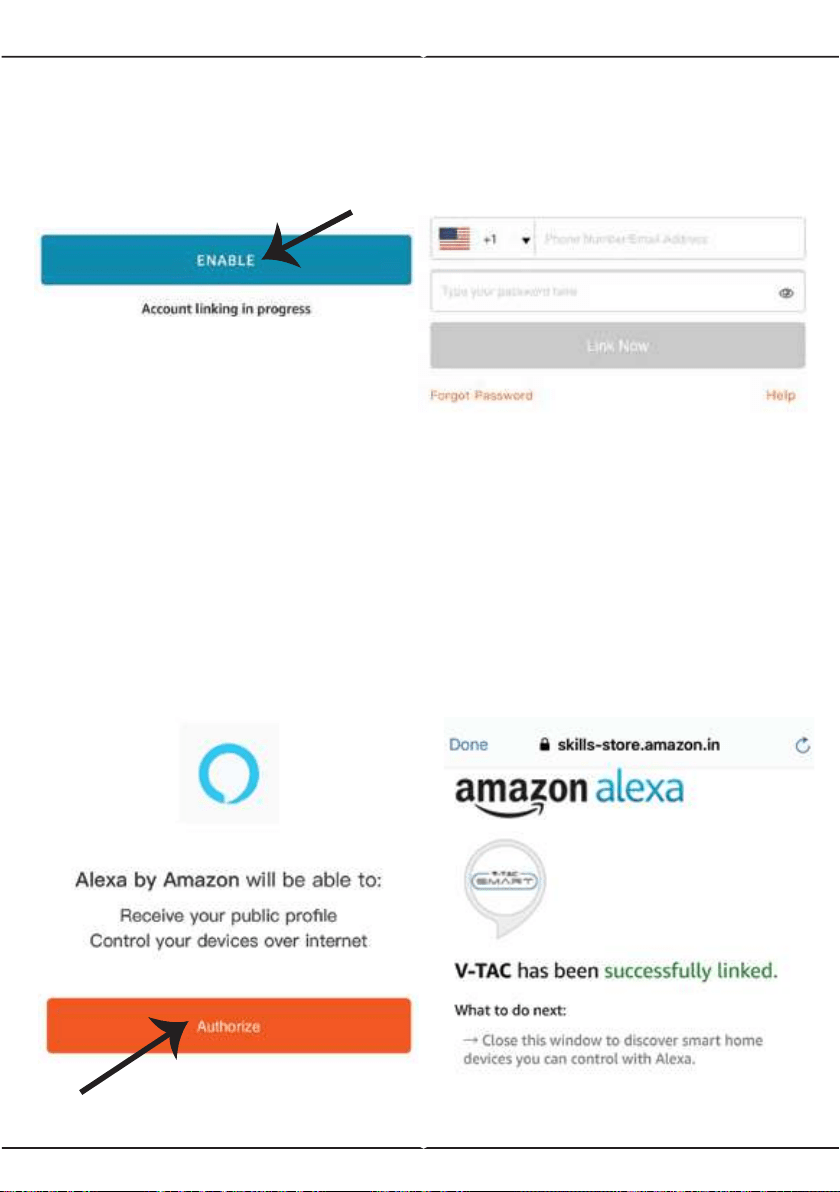
Step5: Enable the Skill.
Step6: Enter your V-TAC Smart
Light login ID and password and
tap on “Link Now”
Step7: Once you tap on Link Now,
you will be redirected to a new page
requesting for authorization (Ref
Image below). Tap on “Authorize”
Step8: You will receive confirma-
tion of the account being linked
successfully (Ref Image below).
8
Now, you can control your smart device using voice commands on Alexa. Below are a few
example commands of how you can use:
Note: Discovering the device must be done every time the device’s name is changed on
the app.
! Alexa, turn on/off the tower fan.
! Alexa, increase the wind speed level to 2.
! Alexa, decrease the wind speed to level 1.
2. Make sure you have Amazon Alexa Device(including Echo, Echo Tap, or Echo Dot)
4. Stable Wifi network
1. V-TAC Smart Light App & Amazon Alexa App
3. Smart Device
ALEXA Commands
THINGS TO REMEMBER BEFORE STARTING INSTALLATION:
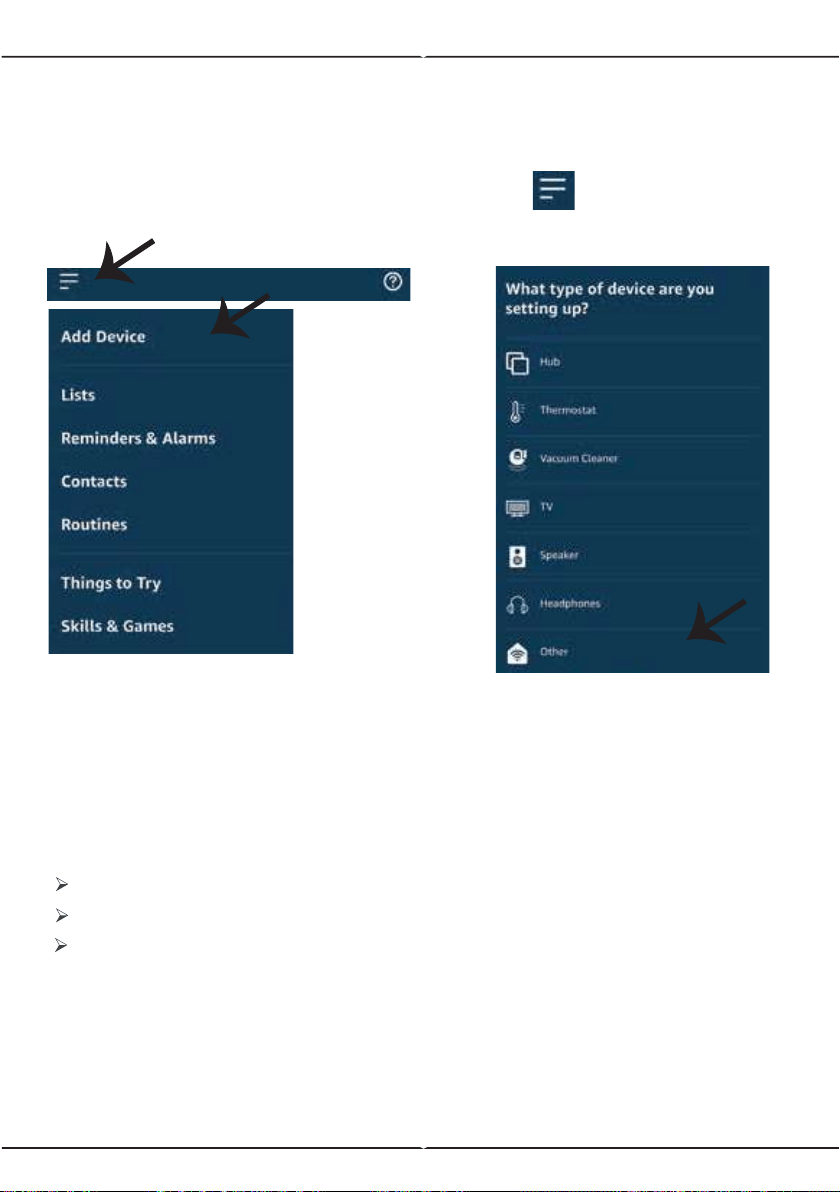
Step8: Discover your smart device on Alexa. Once you have enabled the skill
A) You can use voice command ”Alexa discover devices” to the Alexa device
which you have.
B) To add device manually on home page tap on and tap on Add
device , select the device which you are adding and tap on discover device.
8
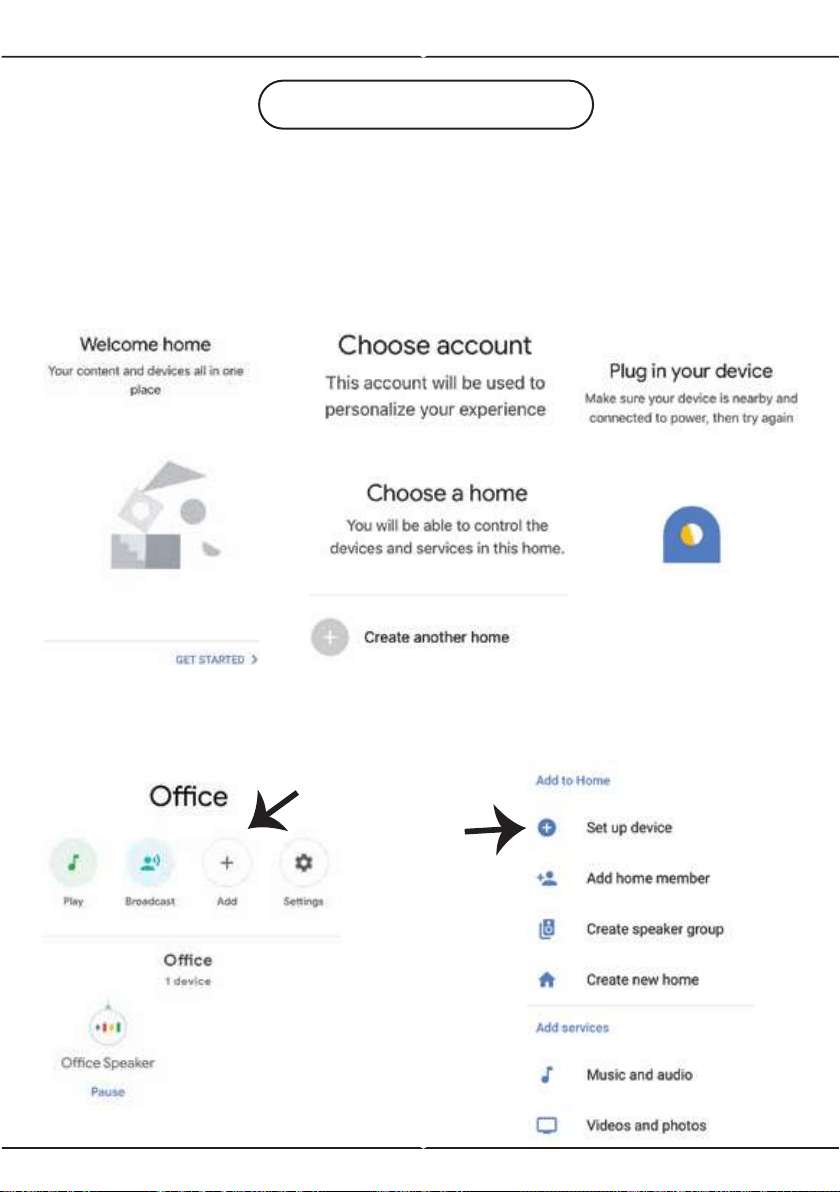
Step2: Once you are on the Google home page, tap on the Add “+” icon– to
add a new device and skill. And then tap on Set up device as shown in the
image below.
GOOGLE HOME SETTINGS
Step1:
a&b) Install the Google Home app via the App Store (iOS) or the Play Store
(Android) and register. If you already have an existing account with Google
Home, please proceed to logging in.
c) Create a New Home/Choose from the existing home if any.
d) Power ON the Google Home device and connect it to the App
(Then Proceed to step 2).
a. b.
c.
d.
a.
b.
8
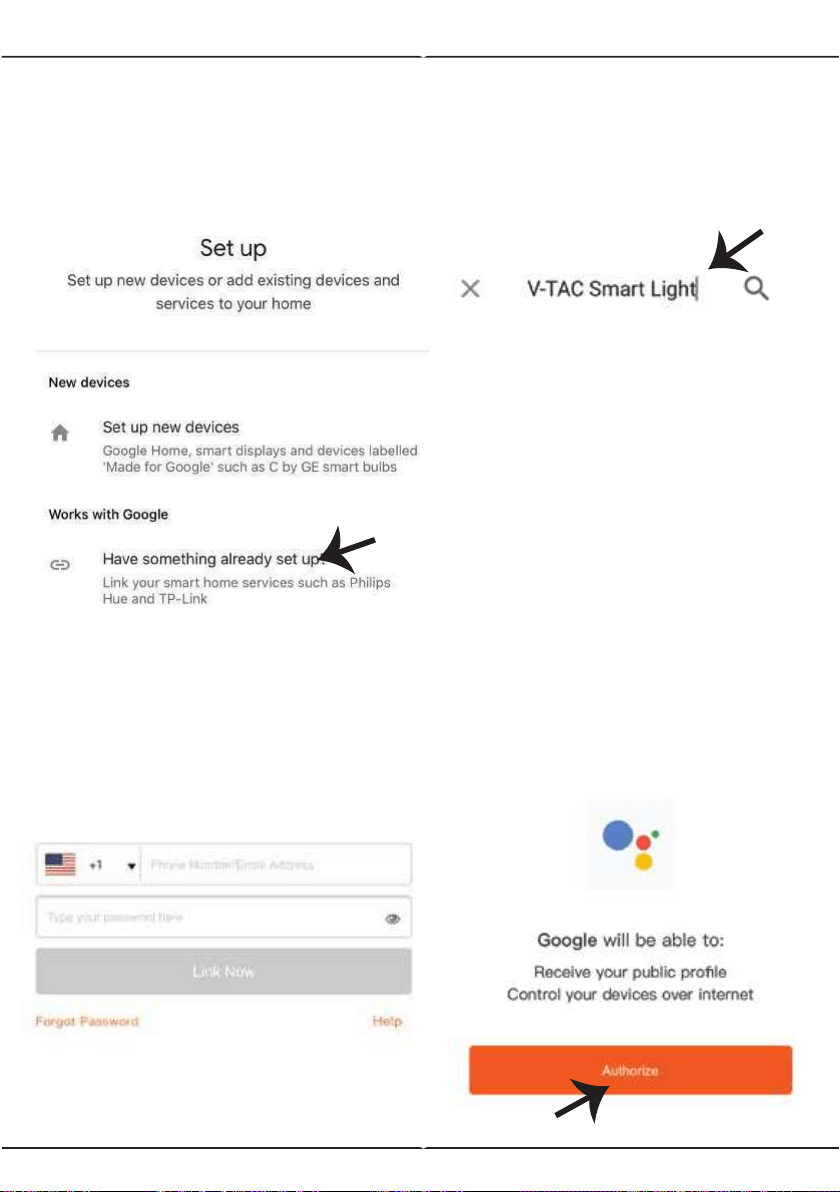
Step3: Make sure the Smart Device
is paired with V-TAC Smart Light app
before starting step 3. Tap on the
arrow section as highlighted in the
below image.
Step5: Sign In with your V-TAC
Smart Light Login credentials to Link
the Smart Light device
Step6: Tap on Authorize in order
to proceed to linking the device.
Step4: Type “V-TAC Smart Light” on
the search bar and tap on the icon of
“V-TAC Smart Light”.
8
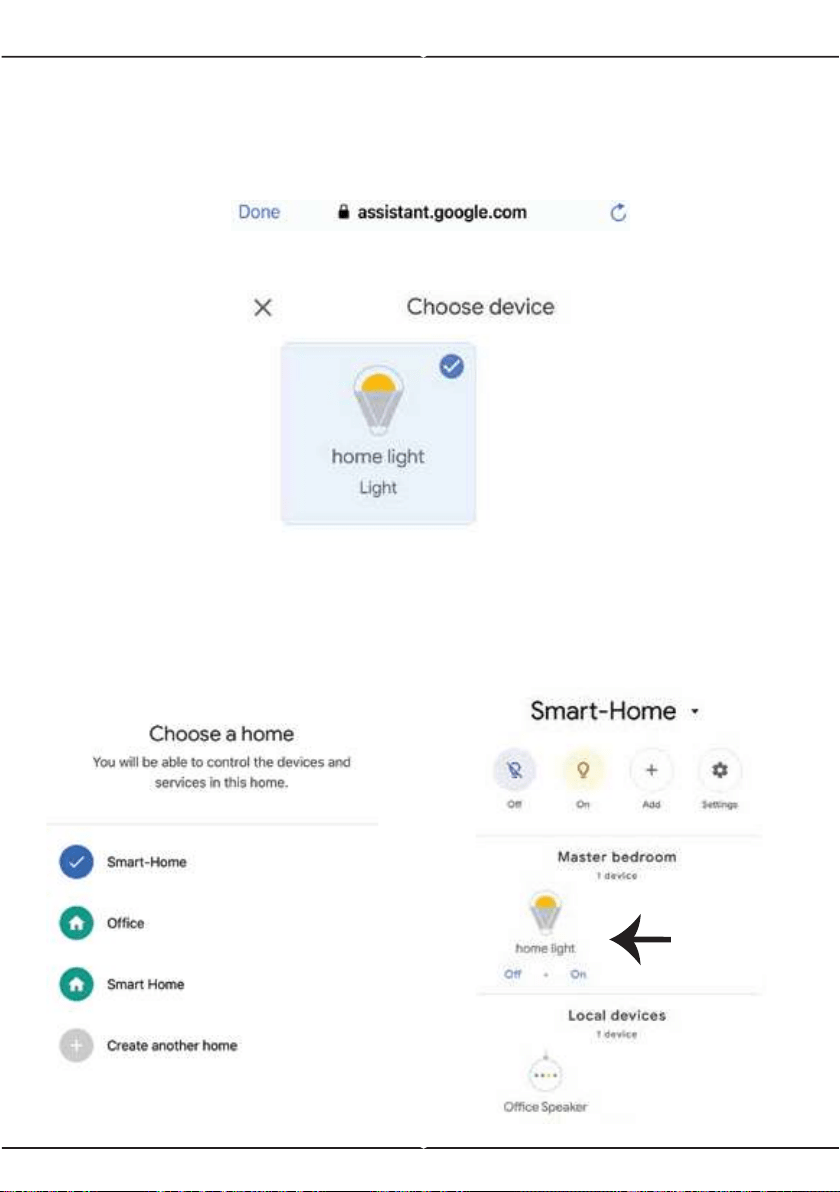
Step7
a. Account will now be linked, please stay on the page you will be redirected
in few seconds to select the device to add to your home.
b. Select the device and tap on Next as show in image b.
Step8: Select the Home where you
would like to add the Smart Light
under. (Or) you can create a New
home in order to add the Smart Light
to it.
Step9: You have succesfully added
Smart Light device to your Google
home App.
Account is now Linked
a.
b.

In case of any query/issue with the product please reach out to us at [email protected]
V-TAC EUROPE LTD, Bulgaria, Plovdiv 4000, bul.L.Karavelow 9B
Now, you can control your smart device using voice commands on Google Home. Below are a
few example commands of how you can use your google home device:
! OK Google, turn on/off the tower fan
! OK Google, increase the wind speed level to 2.
!
OK Google, decrease the wind speed to level 1.
2. Make sure you have Google Home Device
4. Stable Wifi network
1. V-TAC Smart Light App & Google Home App
3. Smart Device
Google Commands:
THINGS TO REMEMBER BEFORE STARTING INSTALLATION: