Loading ...
Loading ...
Loading ...
5. “ ” TIMING KEY
Press this timer key repeatedly to set the time for air delivery. Increase in
increments up to "1-2-3-4-5-6-7-8-9-10-11-12-13-14-15" hours.
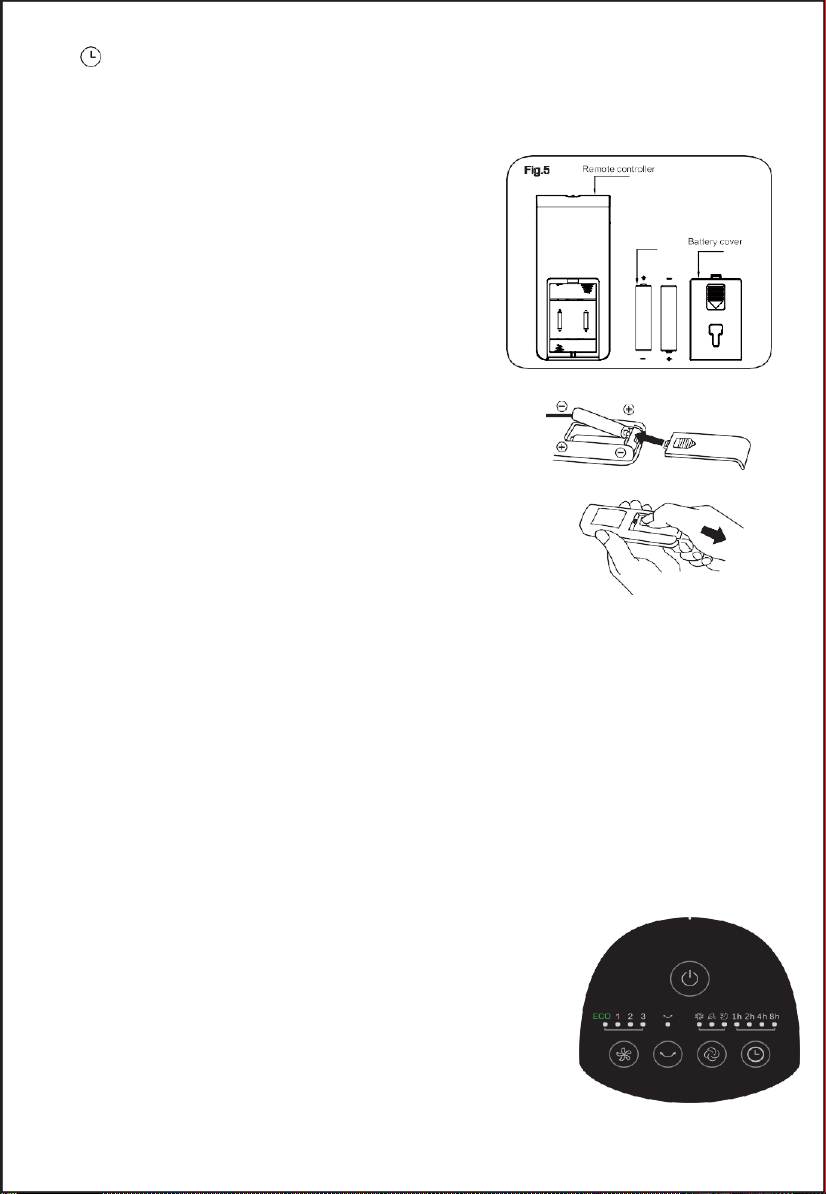
b. BATTERIES
(battery not included in the packaging)
1. Slide the battery compartment Cover.
2. Insert the batteries, and make sure that the
batteries are placed as shown in the Fig.5.
3. Slide back the battery cover.
NOTES: Use manganese or alkaline batteries of
type "AAA". Do not use rechargeable batteries.
c. BATTERY WARNING AS BELOW
1. “Do not dispose of batteries in fire, batteries may
explode or leak.”
2. Do not mix old and new batteries.
3. Do not mix alkaline, standard (carbon-zinc) or
rechargeable (nickel-cadmium) batteries.
Fig.5
AAA Battery, 1.5V
d. REMOTE CONTROLLER OPERATION
Point the remote controller at the receptor on body of the fan and press the desired
button. The remote controller will work at distances of up to roughly five meters and
the angle of 30 degree included between right and left from the receptor.
The batteries must be removed from the remote controller before it is scrapped and
that they are disposed of safely.
e. OVERHEAT PROTECTION OF THE MOTOR
The windings of the motor have a thermal-fuse that burns out and the fan switches
off and temperature of the motor is no longer going up so that plastic parts of the fan
don’t subject to deformation so far so to be burned by the overheat if the motor is
overheat for any unexpected reason.
II. Buttons on fan body / Panel indication (Fig.6)
The buttons on the body such as ON/OFF,SPEED, MODE,
TIMER, OSCILLATION have the same functions as those
of the corresponding keys on the remote controller.
Fig.6
4
Loading ...
Loading ...
Loading ...