Loading ...
Loading ...
Loading ...
Installation Instructions
IMPORTANT NOTES
When reversing doors:
• Read the instructions all the way through before
starting.
• Logo badge, handles, plugs and right hinge cover
are included inside the refrigerator (some models).
• Place the screws by their related parts to avoid
using them in the wrong places.
• Provide a non-scratching work surface for the
doors.
CAUTION
Lifting Hazard. Single person lift can cause injury.
Use assistance when handling, moving or lifting the
refrigerator doors.
NOTE: When removing door, to prevent damage to
door and electronics carefully place the door in a
proper location.
NOTE: The lower door hinge pin and hinge are
keyed and must be matched correctly for the
door to self close properly. Please follow directions
carefully.
Freezer door is heavy. Use both hands to secure the
door before lifting.
WARNING
To eliminate the risk of electric shock or injury during
installation, you must first unplug the refrigerator
before proceeding. Failure to follow these instructions
can result in electrical shock.
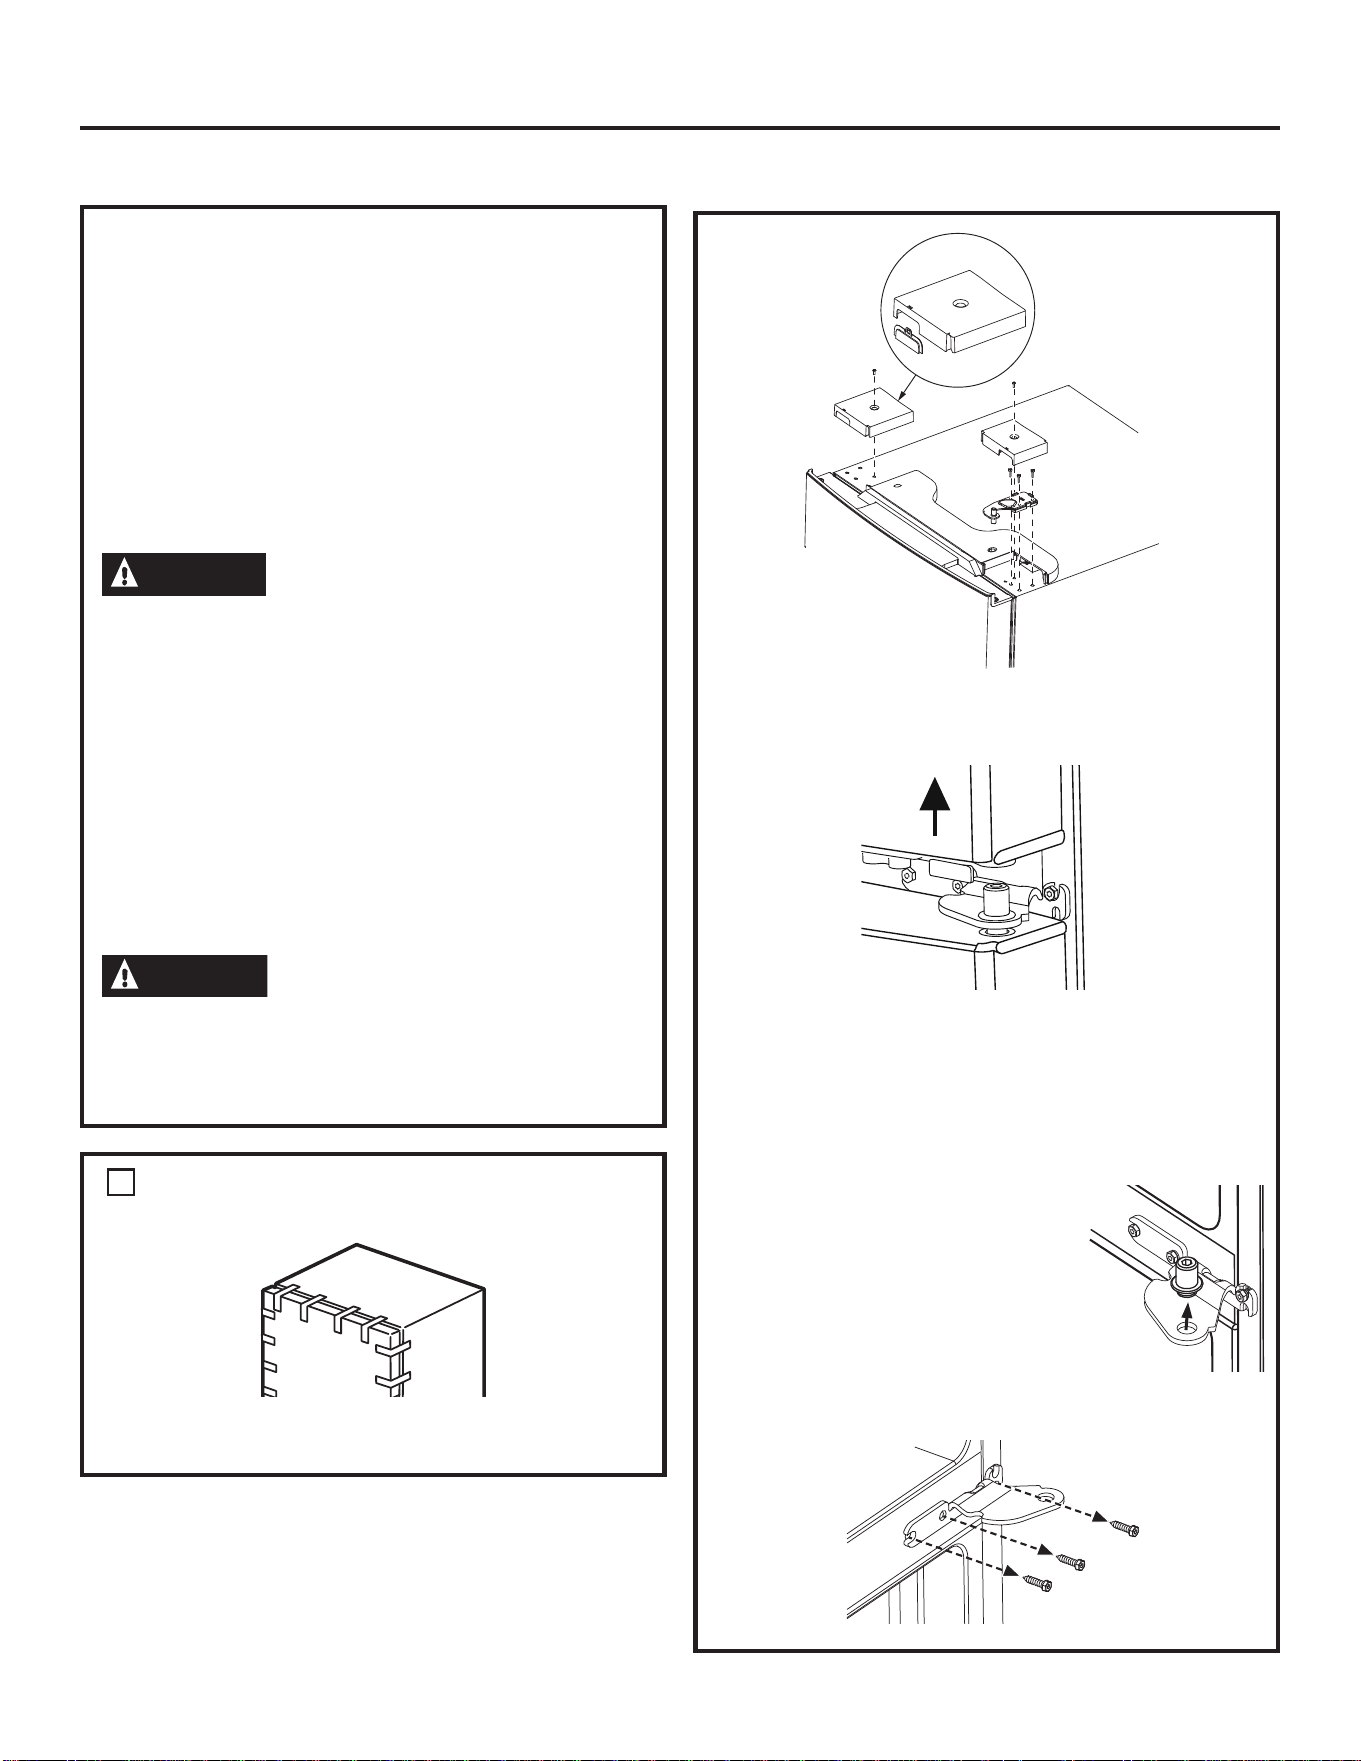
REVERSING THE DOOR (on some models)
1
REMOVE THE REFRIGERATOR DOORS
A. Tape the door shut with masking tape.
B. Remove right and left hinge covers on top of
the refrigerator using a Phillips screwdriver.
C. Using a 5/16” socket/ratchet driver, remove
the bolts securing the top hinge to the
cabinet. Lift the hinge straight up to remove.
D. Remove the tape and tilt the fresh food door
away from the cabinet. Lift the door off of
the center hinge pin.
E. Set the fresh food door on a non-scratching
surface with the inside up.
For Models With a Freezer DRAWER:
F. Using a 1/4” Allen wrench,
remove the hinge pin
from the hinge bracket.
The hinge pin will be used
again on the opposite side.
G. Using a 5/16” socket/
ratchet driver, remove the
bolts securing the center
hinge to the cabinet.
26
Loading ...
Loading ...
Loading ...