Loading ...
Loading ...
Loading ...
23
Installation - Ranges
1
8-1/2”
8-1/2”
(21.6 cm)
(21.6 cm
)
8-1/2”
(21.6 cm)
Ø 1/8”
Ø 1
/8
”
(.32 cm)
(.3
2
cm)
Ø 1/8”
(.32 cm)
1-1/2”
1-1/2”
(3.8 cm)
(3.8 cm)
1-1/2”
(3.8 cm)
1
1
2
2
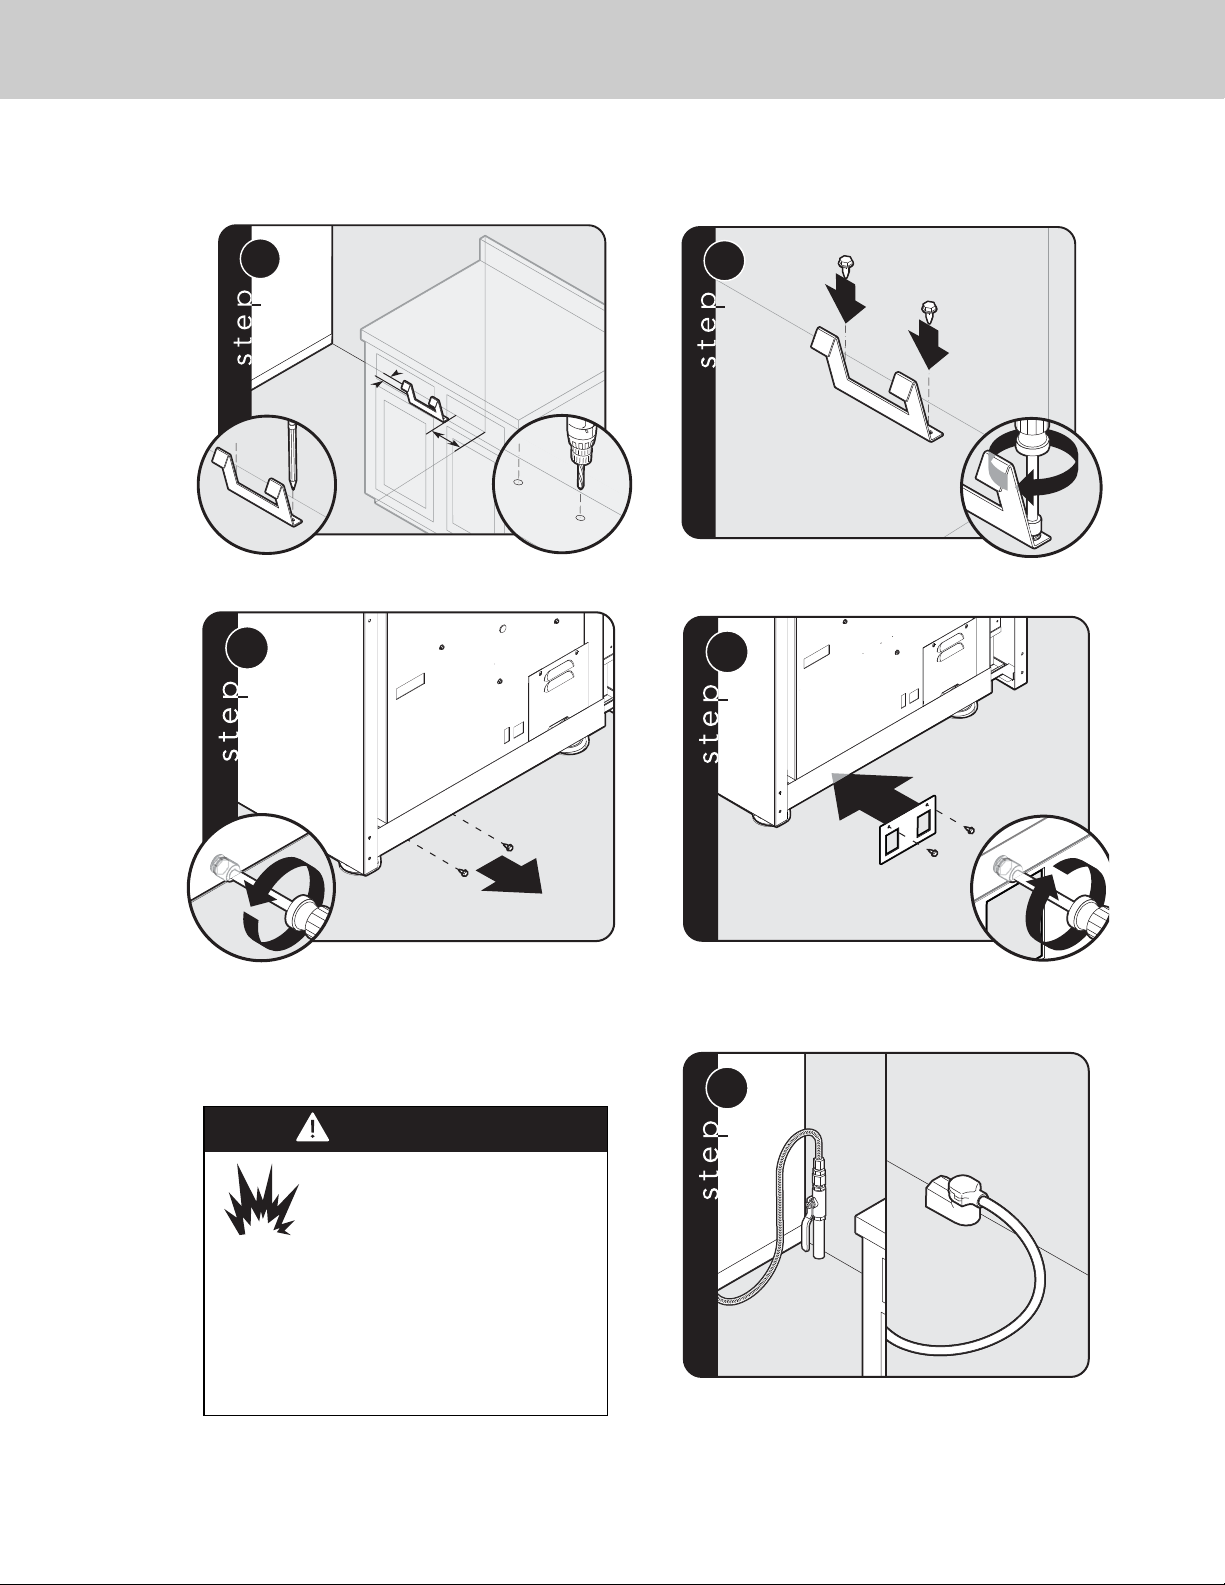
Anti-tip Device Installation (Floor Mount)
2
1
x2
3
1
2
4
Locate anti-tip bracket hook on the floor 8-1/2” (21.6 cm) from side cabinet
and 1-1/2” (3.8 cm) from rear wall. Mark and
drill 1/8” (.32 cm) holes where bracket will be located.
Mount anti-tip bracket hook to floor
using screws provided.
Remove two screws from back of range.
Attach bracket to back of range using two screws.
1
Connect gas and electrical. Before placing appliance in operation,
always check for gas leaks. This must be performed by your dealer, a
qualified licensed plumber, or gas service company.
DANGER
GAS LEAK HAZARD
To avoid risk of personal injury or
death; leak testing of the
appliance must be conducted
according to the manufacturer’s
instructions. Before placing appliance in
operation, always check for gas leaks with
soapy water solution.
• DO NOT USE AN OPEN FLAME TO CHECK
FOR GAS LEAKS.
Connecting Gas & Electric
Loading ...
Loading ...
Loading ...