Loading ...
Loading ...
Loading ...
Version 01/13- Page 6
HOOD INSTALLATION
1. Disconnect and move freestanding range from cabinet
opening to provide easier access to upper cabinet and rear
wall. Put a thick, protective covering over cooktop, set-in
range or countertop to protect from damage or dirt.
2. Determine and clearly mark with a pencil the center
line on the wall where the rangehood will be installed in
between your side cabinets.
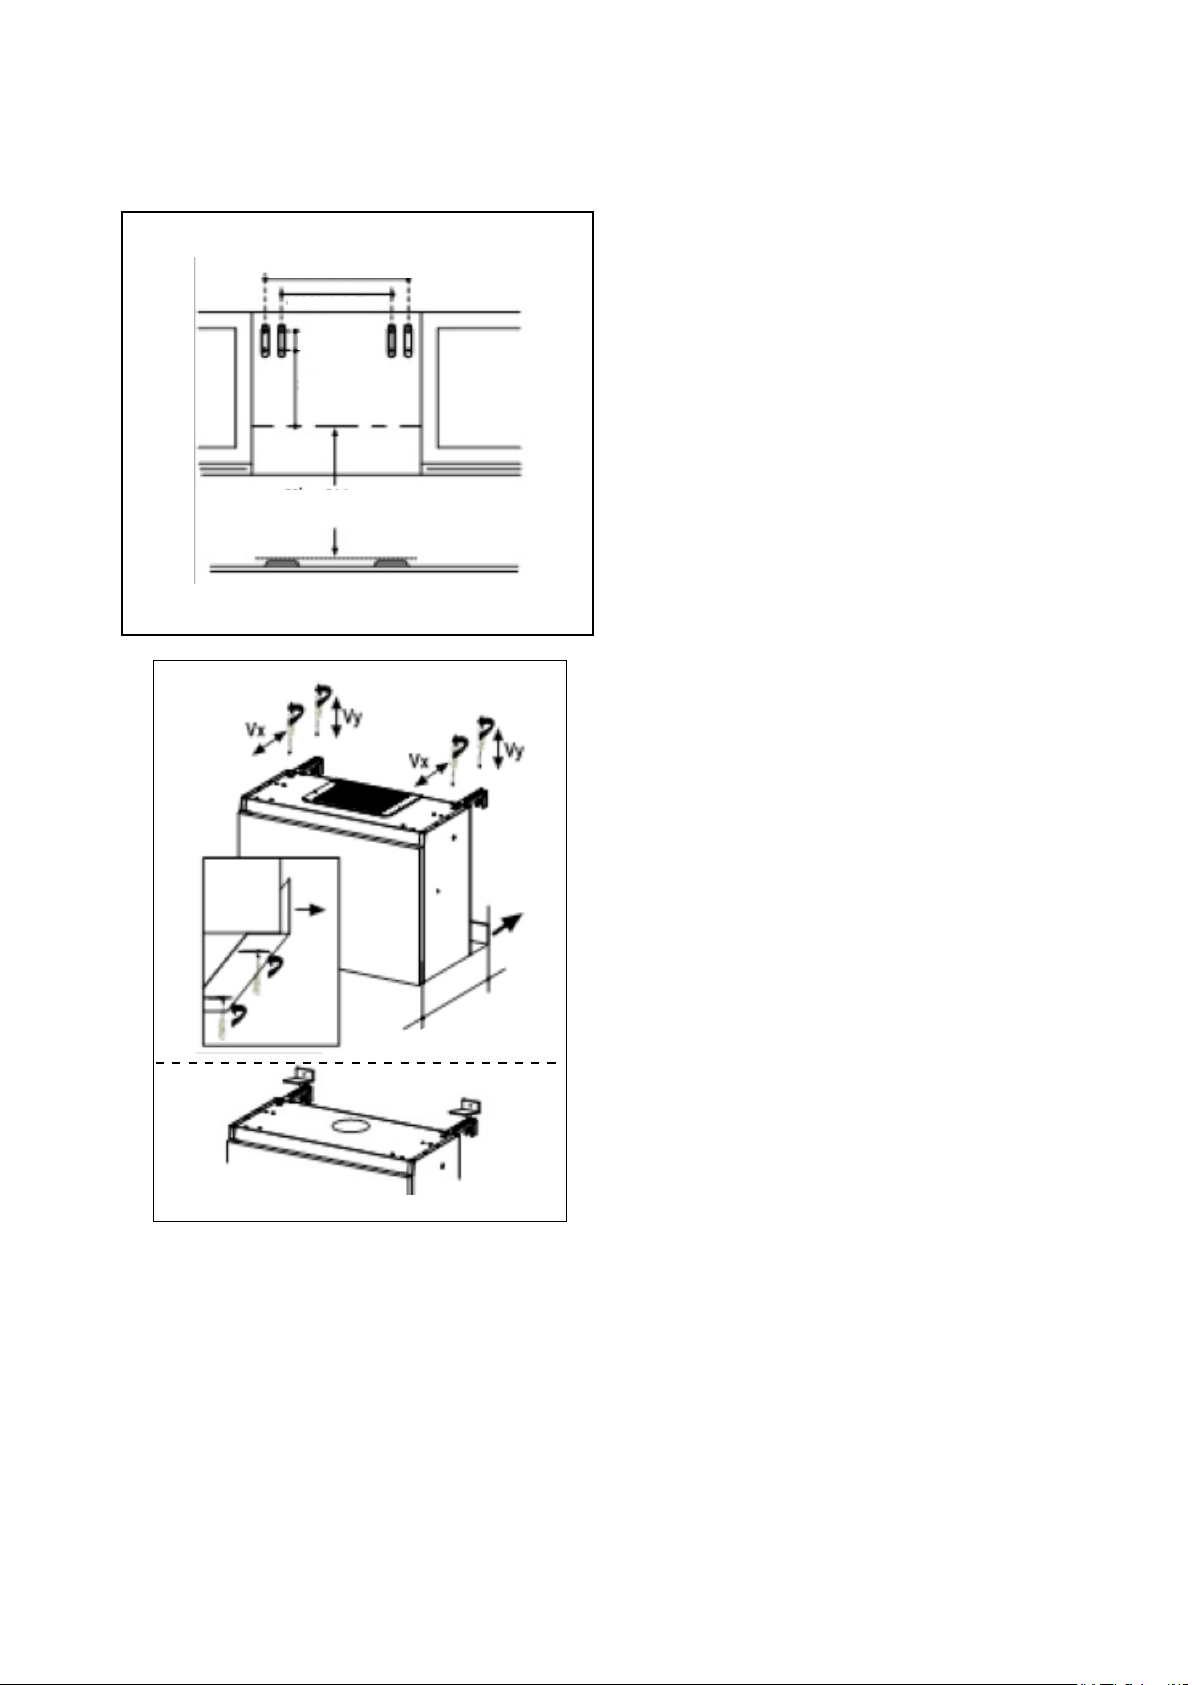
3. See FIGURE 4 for the installation of the mounting screws.
Measure the desired height off your cooking
surface where you want the bottom of the rangehood to be
and mark a horizontal line. Recommended 30" minimum
off the cooktop. You want the top of the rangehood to be
even with the rest of your cabinets. For example if your
side cabinets are 30" tall (standard upper cabinets), and
are 18" off the cooktop, the top of the cabinets are 48"
from the cooktop. The 18" tall rangehood would have to
be installed 30" off the cooktop to be even with the other
upper cabinets.
Mount (2) of (B.) - mounting hardware with (4) of (D.) screws
from FIGURE 1 onto the wall at 17 10/16" or 29 7/16"
apart depending on 24" or 36" hood model. The bottom
mounting screw hole should be 13 6/16" from the bottom
of the desired hood height off the counter top.
4. The Jewel can be adjusted in depth from
11" to 14 1/2" to match the depth of the side cabinets in
order to have a ush mount installation (see dimensional
diagrams on page 4).
5. Hang the hood onto the mounting brackets then
see FIGURE 5, the hood can be adjusted up and down and
back and forth using the Vx and Vy screws which move the
hoods location to meet cabinets. There are 2 screws on
the bottom of the hood which will adjust the metal sliding
spacer to meet the wall, as seen in FIGURE 5.
6. Install the safety brackets (C in FIGURE 1) above the
mounting brackets as in FIGUER 5 with one screw on each
side to secure the mounting bracket into place.
7. Determine and make all necessary cuts in the wall for the
ductwork. Install the ductwork before the rangehood.
8. Determine the proper location for the Power Supply
Cable. Use a 1 1/4" Drill Bit to make this hole. (SEE PAGE
4 for knock-out hole locations on the top and back of
the hood , on the left side of the hood at 6 9/16" from
the center) Run the Power Supply Cable. Use caulking
to seal around the hole. DO NOT turn on the power until
installation is complete.
FIGURE 5
29 7/16" (36" model)
17 10/16" (24" model)
3 5/32"
13 6/16"
Min. 30"
FIGURE 4
11" to 14 1/2"
Loading ...
Loading ...
Loading ...