Loading ...
Loading ...
Loading ...
NOTICE
Risk of damage to the castor bases!
u
When aligning the appliance by the back adjustable feet, do
not use a cordless screwdriver, as this will either damage
the height adjustment mechanism or possibly loosen the
adjusting rod. Adjust the feet by hand.
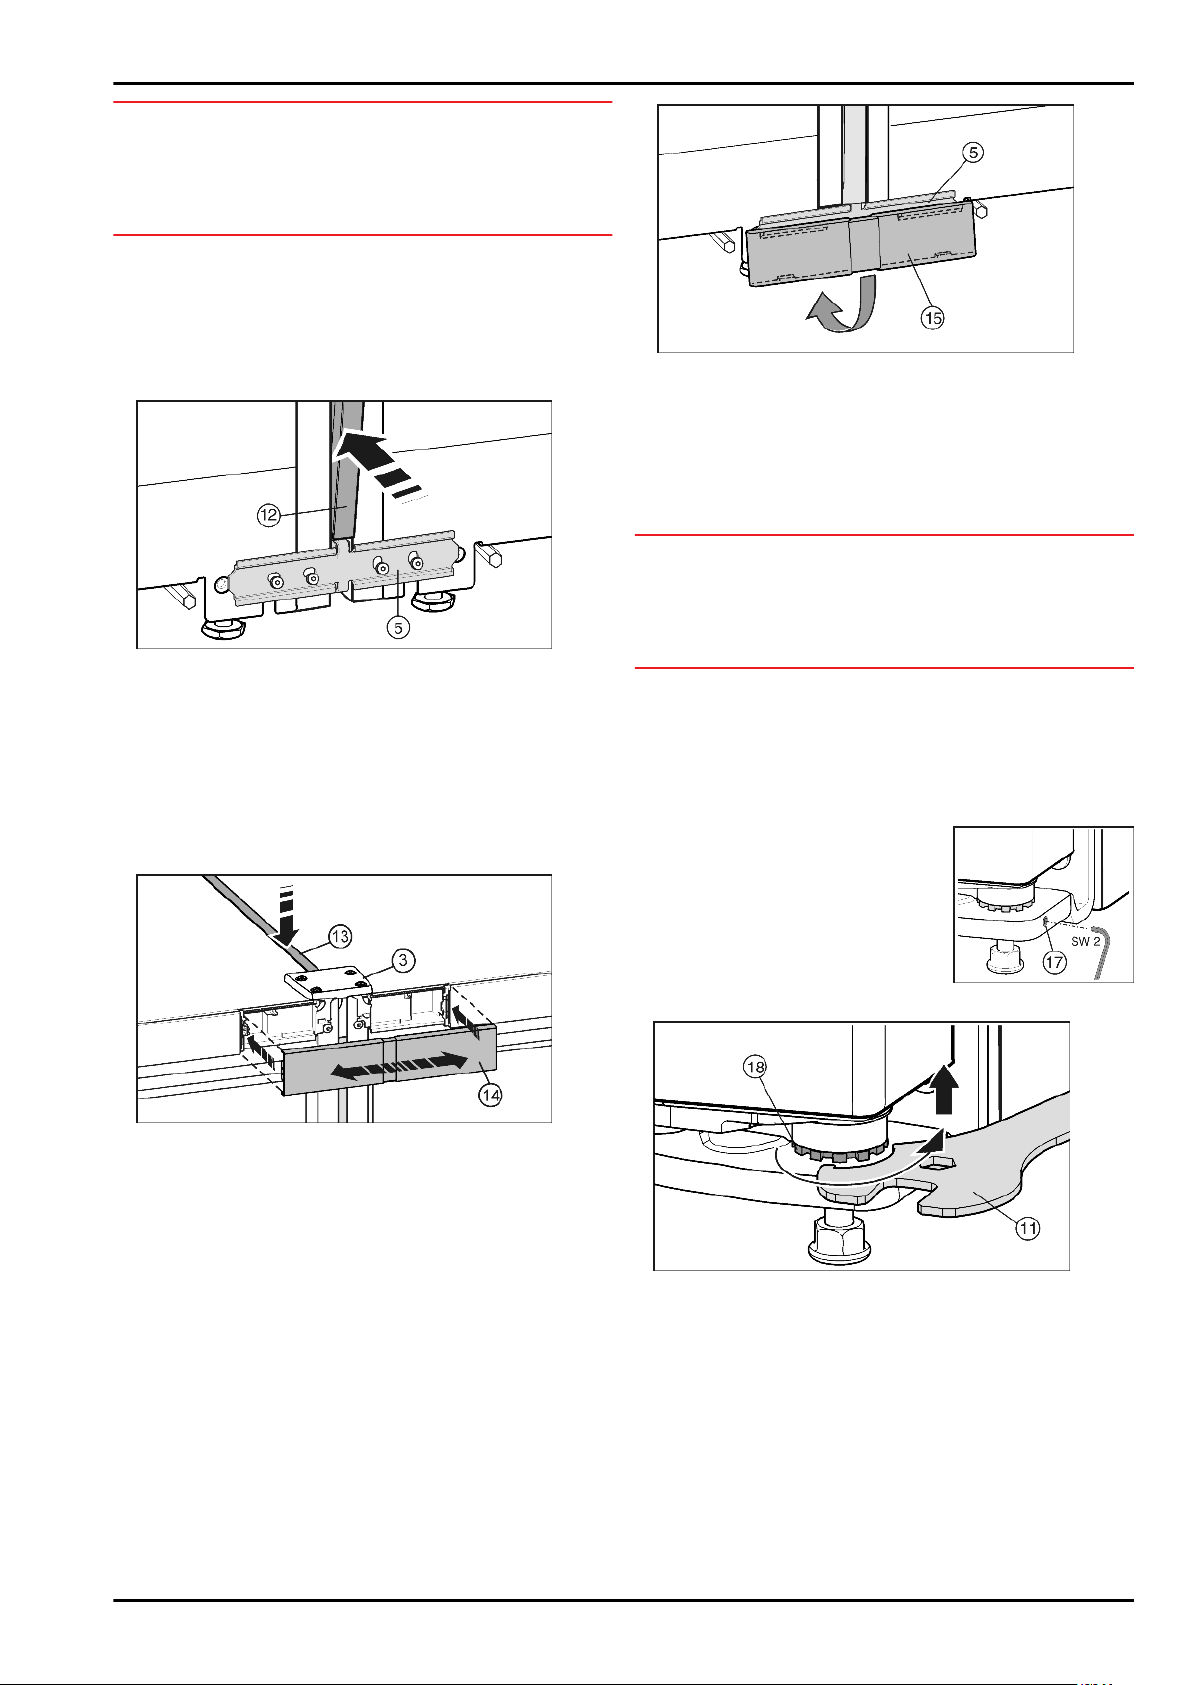
You can adjust the front height-adjustable feet with the open-
ended spanner
Fig. 8 (11)
included in the supply package, and
the rear height-adjustable feet* with a Torx® 25 screwdriver.
u
Retract the centre height-adjustable feet
Fig. 4 (C)
so they
are not in contact with the floor.
u
Level the combination using the outer height-adjustable feet
Fig. 4 (B)
.
Fig. 9
Before fitting the cover strip
Fig. 9 (12)
, press the two bars
together along the whole length. That makes it easier to insert
the strip into the gap. Use a soft cloth to press the strip into
place to avoid making dents in the surface. Carefully press the
strip into the gap, keeping it straight, to achieve an optimal
joint.
u
On the front, press the long cover strip
Fig. 9 (12)
into the
vertical gap. Make sure the strip sits on top of the joining
plate
Fig. 9 (5)
.
u
Peel the protective film off the cover strip.*
Fig. 10
u
On the top of the appliances, press the short strip
Fig. 10 (13)
into the gap. Make sure the front edge of the
strip is flush with the joining plate
Fig. 10 (3)
.
u
Clip the cover
Fig. 10 (14)
over the gap between the two
control panel covers. Make sure the side edges of the cover
are flush with the control panel covers. To enable this, the
cover is expandable.
Fig. 11
u
Fit the bottom cover
Fig. 11 (15)
from above onto the joining
plate
Fig. 11 (5)
and snap it in at the bottom.
u
Connect the combination to the mains according to the
manual.
Appliances with IceMakers:
u
Connect the appliance to the fixed water connection
according to the manual.
NOTICE
Risk of damage when moving the combined SBS appliance!
The combined SBS appliance is heavy once assembled. The
appliance may be dented by improper movement.
u
Observe the information given on moving the appliance (see
above).
u
Carefully slide the combination into the intended position.
u
If necessary, align the height with the height-adjustable feet.
u
Lower the centre height-adjustable feet
Fig. 4 (C)
until they
touch the floor.
u
Then support the door: Extend the height-adjustable feet
Fig. 4 (A)
at the turn hinge until they are resting on the floor,
then turn them further by 90°.
The doors can be aligned in
height with the aid of the outer,
lower turn hinges:*
u
Extend the threaded pin
Fig. 12 (17)
a little (by one
turn at most!).
Fig. 12
Fig. 13
u
To lift the door, turn the bearing pin
Fig. 13 (18)
clockwise
using the open-ended spanner
Fig. 13 (11)
included in the
supply package. In the delivery condition, the bearing pin is
completely screwed in.
u
Tighten the threaded pin
Fig. 12 (17)
again to secure the
bearing pin.
Side-by-side assembly
4