Loading ...
Loading ...
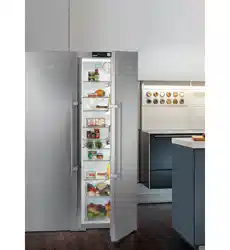
q
Before assembling the appliances, site them as closely as
possible to the final position.
q
When moving the appliances, always take hold of them at
the outer front corners. On no account should you push with
your knee against the side walls or door.
q
The combined appliance is easiest to shift diagonally by
moving the left and right corner alternately.
Once the combined appliance is exactly in front of the aper-
ture, push it straight in.
q
If the combined appliance
has to be pulled out of the
aperture again, take hold of
it in the lower third area and
pull it straight forwards.
NOTICE
Risk of damage when moving the combined SBS appliance!
The combined SBS appliance is heavy once assembled. The
appliance may be dented by improper movement.
u
Observe the information given on moving the appliance (see
above).
u
Remove all protective film from the outside of the housing.
On the front of the appliance:
Fig. 4
u
If necessary, completely retract the height-adjustable feet
Fig. 4 (A)
at the front of both appliances so that they are not
touching the floor.
u
Place the caps
Fig. 4 (1)
onto the four front height-adjust-
able feet.
u
Push both appliances together up to approx. 10 mm apart
so that they stand flush at the front.
Fig. 5
u
Unclip and remove the covers
Fig. 5 (2)
.
The joining plate automatically aligns the height of the appli-
ances. If one appliance is slightly higher than the other, start
with that appliance.
u
Put the joining plate
Fig. 5 (3)
in place and fix it loosely to
one appliance with two screws
Fig. 5 (4)
.
u
Move the joining plate sideways so that the centre bar of the
plate lies on the side wall of the appliance. Tighten the
screws.
u
Now screw the joining plate to the other appliance. As you
do this, shift the appliances together or apart slightly as
necessary.
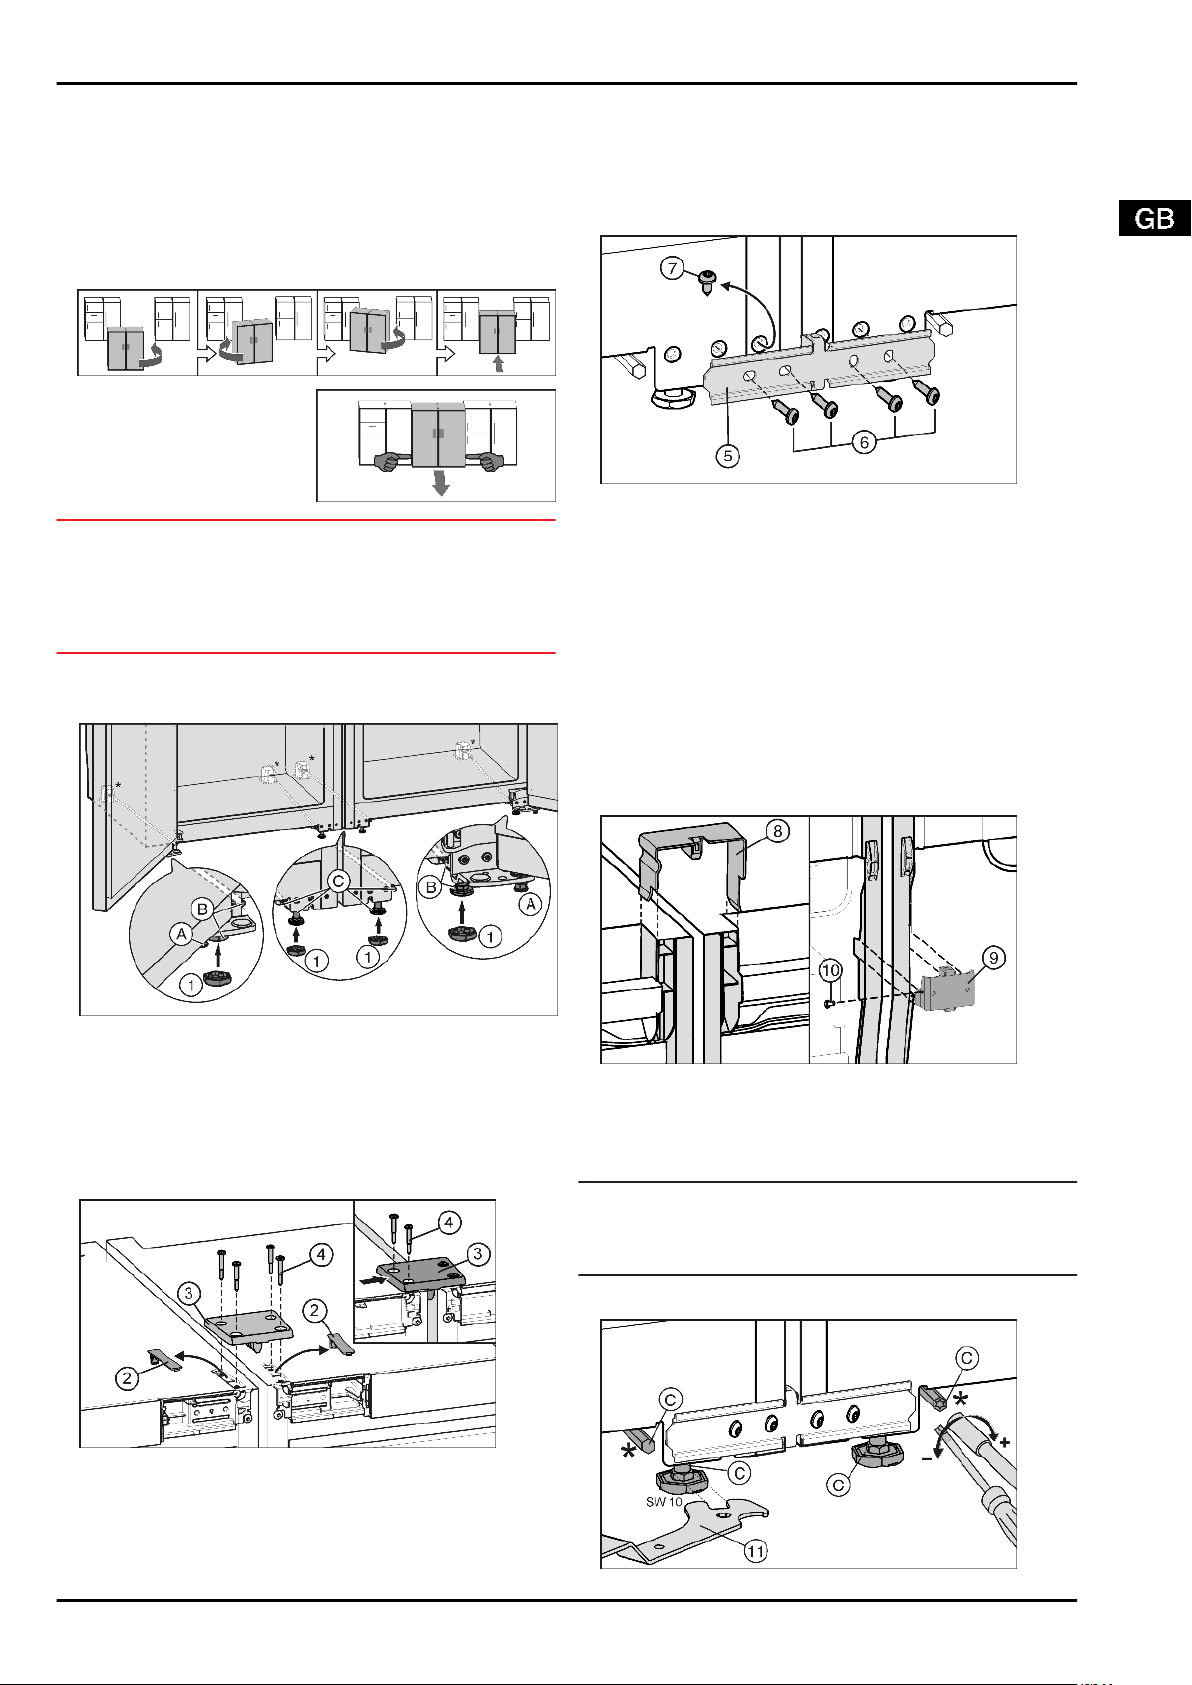
Fig. 6
u
If the appliance is fitted with the pre-mounted screw
Fig. 6 (7)
: Undo the screw.
The joining plate automatically aligns the depth of the appli-
ances. If one appliance is further forward than the other, start
with that appliance. Otherwise start with the appliance on the
left.
u
Fix the joining plate
Fig. 6 (5)
loosely to one appliance with
two screws
Fig. 6 (6)
.
u
Move the joining plate sideways so that the centre bar of the
plate lies on the side wall of the appliance. Tighten the
screws.
u
Now screw the joining plate to the other appliance. As you
do this, shift the appliances together or apart slightly as
necessary.
On the rear of the appliance:
Fig. 7
u
Insert the joining clamp
Fig. 7 (8)
at the top of the centre
side walls.
u
Insert the joining angle
Fig. 7 (9)
into the recess at the
bottom.
u
If the joining angle is too loose, fix it with a screw
Fig. 7 (10)
.
Note
u
To avoid vibration noise, ensure neither the clamps nor the
screws are in contact with the tubes on the rear of the appli-
ance!
On the front of the appliance:
Fig. 8
Side-by-side assembly
3
Loading ...