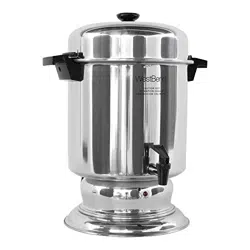
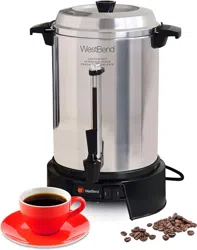
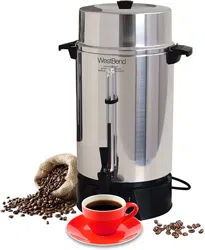
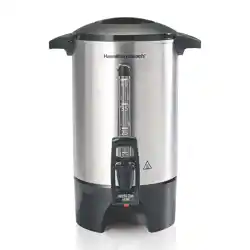
Instruction Manual LARGE CAPACITY COFFEEMAKERS
INSTRUCTIONS FOR MAKING COFFEE
- Before using the coffeemaker for the first time, clean it thoroughly. Refer to “Cleaning your Coffeemaker.”
- Always use the coffeemaker on a dry, level, heat-resistant surface, away from any edge.
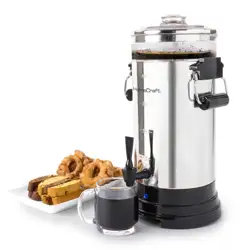
- With the basket and stem removed, fill the coffeemaker with COLD water to just above the faucet. Check for any dripping. If dripping occurs between the faucet and the coffeemaker body, tighten the nut inside the coffeemaker. If the dripping occurs from the faucet spout, tighten the faucet cap. If there is no dripping present, or has been stopped, fill the coffeemaker with cold water to the desired cup level. Marks on inside of the coffeemaker show cup levels. Do not fill past maximum cup level.
- Place the stem and basket in the coffeemaker. For models with a plastic basket, you may find it easier to insert the stem in the opening in the basket then squeeze the top of the basket to hold the stem in place. Place the stem into the heating well in the bottom of the coffeemaker. Or, place the stem into the heating unit well, angle the stem away from you, then place the basket on the stem. When they’re connected, let the basket and stem tip upright. Add electric perk or regular grind coffee to the basket using the chart below for the amount to use depending on the cup level. Spread the grounds evenly in the basket. Use standard measuring cups to measure the grounds. Do not let any grounds fall into the stem opening. Do not use “Drip” or finely ground coffee because the basket can flood. The amount of ground coffee recommended will make mildstrength coffee which most people prefer. The amount of coffee used can be adjusted to suit your preference.
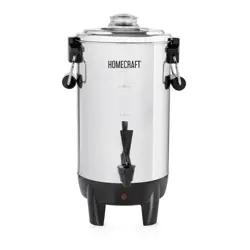
- Place the cover on the coffeemaker and turn to lock into the handle slots. Note the arrows on the cover for correct turning. To reduce coffee spills, especially if the coffeemaker is tipped over, make sure that the cover has been turned clockwise until the cover is completely locked into the handle slots. Note: While moving an appliance containing hot liquids is not recommended, if you must move the coffeemaker, extreme caution should be used because the cover only temporarily reduces coffee from spilling if the coffeemaker is tipped over.
- Plug the cord into a 120 volt AC grounded electric outlet ONLY. If applicable, set the “ON/OFF” switch to “ON.”
- The coffeemaker will stop perking automatically (each cup requires no longer than 1 minute brewing time). Coffee is ready when the light in the base glows. Coffee will remain at serving temperature as long as the coffeemaker is plugged in (and the switch is “ON”). Before serving, turn the cover to remove the basket and stem. Using a hot pad, remove the coffee basket, and stem. If the coffee basket and stem are not removed, bitter oils from the extracted grounds will drip into the coffee. Replace the cover making sure it is completely locked into the handle slots.
- For single-cup filling, press the faucet handle down. Release the handle when filled. For continuous flow when filling the coffee server, lift handle straight up until it locks into the open position. Lower the handle when the server is filled.
- When about 3 cups of coffee remain in the coffeemaker, or when the coffee can no longer be seen in the view tube, turn the switch “OFF” and unplug the cord from the electrical outlet. Note: Liquid must always cover the inside bottom of the appliance at all times. Falling below the minimum level could cause overheating and damage to internal components and will void the warranty
SPECIAL NOTE ON GRINDING COFFEE BEANS: If you grind your own coffee beans, grind to medium coarseness for best results. DO NOT grind too fine (powder-like) because this can cause the basket to flood.
| 100-CUP MODEL |
| Water Level |
Measure of Ground Coffee |
| 100 cups |
6 ¼ cups |
| 80 cups |
5 cups |
| 60 cups |
4 cups |
| 40 cups |
2½ cups |
| Do not make less than 40 or more than 100 cups of coffee at one time. |
| 60-CUP MODEL |
| Water Level |
Measure of Ground Coffee |
| 60 cups |
3½ cups |
| 50 cups |
3 cups |
| 40 cups |
2½ cups |
| 30 cups |
2 cups |
| Do not make less than 30 or more than 60 cups of coffee at one time. |
| 55-CUP MODEL |
| Water Level |
Measure of Ground Coffee |
| 55 cups |
3½ cups |
| 45 cups |
2¾ cups |
| 35 cups |
2 cups |
| 25 cups |
1½ cups |
| Do not make less than 25 cups or more than 55 cups of coffee at one time. |
| 36-CUP MODEL |
| Water Level |
Measure of Ground Coffee |
| 36 cups |
2 cups |
| 30 cups |
1¾ cups |
| 24 cups |
1½ cups |
| 18 cups |
1¼ cups |
| 12 cups |
1 cup |
| Do not make less than 12 cups or more than 36 cups of coffee at one time. |
INSTRUCTIONS FOR HEATING WATER FOR INSTANT BEVERAGES
Plain water may be heated in your coffeemaker for use with instant beverages. Simply fill the clean coffeemaker with cold water to the desired cup level, insert the stem and the clean, empty basket into position the same as for making coffee. Secure the cover in place and plug the coffeemaker in. If applicable, set the “ON/OFF” switch to “ON.” Heat the water until perking stops and the light on the base glows. Remove the cover, lift out the basket and stem with a hot pad, and replace the cover, making sure it is locked in place. Unplug the coffeemaker when less than 3 cups of water remain. The inside of the coffeemaker may darken after heating water, which is normal and does not affect the coffeemaker or the water heated
Other than making coffee or heating water, no other liquid should be heated in the coffeemaker because damage to the heating unit can occur
When the coffeemaker is used to heat water only, it must be cleaned well after each use in addition to special weekly cleaning with white distilled vinegar for removal of mineral deposits. If these deposits are not removed, pitting of the metal can occur and result in damage to the coffeemaker. See “Special Cleaning – Every Two Weeks” in this manual.
Improper cleaning of the coffeemaker, especially the heating unit well, will affect the performance, resulting in weak, lukewarm coffee and may even cause the coffeemaker to stop perking. To keep the coffeemaker working properly, it is very important to follow the regular and special cleaning instructions.
HELPFUL HINTS
- Never make less than the minimum or more than the maximum amount of coffee for your coffee urn.
- Do not use soft water, as flooding of the basket may occur.
- Use regular electric perk grind coffee or coffee ground for all coffeemakers for best results. Do not use drip or finely ground coffee as flooding of the coffee basket can occur. If grinding your own coffee beans, grind to medium coarseness for best results. Do not grind coffee too finely, powder-like, as this can cause the coffee basket to flood.
- Do not use paper filters in your basket. If you find that grounds are falling through, wet the basket before adding coffee grounds.
- Remove coffee basket with grounds as soon as the brewing cycle is completed. This also helps maintain the coffee flavor. Use the coffee maker cover as a carrying tray when disposing of wet grounds.
- If dripping occurs between the faucet and the coffeemaker body, tighten the nut inside the coffeemaker. If the dripping occurs from the faucet spout, tighten the faucet cap. Do not over tighten. If the faucet continues to drip or is damaged, contact customer service; see information on warranty page.
- Liquid must always cover the inside bottom of the appliance at all times. Falling below the minimum level could cause overheating and damage to internal components and will void the warranty.
- A small amount of smoke or odor may occur upon heating due to the release of manufacturing oils – this is normal.
- Some minor expansion or contraction sounds may occur during heating and cooling – this is normal.
- Do not allow ground coffee to fall into the stem.
- If more coffee is immediately desired, partially fill the coffeemaker with cold water to reset the thermostat. Empty the water out of the coffeemaker, then repeat steps 3-9.
CLEANING YOUR COFFEEMAKER
- Unplug the coffeemaker and allow it to cool. Drain any coffee out of the coffeemaker.
- Wash the basket, stem, and cover in warm, soapy water with a dishcloth or sponge. Rinse and dry. Coffee stains on the metal can be removed with a scouring pad. Plastic parts may be washed in the dishwasher, top rack only. Washing any aluminum parts in the dishwasher may cause them to discolor.
- Clean the inside of the coffee maker by filling with warm water about one-third of its capacity. Add dish soap and wash with a sponge or cloth. Scour the heating unit well (where the stem fits) with the special cleaning tool provided and a scouring pad. Twist the pad inside the heating unit well to clean. The heating unit well must be kept clean for coffeemaker to work properly. Rinse with warm water after cleaning and dry.
- Clean the outside of the coffeemaker with a damp cloth and dry with a soft cloth. Do not use abrasive metal scouring pads or cleansers on the outside of the coffeemaker because scratching will occur.
SPECIAL CLEANING - EVERY TWO WEEKS
If coffeemaker is used daily, a special cleaning every 2 weeks, or every week if it is used for heating water, is necessary to thoroughly clean the heating unit well. If not kept clean, the coffeemaker will not work properly.
- Fill the coffeemaker with 1 quart EACH of water and white distilled vinegar. (If a white mineral buildup has formed on the inside of coffeemaker, use an additional 2 cups of vinegar). Place the stem and empty basket in place and lock the cover onto the coffeemaker. If applicable, set the “ON/OFF” switch to “ON.” Allow the coffeemaker to complete the perking cycle, then let stand for 20 minutes.
- Turn “OFF” and unplug the cord from the outlet. Drain the coffeemaker and allow it to cool. Wash the inside and the parts following the regular cleaning instructions, making sure to thoroughly clean the heating unit well.
- If applicable, clean the coffee level view tube with a soft brush. Unscrew the gauge cap and lift out the tube. Wash in warm, soapy water with a brush and rinse. Replace the tube and secure with the gauge cap.
- To clean the faucet, unscrew the handle. Move a small brush up and down through the faucet, then insert the brush through the opening on the inside of the coffeemaker to clean the faucet connection. Wash the faucet handle in warm, soapy water and rinse. Replace the faucet.
DO NOT USE BAKING SODA TO CLEAN THE COFFEEMAKER BECAUSE IT CAN DISCOLOR AND PIT THE METAL.
To Remove Discoloration: Inside of the coffeemaker can discolor when used for heating water, which is normal. To remove/lighten discoloration, fill coffeemaker with water to the level of discoloration (at least to the minimum cup level, but not past maximum cup level). Place stem and empty basket in place. For every 12 cups of water added to coffeemaker, add 2 teaspoons cream of tartar to basket. Secure cover onto coffeemaker, plug cord into coffemaker and then into outlet and allow coffeemaker to complete perk cycle. Let stand for 15 to 20 minutes or until discoloration is lightened. Unplug cord and drain coffeemaker. Allow to cool and follow general cleaning instructions.