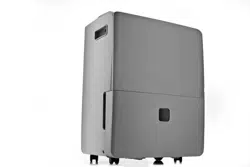
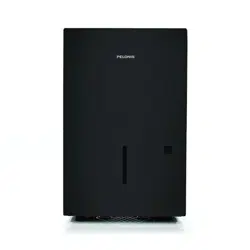
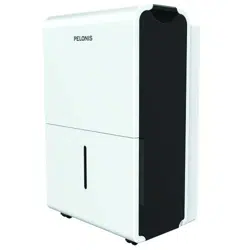
Pelonis PAD30C1AWT 30-Pint Dehumidifier
Product's Documents
Below are documents related to this product, you can read online or download:
- Owner's manual - (English) Read Online | Download pdf
PELONIS User manual Dehumidifier
Dehumidifier DP&DL
Rated voltage: 115V
Frequency: 60Hz
PAD20C1AWT, PAD30C1AWT, PAD40C1AWT, PAD50P1ABL, PAD60P1AGR
Customer service: 1(866) 646-4332
www.pelonis.com
To prevent injury to the user or personal and property damage, these instructions must be followed. Incorrect operation due to ignoring of instructions may cause harm or damage. The level of risk is shown by the following indications.
• Plug in power plug properly. Otherwise, it may cause electric shock or fire due to excess heat generation.
• Do not modify power cord length or share the outlet with other appliances. It may cause electric shock or fire due to overheating.
• Always ensure effective grounding. Incorrect grounding may cause electric shock.
• Unplug the unit if strange sounds, smells, or smoke come from it. A damaged product may cause fire and electric shock.
• Ventilate room before operating the unit if there is a gas leak from other appliances.
• Do not operate or stop the unit by inserting or pulling out the power plug. It may cause electric shock.
• Do not allow water to enter into electric parts. It may cause failure or electric shock.
• Do not use the power outlet if it is loose or damaged. It may cause fire and electric shock.
• Do not use or keep the power cord close to heating appliances or heat sources such as fireplaces. It may cause fire and electric shock.
• Do not disassemble or modify unit. It may cause failure and electric shock.
• Do not damage or use an unspecified power cord. It may cause fire and electric shock.
• If the power cord is damaged, it must be replaced by the manufacturer or an authorized service center or a similarly qualified person in order to avoid electrical risk.
• Do not use the unit near flammable gas or combustibles, such as gasoline, benzene, thinner, etc. It may cause fire.
• Before cleaning, turn off the power and unplug the unit.
• Do not remove the water bucket during operation, the bucket full protection may be activated and risk electric shock.
• Do not use the unit in small spaces. Lack of ventilation can cause overheating and fire.
• Do not use in places where water may splash onto the unit. Water may enter the unit and degrade the insulation. It may cause an electric shock or fire.
• Place the unit on a level, sturdy section of the floor.
If the unit falls over, it may cause water to spill and damage belongings, or cause electrical shock or fire.
• Never insert your finger or other foreign objects into grills or openings. Take special care to warn children of these dangers.
It may cause failure or electric shock.
• Do not climb up on or sit on the unit. You may be injured if you fall or if the unit falls over.
• Always insert the filters securely, and take caution to avoid injuries to hand and fingers. Clean filter once every two weeks.
• If water enters the unit, turn the unit off and disconnect the power, contact a qualified service technician.
• Do not place flower vases or other water containers on top of the unit. Water may spill inside the unit, causing insulation failure and electrical shock or fire.
• If the unit is knocked over during use, turn off the unit and unplug it from the main power supply immediately. Visually inspect the unit to ensure there is no damage. If you suspect the unit has been damaged, contact customer service or a qualified technician.
• In a thunderstorm, the power should be disconnected to the unit due to lightning.
• Do not run power cord under carpeting. Do not cover cord with throw rugs, runners, or similar coverings. Do not route cord under furniture or appliances. Arrange cord away from traffic area and where it will not be tripped over.
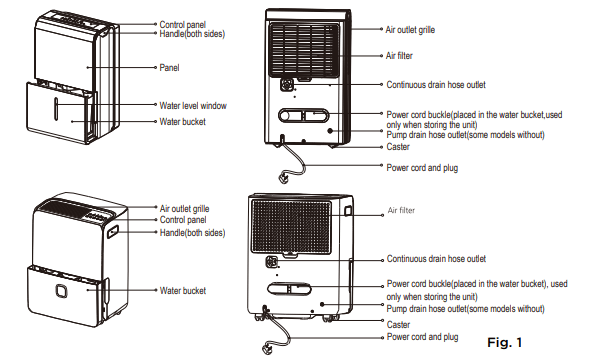
• The manufactures nameplate is located on the rear panel of the unit and contains electrical and other technical data specific to this unit.
• Be sure the unit is properly grounded. To minimize shock and fire hazards,
proper grounding is important. The power cord is equipped with a three-prong grounding plug for protection against shock hazards.
• Your unit must be used in a properly grounded wall receptacle. If the wall receptacle you intend to use is not adequately grounded or protected by a time delay fuse or circuit breaker, have a qualified electrician install the proper receptacle.
• Ensure the receptacle is accessible after the unit installation.
• To avoid the possibility of personal injury, always disconnect the unit from power supply, before installing and/or servicing.
• Do not store or use gasoline or other flammable vapors and liquids in the vicinity of this or any other appliance.
• Avoid fire hazard or electric shock. Do not use an extension cord or an adaptor plug. Do not remove any prongs from the power cord.
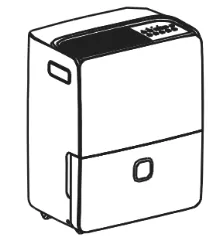
NOTE: All the pictures in this manual are for illustrative purposes only. The actual shape of the dehumidifier you purchased may be slightly different, but its operations and functions are similar.
CAUTION: Clean your unit occasionally to keep it looking new. Be sure to unplug the unit before cleaning to prevent shock or fire hazards.
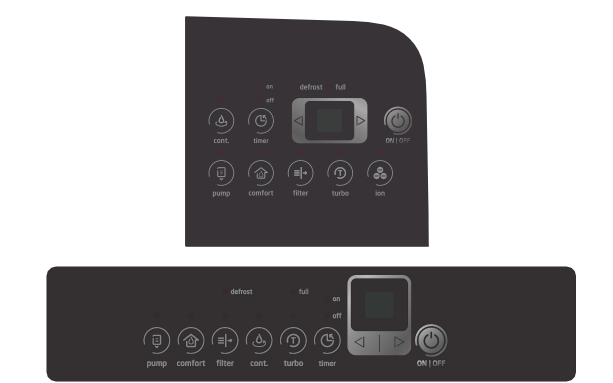
NOTE: The appearance of the control panel on your unit may vary slightly. Functions will be similar
When you push the button to change operation modes, the unit will make a beep sound to indicate that it is changing modes.
(PUMP) Button: Press to activate the pump operation.
NOTE: Make sure the pump drain hose is installed into the unit and the continuous drain hose is removed from the unit before the pump operation is activated. When the bucket is full, the pump starts to work. Refer to the next pages for removing the collected water. Do not use this operation when the outdoor temperature is equal to or less than 0°C (32°F).
NOTE: When CONTINUOUS mode function is turned on, set humidity is automatic and cannot be changed manually
 /
/  )button and set to a lower value (%). For damper air, press the button and set a higher value (%). and key buttons to set the Timer ON or Timer OFF from 0 to 24 hours.
(POWER) Button Press to turn the dehumidifier on and off.
LED Display: Shows the set % humidity level from 35% to 85% or auto start/stop time (0 ~ 24) while setting, then shows the actual (+/- 5% accuracy) room % humidity level in a range of 30% RH (Relative Humidity) to 90% RH (Relative Humidity).
Error Codes and Protection Code:
AS - Humidity sensor error - Unplug the unit and plug it back in. If error persists, contact Customer Service
ES - Tube Temperature sensor of the evaporator error - Unplug the unit and plug it back in. If error persists, contact Customer Service.
P2 - Bucket is full or bucket is not in right position - Empty the bucket and replace it in the right position. (only available for the unit with no pump feature.)
P2 - Bucket is full - Empty the bucket. (only available for the unit with pump feature.)
Eb - Bucket is removed or not in right position - Replace the bucket in the right position. (only available for the unit with pump feature.)
Bucket Full Light: Lights up when the bucket is ready to be emptied.
Auto Shut Off : The dehumidifier shuts off when the bucket is full, or when the bucket is removed or not replaced in the proper position. When the set point humidity level is reached, the unit will be shut off automatically. The fan motor will continue operating.
Auto Defrost : When frost builds up on the evaporator coils, the compressor will cycle off and Auto Defrost function will run automatically. 3 minute compressor operation delay protection After the unit has stopped, it can not be restarted in the first 3 minutes to protect compressor operation. The unit will restart automatically after 3 minutes.
Auto-RestartL : If the unit stops unexpectedly due to a power cut, it will restart with the previous function setting automatically when the power resumes.
Setting the Timer ON and Timer OFF
and key buttons to change the Timer by 0.5 hour increments, up to 10 hours, then at 1 hour increments up to 24 hours. The control will count down the time remaining until start.NOTES
There are three ways to remove collected water:
1. Use the bucket
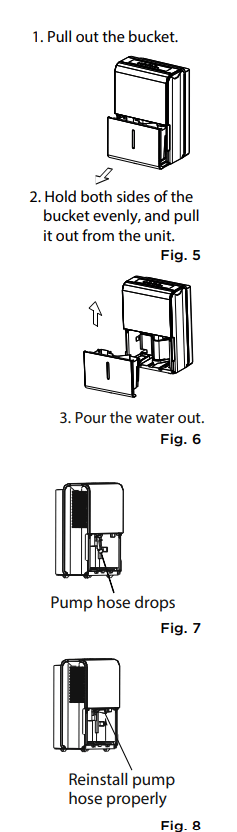
NOTES
2. Continuous draining

NOTE: When the continuous draining feature is not being used, remove the drain hose from the outlet, and dry the water in the continuous drain hose outlet using a dry cloth.
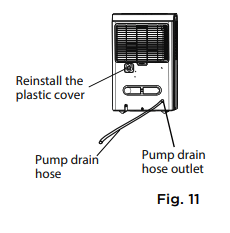
3. Pump draining (Pump models only)
Water can be automatically emptied into a floor drain or a suitable drainage facility by attaching the pump drain out with a pump drain hose (Ø od = 1/4”, supplied).
NOTE: The pump may generate a loud noise for the first 3~5 minutes of operation.
NOTE: The pump operation light blinks when a failure occurs. Please turn off the unit and disconnect the power cord. Check the following items:
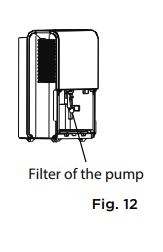
NOTE: Do not use the pump operation when the outdoor temperature is equal to or less than 0°C (32°F), otherwise ice may form, blocking the hose and causing the unit to stop operating. Make sure to empty the bucket at least once a week a week when using the pump draining feature. When the pump draining feature is not being used, remove the pump drain hose from the outlet.
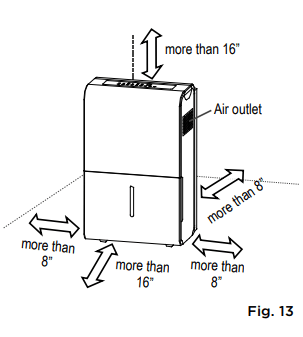
A dehumidifier operating in a basement will have little or no effect in drying an adjacent enclosed storage area, such as a closet, unless there is adequate circulation of air in and out of the area. (See Fig. 13)
Turn the dehumidifier off and disconnect the plug from the power source before cleaning.
1. Clean the Grill and Case
2. Clean the bucket
Every few weeks, clean the bucket thoroughly to prevent growth of mold, mildew and bacteria. Partially fill the bucket with clean water and mild detergent. Swish it around in the bucket, empty and rinse.
NOTE: Do not use a dishwasher to clean the bucket.
3. Clean the air filter
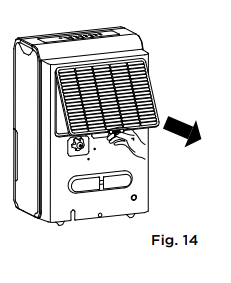
CAUTION: DO NOT operate the dehumidifier without a filter to avoid loss of performance and damage to the unit.
4. When not using the unit for long time periods
Before calling for service, review this list. It may save you time and money. This list includes common occurrences that are not the result of defective workmanship or materials in this appliance.
1. Unit does not start
2. Dehumidifier does not dry the air as it should
3. The unit makes a loud noise when operating
4. Frost appears on the coils
5. Water on floor
6. ES, AS, P2, EC, Eb and E3 appear in the display
7. The pump operation on light blinks at 1Hz
Reference file: Pelonis PAD30C1AWT 30-Pint Dehumidifier
Additionally, the document applies to other Pelonis models: PAD20C1AWT, PAD40C1AWT, PAD50P1ABL, PAD60P1AGR